Designing Your Workflow

With your custom status names defined, you are ready to build the sequential process that is unique to your business. Your Workflow is the blueprint for how a Sales Order moves from beginning to end.
The purpose of this step is to design the logic for a specific stage of your operations, such as Intake, Production, or Fulfillment. This allows you to create distinct workflows for different scenarios, ensuring that a complex repair intake, for example, follows a completely different path than a standard retail transaction.
Accessing the Workflow Builder
To begin setting up your unique workflow, follow the same path you took for the Status Library:
- Find the Workflow Screen: The Workflows configuration is located in the exact same section as the Status Library. Head over to Settings > Order Management, then look for Workflows.
- Start Building: Click the + Add Workflow button to open the Edit Workflow template.
Configuring Your Workflow
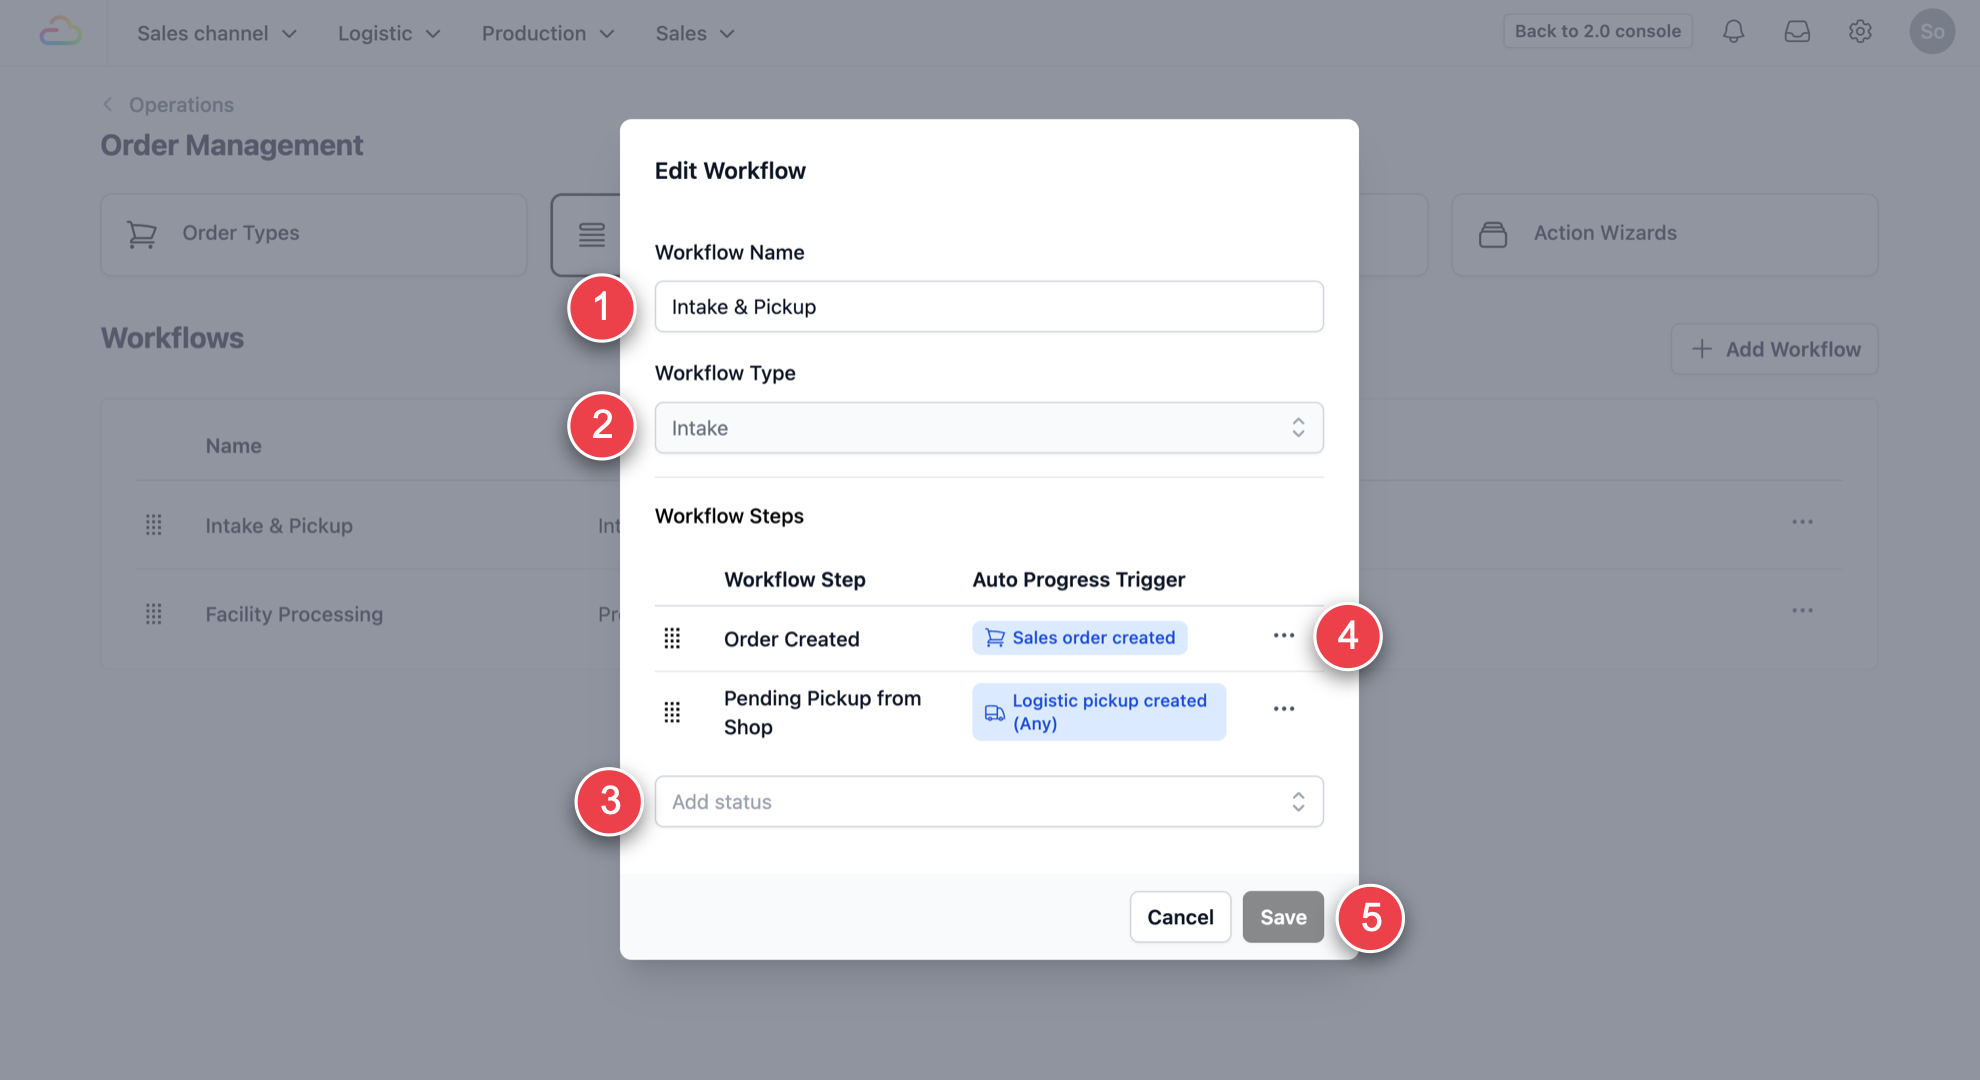
- Workflow Name: Give your workflow a descriptive name that reflects its purpose (e.g., "Repair Service Intake," "Standard Laundry Production").
- Workflow Type: Use the dropdown box to select the high-level category that your workflow falls under (e.g., Intake, Production, Fulfillment). This helps organise your different processes.
- Add Status & Trigger: Now, you will integrate the status names you defined in Step 1 into your sequence.
- Status Selection: Use the dropdown box to select a status name (e.g., "Pending Pickup").
- Define the Trigger: A popup will appear when a status is selected. In the dropdown menu, specify the Auto Process Trigger—this is the worker's action that automatically moves the sales order to the next step in the process.
- Workflow Steps: Once you complete the status and added a trigger, a new step in your workflow will appear as such. Continue adding your custom statuses and defining the process trigger for each transition, moving sequentially toward the final status for the specific workflow.
- Finalise: Click Save to save your changes when your sequence of steps and triggers is complete.
tip:
You have complete control over your sequence. To quickly change the order of statuses after you've added them, look for the dot layout handle on the left side of the workflow step. Click and drag and drop the step to its new position to rearrange your workflow logic. This makes reordering your process quick and efficient.
Give feedback
Up next
Configuring Order TypesYou have defined your names: Status Library, and your logic: Workflows.
Read more