Setting up your Business Portfolio
In this article
A Business Portfolio acts as the central profile for your company. Setting it up correctly is a critical first step, as this information dictates how your business appears on invoices and receipts, ensures accurate tax compliance, and controls how transactions appear on customer bank statements.
Contents
Contents
How to Add a New Business Portfolio
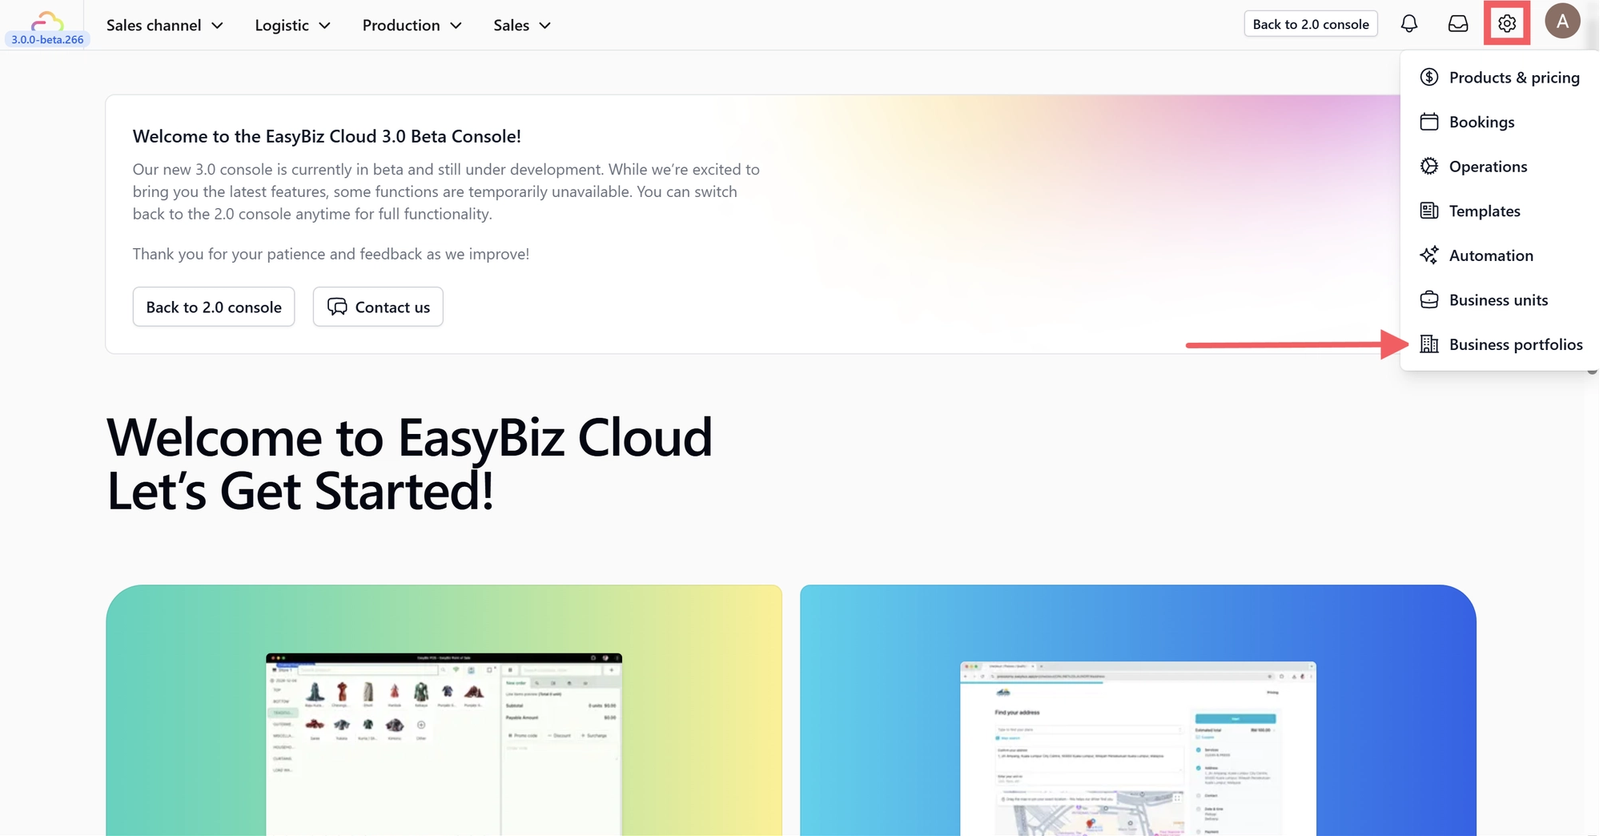
Click on the Settings icon in the main navigation menu and select Business Portfolios.
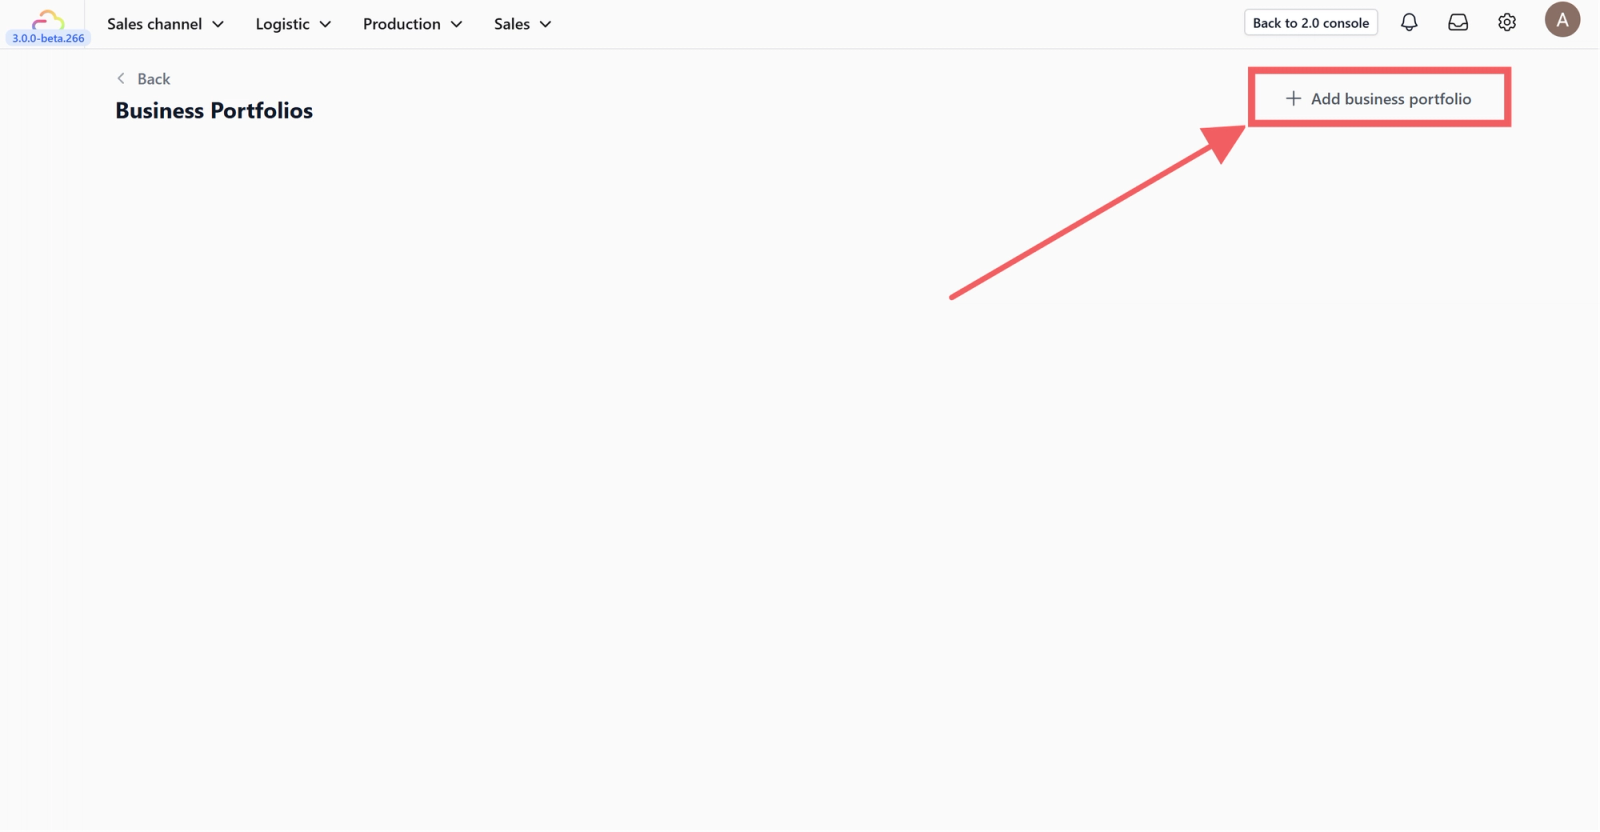
You will enter the Business Portfolios list page. Click the +Add Business Portfolio button in the top right corner.
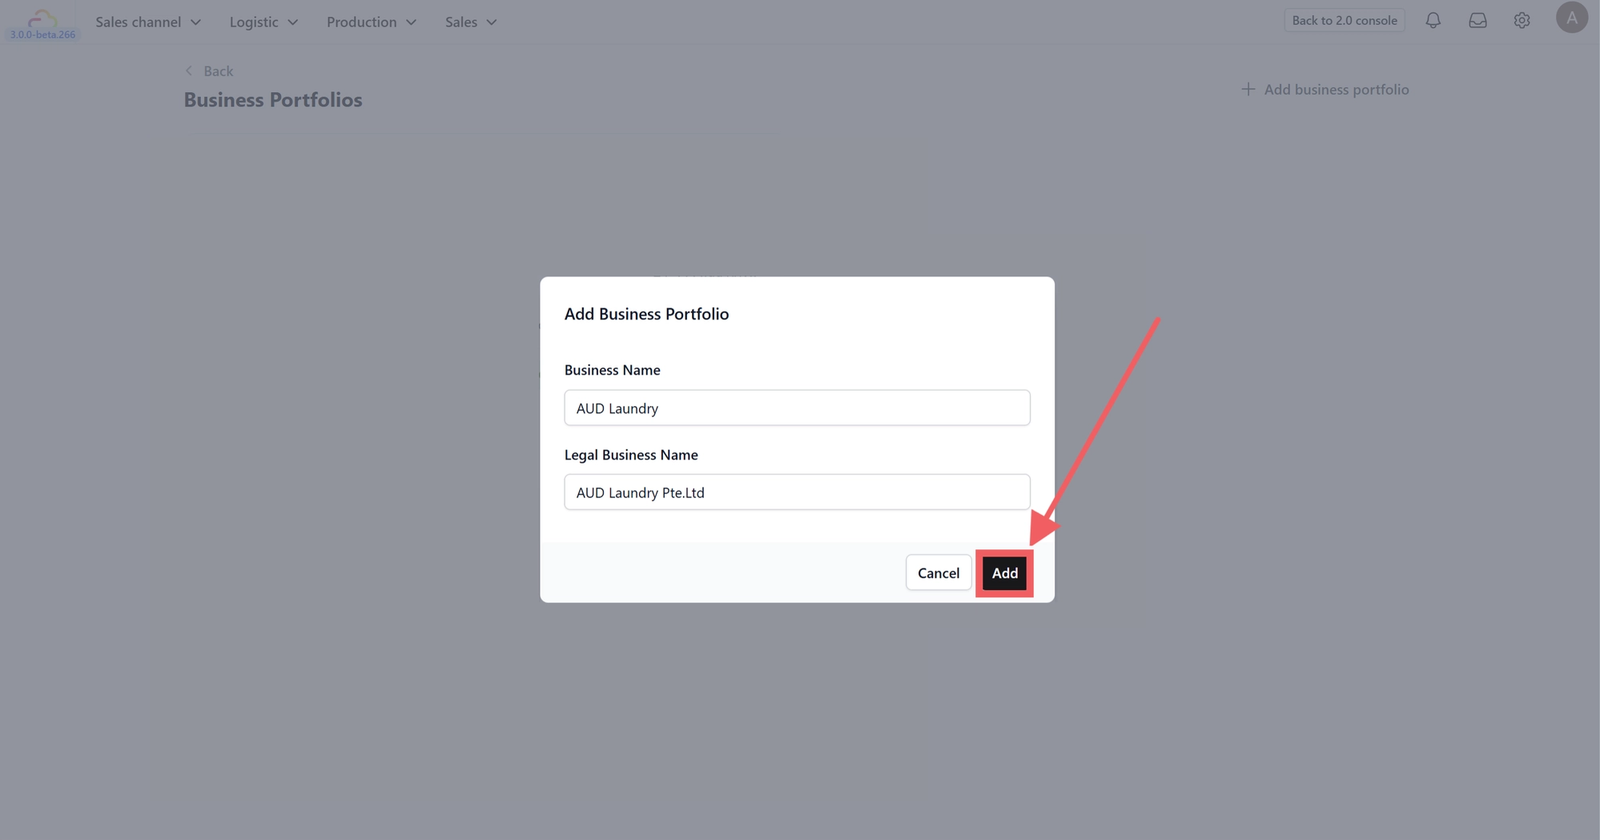
A pop-up will appear. Enter your Business Name (what customers see) and your Legal Business Name (registered entity name).Click Add to proceed to the detailed setup page.
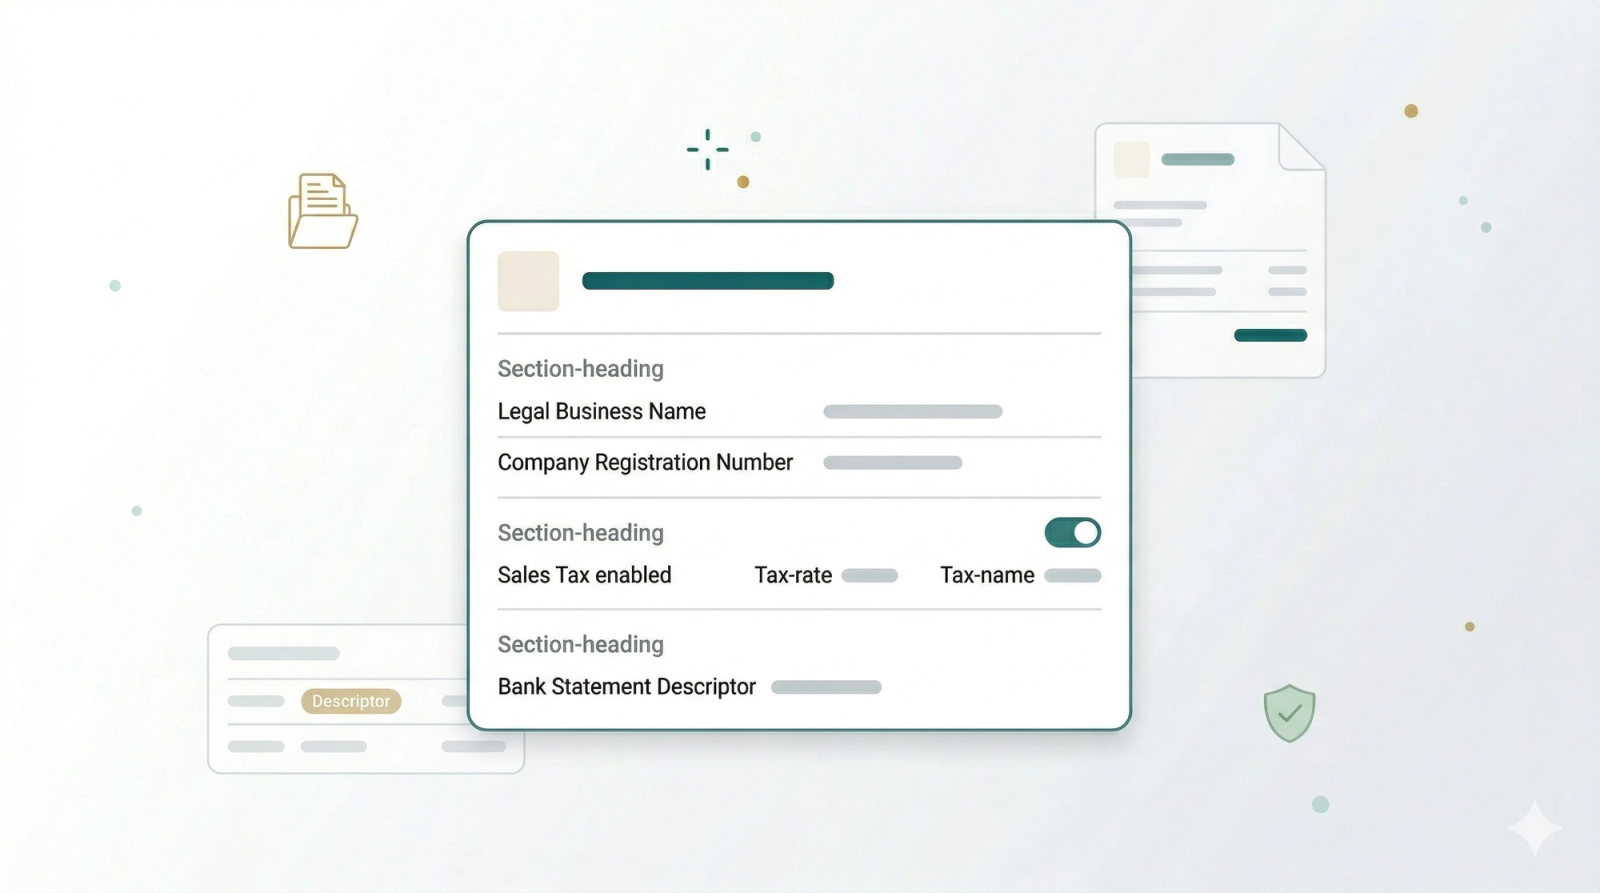
Configure Business Details
On the setup page, fill in the essential legal and financial identifiers for your business.
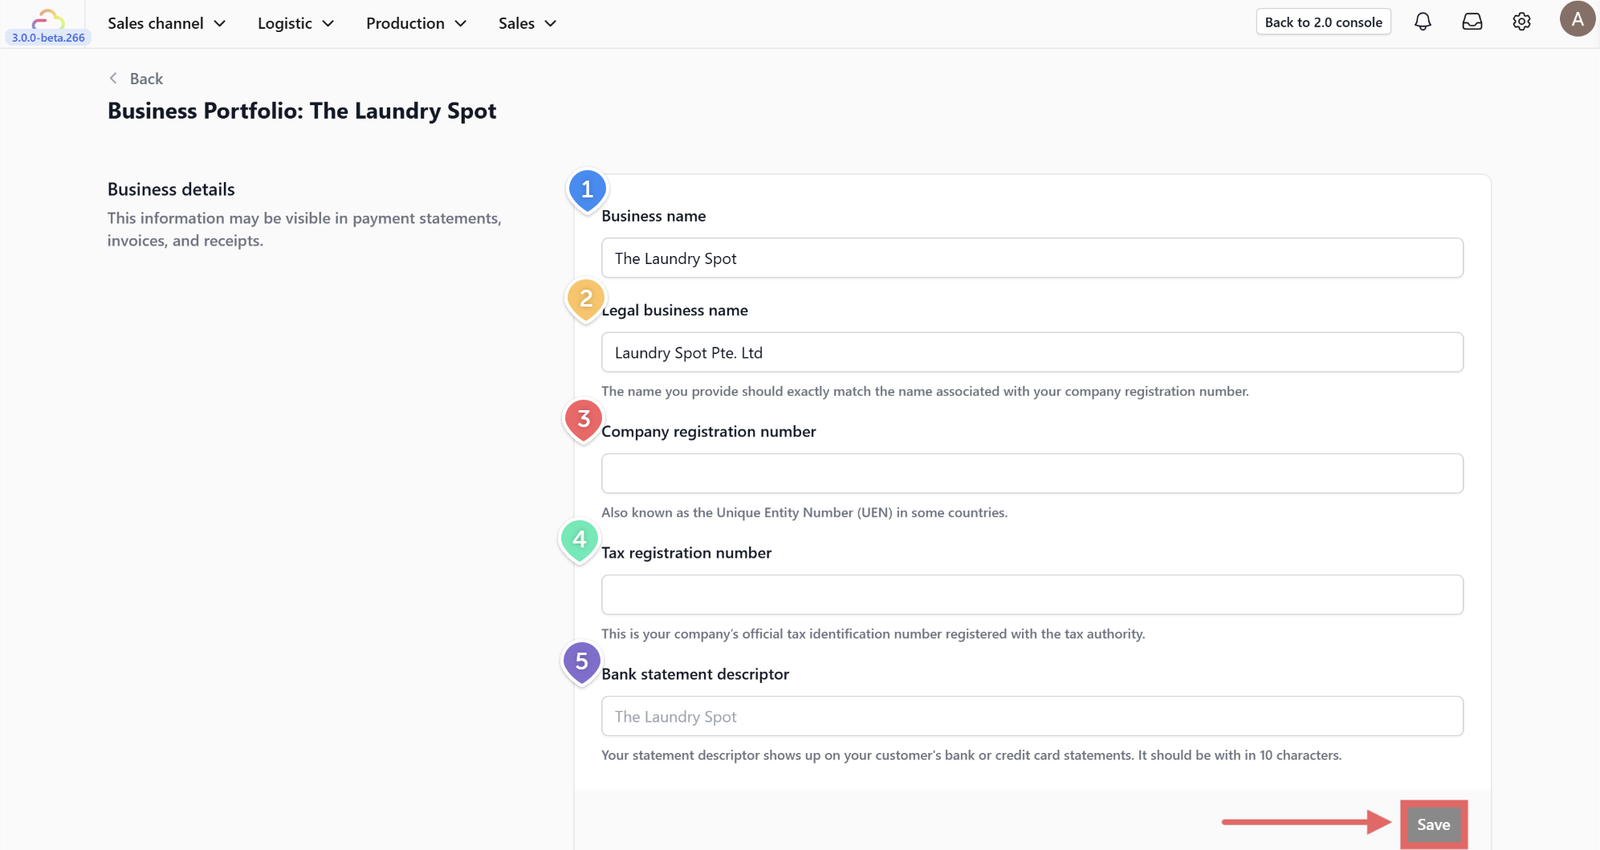
Business Details
- Business Name: The display name used for general purposes and customer-facing communications.
- Legal Business Name: The official name registered with government authorities. This will appear on formal tax invoices.
- Company Registration Number: Your unique business identifier issued by the government (e.g., UEN, CIN, or ABN, depending on your country).
- Tax Registration Number: The number used for tax filing purposes (e.g., GST, VAT, or SST number).
- Bank Statement Descriptor: The text that appears on a customer's credit card or bank statement to identify a transaction from your business. Keep this clear and under 10 characters to prevent chargebacks.
Don't forget to click the Save button in this section once done.
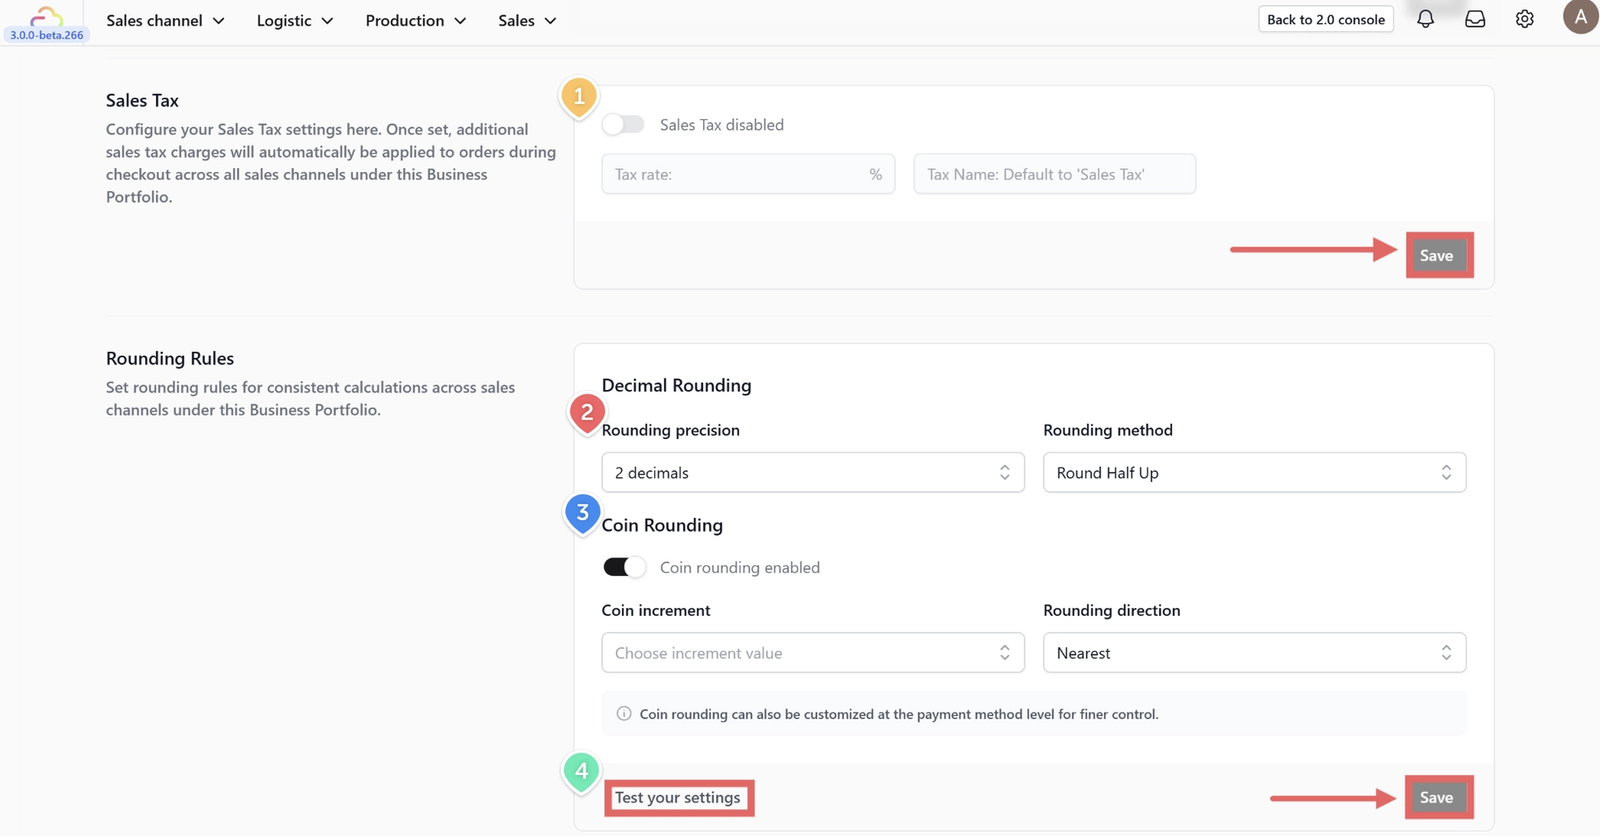
Sales Tax
- Here you can configure automatic tax calculations.
- Toggle Enabled: Turn on to activate tax calculations.
- Tax Rate: Enter your specific tax percentage (e.g., 9 for 9%).
- Tax Name: Enter the label that will appear on receipts (e.g., "GST", "VAT", "Sales Tax"). Leave empty to use the default "Sales Tax" label.
- Click Save.
Rounding Rules
Configure how the system handles financial calculations involving fractions of cents.
2. Decimal Rounding: Controls precision for standard calculations.
- Rounding Precision: Choose how many decimal places to use in calculations (ranging from 0 to 3 decimals).
- Rounding Method: Define how the system handles the midpoint (0.5):
- Round half up: The standard method. 0.5 rounds up to the next nearest whole number (e.g., 1.5 becomes 2).
- Round half down: 0.5 rounds down (e.g., 1.5 becomes 1).
- Round half to even: Also known as "Banker's Rounding." Rounds to the nearest even integer to reduce cumulative error over many transactions (e.g., 1.5 becomes 2, but 2.5 also becomes 2).
3. Coin Rounding: Enable this if your country has phased out small denomination coins and cash totals must be rounded to the nearest available coin (e.g., nearest 0.05 or 0.10).
- Coin Increment: Select the smallest currency unit available (e.g., 0.05).
- Rounding Direction:
- Nearest: Rounds to the closest increment.
- Up: Always rounds up to the next increment.
- Down: Always rounds down to the lower increment.
4. Test your settings to input sample amounts and ensure the final totals match your expectations.
Click Save when satisfied.
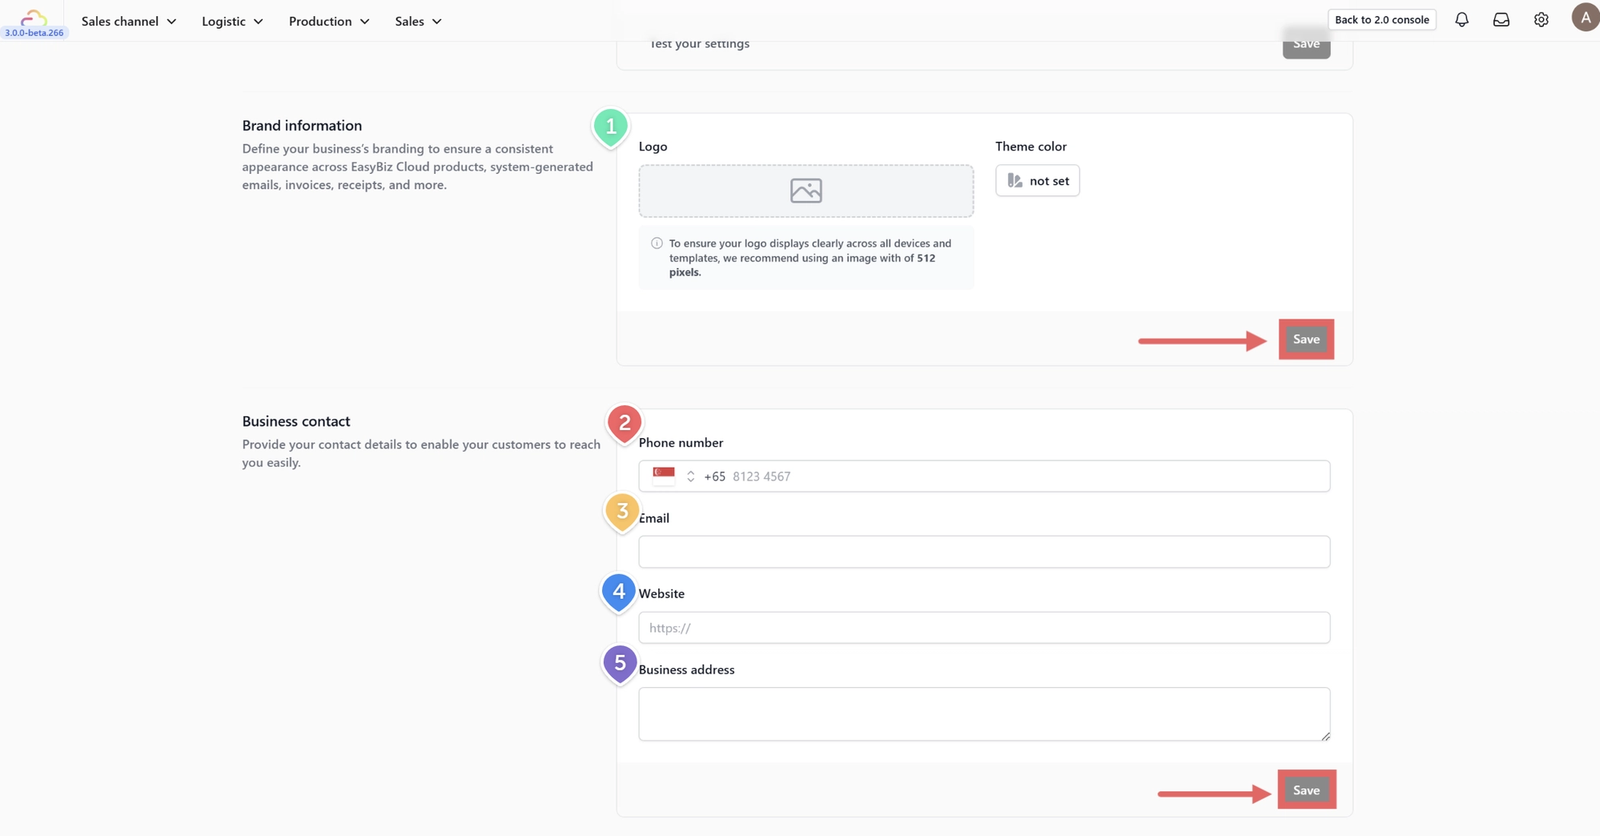
Brand Information
1.Logo: Upload your official business logo. This image will be used on digital receipts, invoices, and potentially on your POS interface. Click Save.
Business Contact
These details will appear on your invoices and are used for customer support inquiries.
2. Phone Number: Enter the primary customer service number for this business unit. This is the number customers will use to contact you regarding their orders or billing inquiries.
3. Email Address: Input the official business email. This address typically appears on digital receipts and serves as the primary contact point for official communications.
4. Website URL: Add the link to your company’s main website page. This gives customers a way to find more information about your services online.
5. Business Address: Enter the full physical location of your business operations. This address is required for official tax invoices and ensures compliance with local business regulations.
Click Save.
Managing Your Portfolio Card
Once setup is complete, navigate back to the main Business Portfolios page. Your new business will appear as a card.
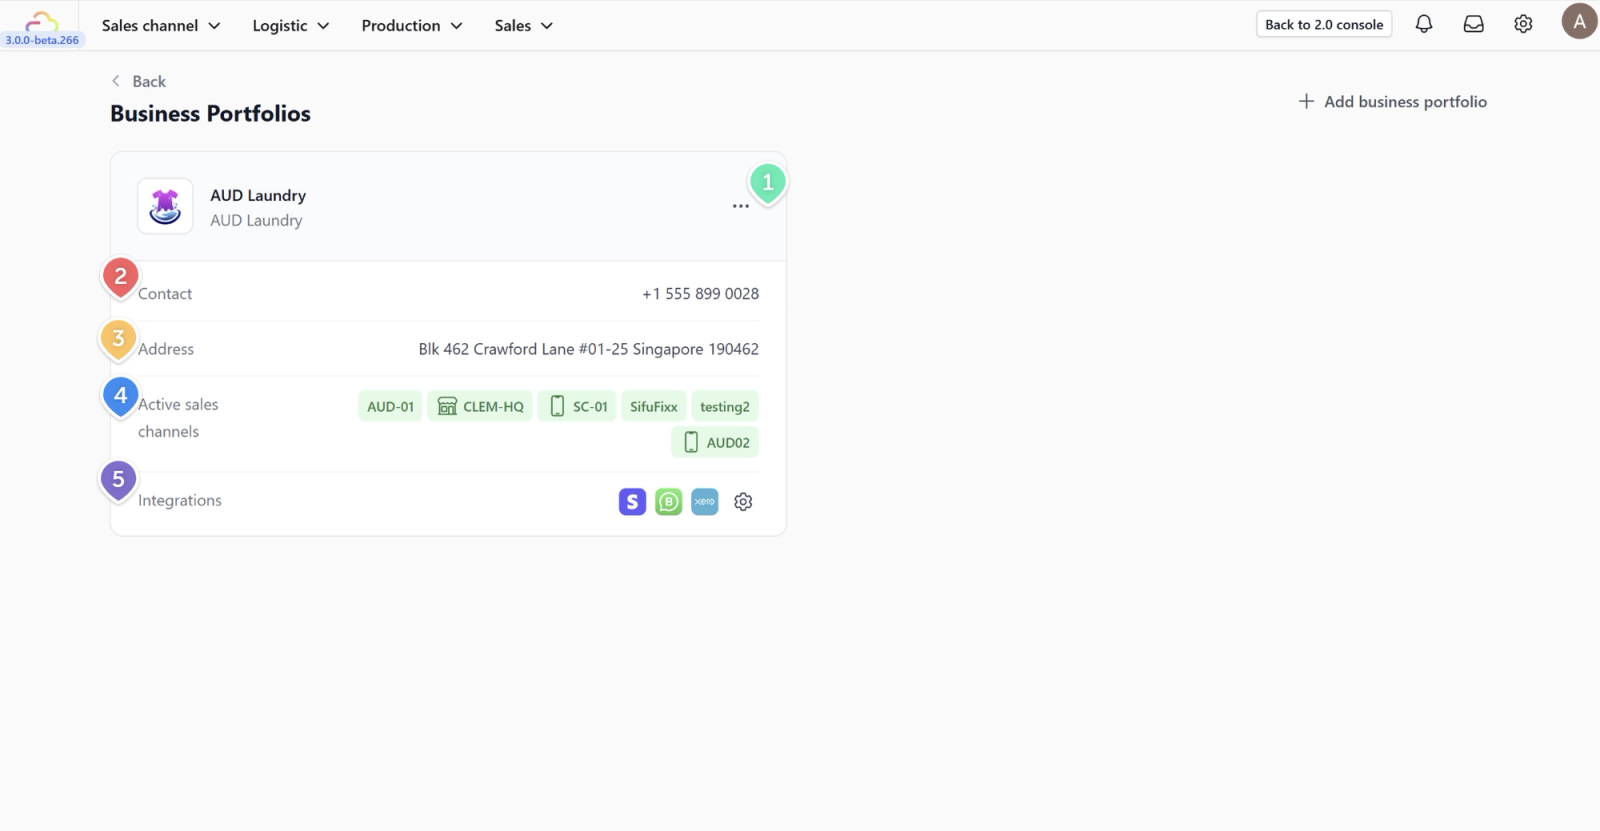
1.Edit settings: Click the three dots icon (...) on the top right of the card to revisit and edit the settings configured above.
2. Contact: Provides an at-a-glance view of your primary contact details.
3. Address: Provides an at-a-glance view of your primary address details.
4. Active Sales Channels: Shows which selling platforms (e.g., POS, Mobile App, Online Store) are currently active for this business unit.
5. Integrations: Displays third-party services connected to this business portfolio.
For detailed guides on setting up specific integrations, refer to these resources:
Give feedback
Up next
Introduction to Business UnitLearn the fundamentals of Business Units and how they help categorize your specific services—like Laundry, Alteration, or Home Cleaning—within your broader portfolio.
Read more