Setting Up Your Product Catalog
In this article
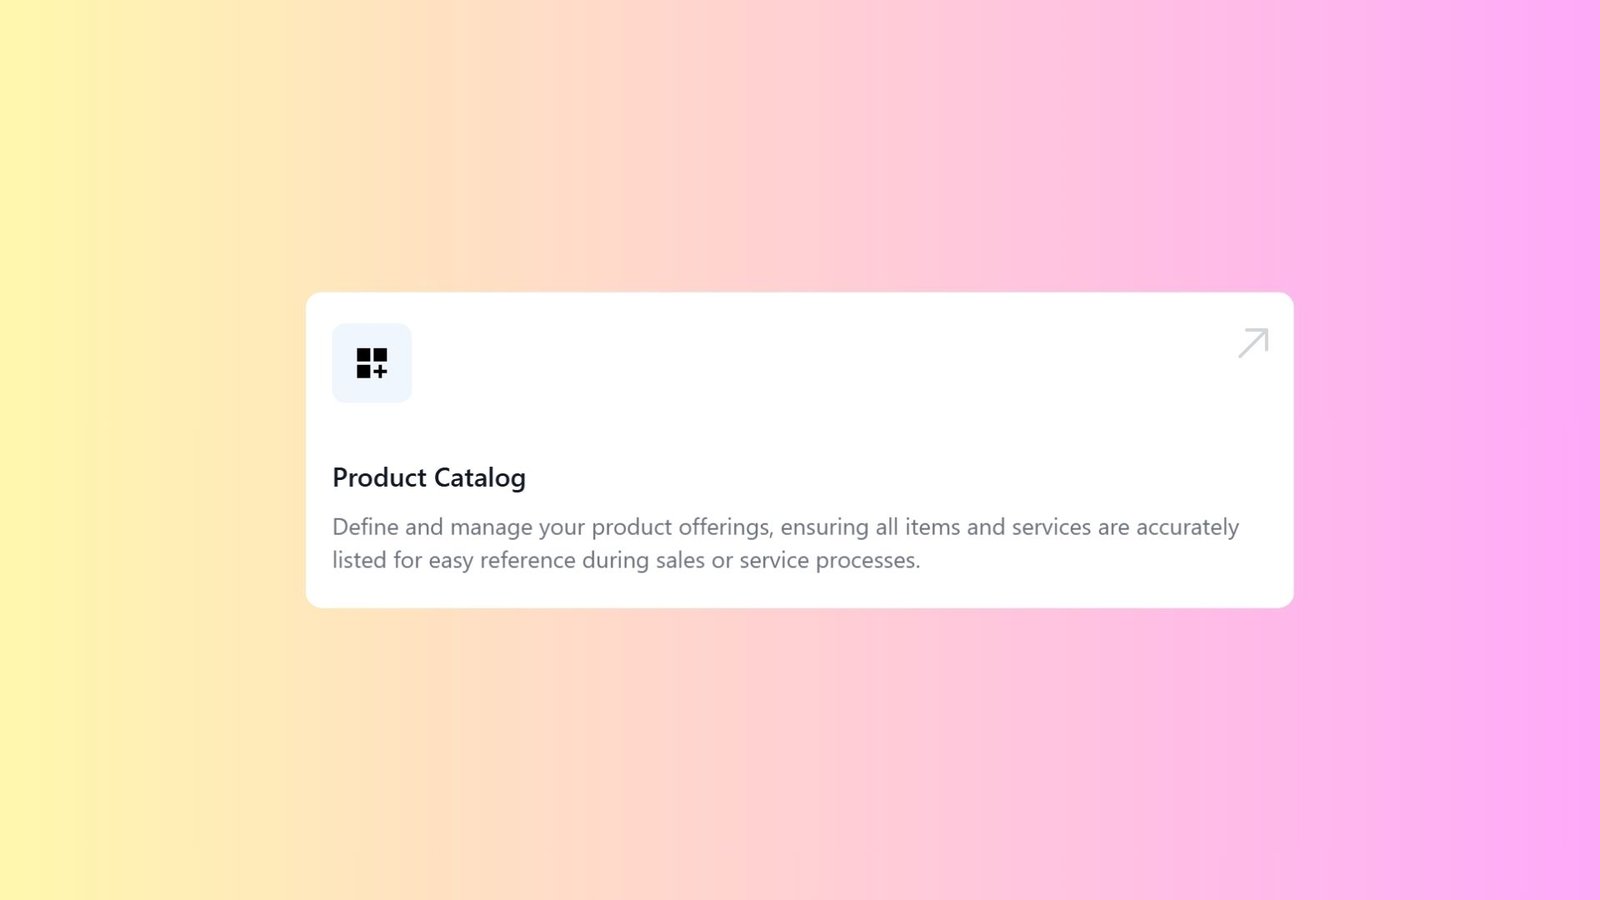
The Product Catalog is the central database for everything your business offers. It defines what you sell or service, ensuring that every item from a standard laundry service to a retail detergent bottle is accurately listed for easy reference during sales.
Contents
Contents
Why set up your Product Catalog?
Configuring this section properly offers three major operational benefits:
- Speed & Accuracy: Staff can process orders instantly by tapping buttons instead of manually typing item names, reducing human error.
- Standardized Naming: It prevents confusion by ensuring all staff use the exact same official name for an item (e.g., preventing mix-ups between "Trousers" and "Pants").
- Production Clarity: By pre-defining strict variants (like specific materials or sizes), you ensure the production team receives clear, structured instructions every time.
Accessing the Catalog
To begin managing your offerings:
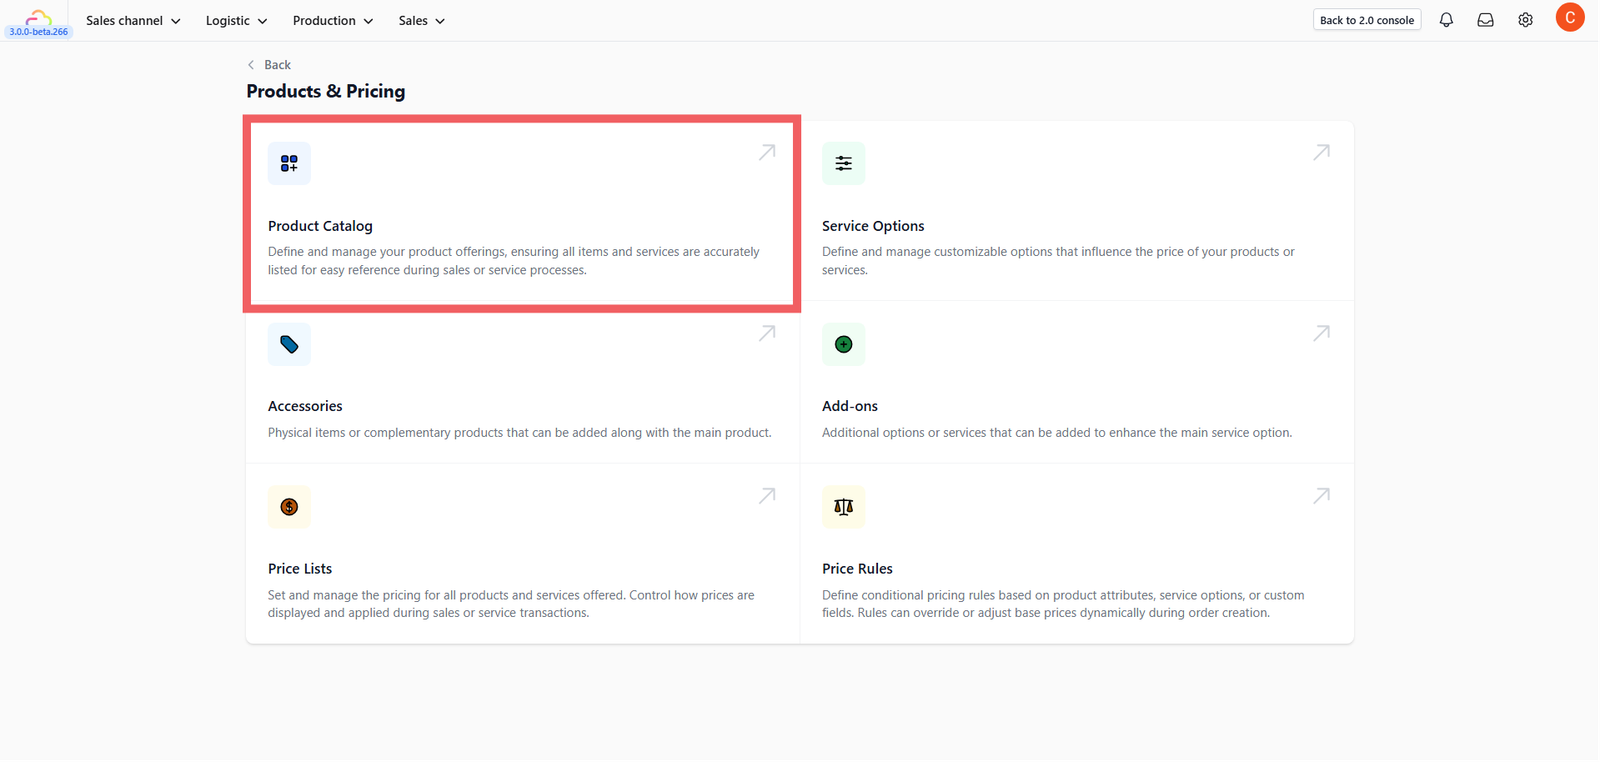
- Navigate to Products & Pricing > Product Catalog.
Navigating the List
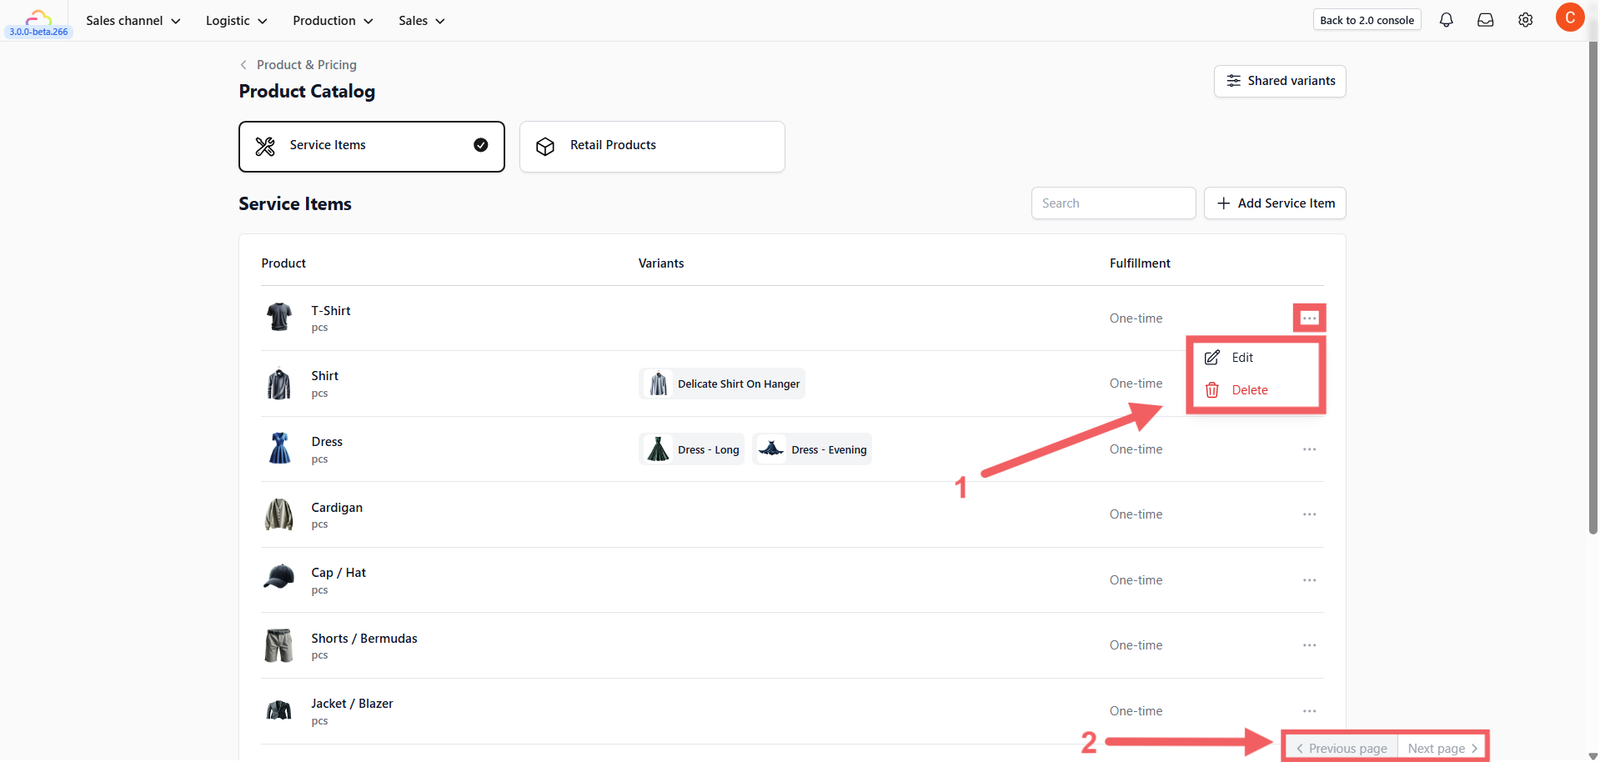
You will see a list of premade items generated based on your Business Unit.
- To Edit/Delete: Click the three-dot menu (•••) on any item row.
- Pagination: If you cannot find an item, check the bottom right corner to toggle between pages (Previous / Next).
Adding Service Items
Service Items are the core tasks your team performs (e.g., Dry Cleaning, Ironing, Repair).
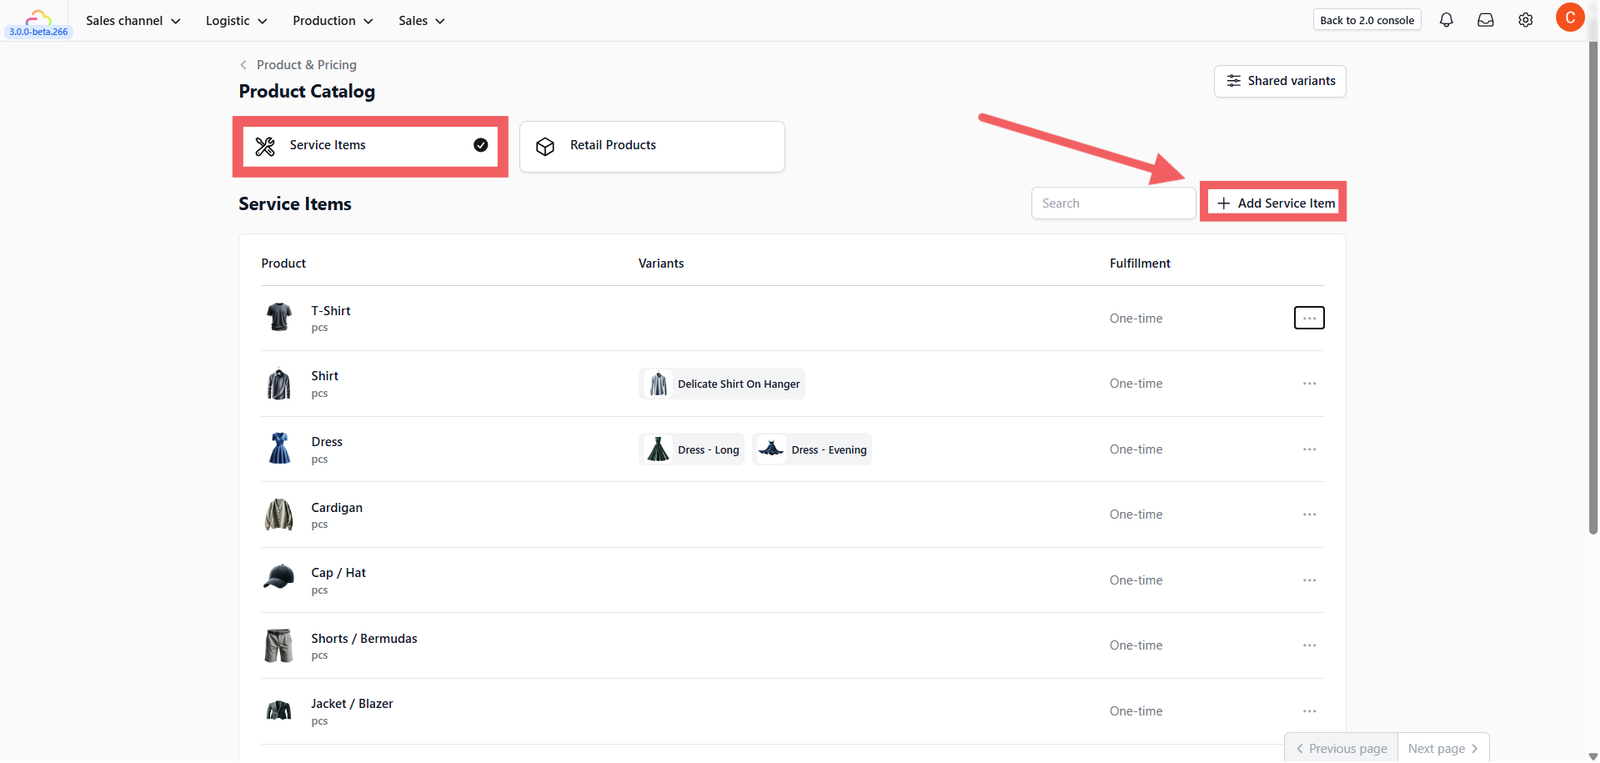
Ensure you are on the Service Items tab and click the green + Add Service Item button.
Fill in the item definitions:
- Name: The display name (e.g., "Men's Shirt").
- SKU: Leave blank to auto-generate, or enter your own internal code.
- External SKU/Barcode: (Optional) Input this if you use a barcode scanner for intake.
- Unit Label: Select the measurement unit (e.g., pcs for clothes, kg for wash & fold, sqft for carpets).
- Item Label Generation: Define how many physical tags print per unit (e.g.,
1unit =1tag). - Fulfillment: Currently set to "One time".
- Image: Upload a visual reference to help staff identify items.
Configuring Variants (Optional)
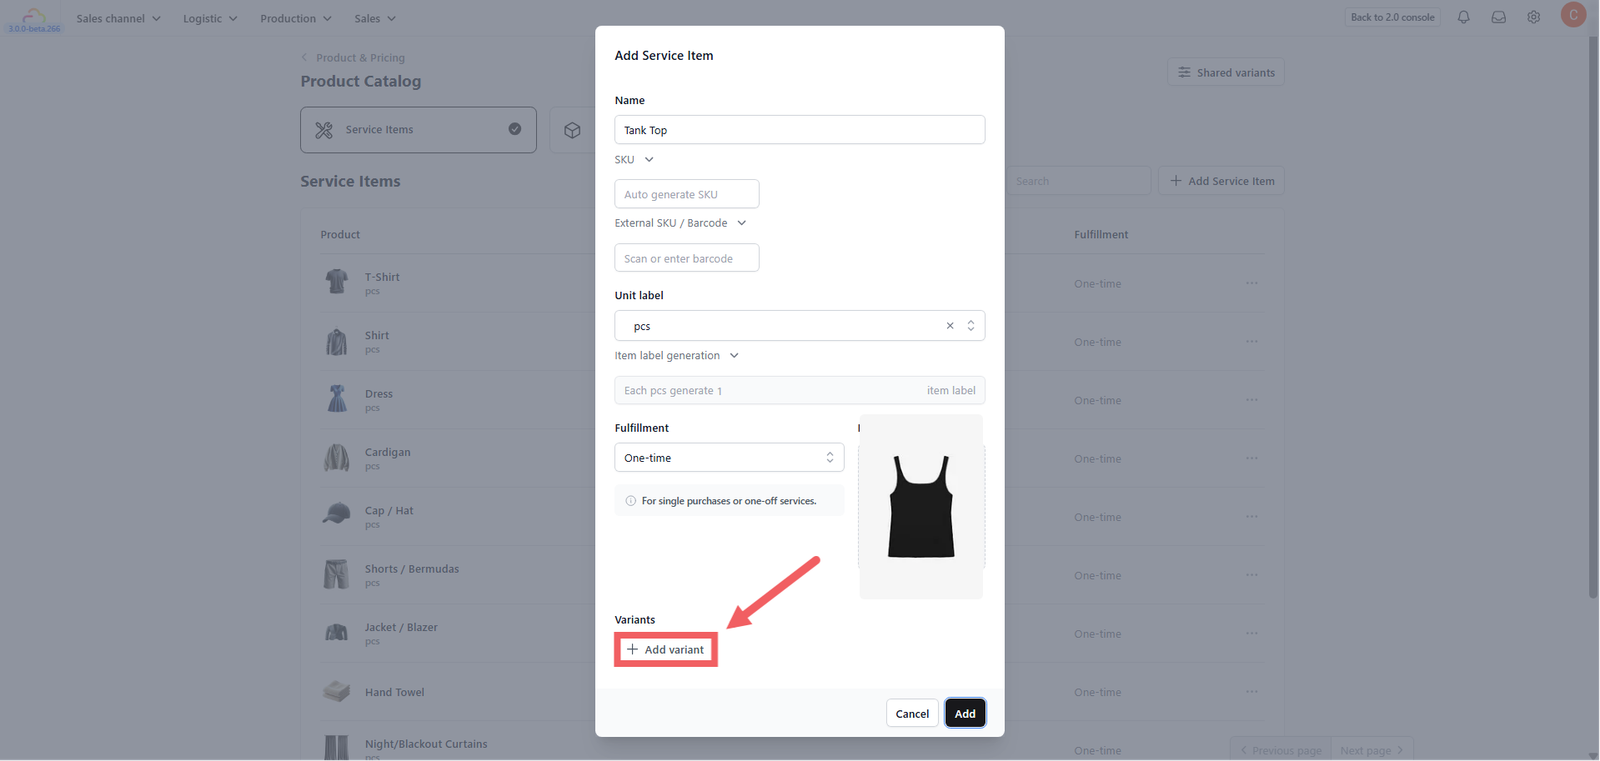
If your item is simple (e.g., "Blanket"), you can skip this and click Add. However, if the item requires specific choices (like Size or Material), you can add them here using one of two methods:
Custom Variants (Standard)
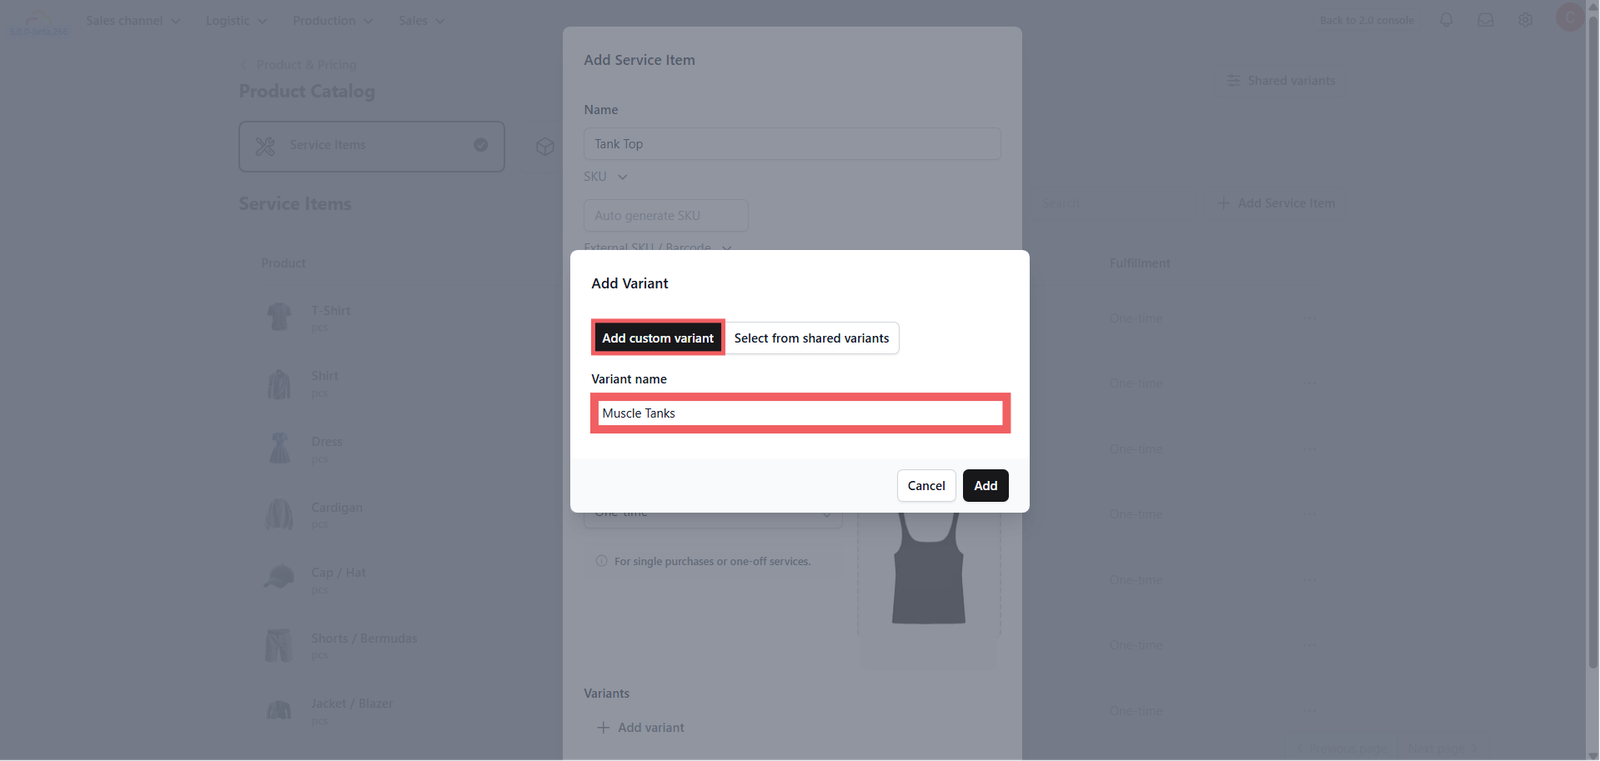
Use this for unique variations specific to this item (e.g., a "Sofa Cleaning" service with options for 2-Seater, 3-Seater, or L-Shape).
- Click Add Custom Variant to define the specific options and upload photos for each type.
Shared Variants (Reusable Templates)
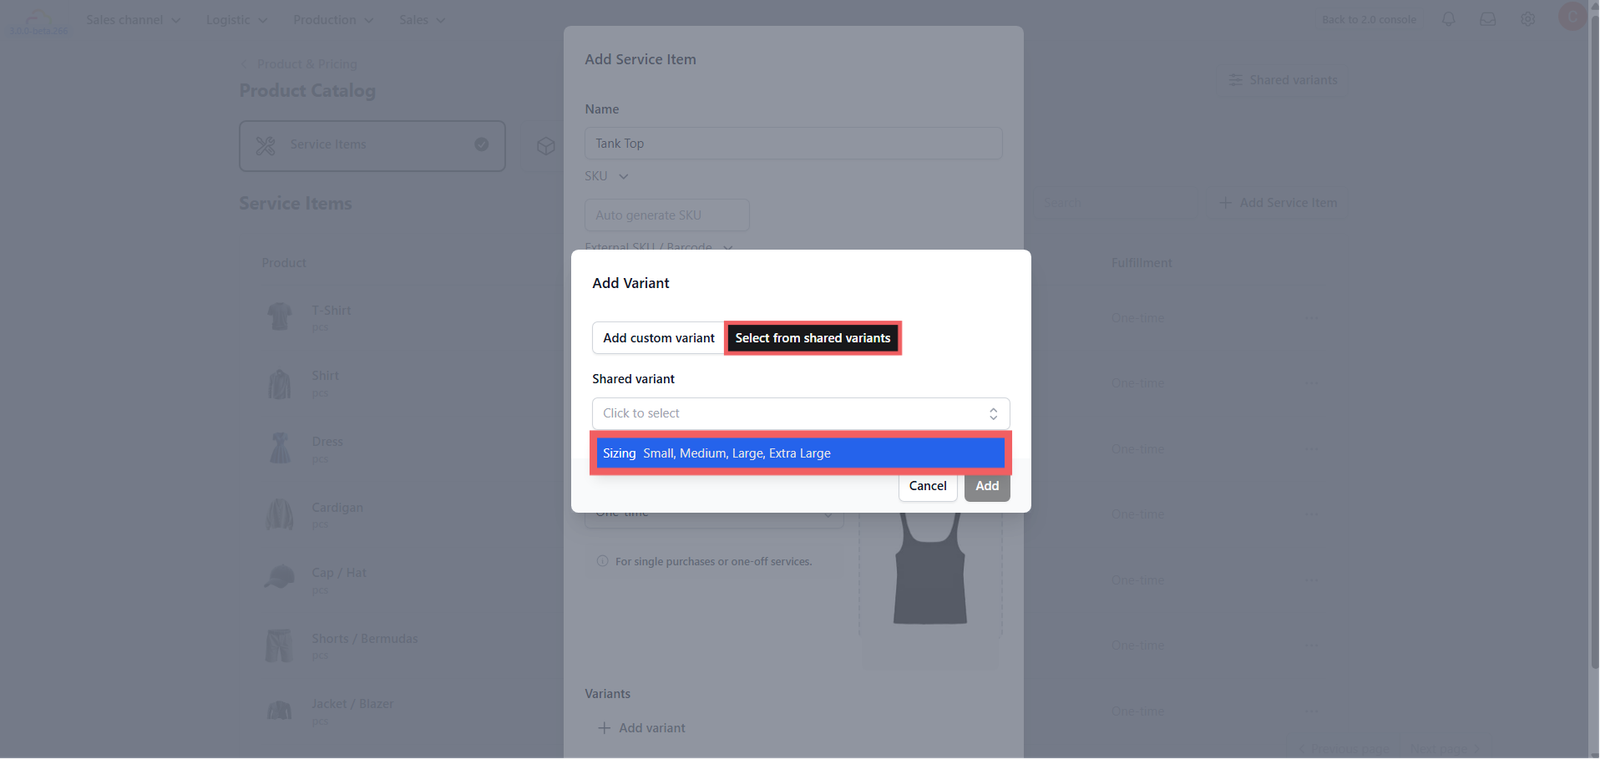
Use this if you have a standard list that applies identically to many items (like clothing sizes S, M, L, XL).
- Click Select from Shared Variants to choose a pre-made list.
Once finished, click Add to save the item.
Creating Shared Variants (Optional)
Shared Variants are useful if you want to create a standard list of options once and reuse them for multiple products.

1. Go to the main Product Catalog page (the list view).
2. Click the Shared Variants button.
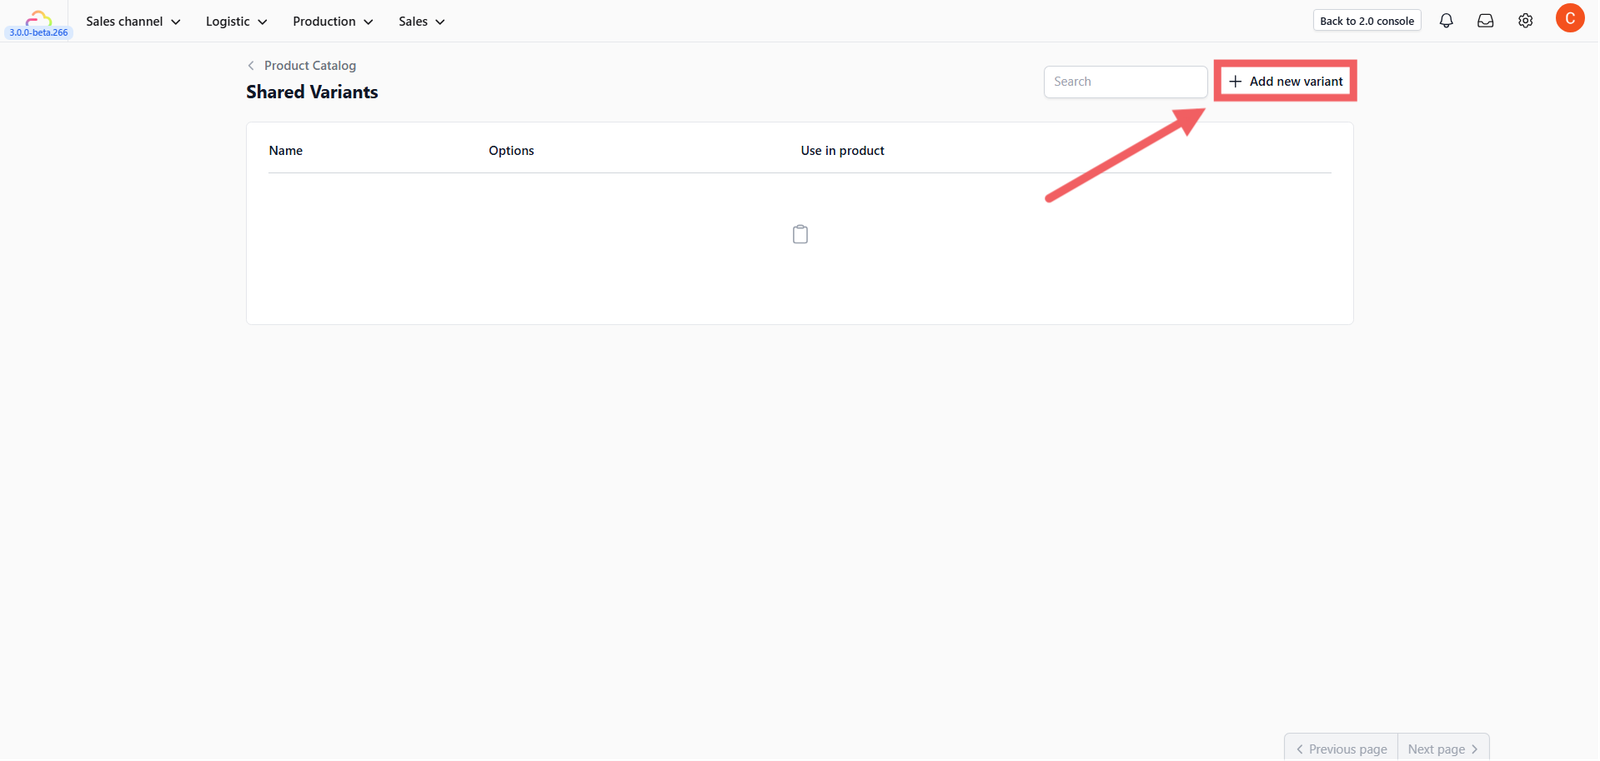
3. Click + Add Shared Variant.
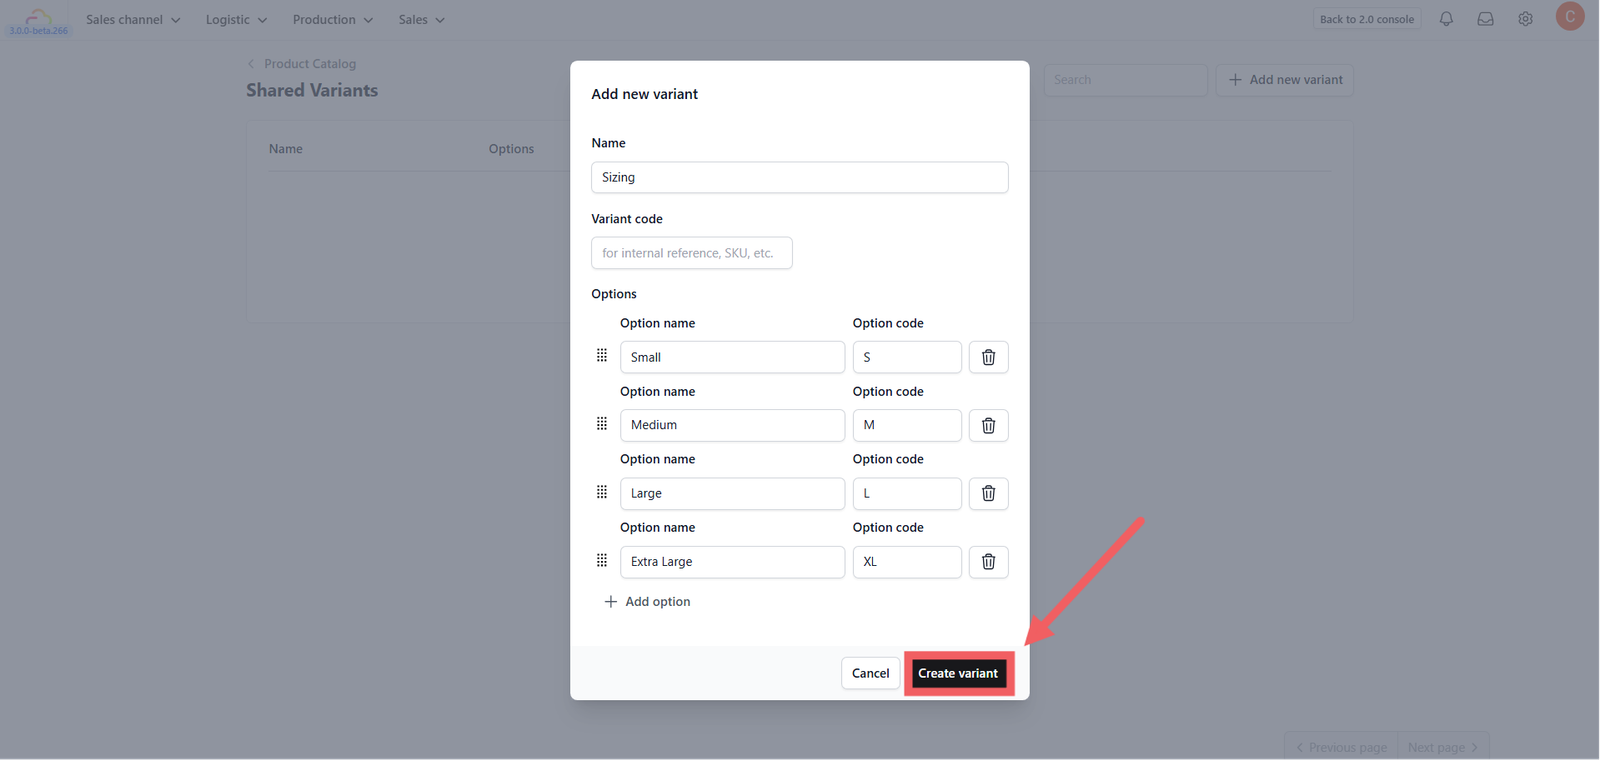
4. Fill in the General Information:
- Name: The display name for this variant group (e.g., "Standard Sizes").
- Variant Code: (Optional) A unique code for internal reference.
5. Define the Options (the choices inside the list):
- Option Name: The label customers see (e.g., "Small").
- Option Code: A short code for the system (e.g., "S").
- Click + Add option to add more options like Medium/M, Large/L, etc.
6. Click Create Variant to save.
You can now return to Step 2 or Step 4 and select this template when creating new items.
Adding Retail Products
Retail Products are physical goods you sell directly to customers (e.g., Lint Rollers, Detergent).
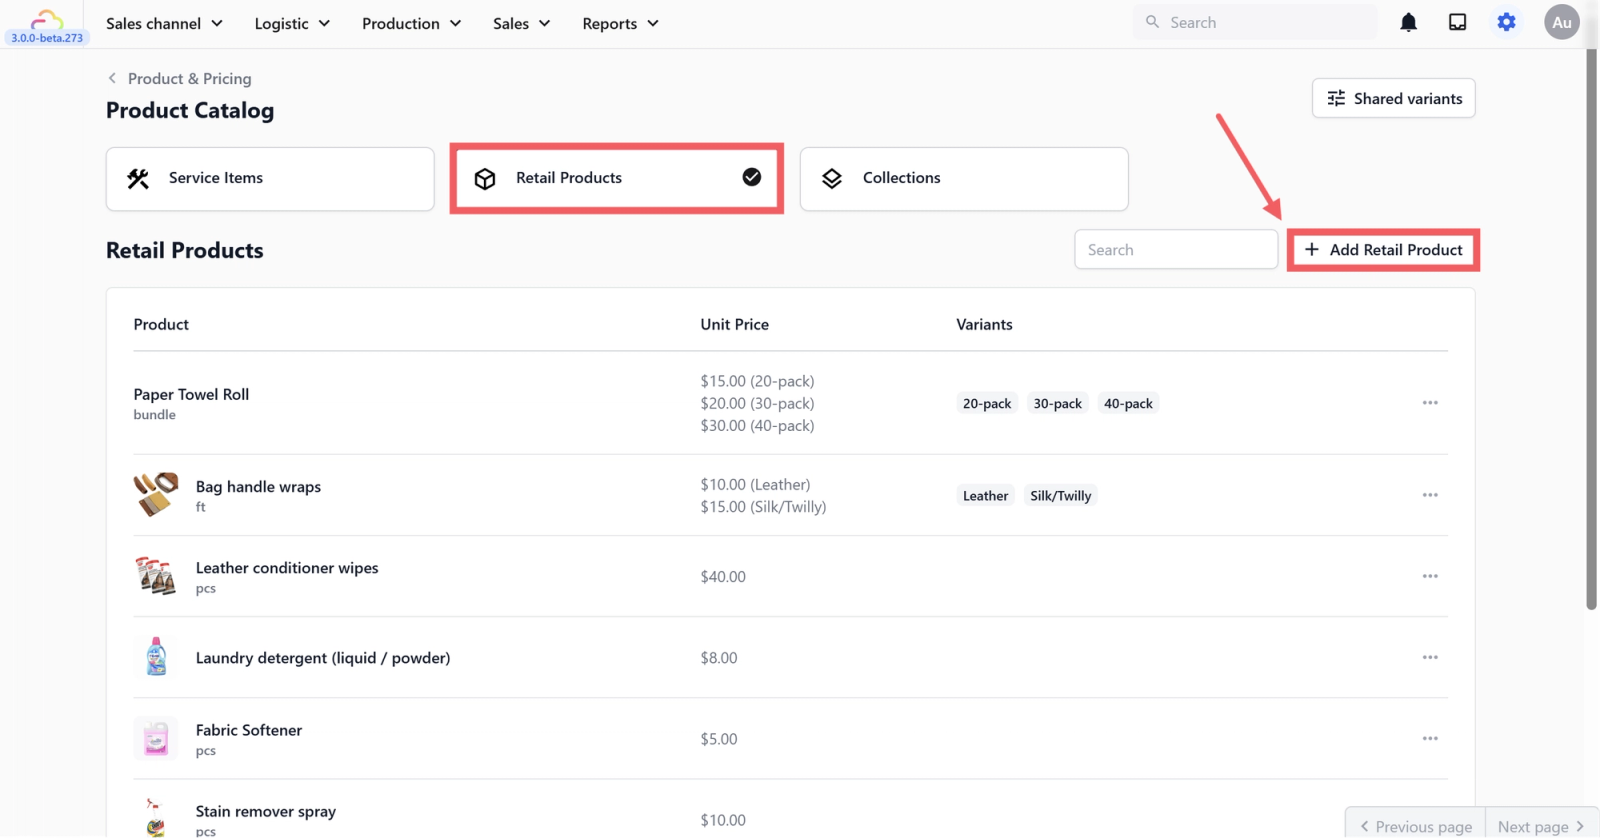
1. Switch to the Retail Product tab on the main catalog page.
2. Click + Add Retail Product.

3. The setup is identical to Service Items (including the optional Variants), with a few key differences:
- Unit Price: You must input the base selling price per unit here.
- Unit Label: Select a label that describes how the product is measured or sold (e.g., "pcs," "pack," "bundle").
Bundle Inventory
When you add variants to a retail product, two additional fields become available: Base Qty and the Bundle Inventory toggle.
Watch: How to set up Bundle Inventory for a retail product with variants.
This feature is for products where the variants are simply different package sizes of the same item — for example, a Laundry Bag sold as a 20-pack, 30-pack, and 40-pack. The product is the same; only the quantity per package changes.
Instead of tracking stock per variant separately, Bundle Inventory lets you track everything in base units at the product level. All variants share a single stock pool.
- Base Qty: Assign a value to each variant to define how many individual units are inside that package.
- Bundle Inventory: Toggle this on to activate base unit tracking.
How it works:
Once enabled, the system uses the Base Qty as a conversion rate during sales. For example, if you stock in 100 individual laundry bags and a customer purchases one 20-pack, the system automatically deducts 20 from your inventory. If another customer buys a 40-pack, 40 are deducted — all from the same pool of 100.
When to use Bundle Inventory:
Use this for products where variants represent different quantities of the same SKU — such as cleaning supplies in multi-packs, disposable items in different bundle sizes, or consumables packaged in small and bulk options.
It is not intended for products where variants represent genuinely different items (e.g., a T-shirt in Small, Medium, and Large). For those, standard variant tracking is more appropriate.
Give feedback
Up next
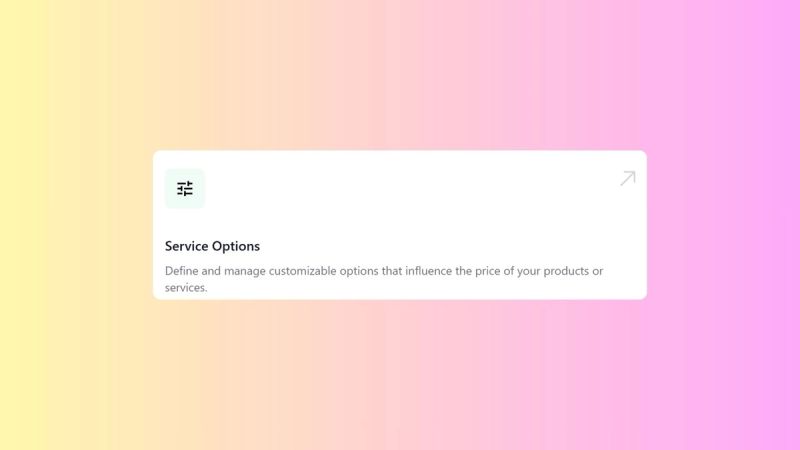
Configuring Service OptionsLearn how to categorize your services and configure specific pricing models to ensure accurate billing.
Read more