Customize Invoice Templates
In this article
At the end of each billing cycle, you will need to send your agents an invoice showing what they are owed. EasyBiz gives you two templates to work with — an Invoice Cover that shows the total amount due, and an Itemised Breakdown that lists every order line by line. This guide walks you through how to set up both and link them to your agents.
Contents
Contents
What are Invoice Templates?
Invoice Templates are the documents you send to your agents when it is time to pay them. There are two parts to a complete invoice:
- Invoice Cover: This is the front page of the invoice. It shows your business details and the total amount due.
- Itemised Breakdown: This is the detailed section. It lists every order and service line by line, so your agent can see exactly what they are being paid for.
You can customise both to match your business using the visual editor.
Access the B2B Page
To begin customizing your documents, you need to head over to the B2B management page.
How to navigate there:
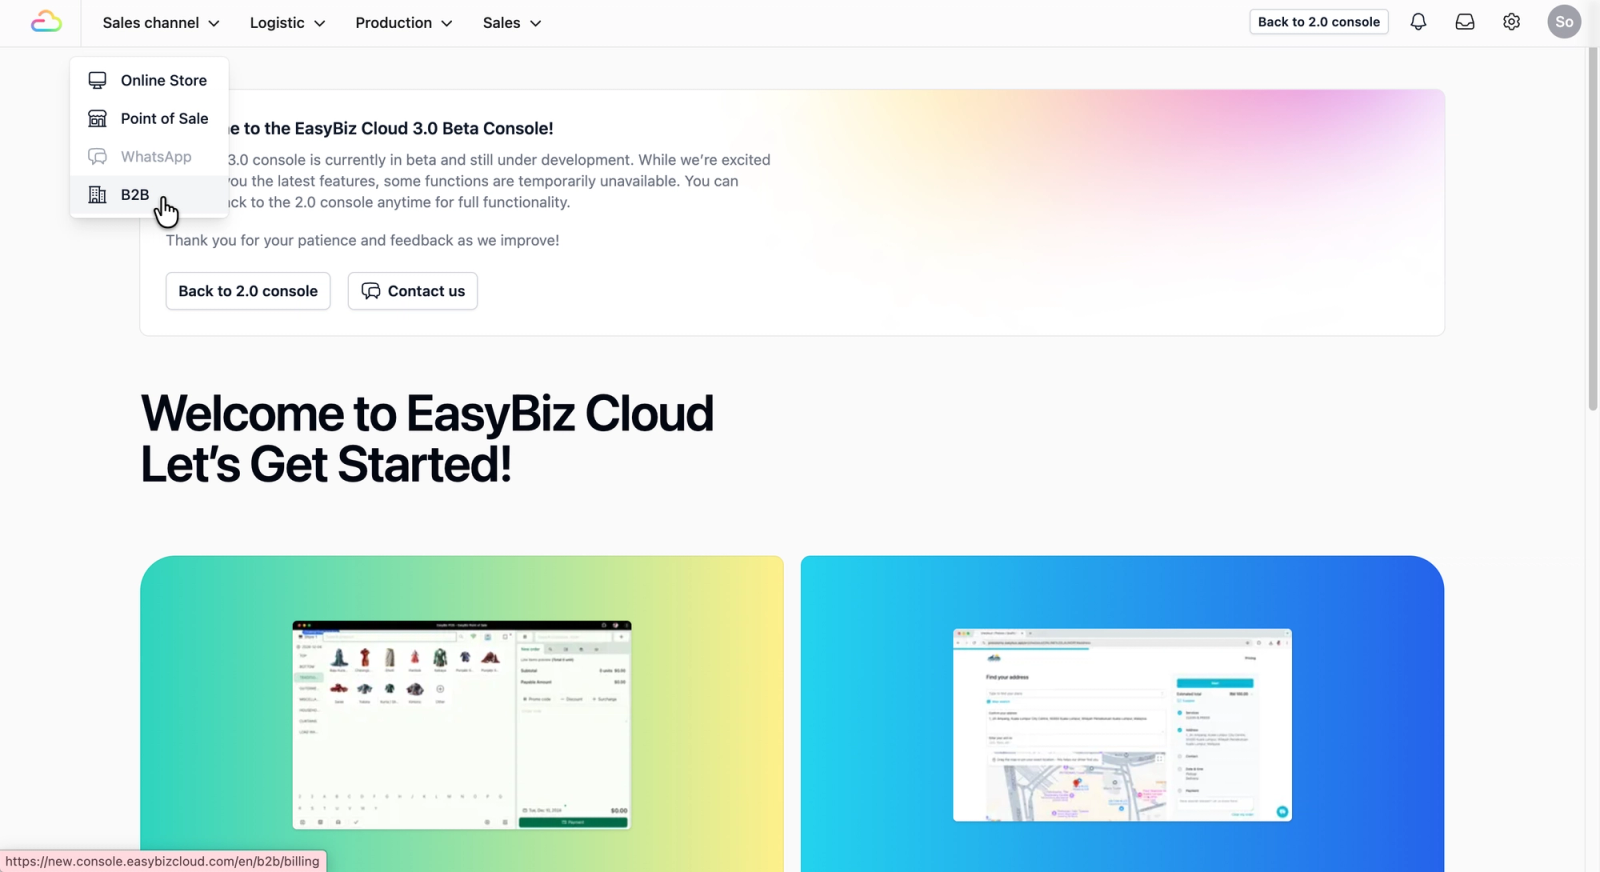
- On the top navigation bar, click on Sales Channel.
- Select B2B from the dropdown menu.
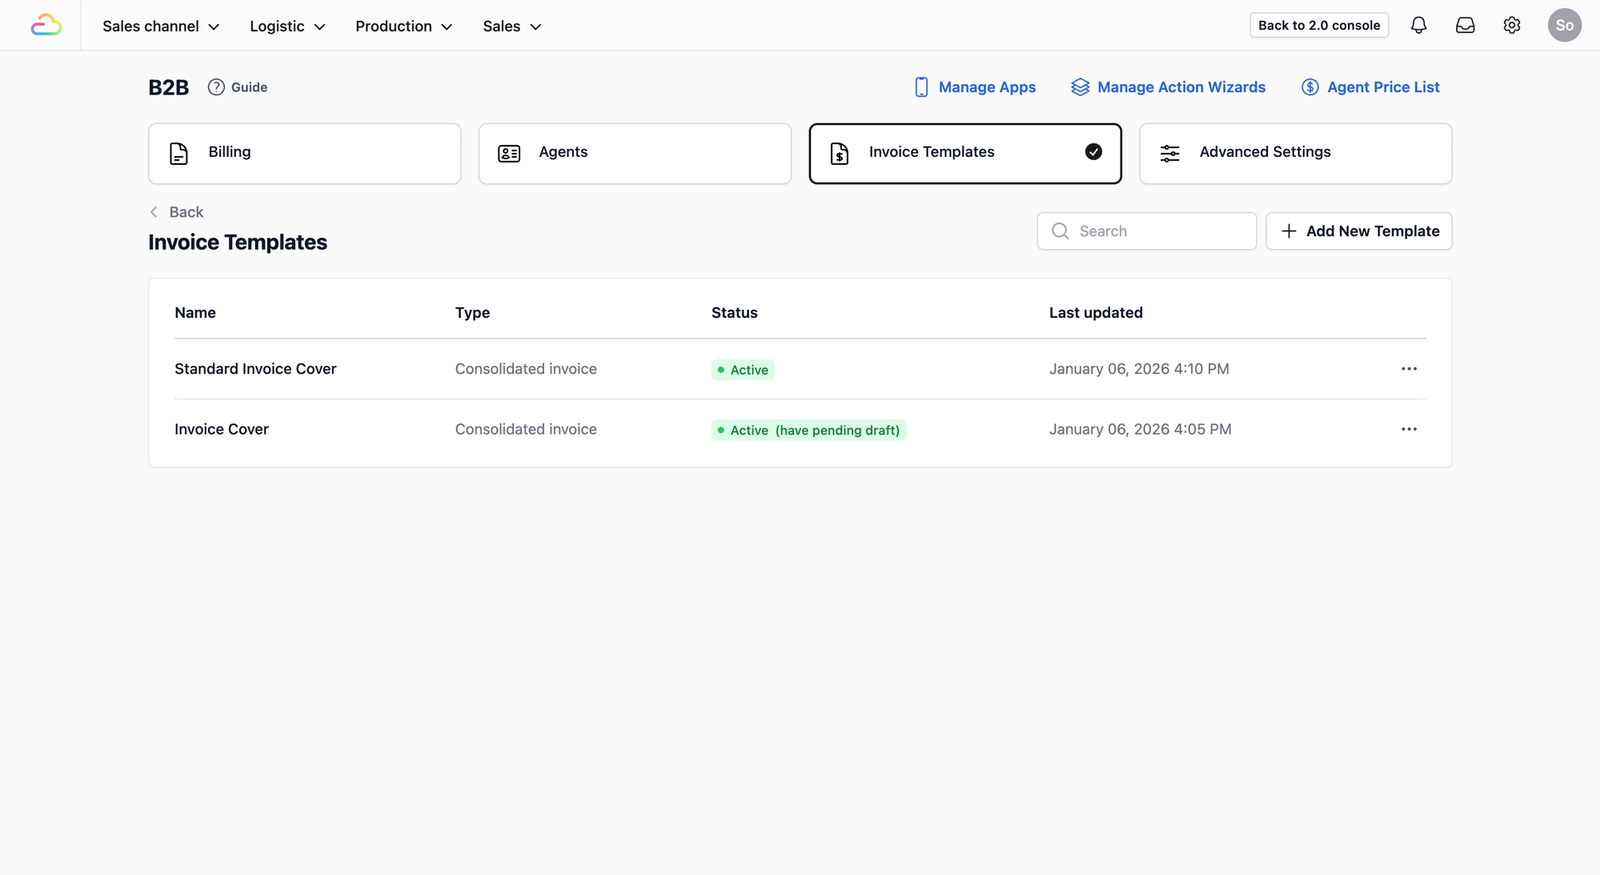
Locate the Invoice Templates Tab
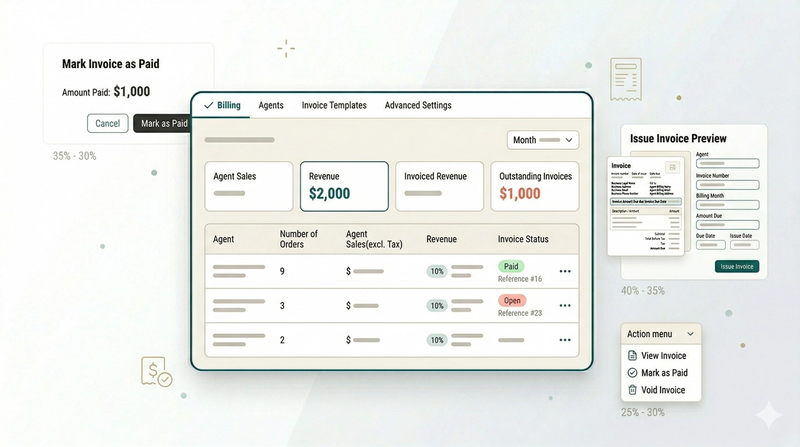
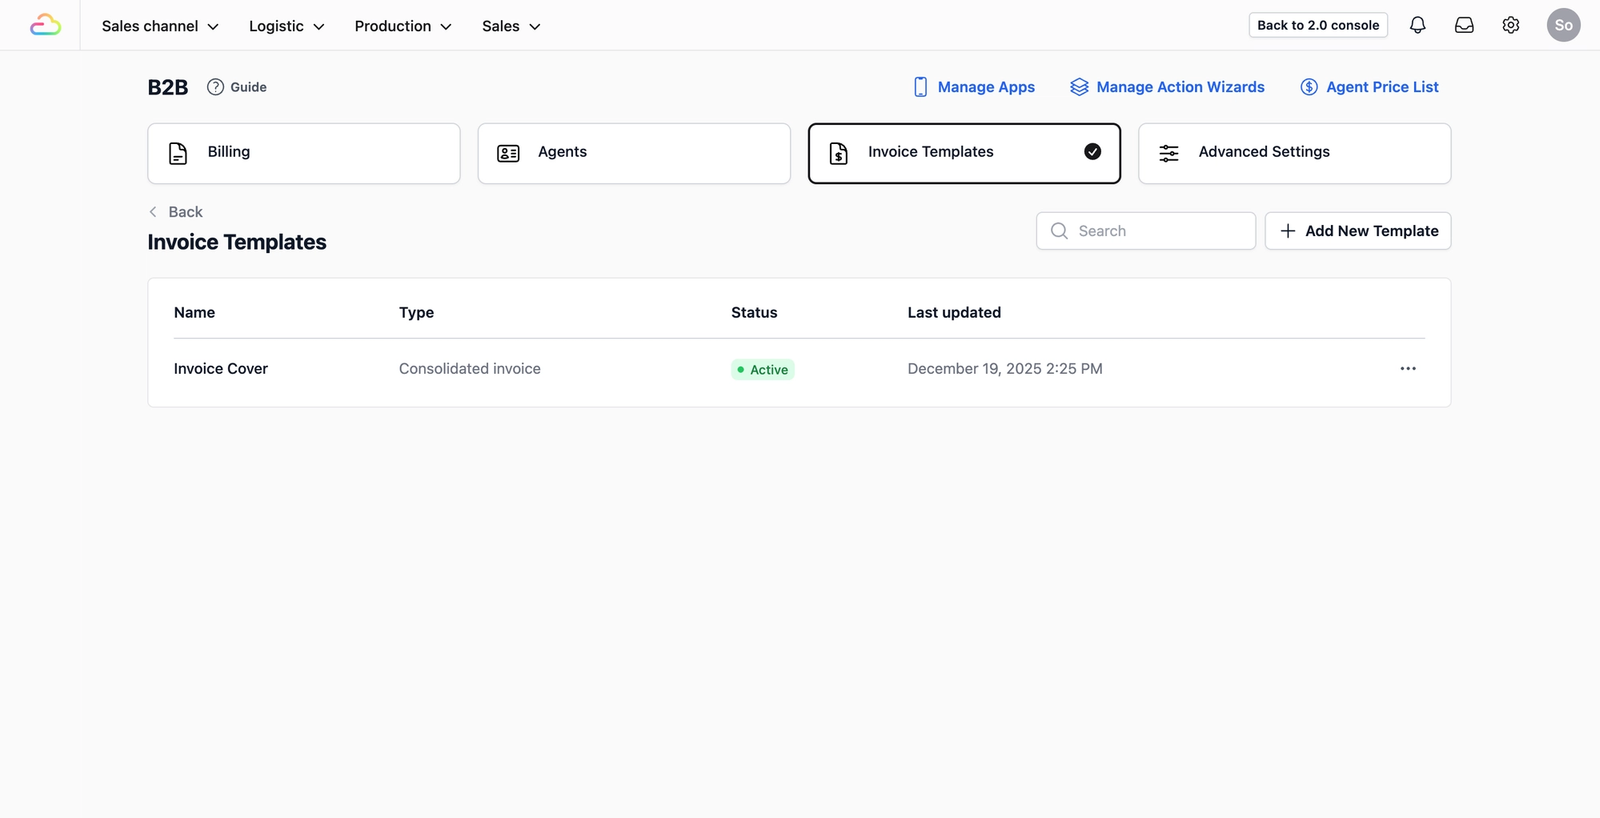
Once the B2B page loads, you will see several options at the top. Click on the Invoice Templates tab. This is where you will manage the invoices you send to your agents at the end of each month.
Customise Your Templates
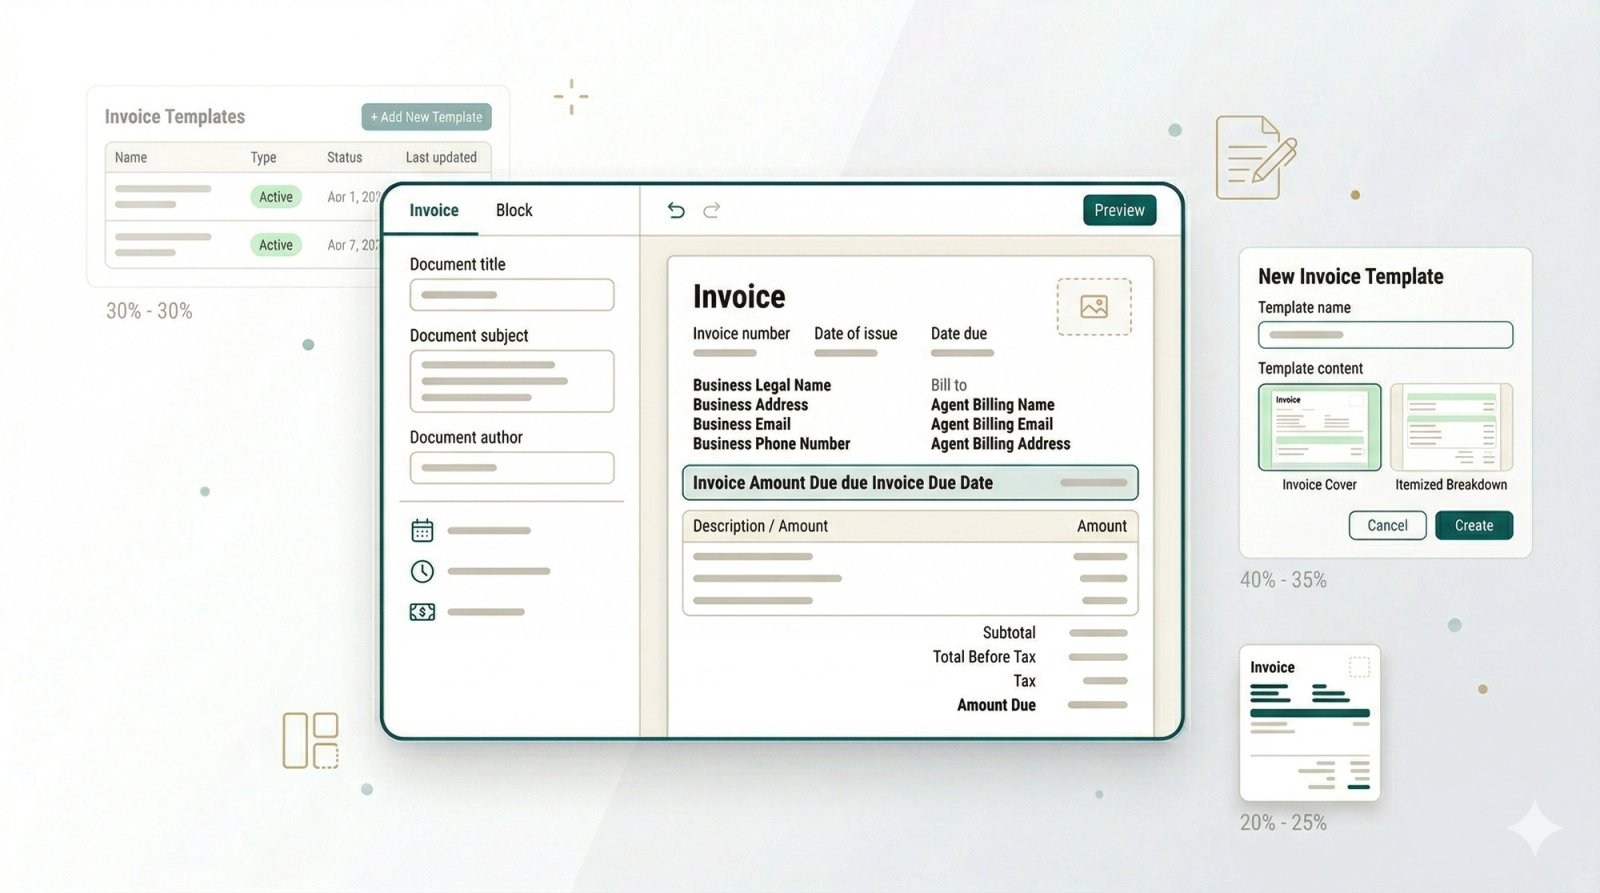
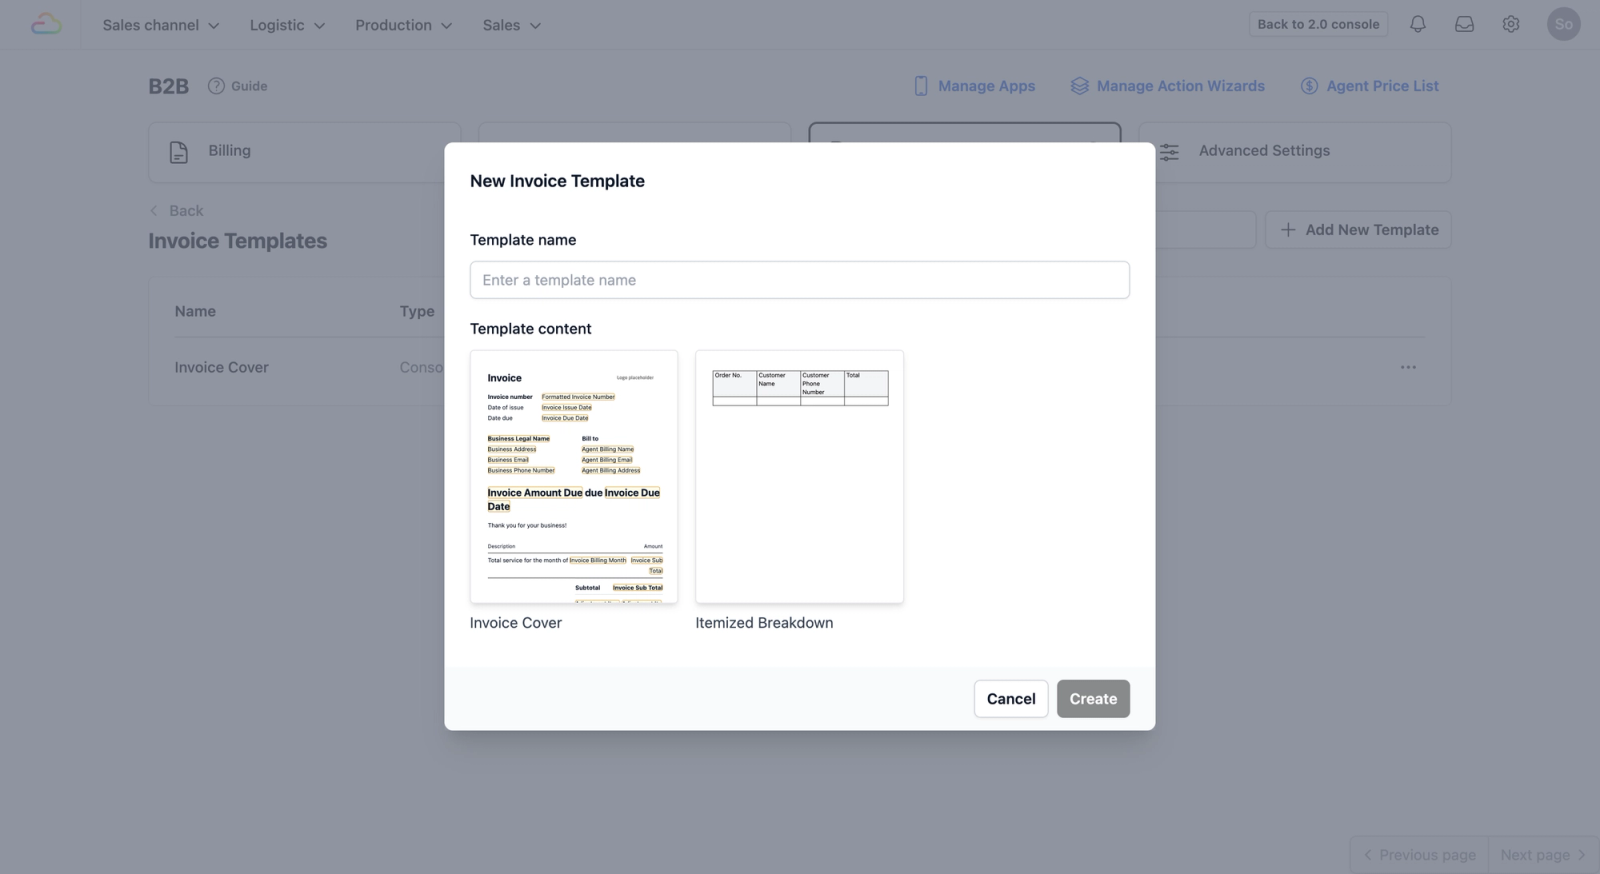
To build a complete invoice for your agents, you will need to add two specific templates to your system. Click on the + Add New Template button; a pop-up window will appear with two sections:
- Template name: Rename this if you have multiple invoice covers suited for different agents, or leave it blank to use the default name.
- Template content: Here you can select from two pre-built templates designed for your monthly billing to your agents:
- Invoice Cover: Think of this as the "Face" of the bill. It shows the total amount due and your business details.
- Itemized Breakdown: This is the "Evidence." It provides a detailed, line-by-line list of all individual services, ensuring complete transparency so there is no confusion over the final total.
Setting up the Invoice Cover
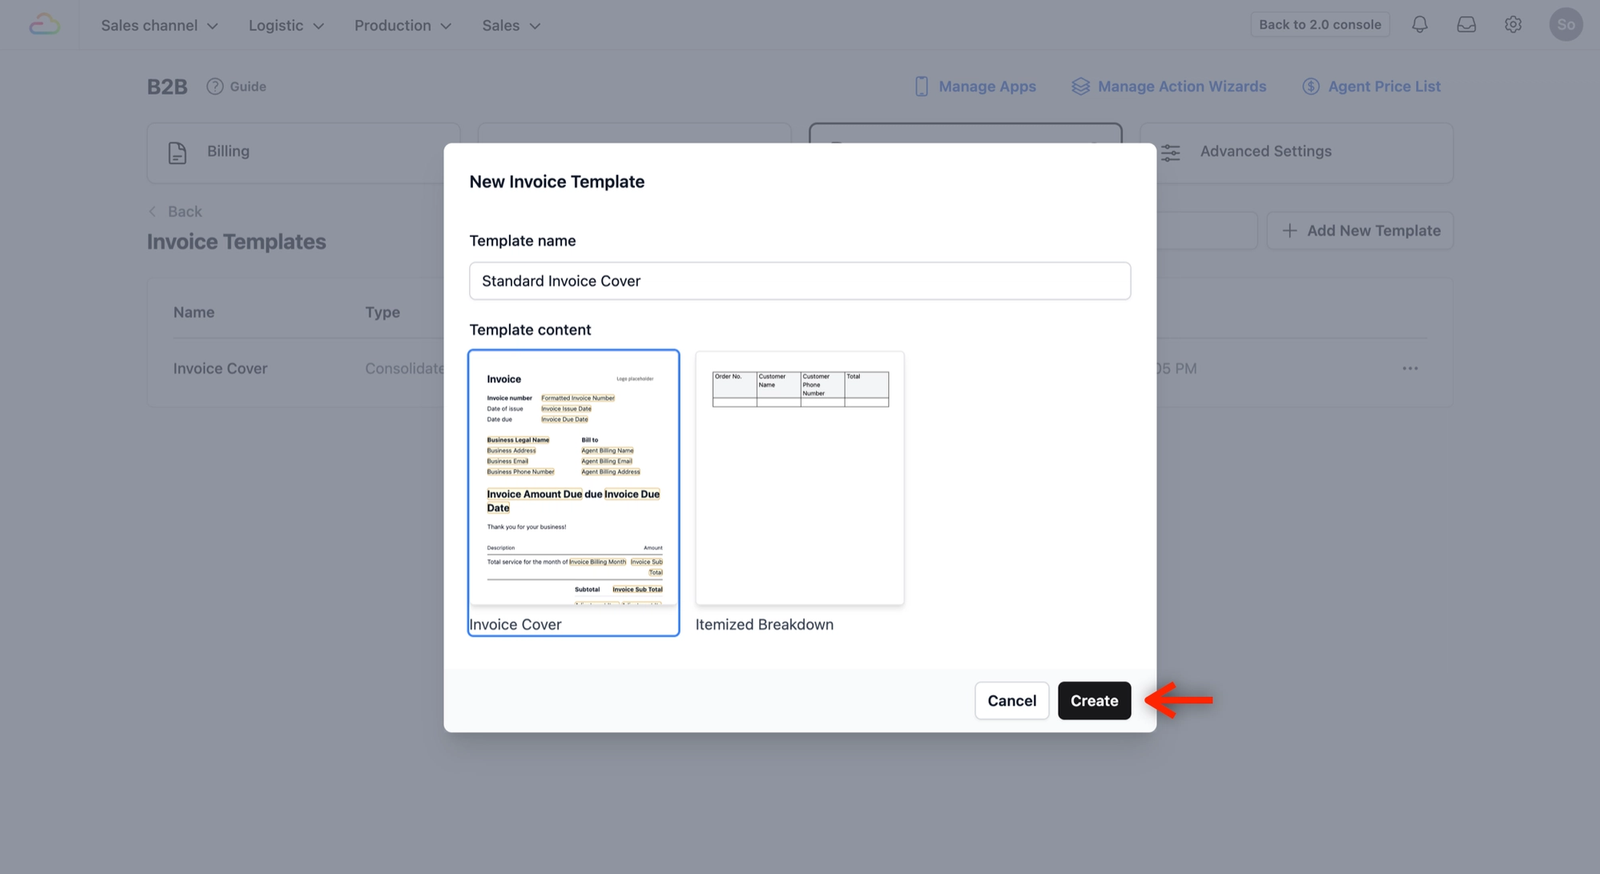
The Cover is the first thing your agent sees when you issue their monthly statement. In the pop-up window:
- Template name: You can rename this (e.g., "Standard Invoice Cover") or leave it blank, which will default to the template's name.
- Template content: Select Invoice Cover.
- Click Create.
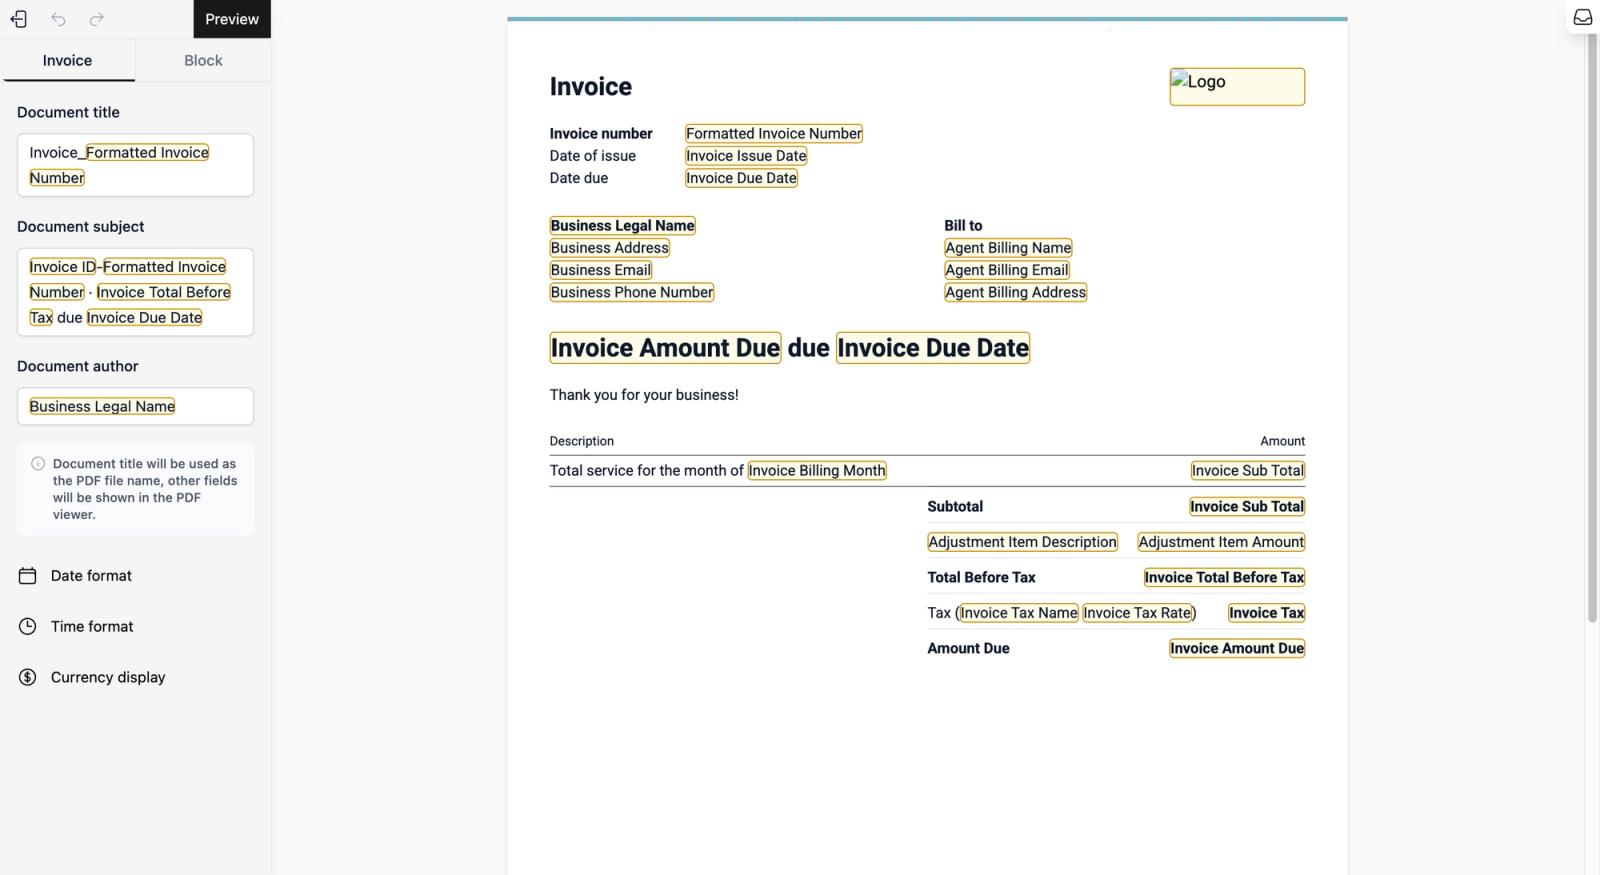
This opens up the Visual Editor on the left with the ready-to-use template on the right.
- Visual Editor (Left): This controls the high-level "logic" and metadata of your invoice. You can customise the Document Title (which serves as the PDF file name), the Document Subject, and the Document Author. You can also set your preferred Date, Time, and Currency formats to match your business standards.
- Template view (Right): This is your visual canvas. The fields are all editable, allowing you to click into text boxes or drag and drop elements to rearrange the layout to fit your specific requirements.
This video demonstrates how you can configure your PDF metadata for professional bookkeeping and see how easy it is to drag and drop elements to customize your template layout.
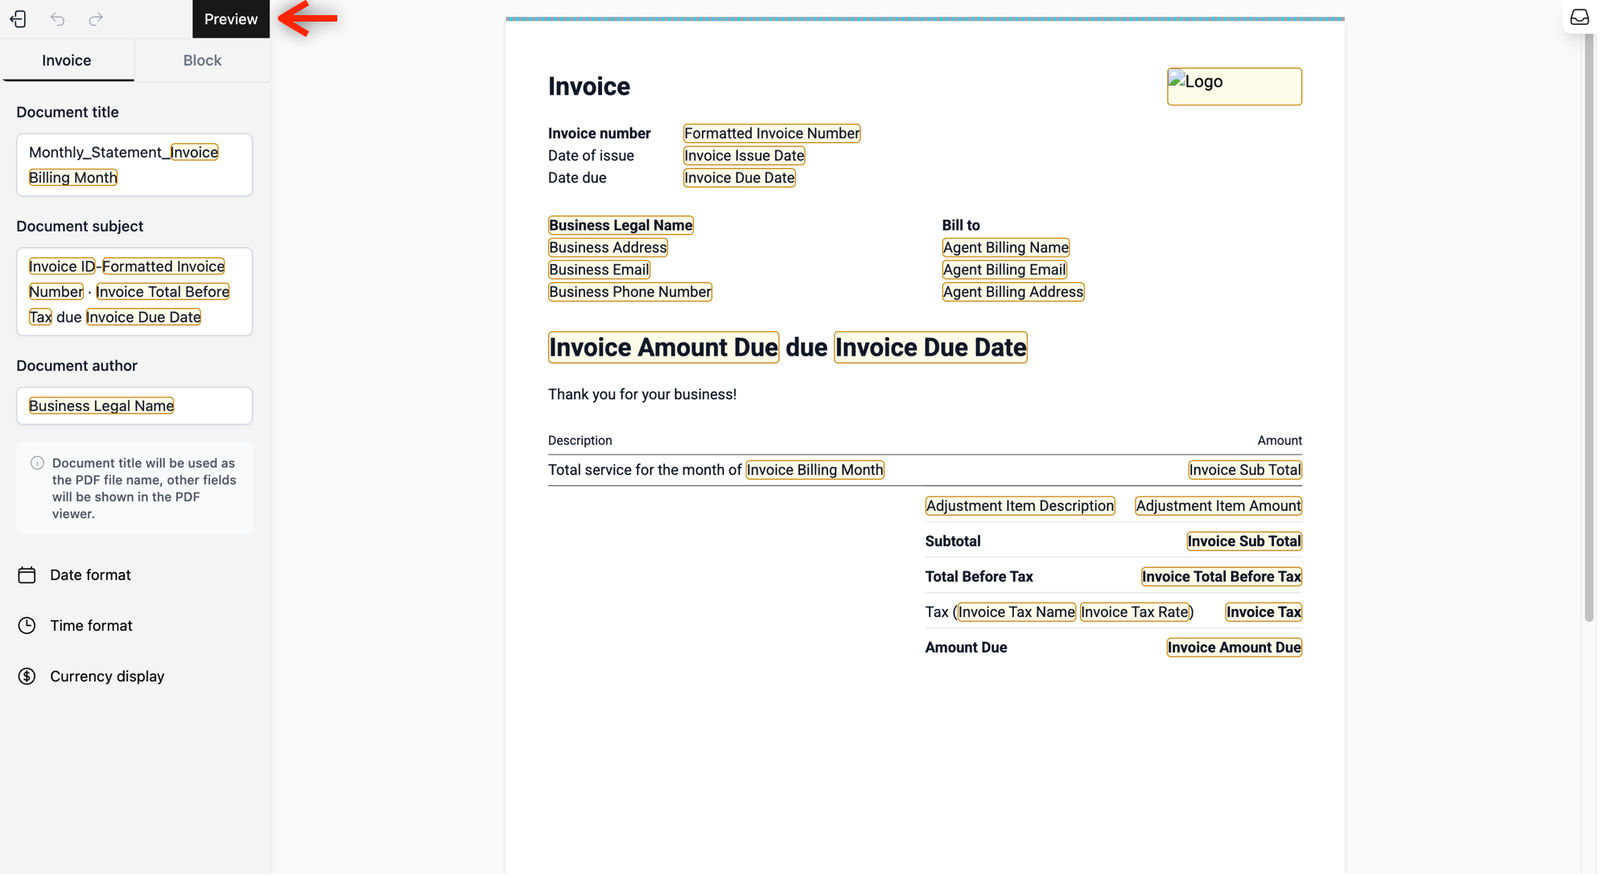
Preview & Publish the template
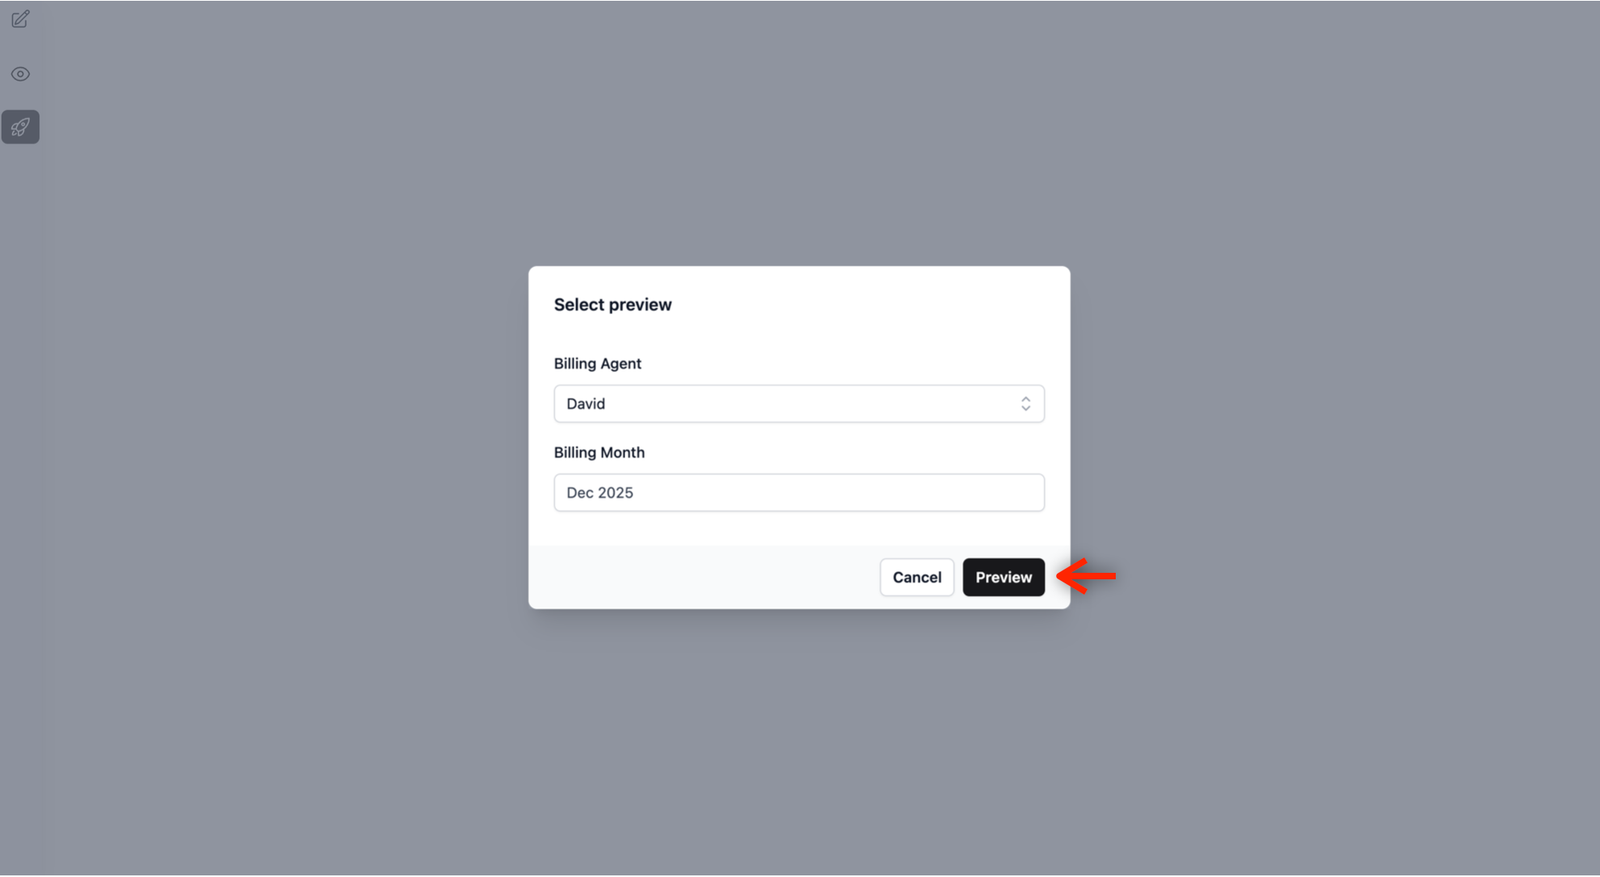
Before you publish the template, you can see how the template looks with real data:
- Click the Preview button.
- In the pop-up, select the agent you would like to see this preview on under Billing Agent and choose a Billing Month.
- Click the Preview button.
This generates the PDF view when you issue this invoice cover template to your agents.
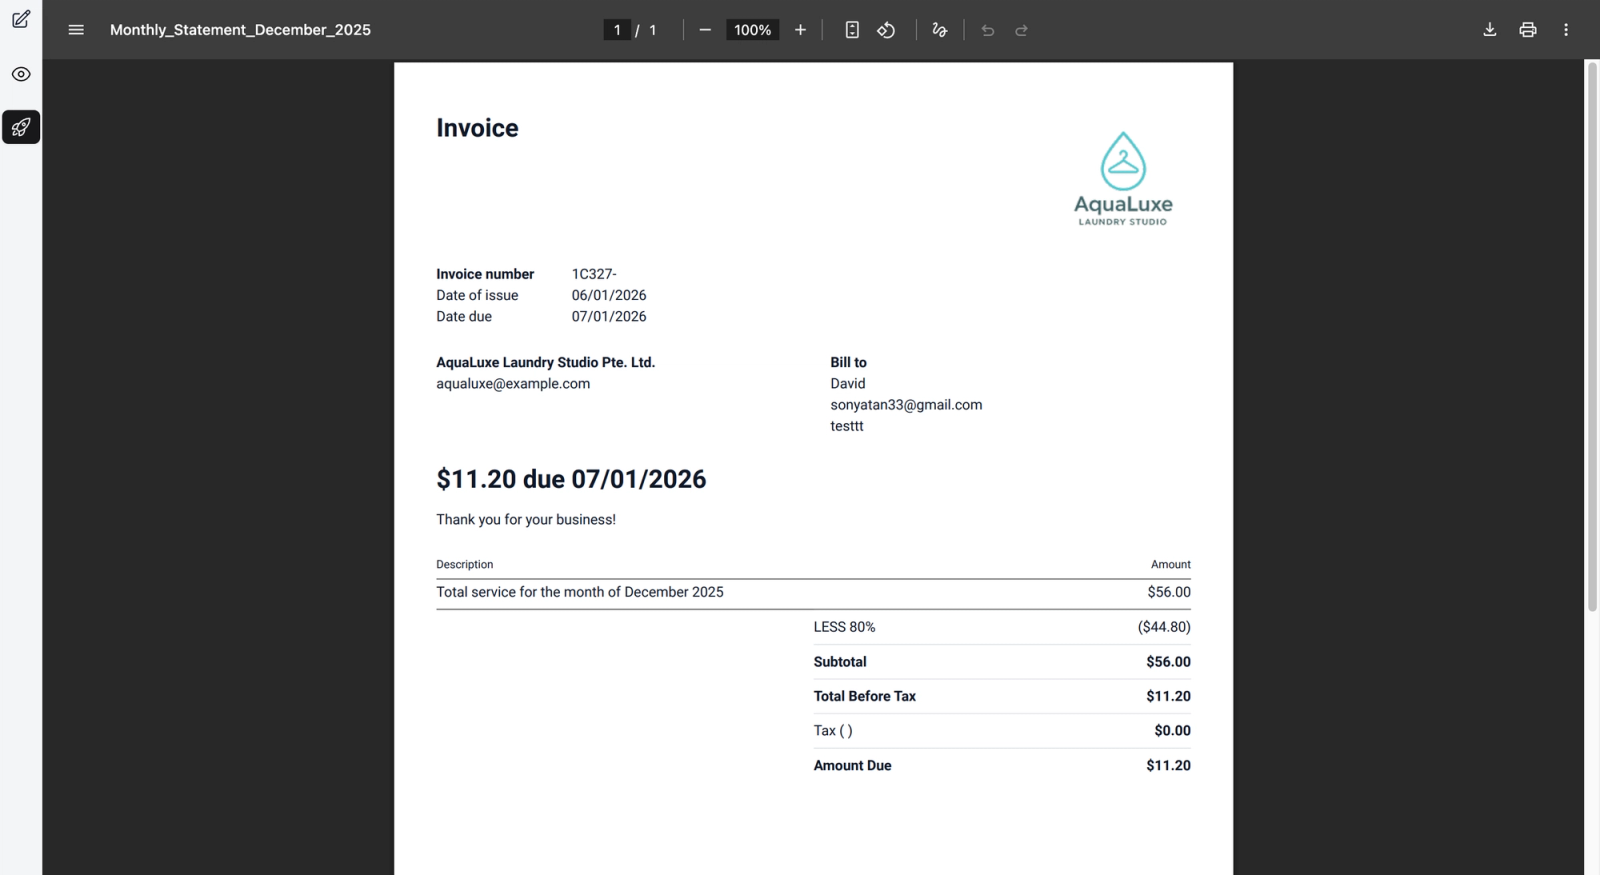
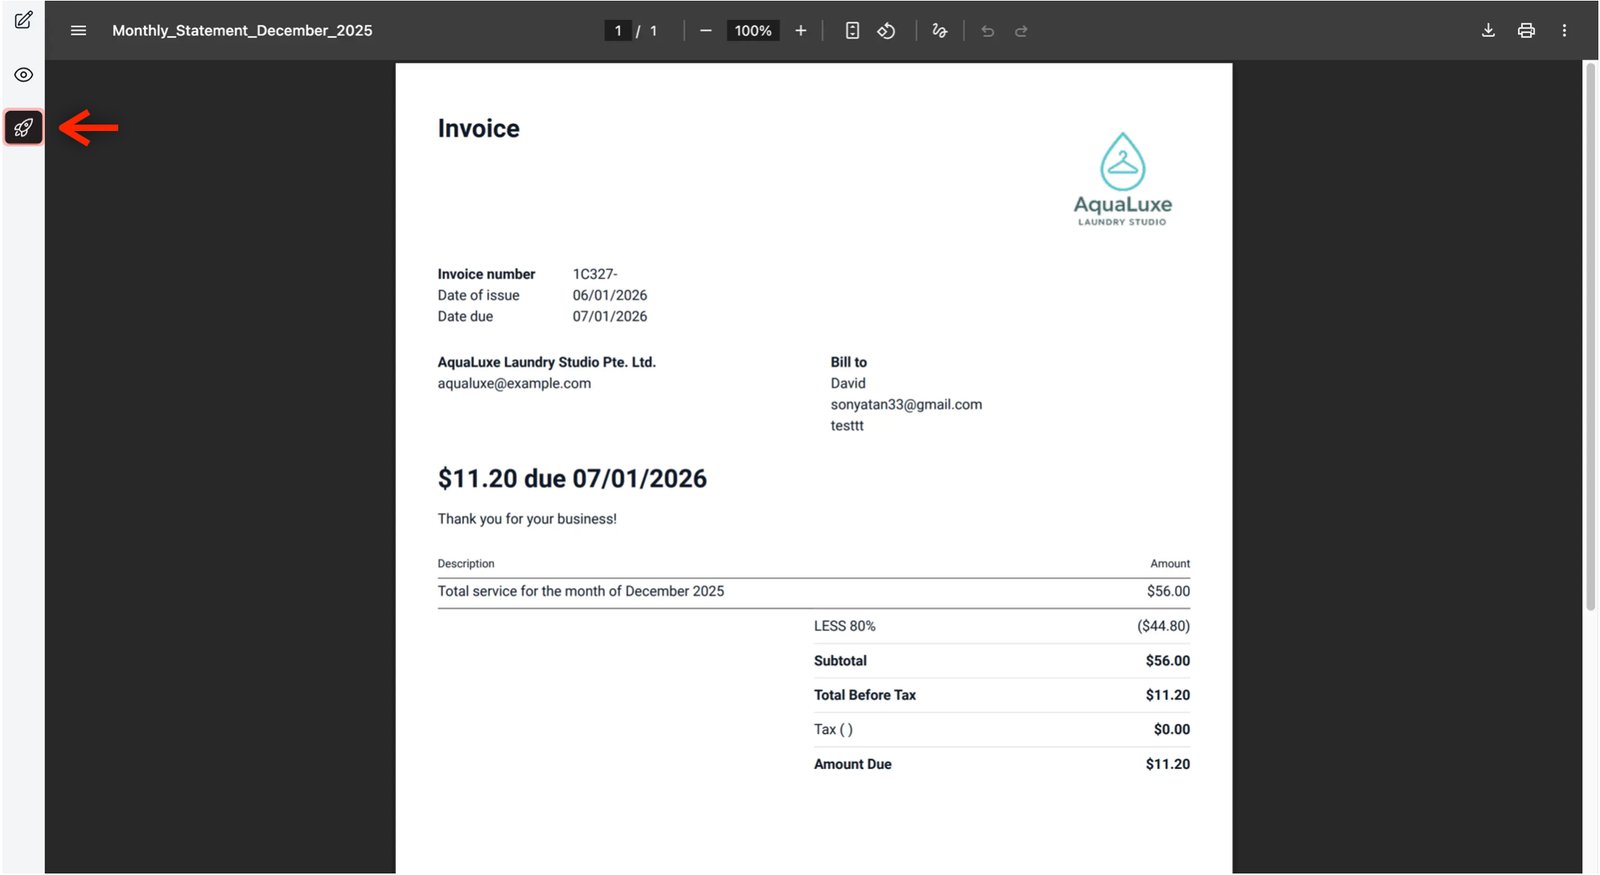
If you are satisfied with the PDF preview, click on the Publish icon.
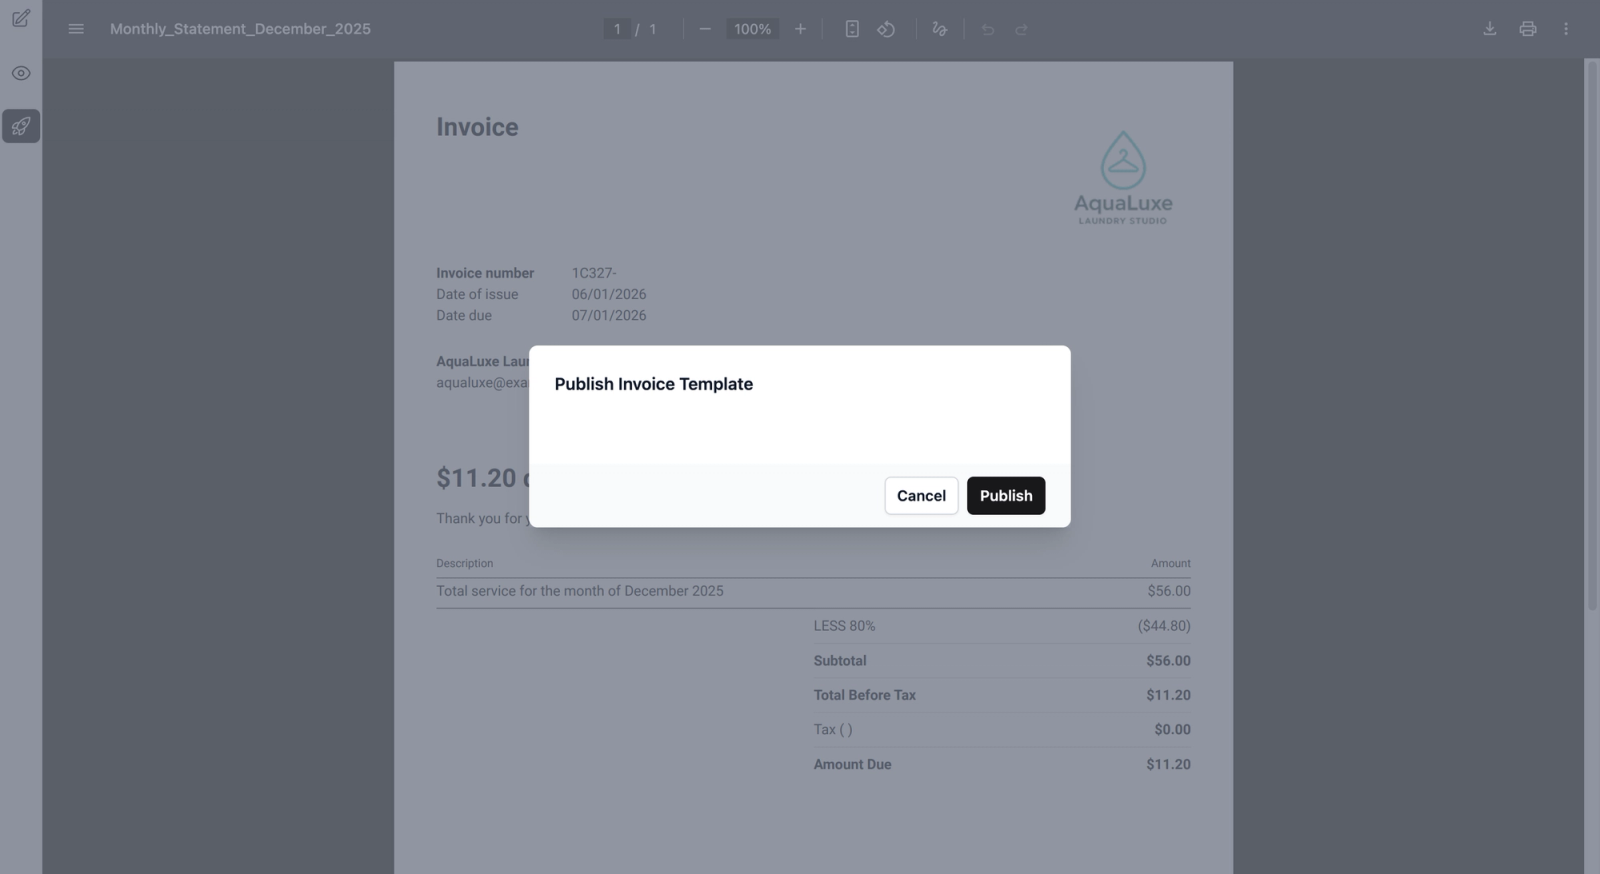
A pop-up window will appear for you to confirm the choice. Click on the Publish button to confirm.
The page will refresh to the Invoice Templates tab. A new created Invoice Cover Template should be now marked as Active in the table view.
Add the Itemized Breakdown
Now, follow the same steps to ensure the agent receives the line-by-line detail of their service line items.
- Click + Add New Template again.
- Template Name: Leave this blank or give it a custom name.
- Template Content: Select Itemized Breakdown this time.
- Customise & Preview: Use the editor and the preview tool just as you did for the cover to ensure the layout looks professional.
- Publish: Hit the Publish icon, and confirm in the pop-up window.
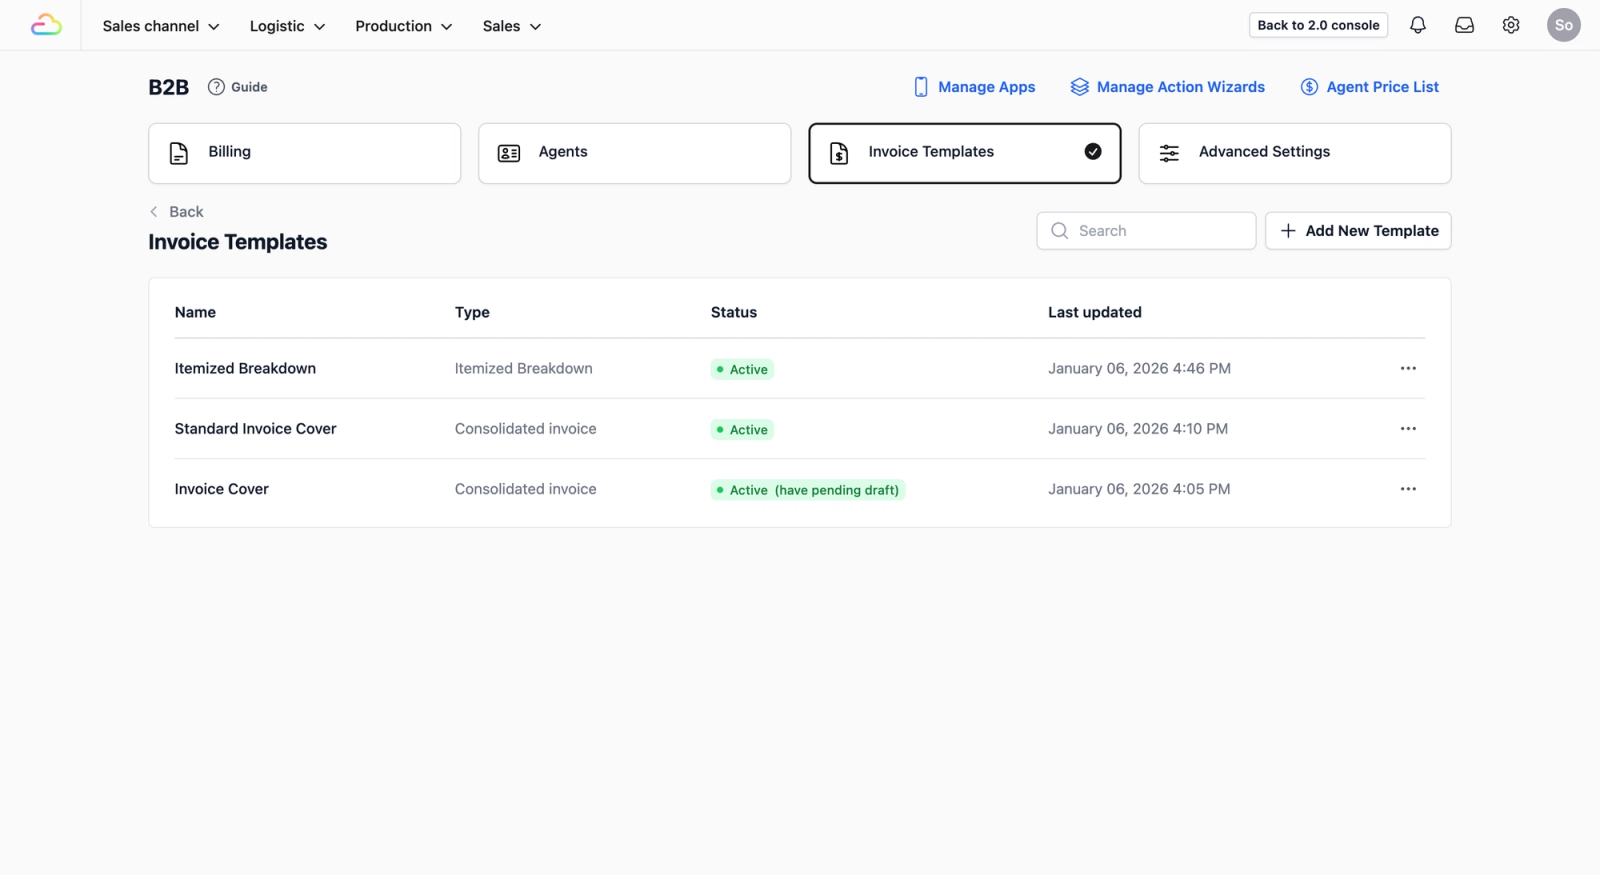
You should now see both the Invoice Cover and Itemized Breakdown templates listed in your table with an Active status.
Link the Invoice Templates to an Agent
Creating the templates is the first half; now you must tell the system which specific agents should use them.
There are two ways to navigate to the Agents tab:
- From home screen: On the top navigation bar, click on Sales Channel.Select B2B from the dropdown menu. In the B2B page, click on the Agents tab.
- From current screen (Invoice Templates tab): Click on the Agents tab.
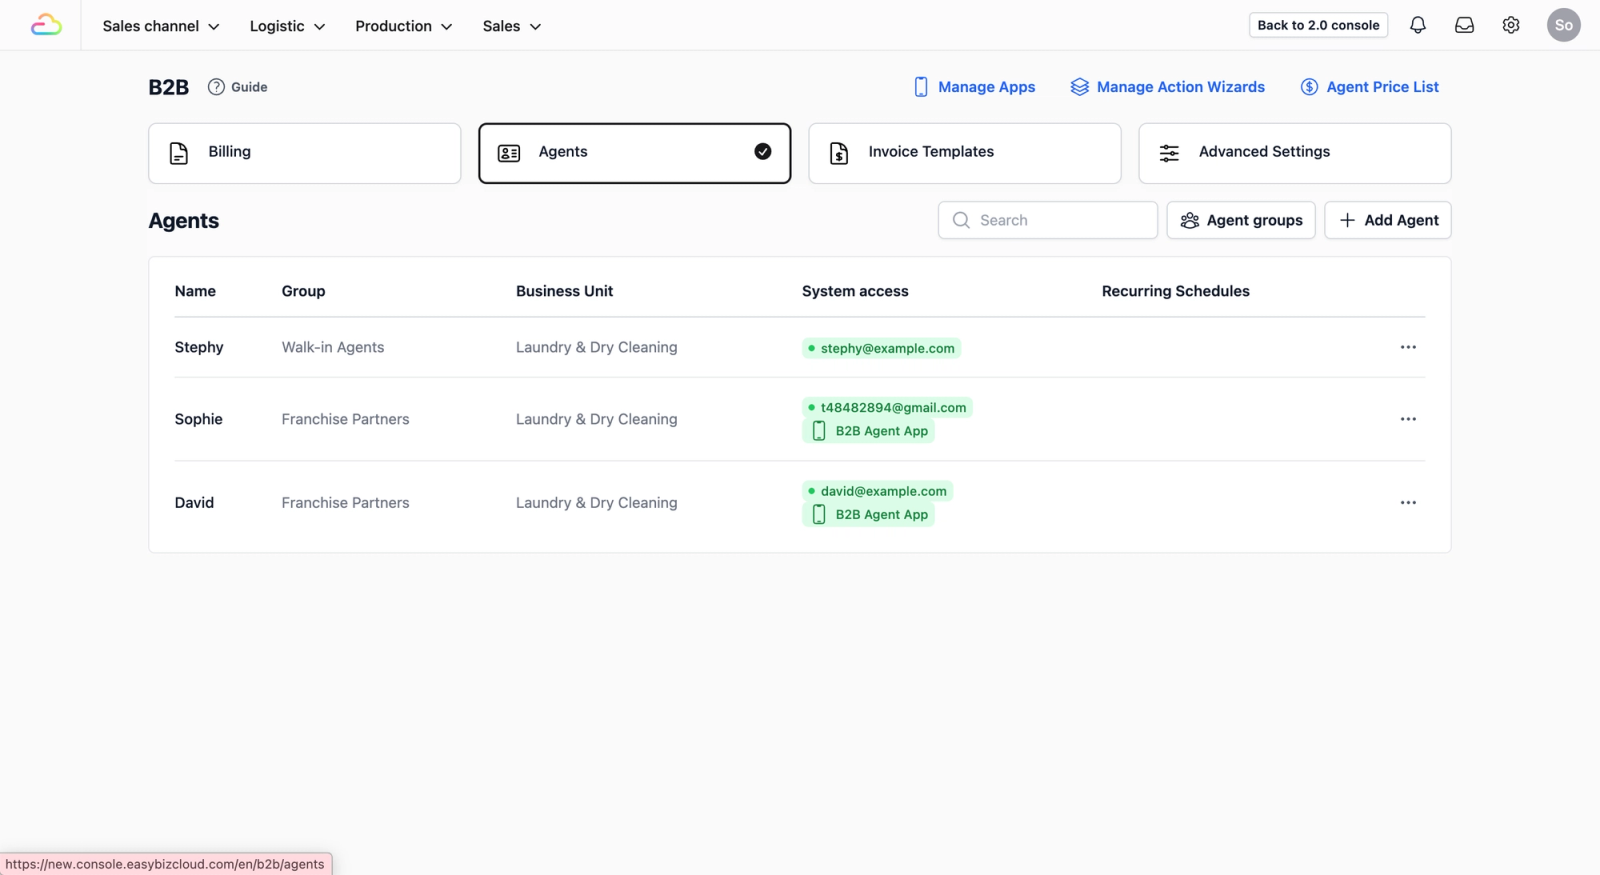
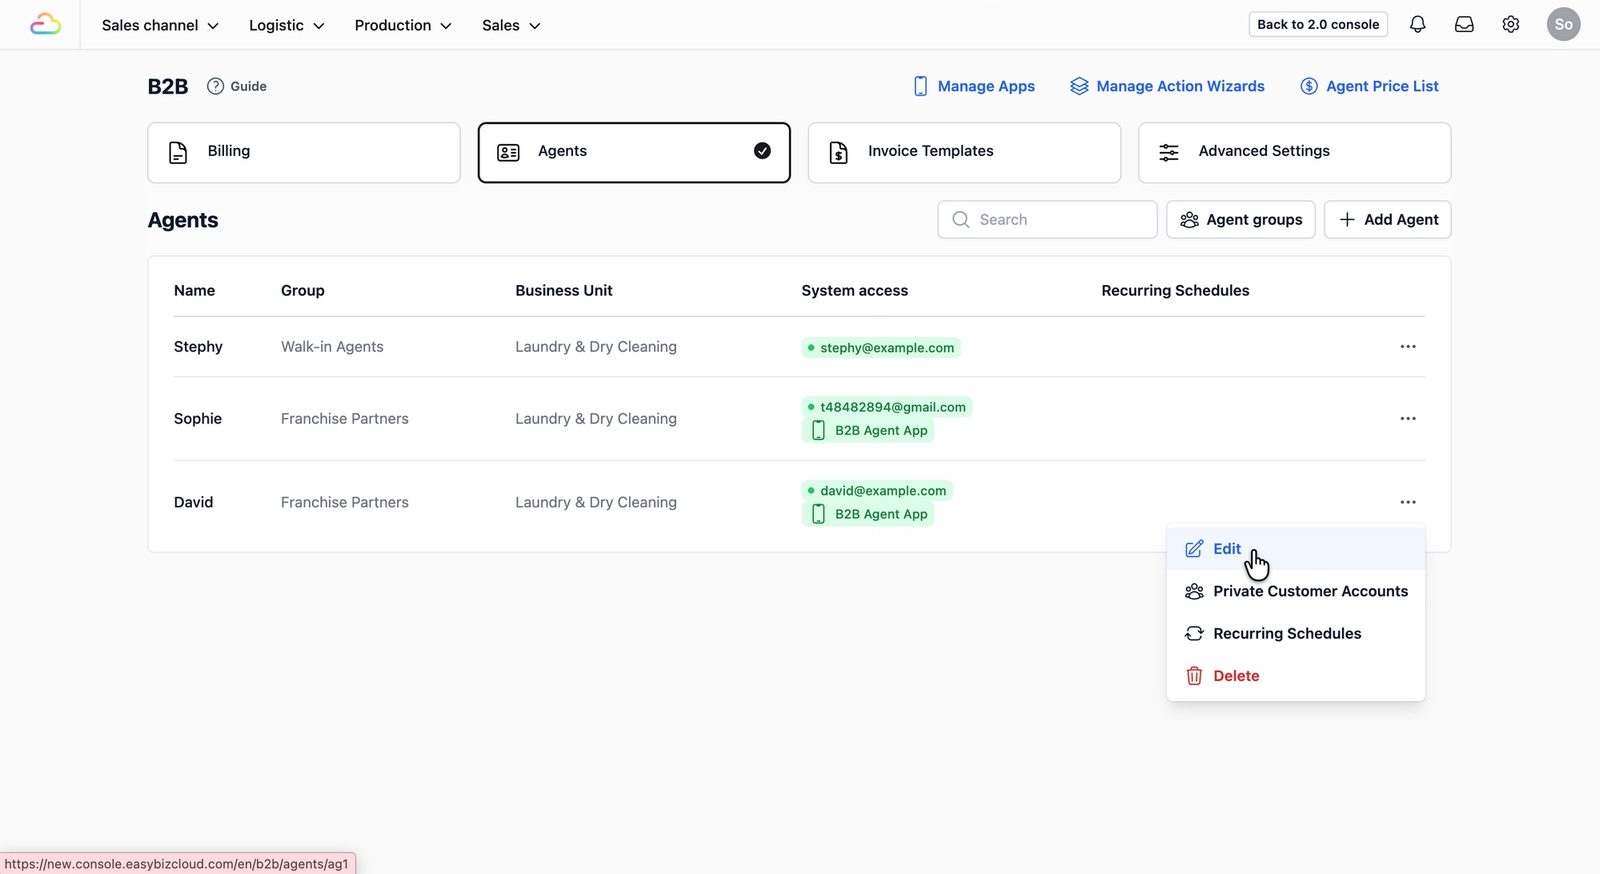
Click on the Agents tab to view your full list of registered agents. In the table view, locate the agent you want to apply the newly created invoice templates to and click on the ••• (Action Menu) on the far right, and select Edit.
Scroll down the profile page until you locate the Agent Billing Information
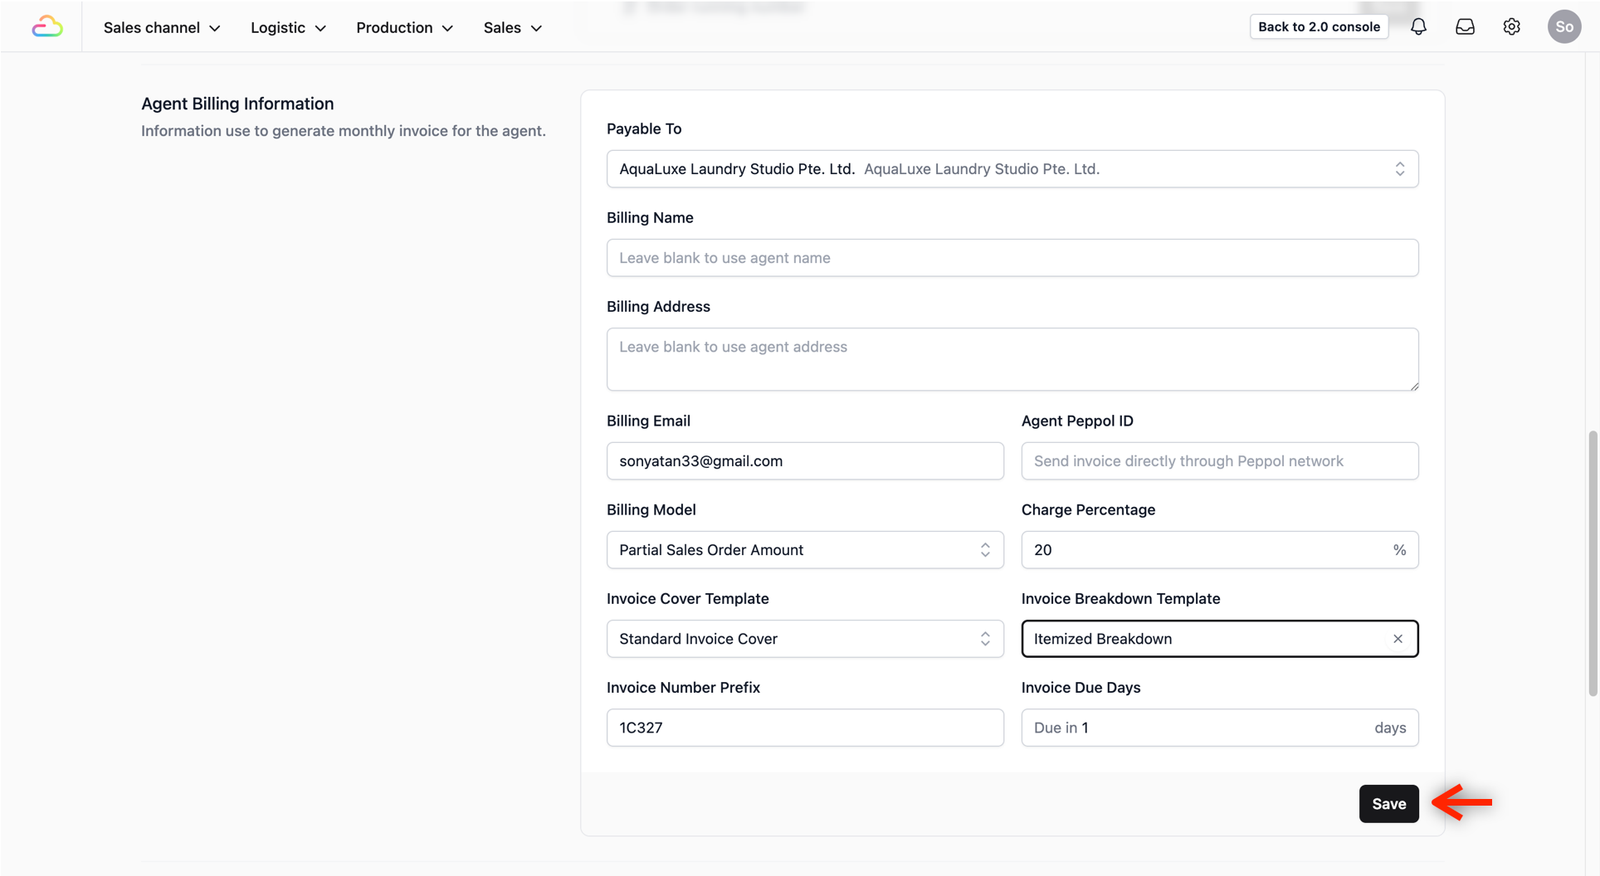
section. Under the Invoice Cover Template field, click the dropdown box and select your newly created Invoice Cover Template.
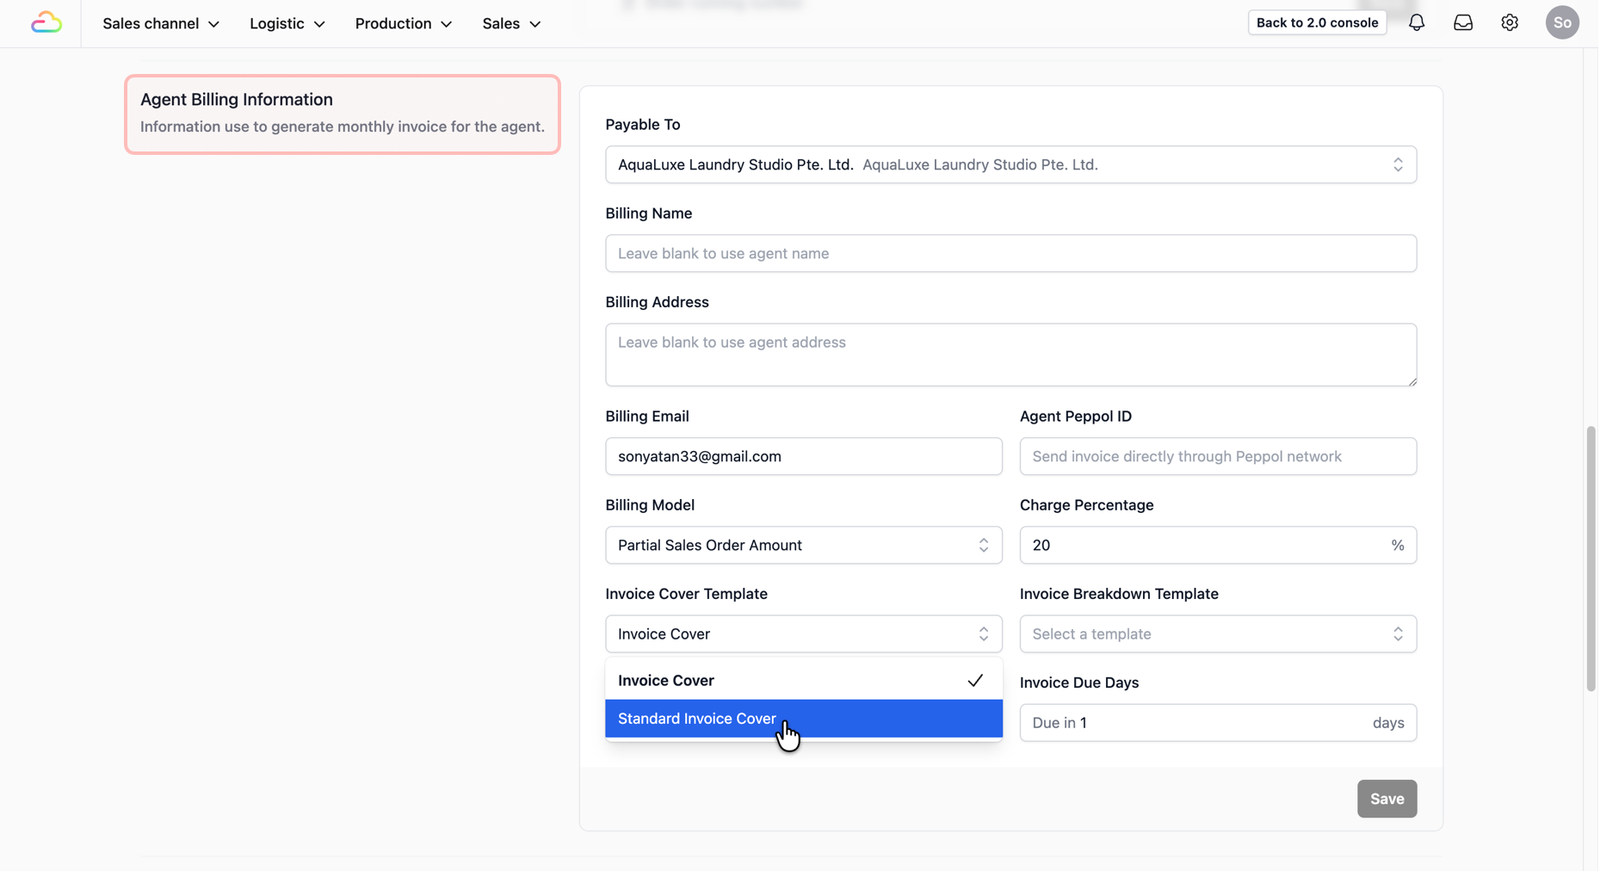
Do the same for Invoice Breakdown Template dropdown field.
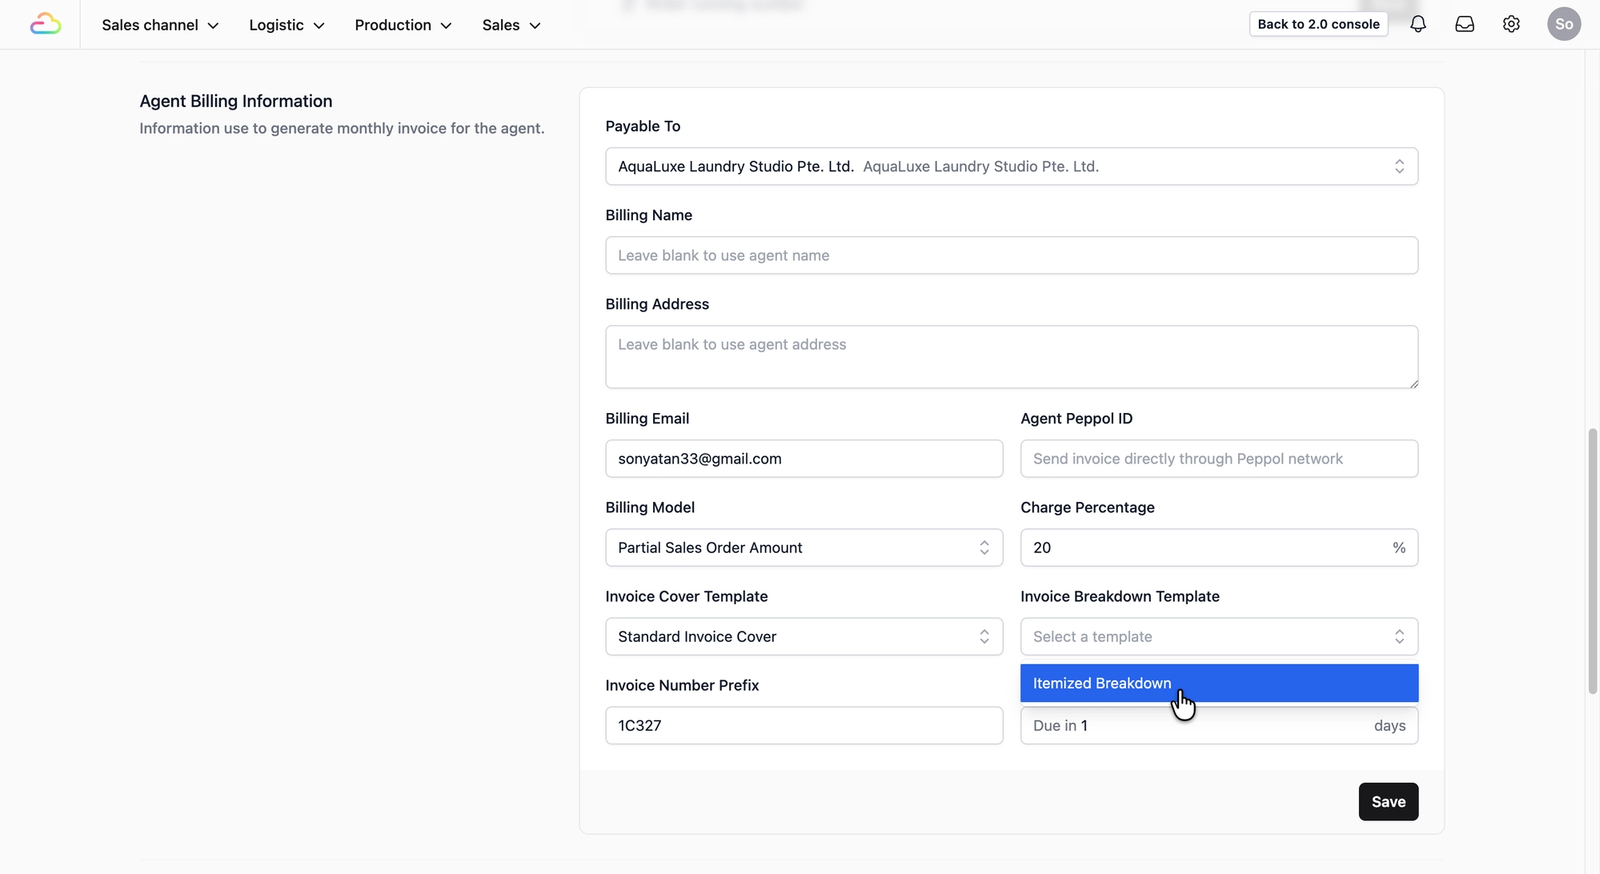
Once done, click on the Save button at the bottom right of the section to apply the change.
Give feedback