Set Up Order Procedures
In this article
When an order is created under an agent, you may want to control what steps are followed, such as selecting a customer, adding items, or choosing a delivery date. Order Procedures let you define this process so that every order is created the same way. This guide walks you through how to set up a procedure and link it to your agents.
Contents
Contents
What is an Order Procedure?
An Order Procedure is a set of steps that must be followed when creating an order. By setting this up, you can make sure every order comes in with the correct information, whether it is your own team creating the order or an agent doing it themselves. You can use a standard procedure for all your agents, or create different ones depending on how each agent works with you.
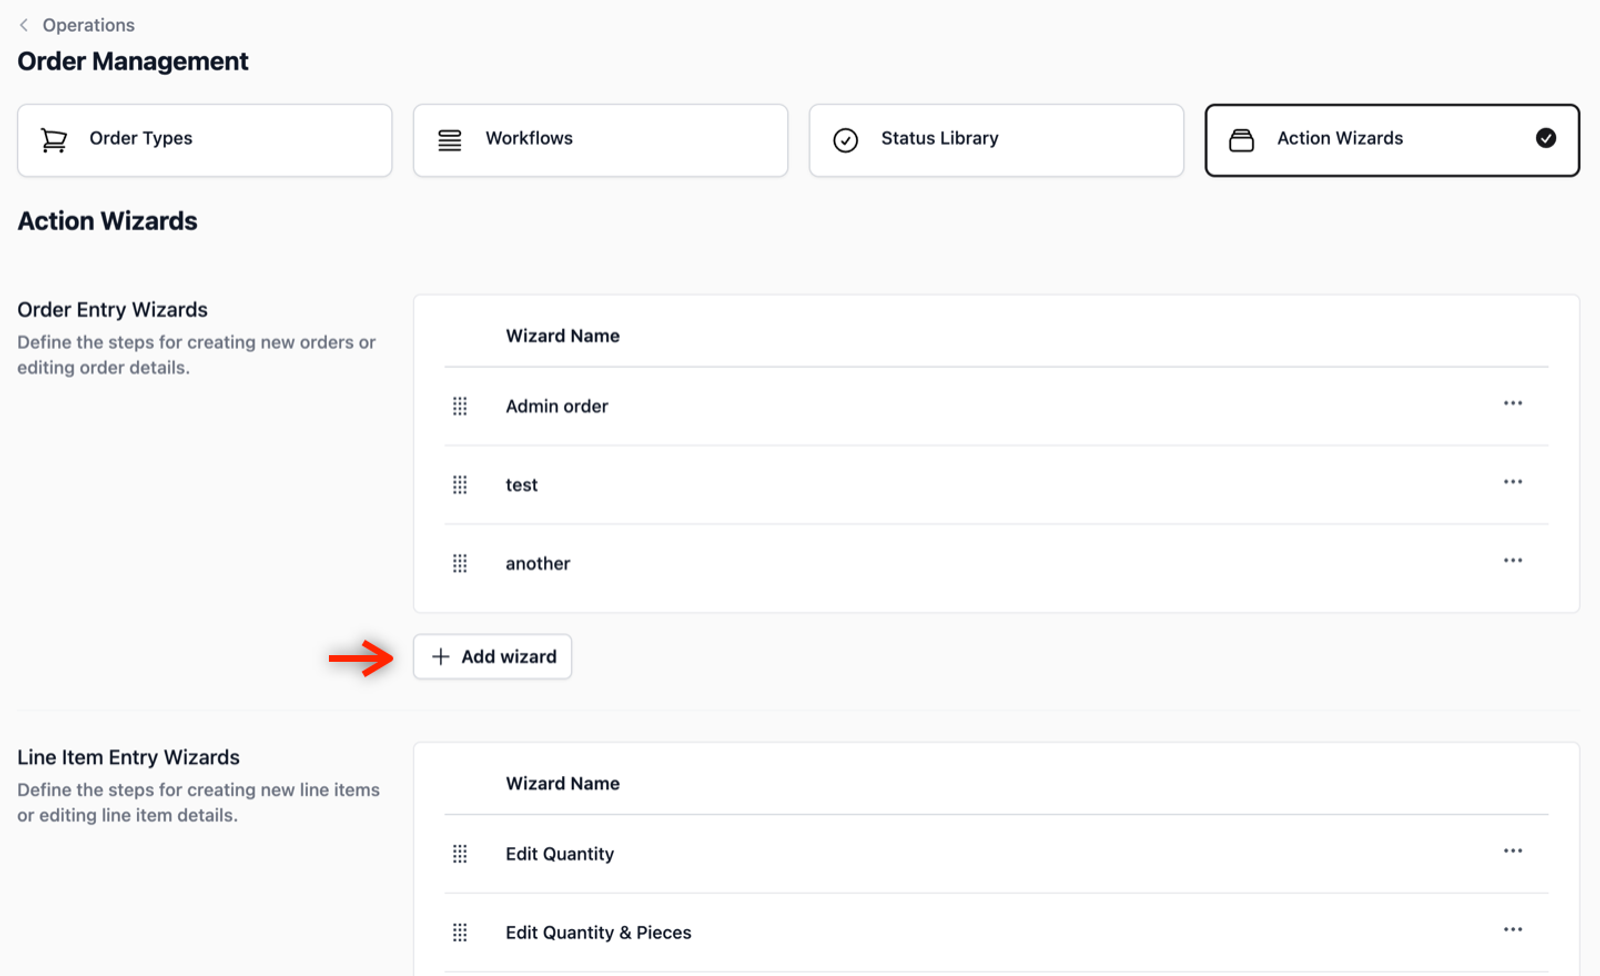
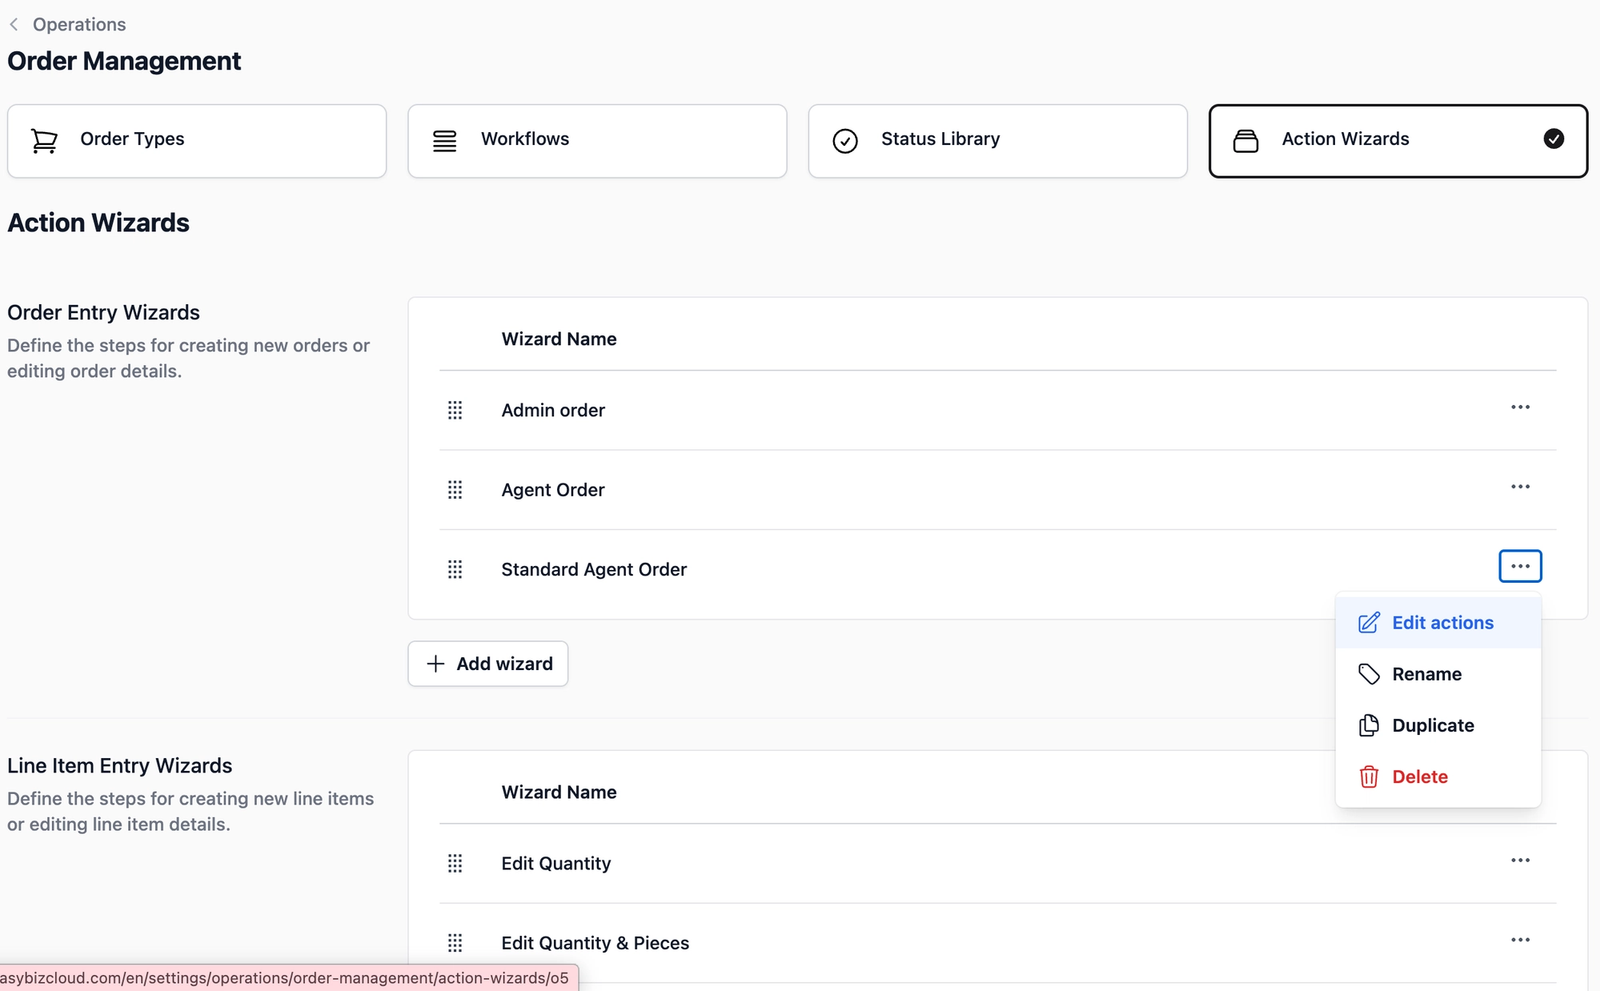
Access the Action Wizard
To define the steps your agents follow when creating a new sales order, you will first need to set up a procedure in the Action Wizards. You can locate the Action Wizards in two ways:
- If you are already on the B2B page: Simply click the Manage Action Wizards button.
- From any other screen: Click the Gear Icon (Settings) → Operations → Order Management. Click on the Action Wizards tab.
Create a New Procedure
To create a new sales order procedure, click on the + Add wizard button under the Order Entry Wizards section.
In the pop-up field, enter a name for this new workflow (e.g., Standard Agent Order). This name will appear later when linking the procedure to your specific agents, so make sure to give it a meaningful name!
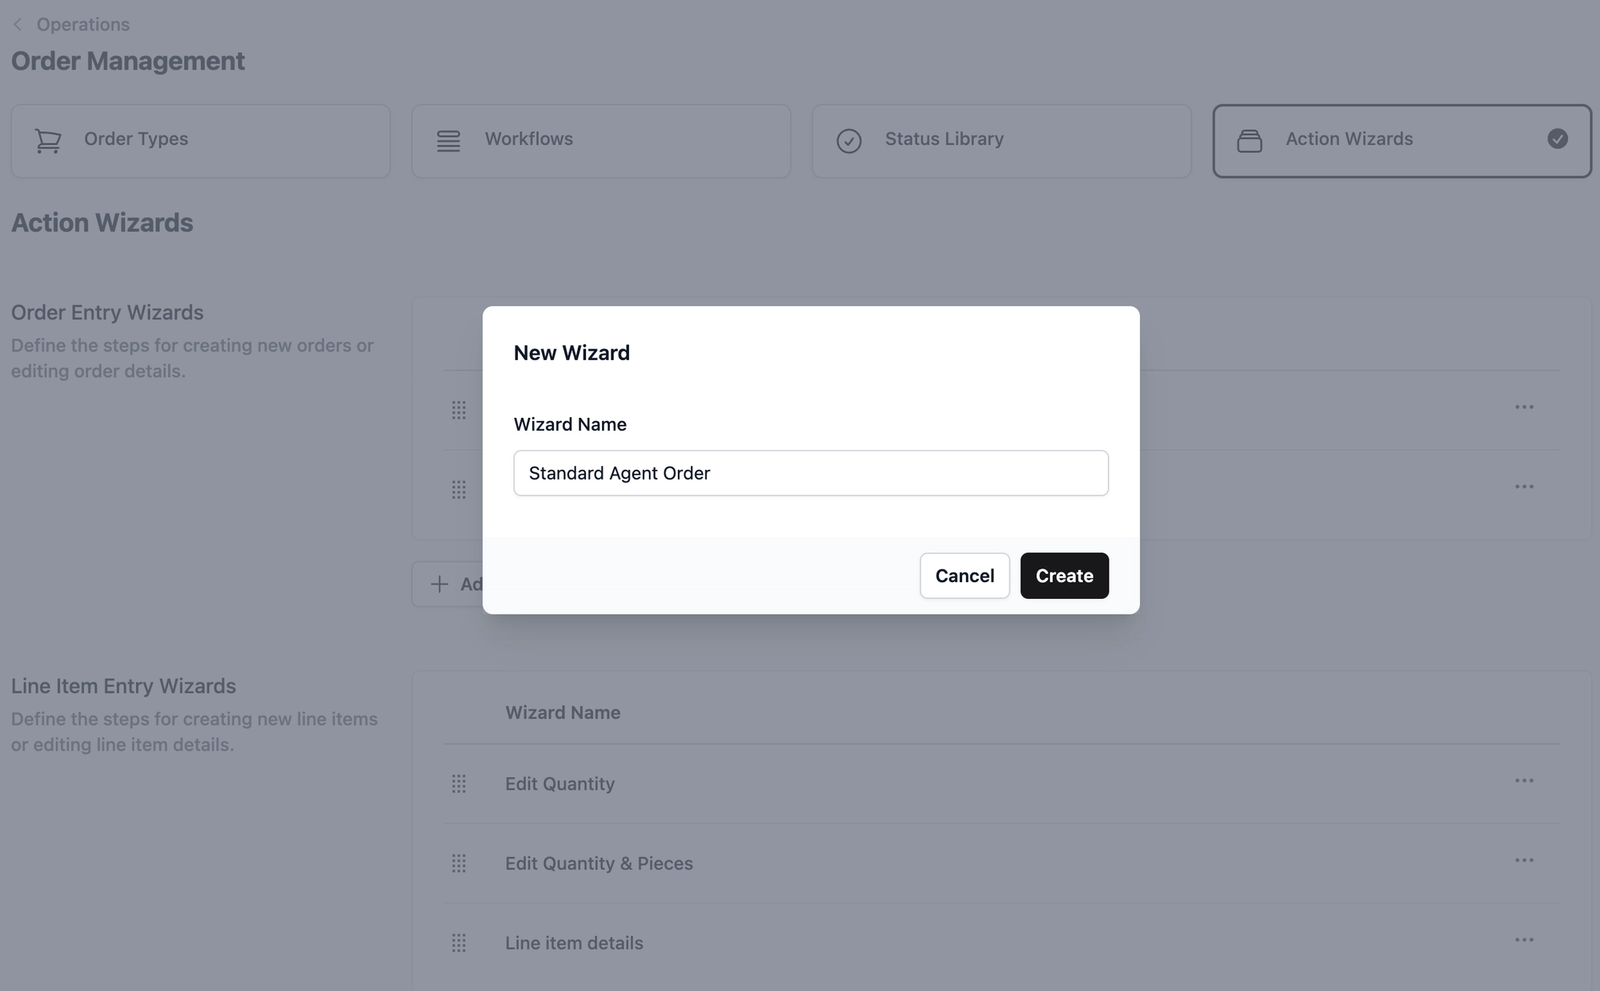
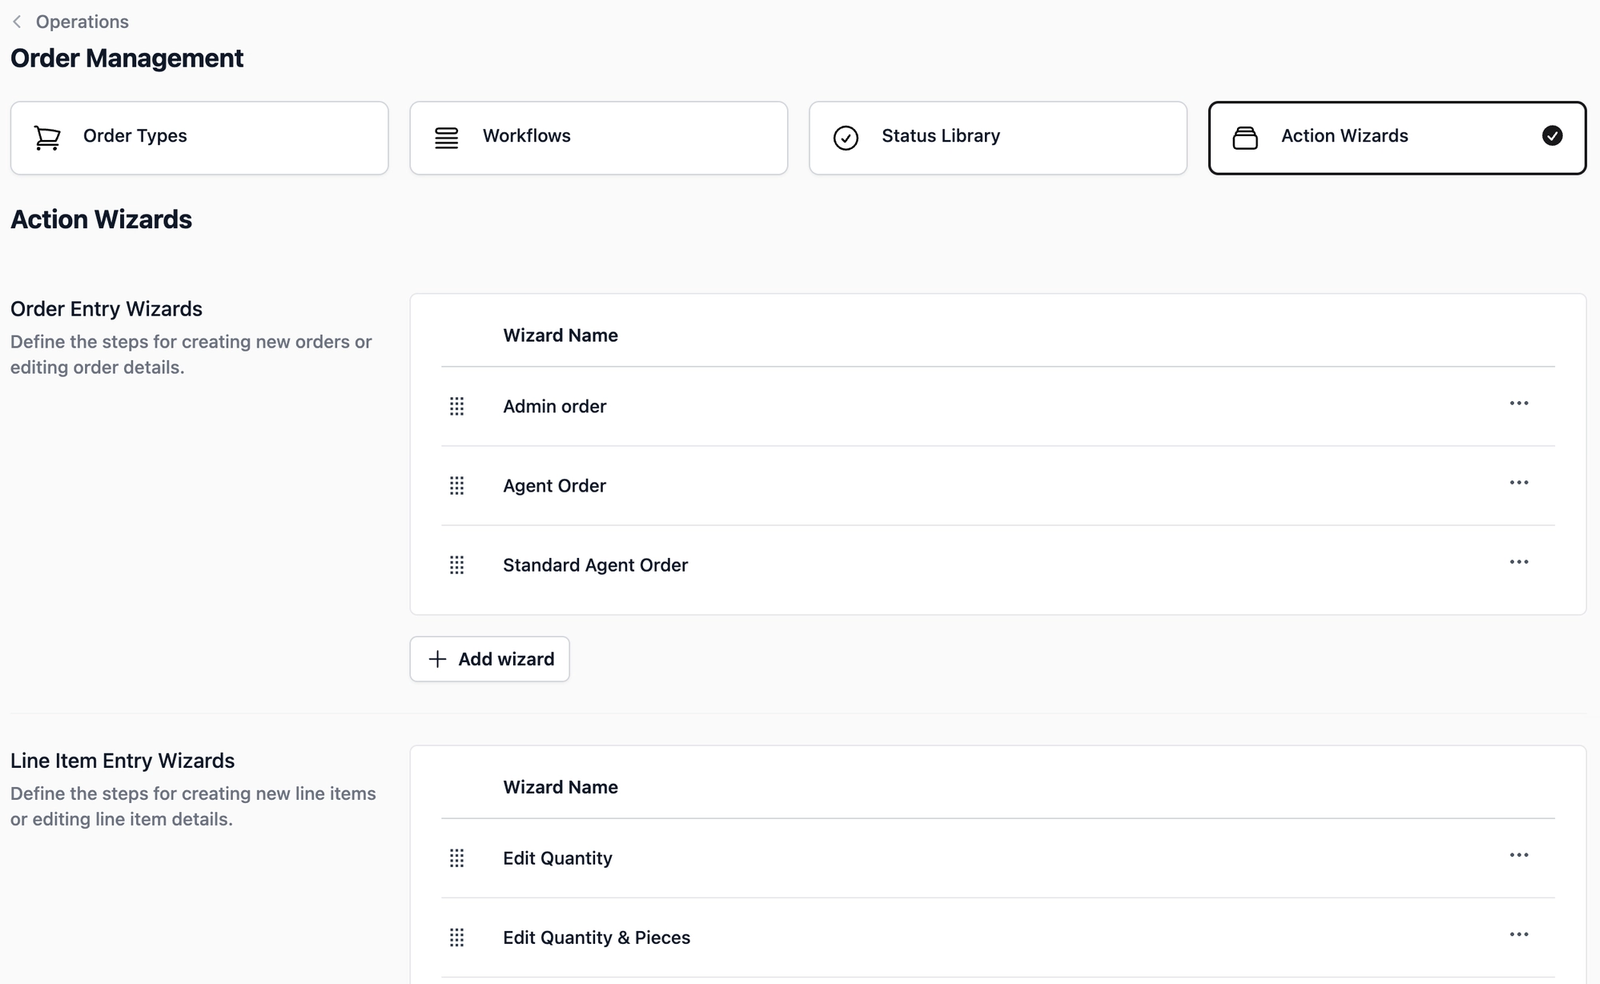
Click the Create button. You will now see your new procedure listed in the Order Entry Wizards table below.
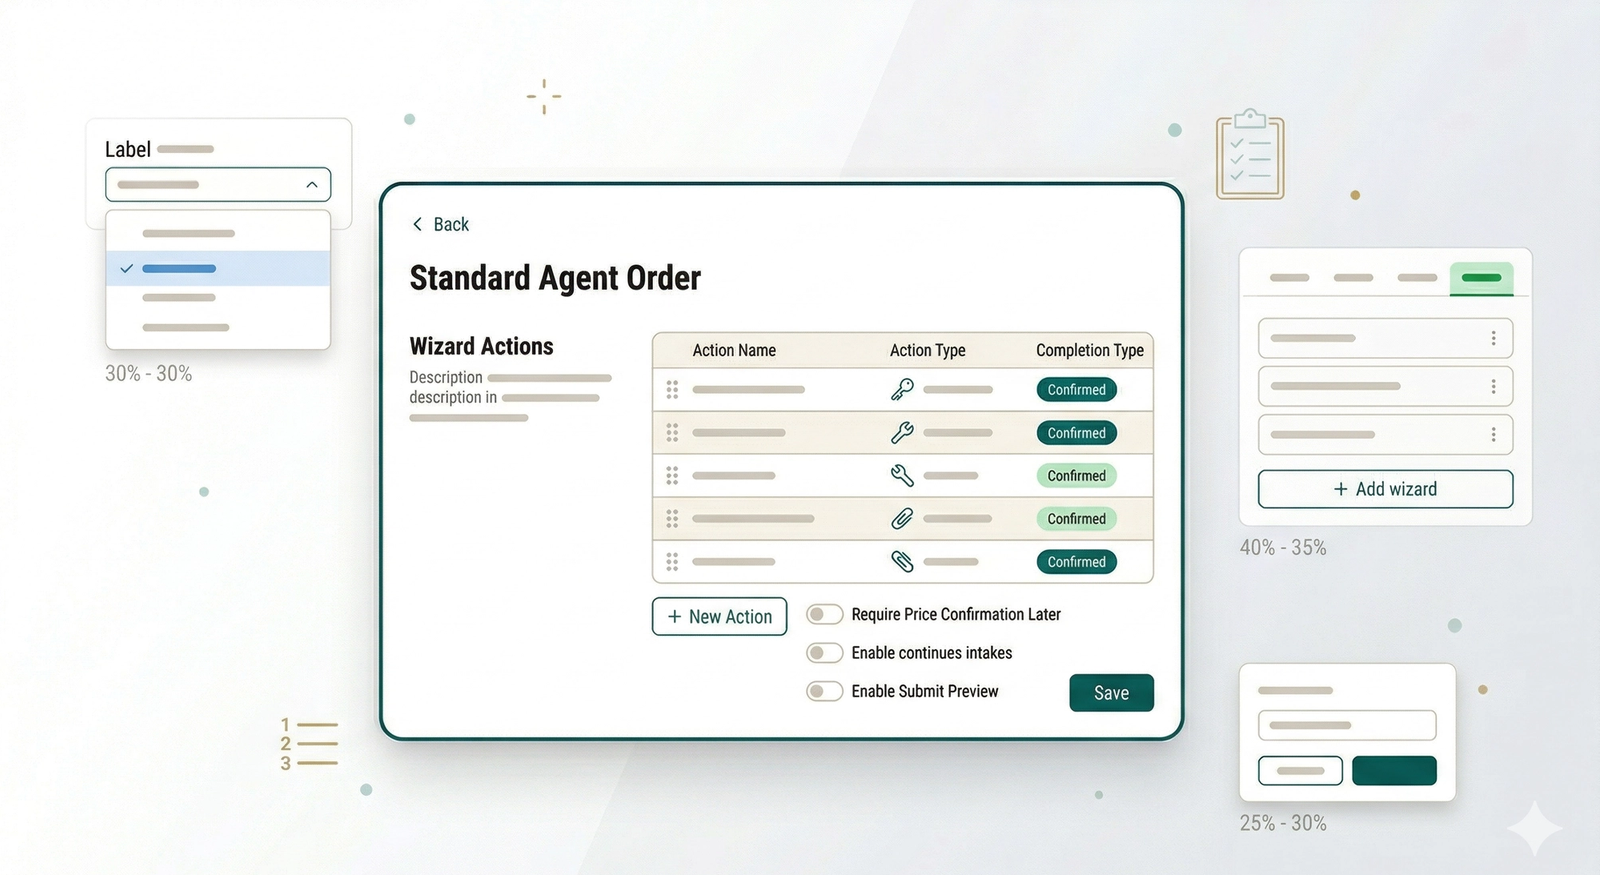
Choose the Steps Your Agent Will Follow
Find the procedure you would like to add the steps to in the table, click the ••• on the right side, and select Edit Actions.
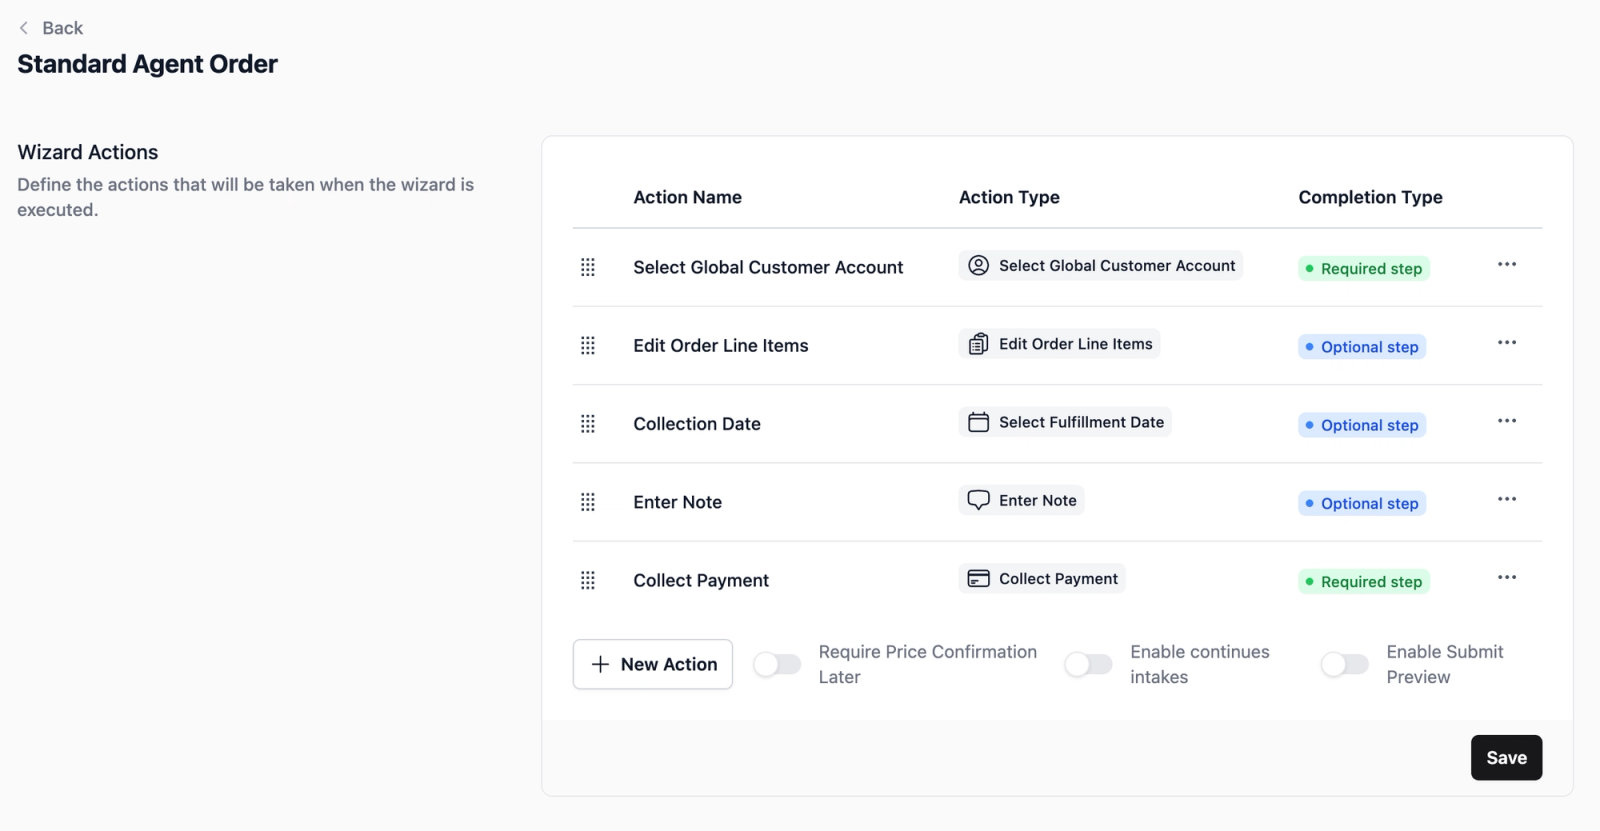
In Wizard Actions, click the + New Action button to start adding the actions (steps).
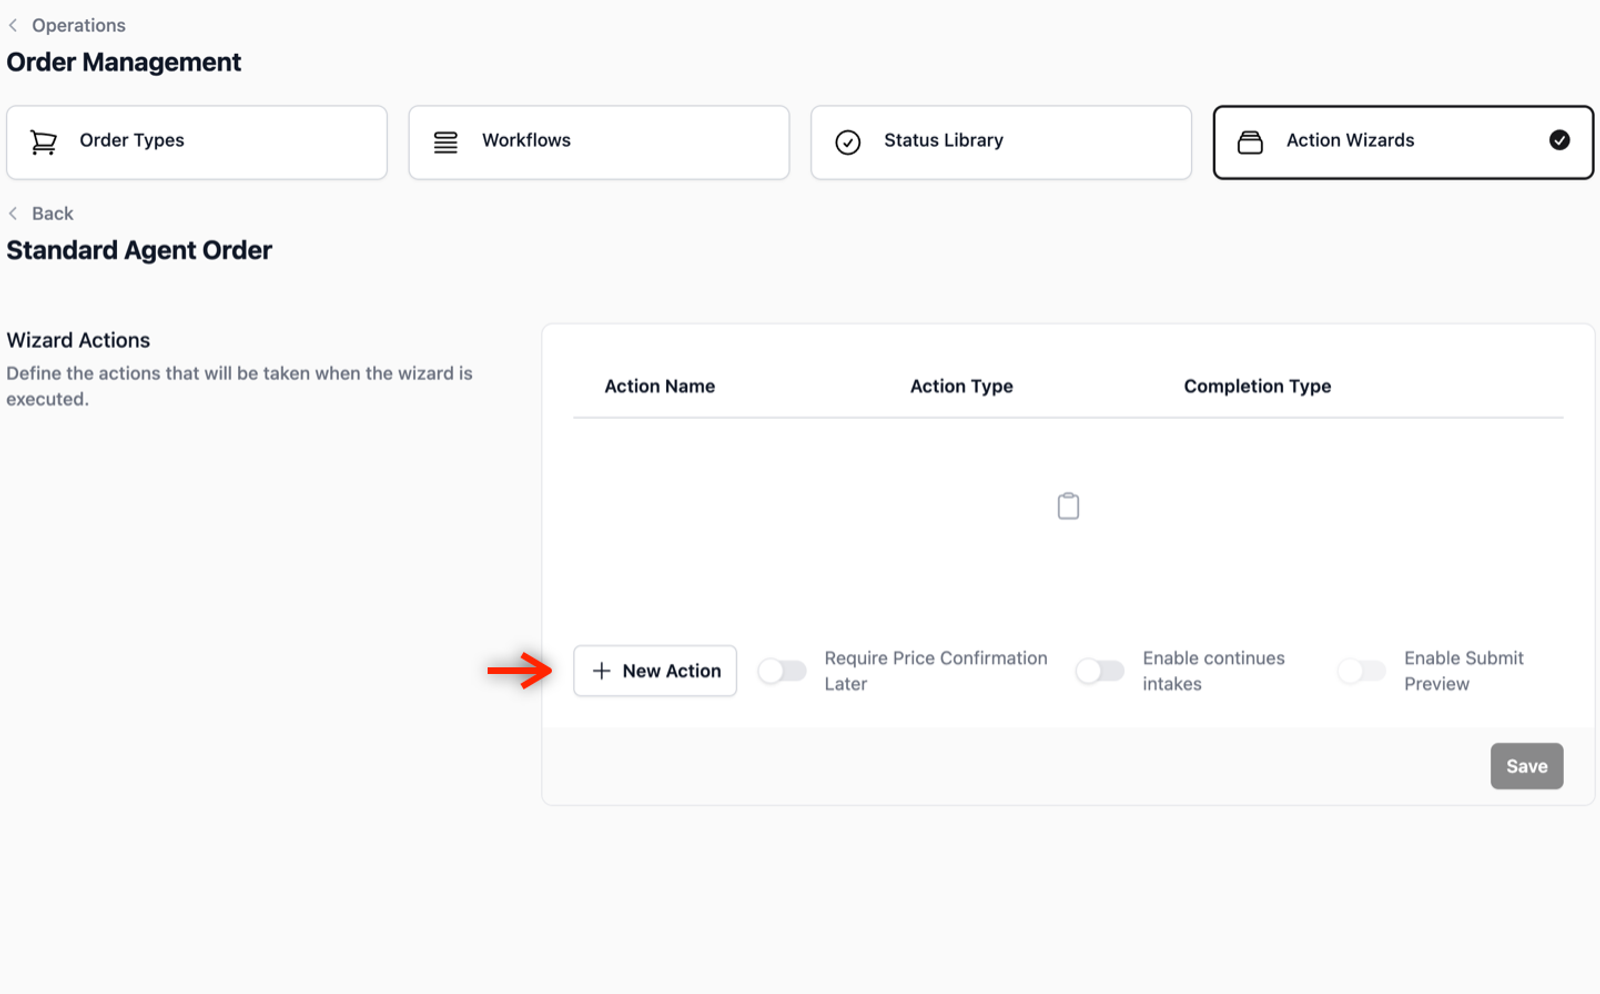
- Select your first step: For this example, we will choose Select Global Customer Account so the agent begins the order by identifying the customer. You can, of course, choose a different starting action based on your specific business process.
- Scroll down and click the Add button.
- Repeat this for every step you want the agent to take, such as adding order line items or choosing a delivery date.
- Click on the Save button to apply the changes.
Link the Procedure to Your Agents
The final step is to assign this new procedure to the specific agents who will use it.
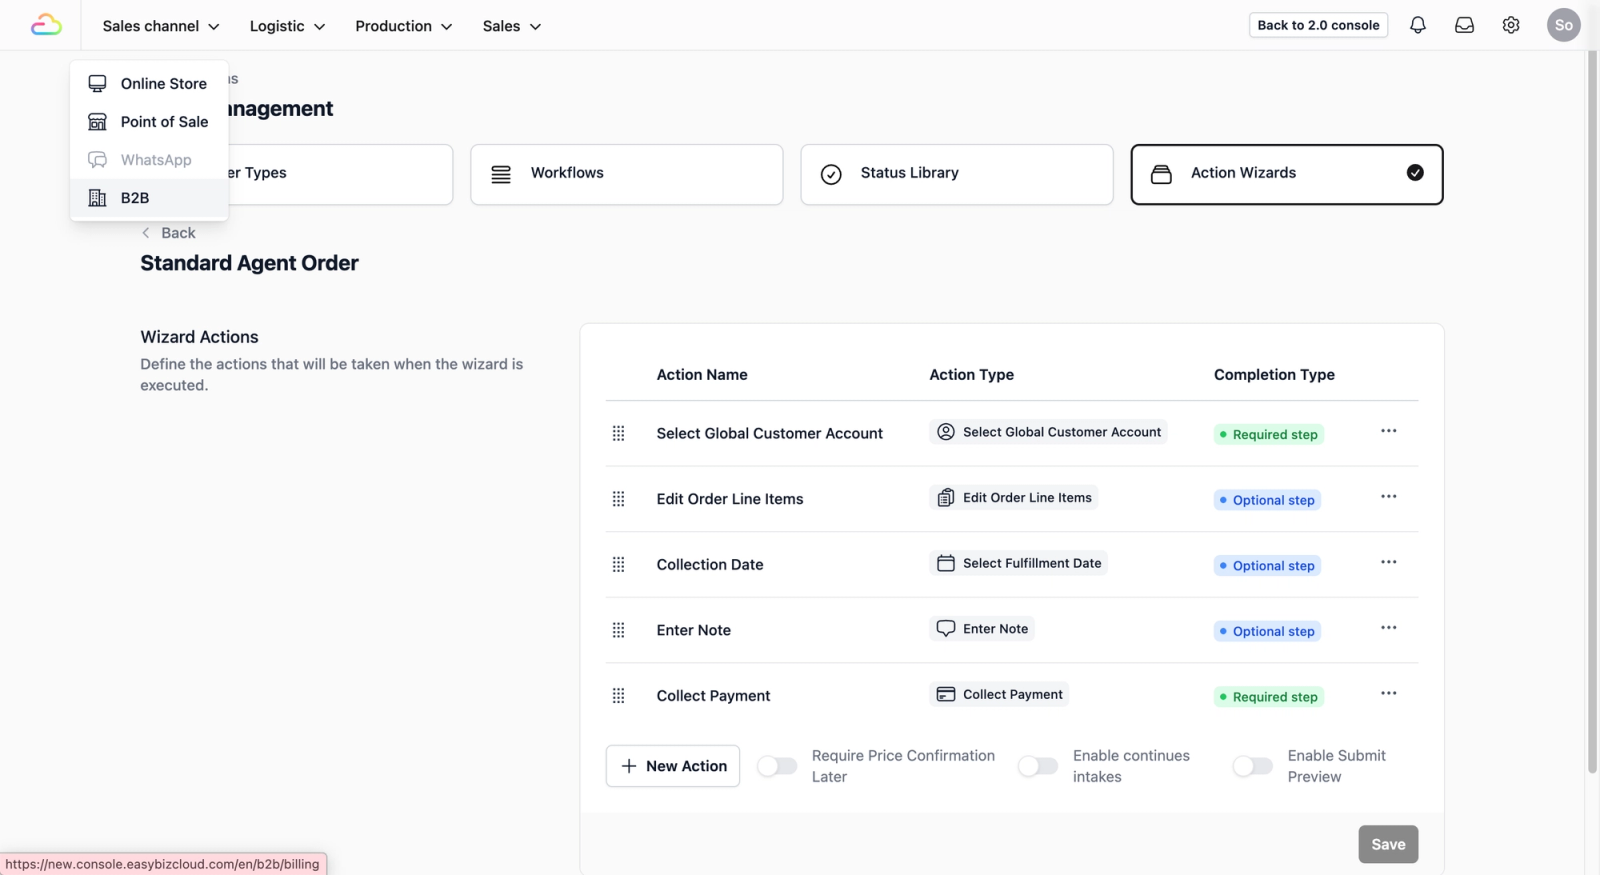
- Head back to the B2B page by clicking Sales Channel in the top navbar and selecting B2B from the dropdown menu.
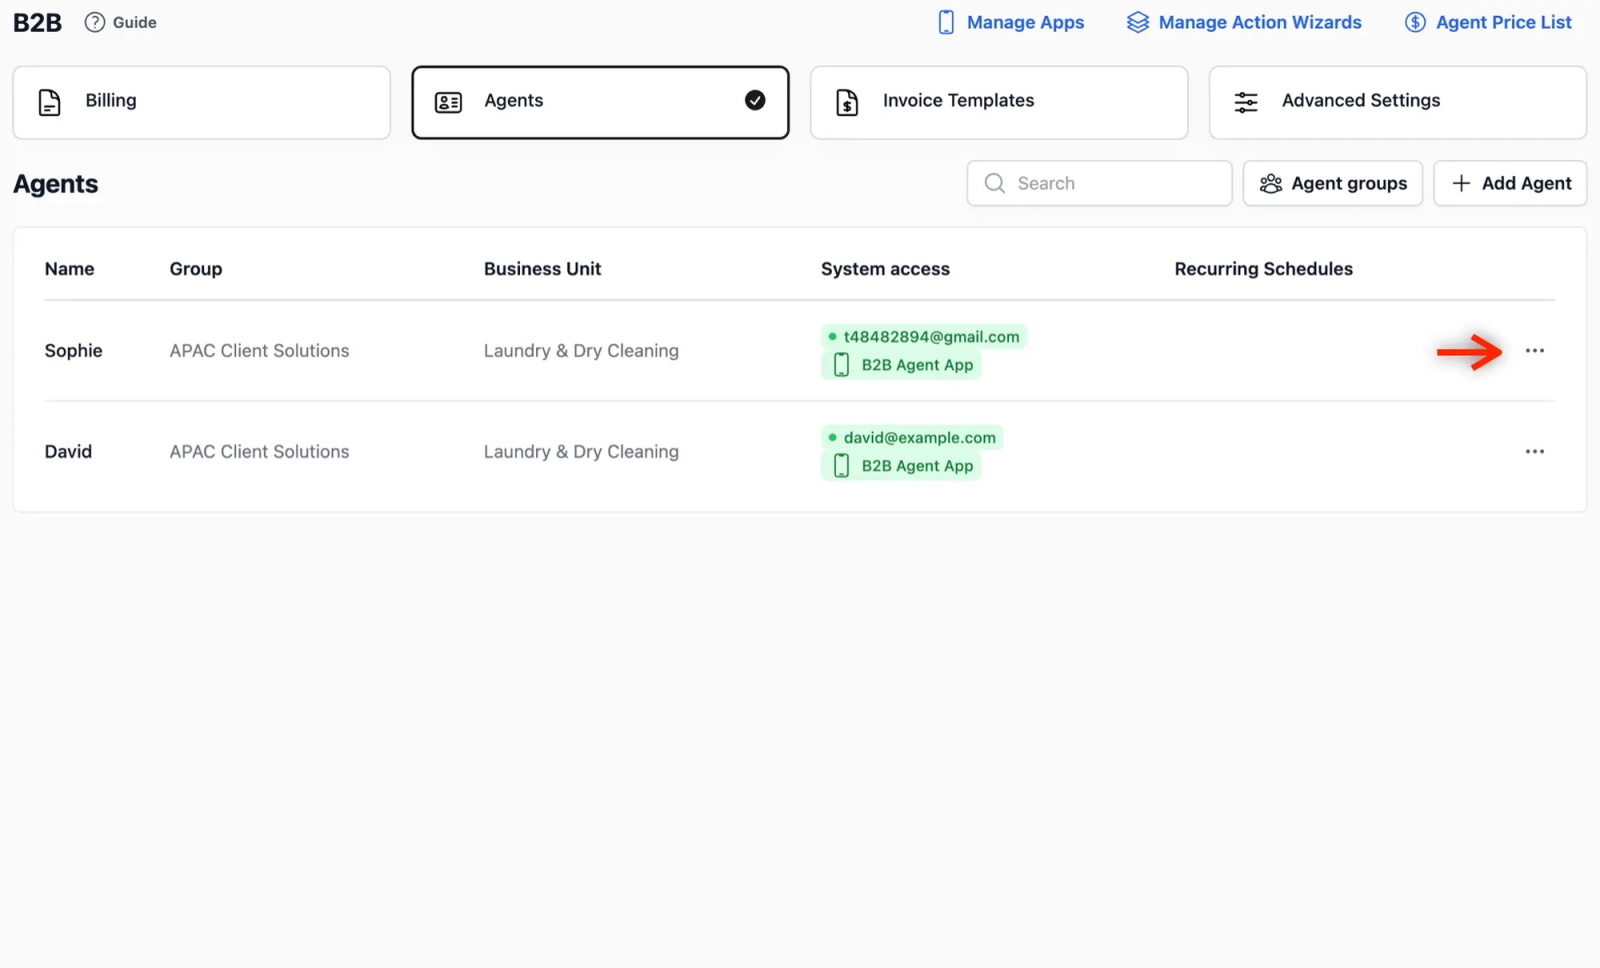
- Once you are on the B2B page, click on the Agents tab to view your full list of registered agents.
- In the table view, find the agent you want to add this new procedure to, click on the ••• on the far right, and select Edit.
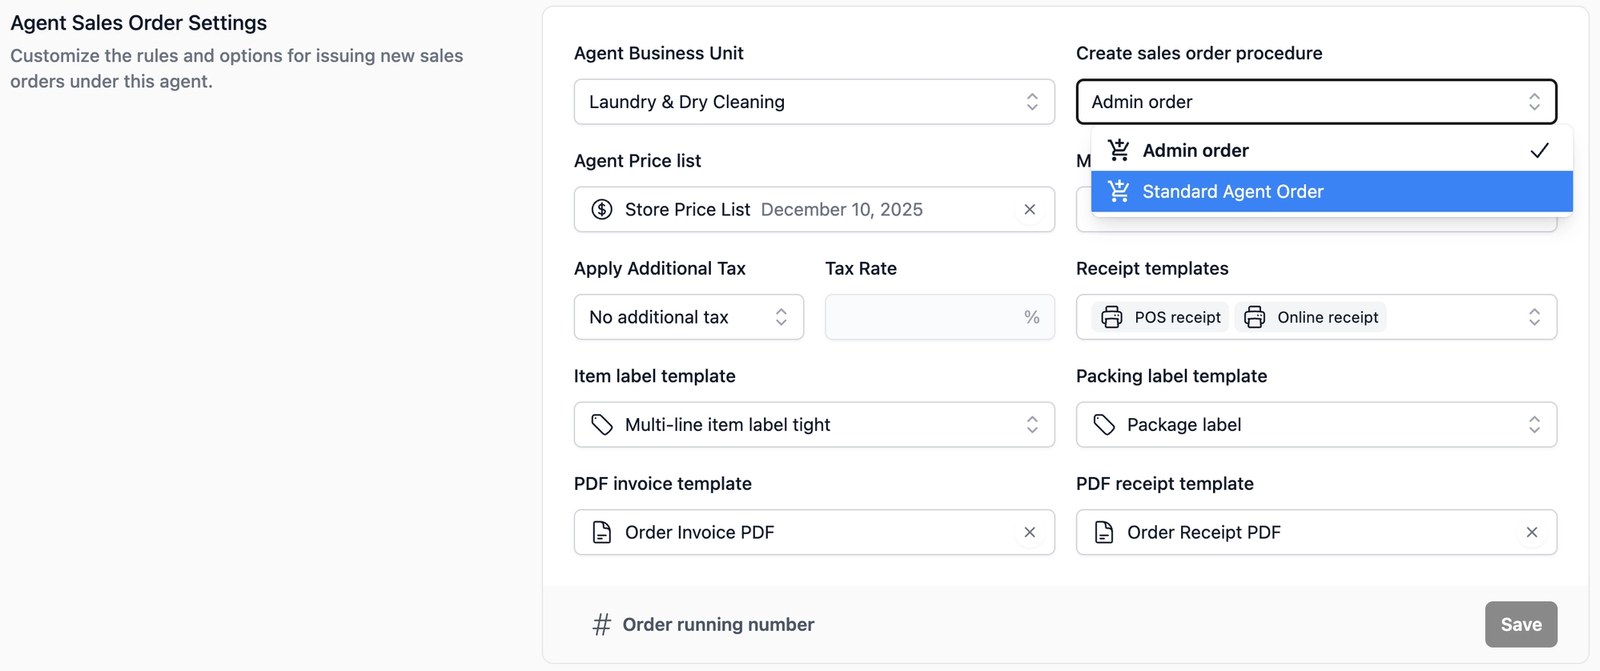
- Scroll down the profile page until you locate the Agent Sales Order Settings section.
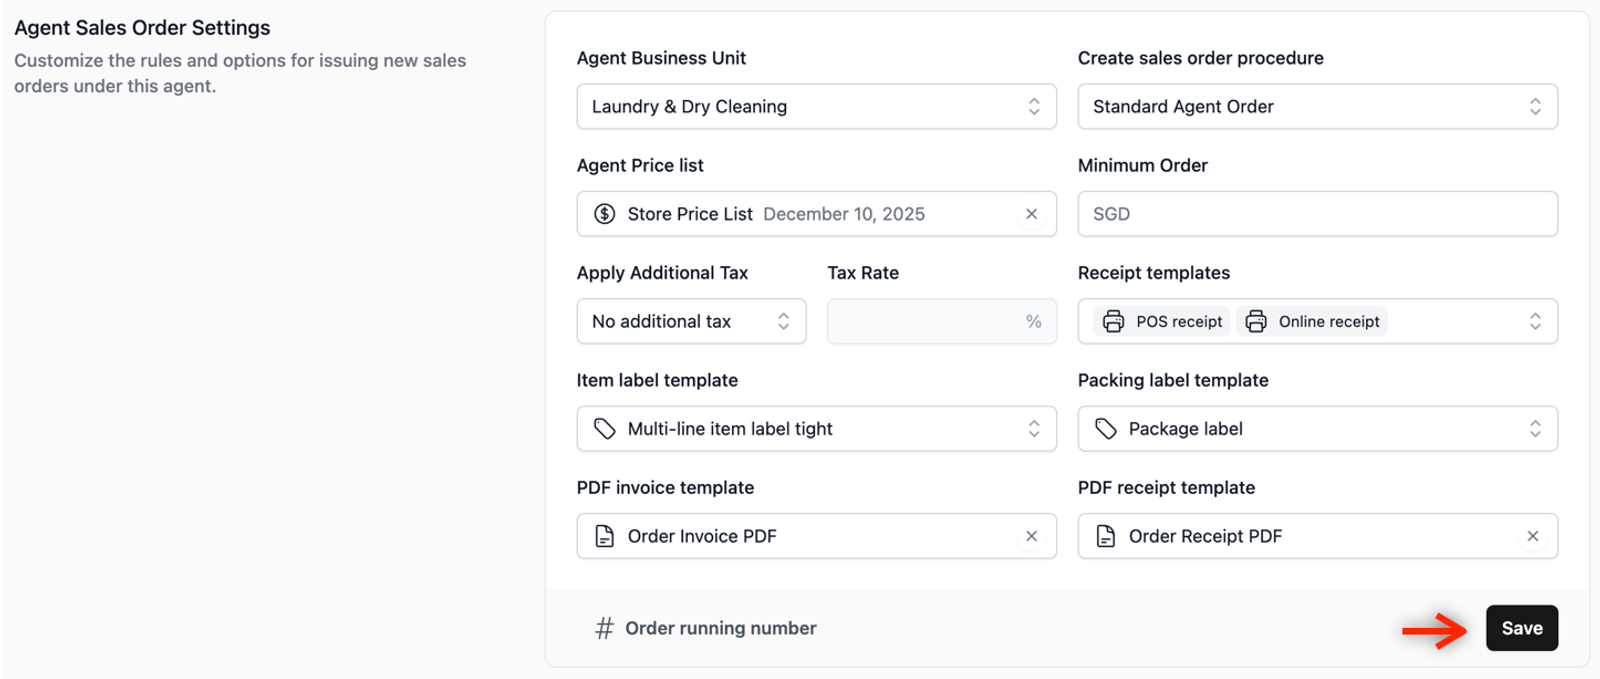
- Under Create Sales Order Procedure field, click the dropdown box and select the new procedure that you just created.
- Click on the Save button at the bottom right of the section to apply the change.
Give feedback
Up next
Set up an Agent Workflow AccountGive your agents their own login so they can create orders and access the mobile app.
Read more