Configure Order Types
In this article
Now that you have your stages and workflows set up, the final step is to bring them all together. Order Types let you link your workflows to a specific type of order, so that when your team creates an order, the system automatically knows which process to follow. This guide walks you through how to set that up.
Contents
Contents
What are Order Types?
Order Types differentiates between the various services you provide. This is where you link the workflows you created in the previous guide to form a complete end-to-end process.
For example, a Home Delivery order might follow a different set of steps than an In-Store Pickup order. By creating separate Order Types, you make sure the system automatically follows the right process whenever your team creates a new order.
Access the Order Types Tab
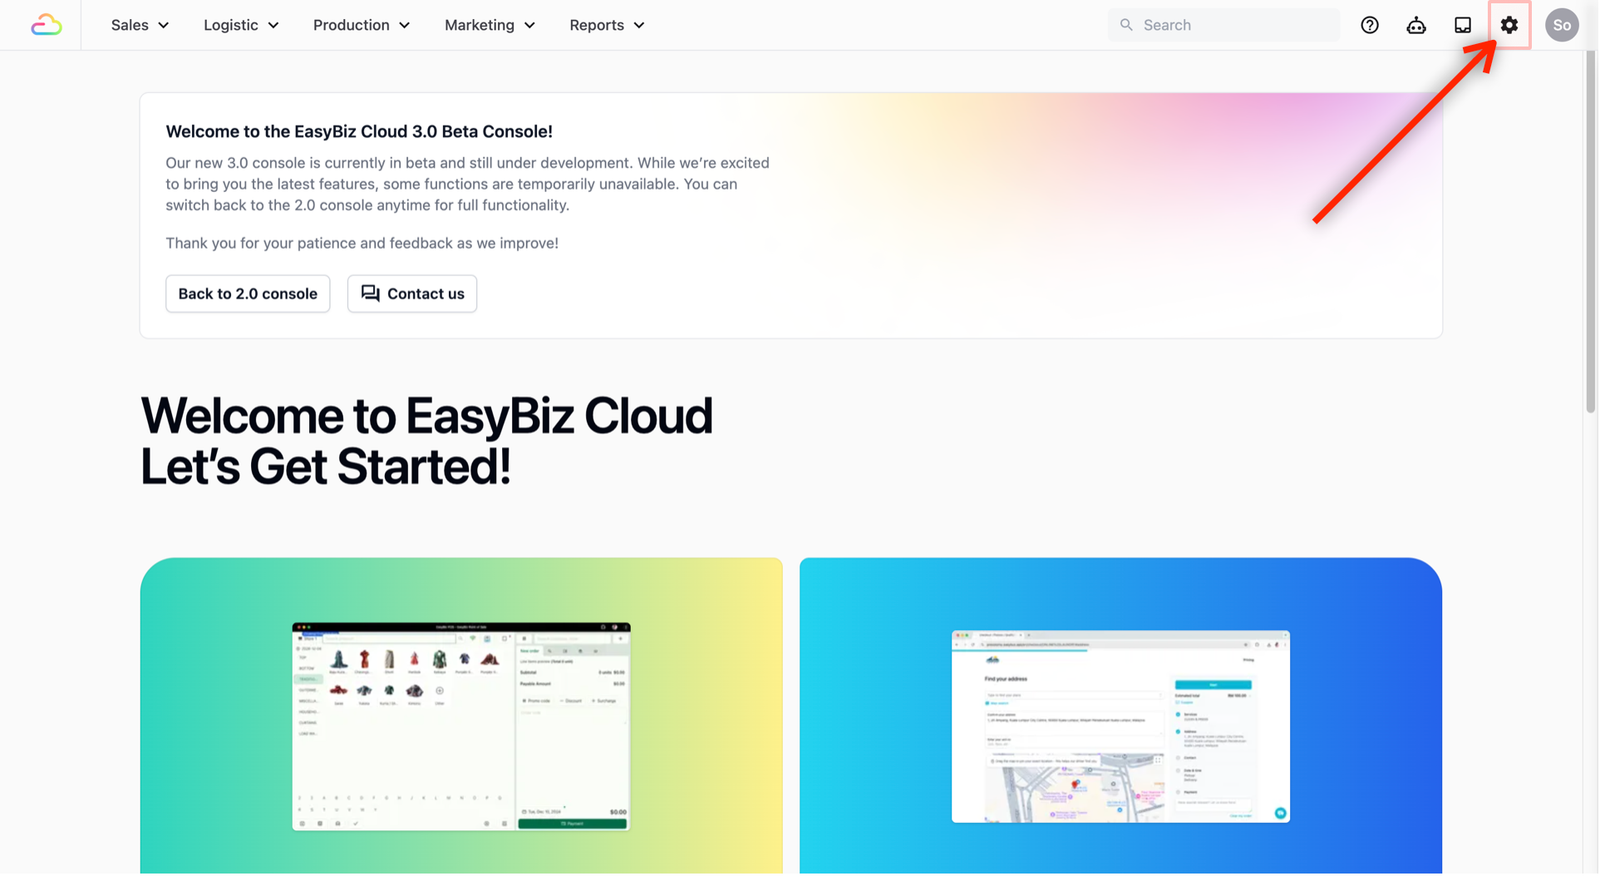
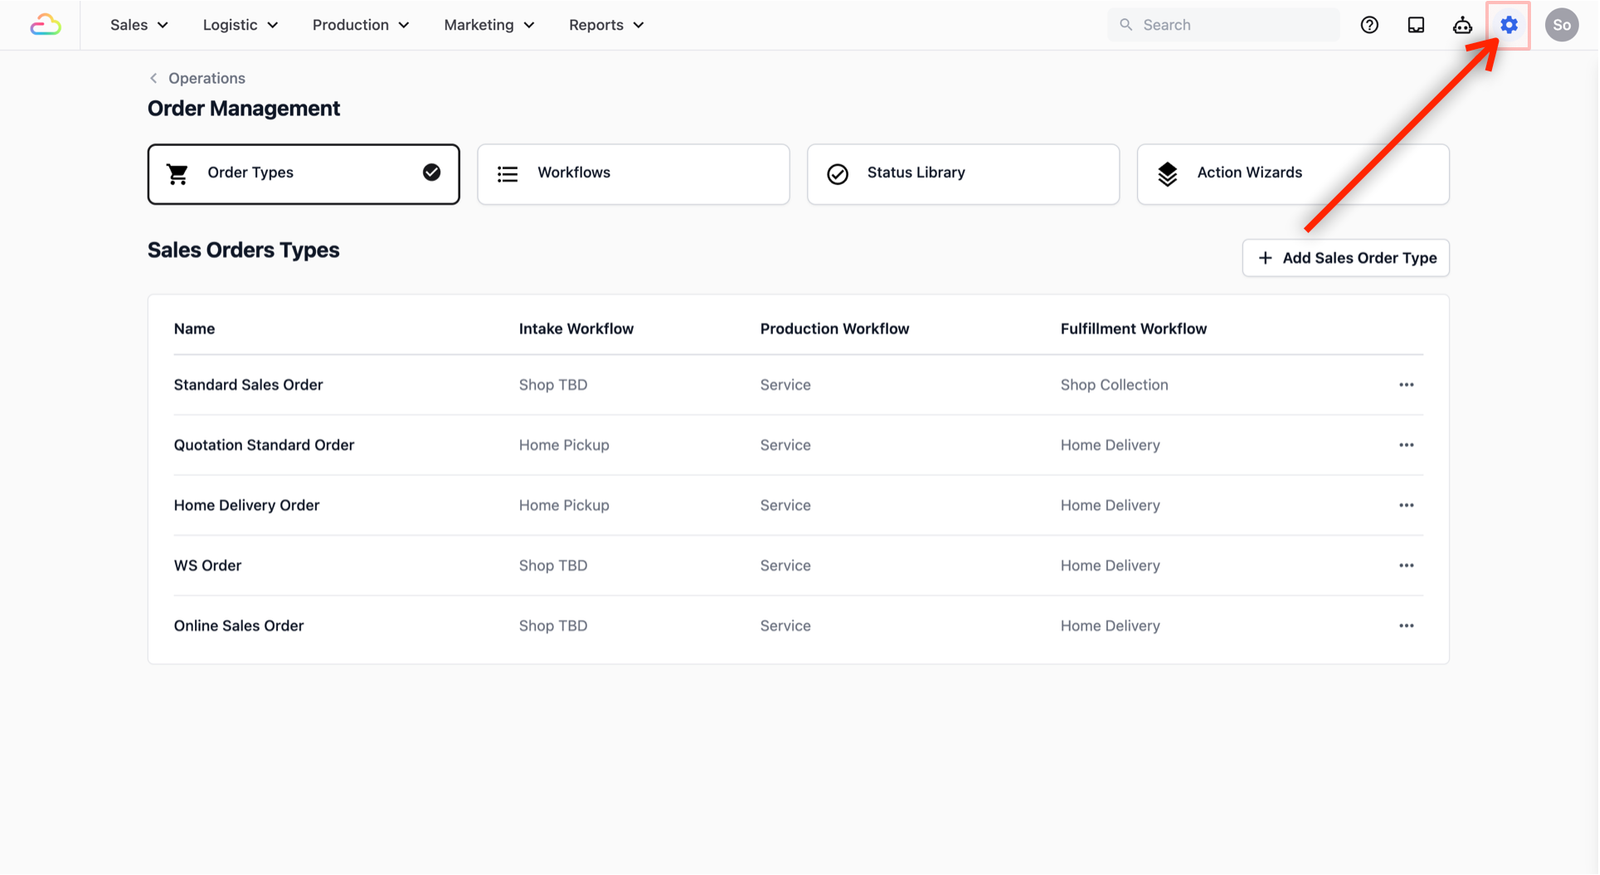
To finalize your setup, head back to the Order Management hub:
- On the top navigation bar, click the Gear Icon (Settings).
- Scroll down until you see Operations. Select Order Management.
- This is the central hub where you define your sales orders, the steps necessary for your team to create an order, and the processes tied to that order.
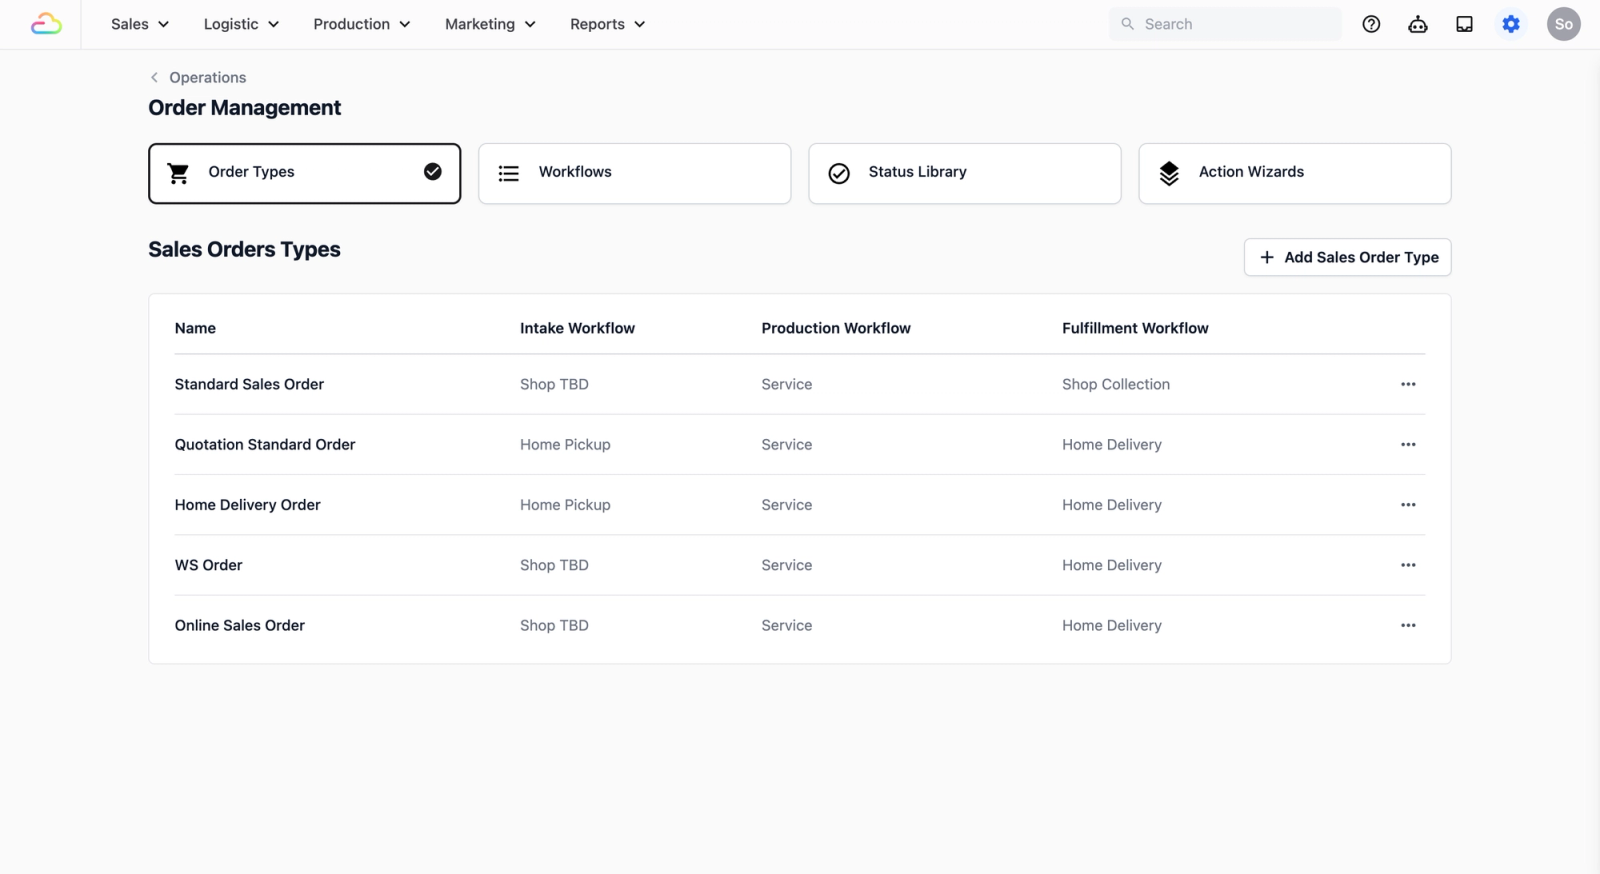
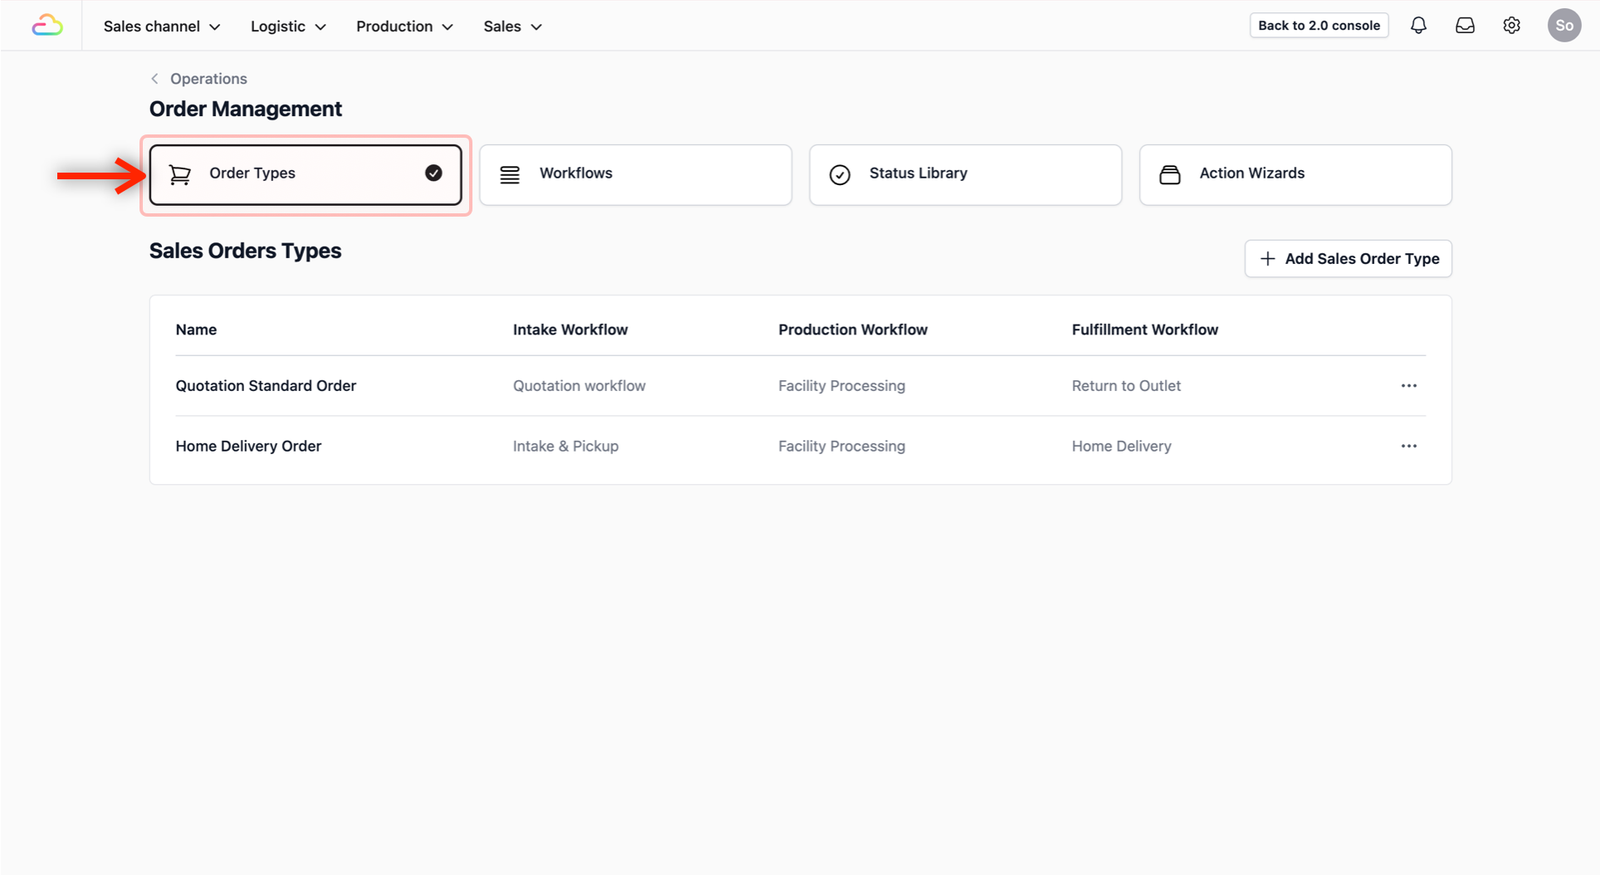
- By default, you should see the Order Types tab immediately. If not, click on the Order Types tab. This is where you bring your workflows together.
Create and Link a New Order Type
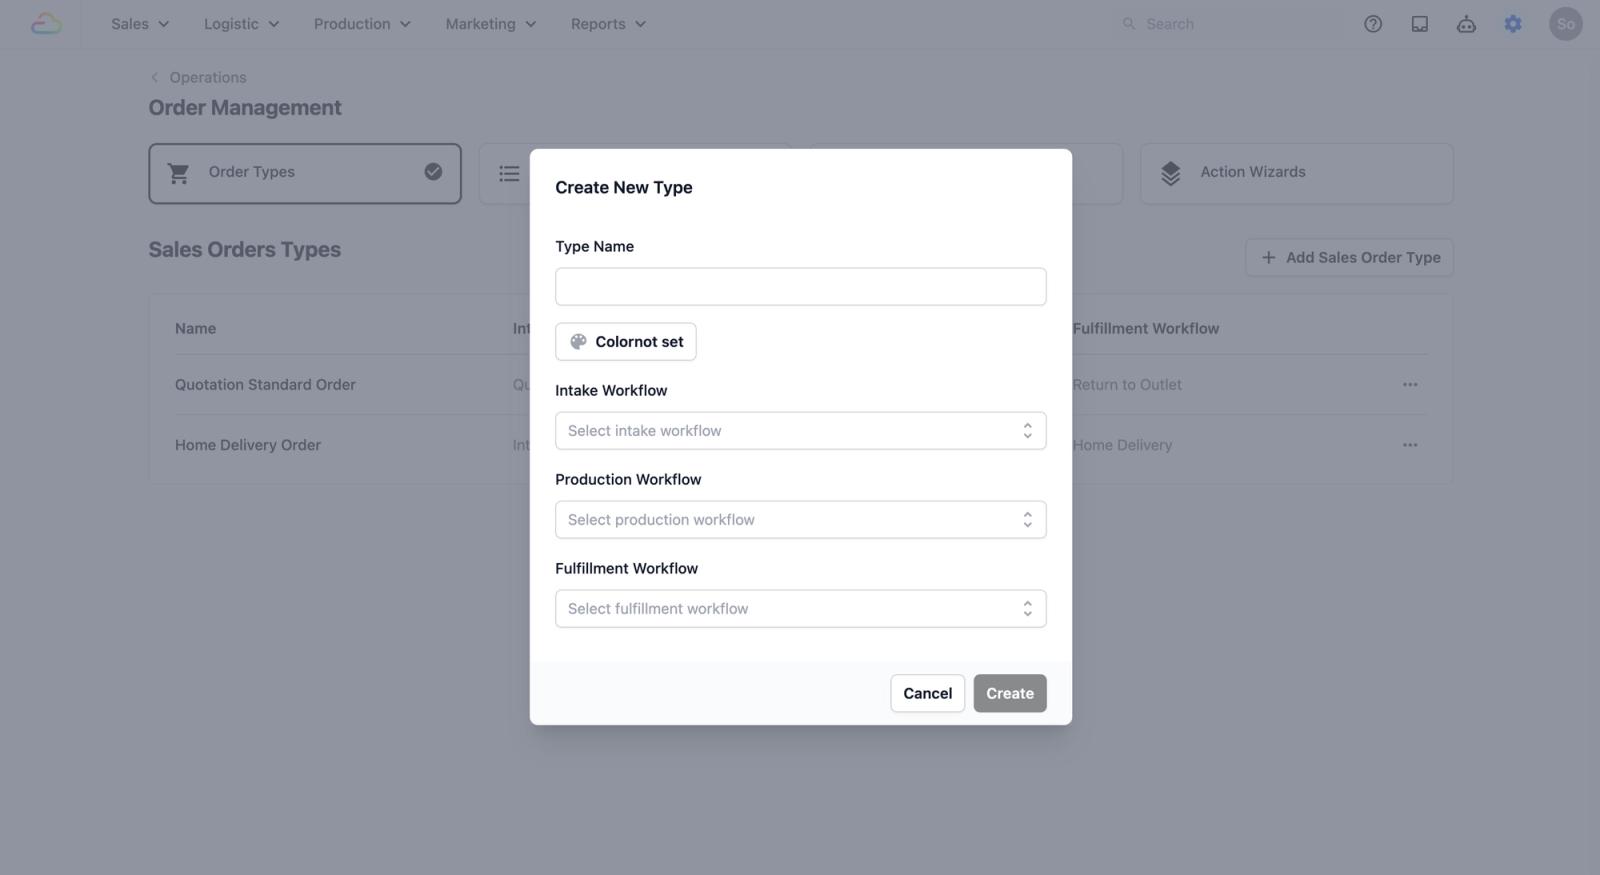
To create a new Order Type, click on the + Add Sales Order Type button.

A pop-up window will appear. Here is how to fill in the fields:
- Order Type Name: Enter a descriptive name under the Type Name field (e.g., "Home Delivery" or "Repair Service").
- Color: Choose a color to visually distinguish this order type from others in your order list.
- Link the Workflows: This is where you connect the "engine" to the record. Use the dropdown menu to select the specific workflows you built in the previous guide for the corresponding phases: Intake, Production, and Fulfillment Workflow.
Watch this clip to see how to fill in the Order Type Fields using the workflows you have created in the Workflows Tab.
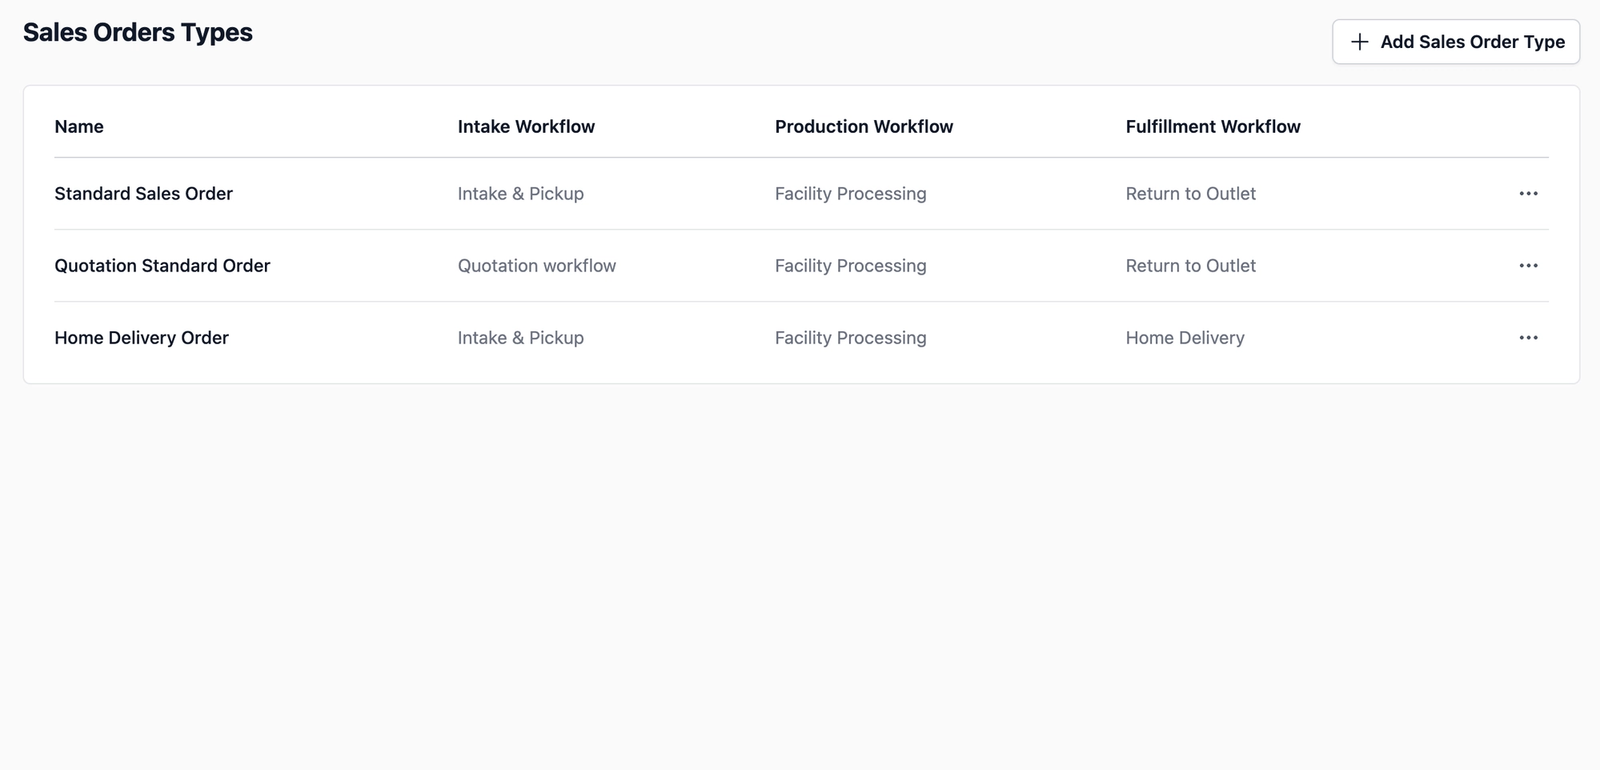
Once you have linked all the required workflows, click on the Create button. A success message will appear on the bottom right of your screen, and you should now see the new Order Type you just created in the table view.
Activate Your Order Type
Your Order Type is ready, but your staff will not see it yet until you link it to the right place in your business. Here is how to do that.
- On the top navigation bar, click the Gear Icon (Settings).
- Under Platform section, select Business Units.
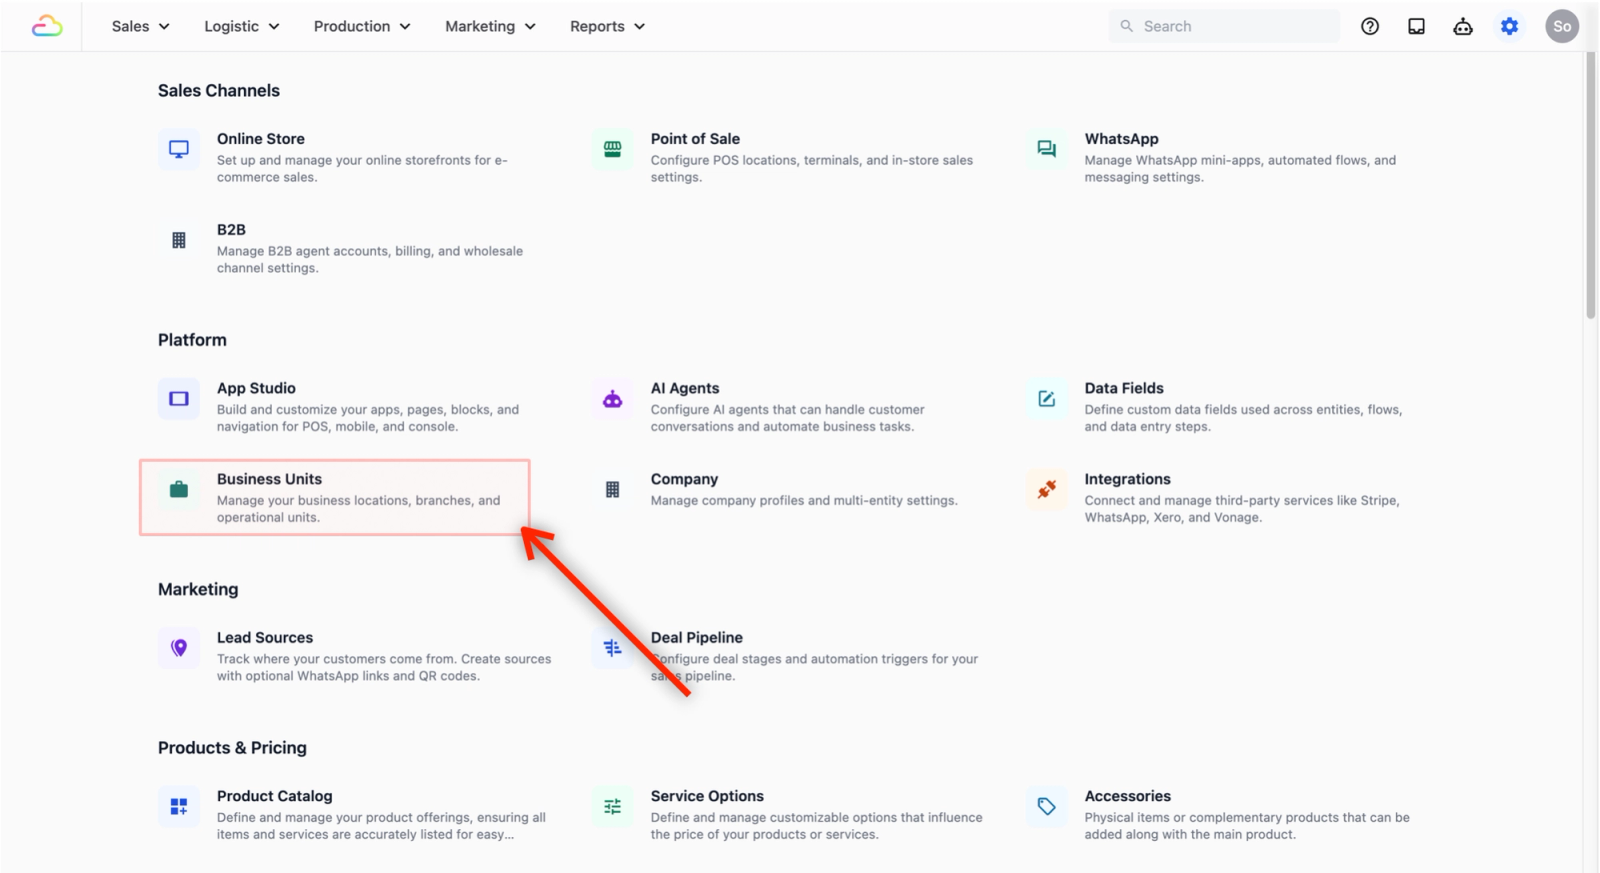
- Here is where you can see all the Business Units you have created for your business.

- To link your Order type that you have created, find the Business Unit you want to link your order type to, and click on the row where Sales Order Types is.
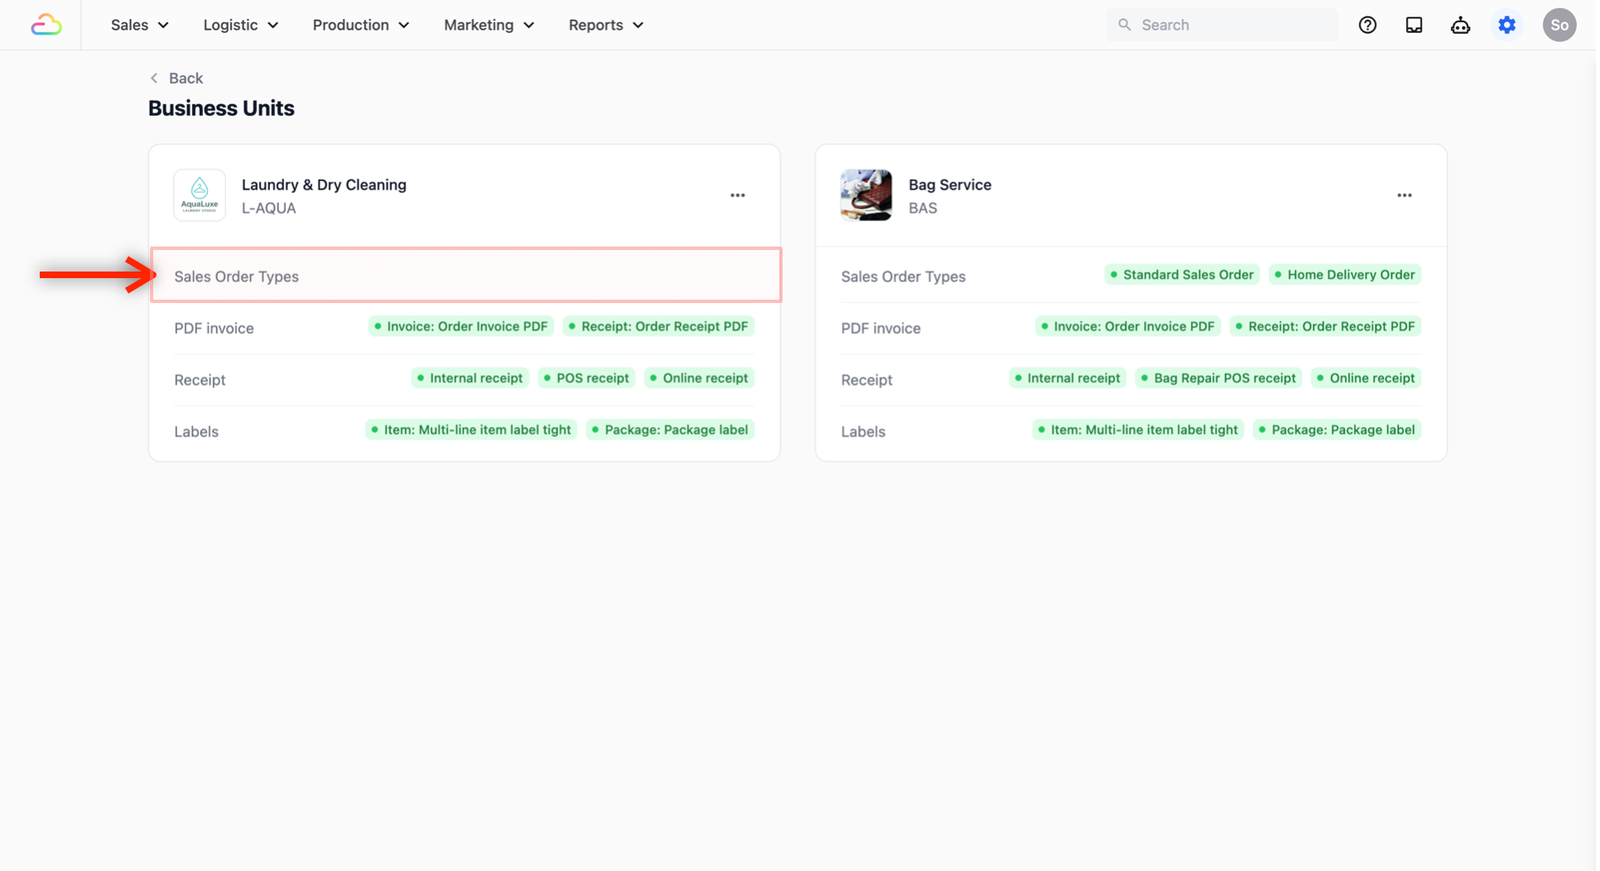
- A pop-up window will appear with two options:
- POS Order Types: Select this to make the Order Type available when your staff creates a new order at the counter (POS). Every time they start a new order here, the system will automatically follow the workflow you linked to this Order Type.
- Online Order Types: Select this if you want the Order Type to apply when a customer makes a booking through your online store. When the customer completes their booking, the system will automatically create a sales order with this Order Type — and the workflow you assigned will kick in from there.
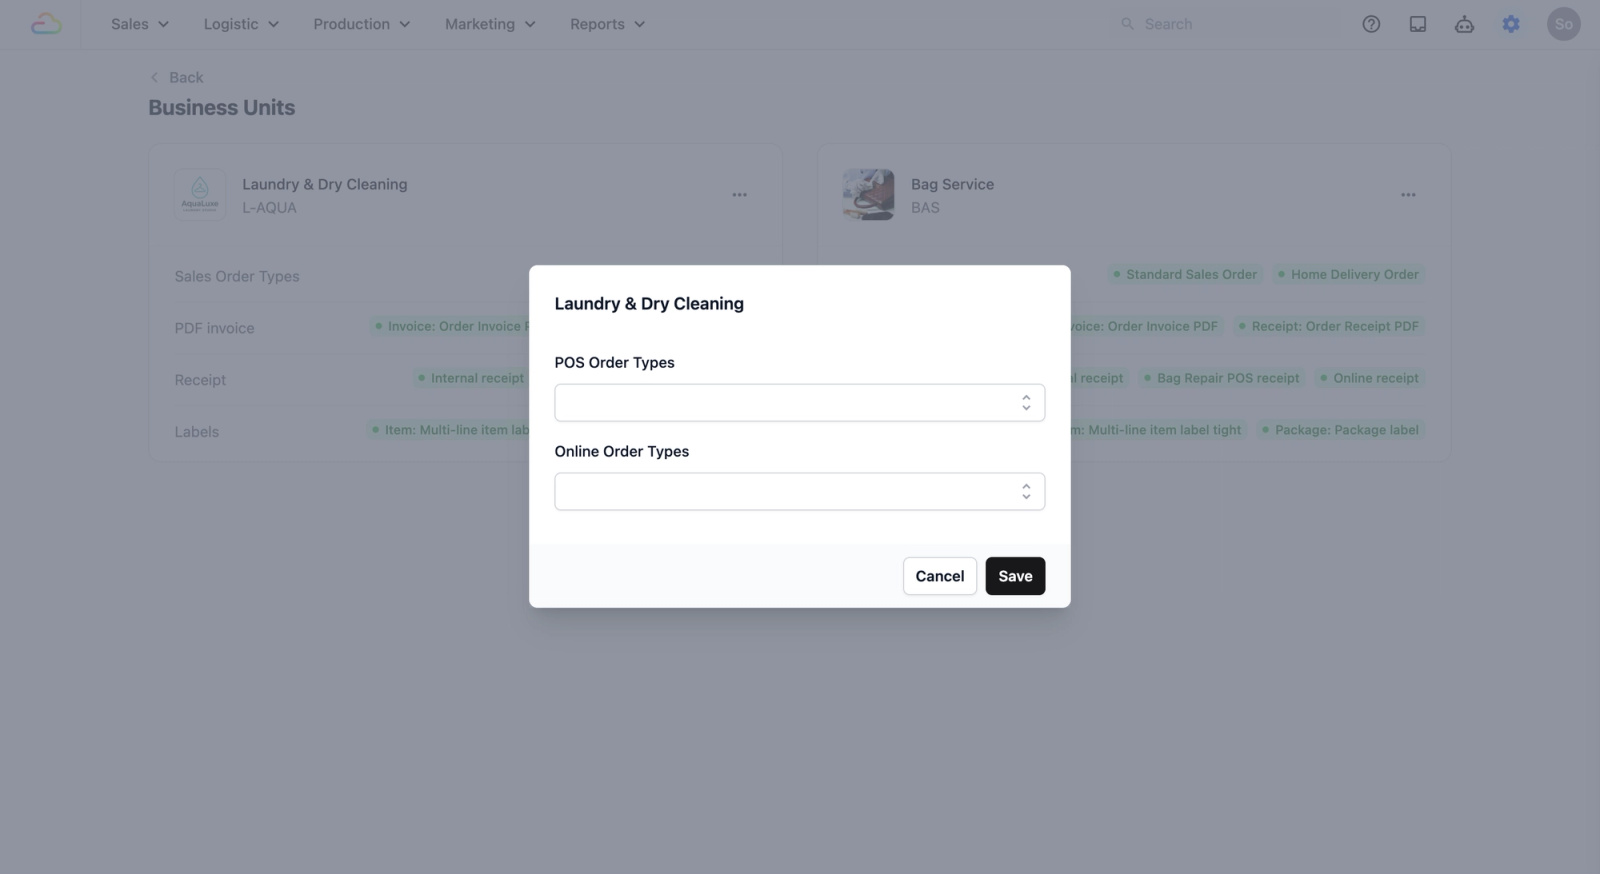
- Click on the dropdown for the option that applies to your setup and select the Order Type you just created.
- For this demo, we will select it under POS Order Types.
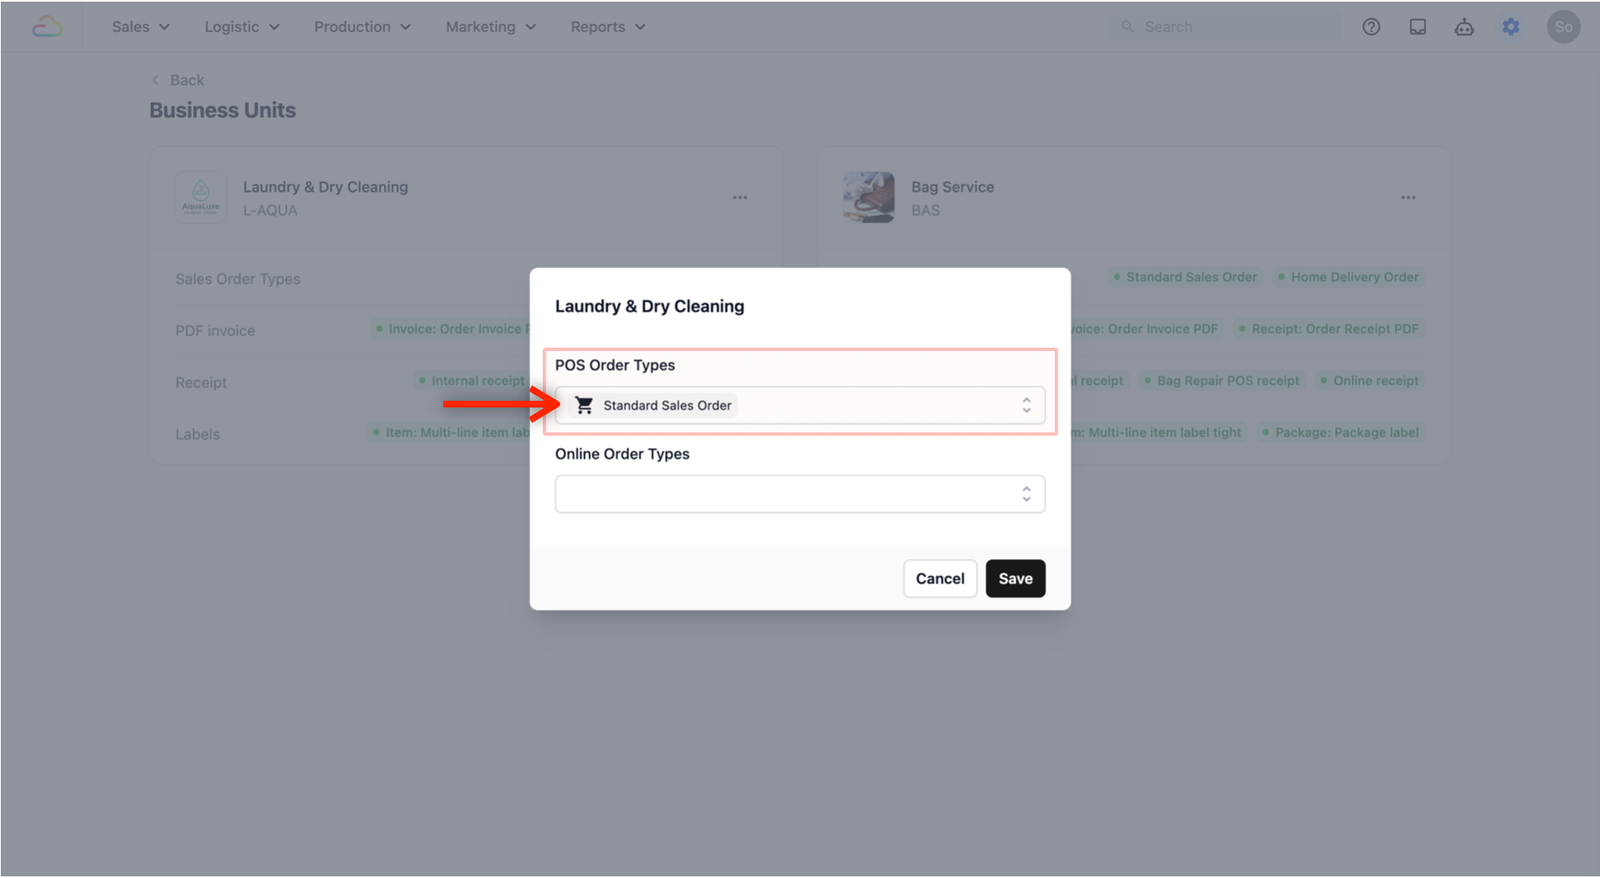
- Click Save.
Your Order Type is now active. The next time your staff creates a new order at this Business Unit, the system will automatically follow the workflow you have set up — no extra steps needed on their end.
Give feedback
Up next
Order PipelinesDefine the stages every order moves through — from drop-off to collection — so your team always knows what's happening and what needs to happen next.
Read more