Design Your Workflow
In this article
Now that you have defined your stages in the Status Library, you can arrange them into a workflow (the step-by-step process an order follows as it moves through your business). This guide walks you through how to create a workflow and set up the rules for how orders move from one stage to the next.
Contents
Contents
What is a Workflow?
A Workflow is a sequence of stages that an order follows as it moves through a specific part of your business, such as Intake, Production, or Fulfillment.
Every business has different scenarios, and a "one-size-fits-all" process doesn't always work.
Every business handles orders differently. For example, a simple sales order where the customer pays immediately follows a very different path than one that requires a quotation and customer approval before work begins. By creating separate workflows for these situations, you make sure the system follows the correct process for each one.
Access the Workflows Tab
To begin setting up your unique workflow, follow the same path you took for the Status Library.
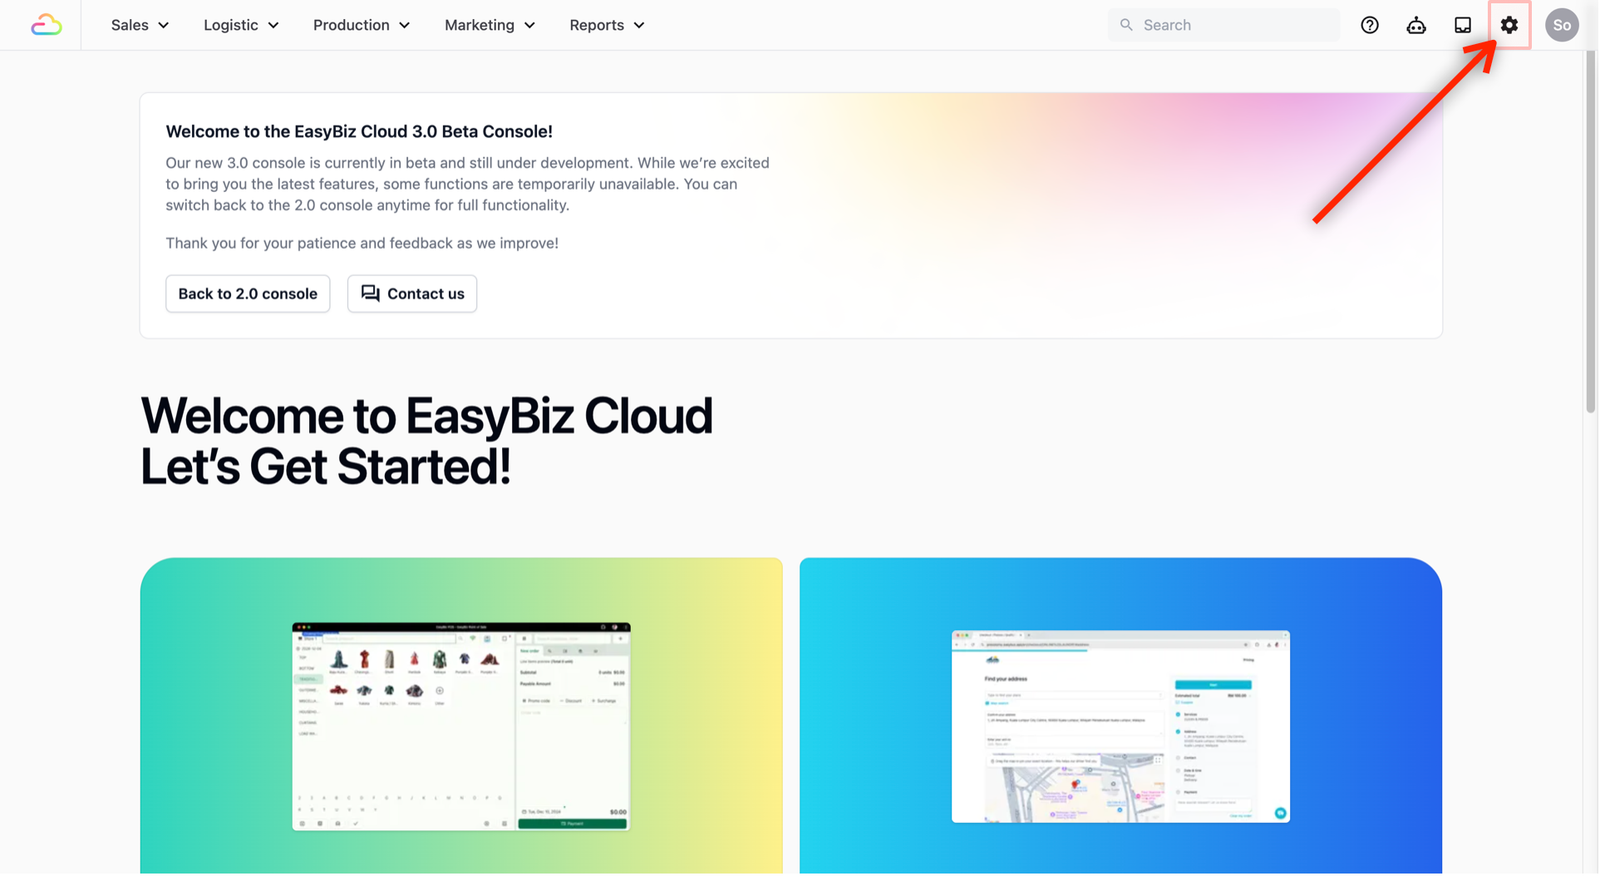
- On the top navigation bar, click the Gear Icon (Settings).
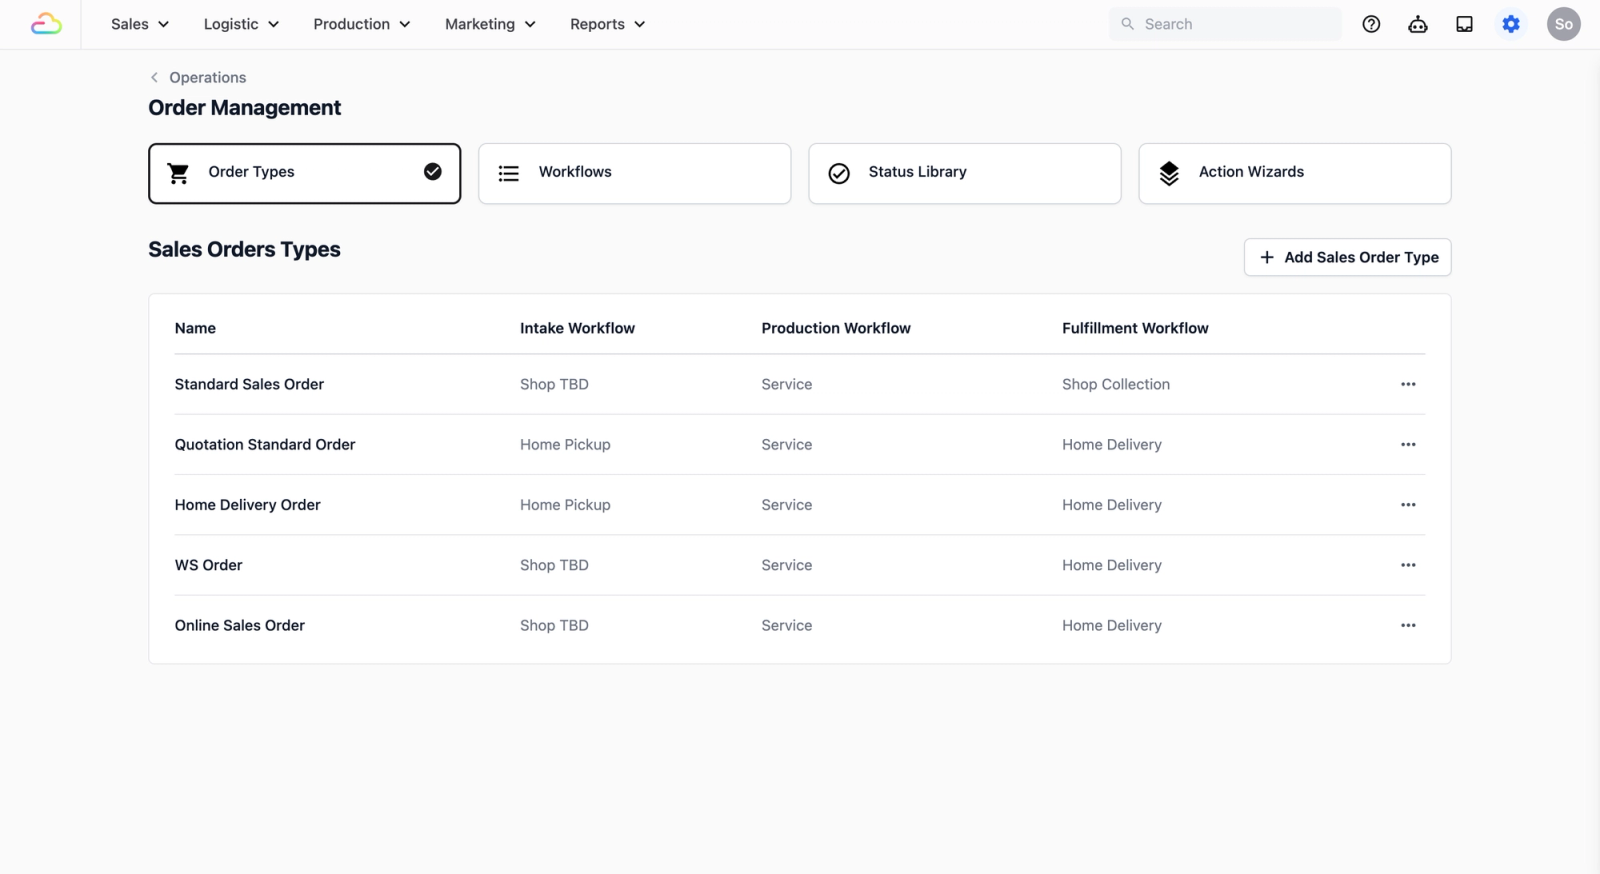
- Scroll down until you see Operations. Select Order Management.
- This is the central hub where you define your sales orders, the steps necessary for your team to create an order, and the processes tied to that order.
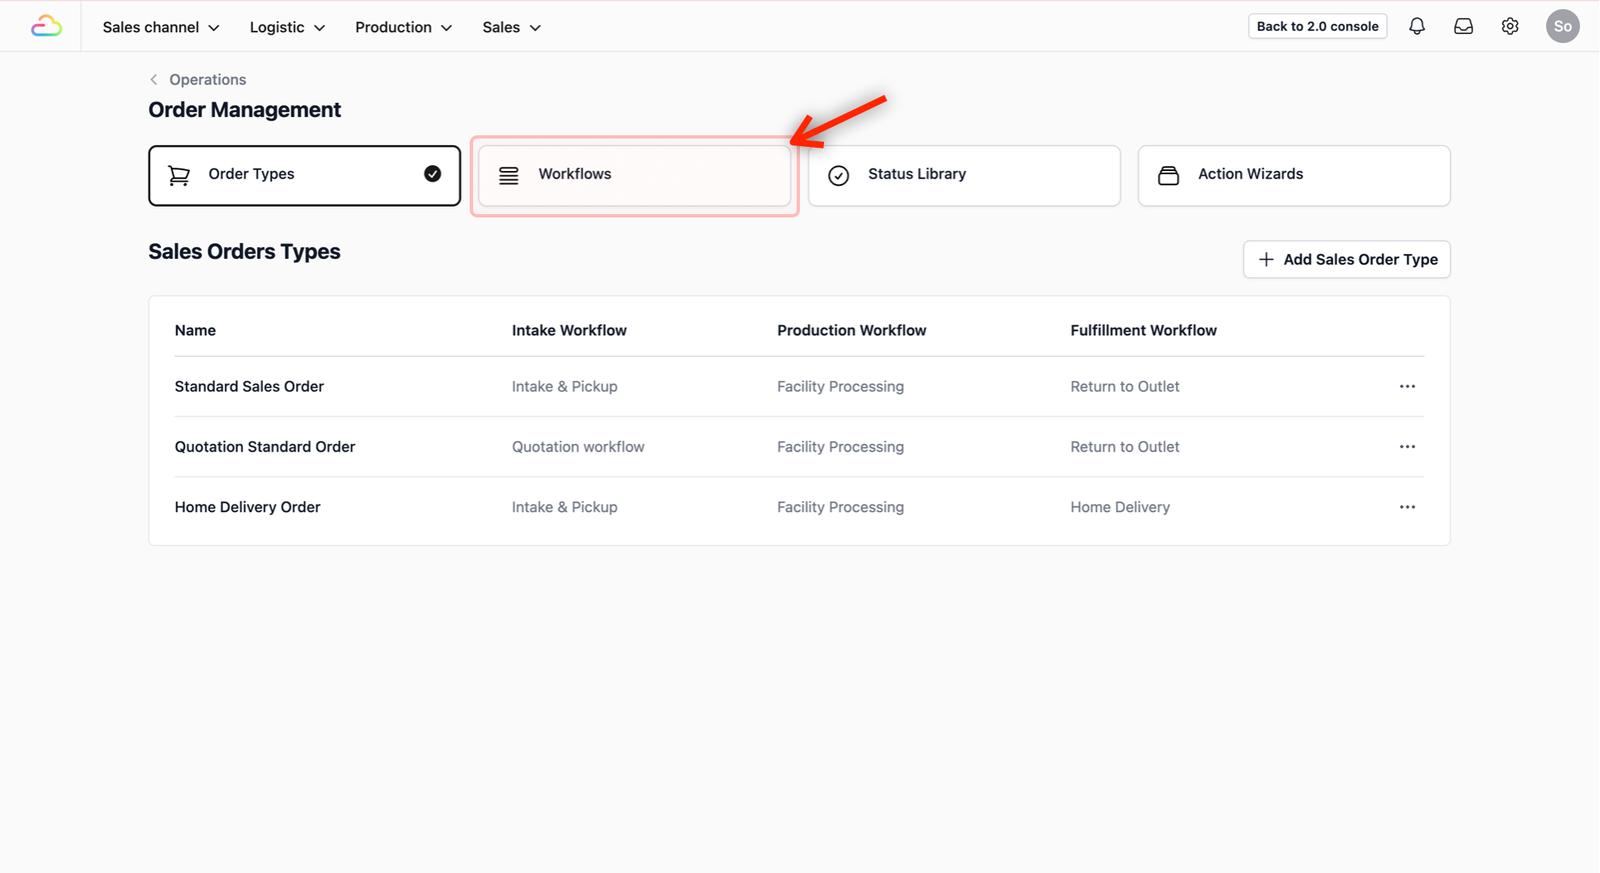
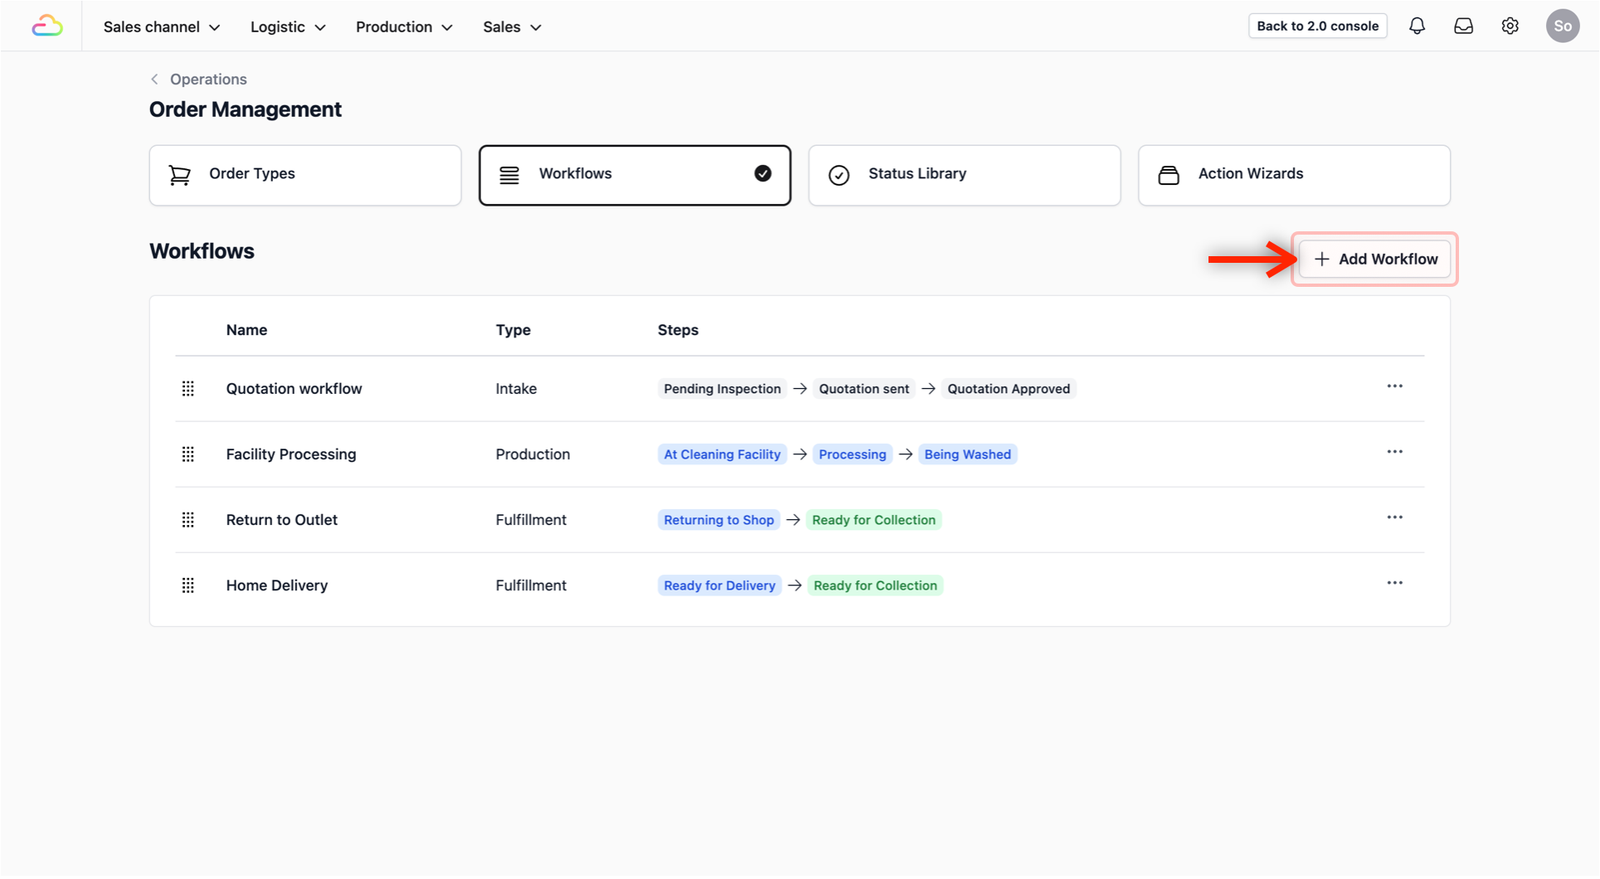
- Click on the Workflows tab to start building your sequences.
Configure Your Workflow
To add a new Workflow, click on the + Add Workflow button.
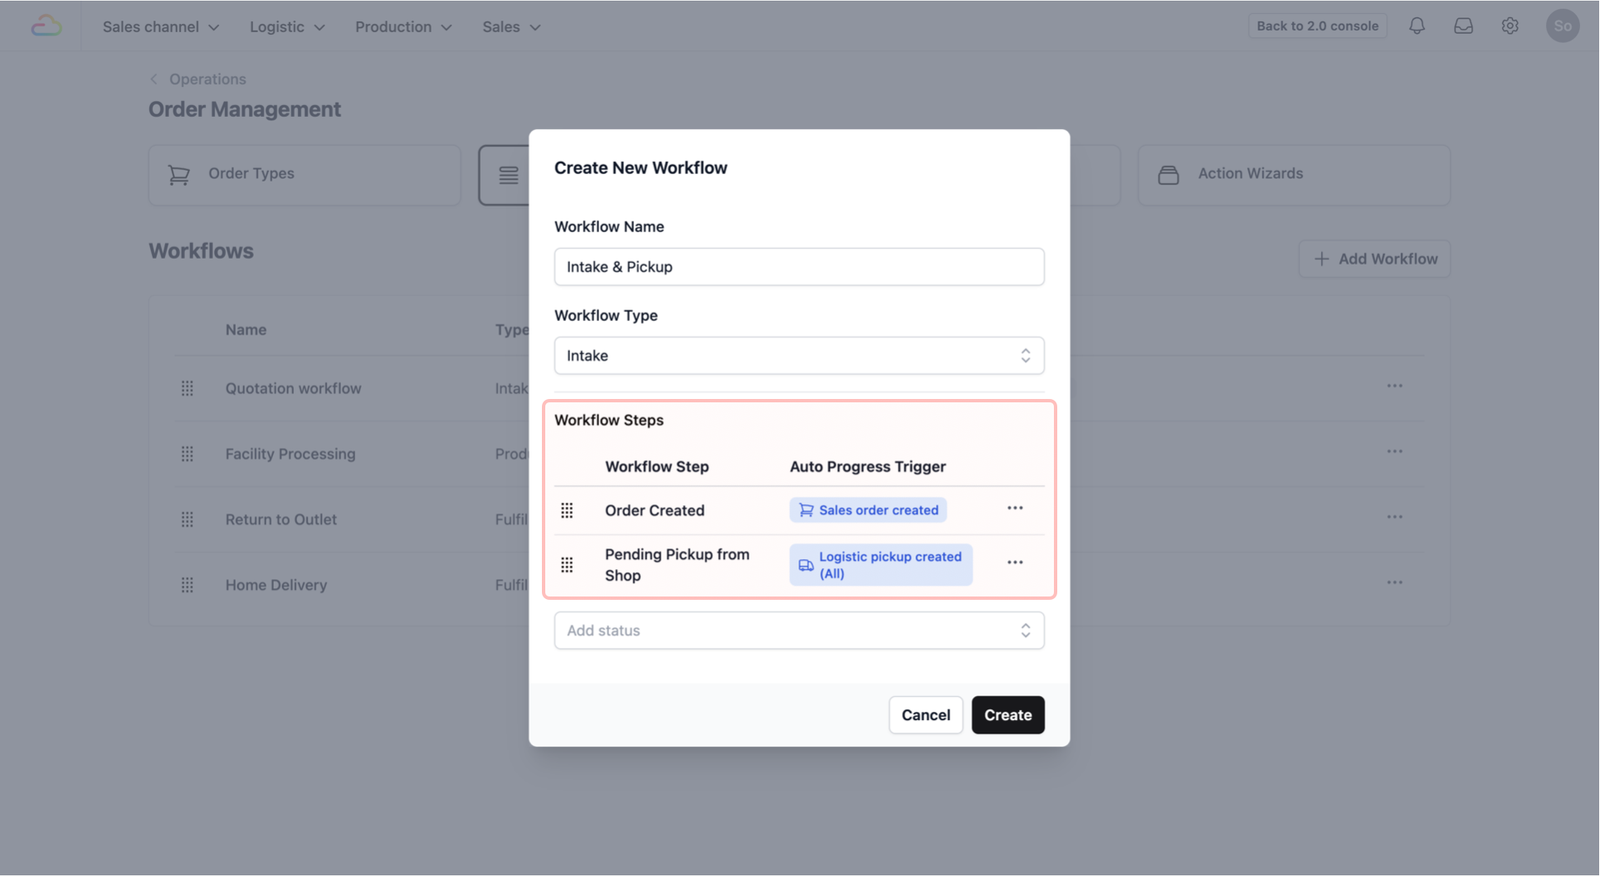
A pop-up window will appear. Lets look at how to fill in the fields:
- Workflow Name: Give your workflow a descriptive name that reflects its purpose (e.g., "Repair Service Intake," "Standard Laundry Production").
- Workflow Type: Use the dropdown box to select the high-level category that your workflow falls under (e.g., Intake, Production, Fulfillment). This helps organize your different processes later in the Configure Order Types guide.
If you select Fulfillment, a second dropdown will appear asking for the Fulfillment Type. Choose:
- Shop Pickup: If customers collect their orders in-store
- Home Delivery: If you deliver to customers.
- Add Status: This is where the status names in your Status Library come to life. Use the dropdown box to select a status name (e.g., "Pending Pickup"). This name is pulled directly from what you defined in the previous guide.
- Auto Progress Trigger: A pop-up will appear when you select a status. From the dropdown, choose which event should automatically move the order to the next step. If you leave the trigger empty, the order will not advance automatically — your staff will need to manually update the status when each step is complete.
- Here are the types of events you can choose from:
- Sales order events: Triggered when the order itself changes state, such as Sales order confirmed, Sales order completed, or Order ready for collection.
- Logistic events: Triggered by pickup or delivery operations, such as Logistic pickup completed or Logistic delivery completed.
- Payment events: Triggered when a payment is recorded against an order such as Payment Succeeded.
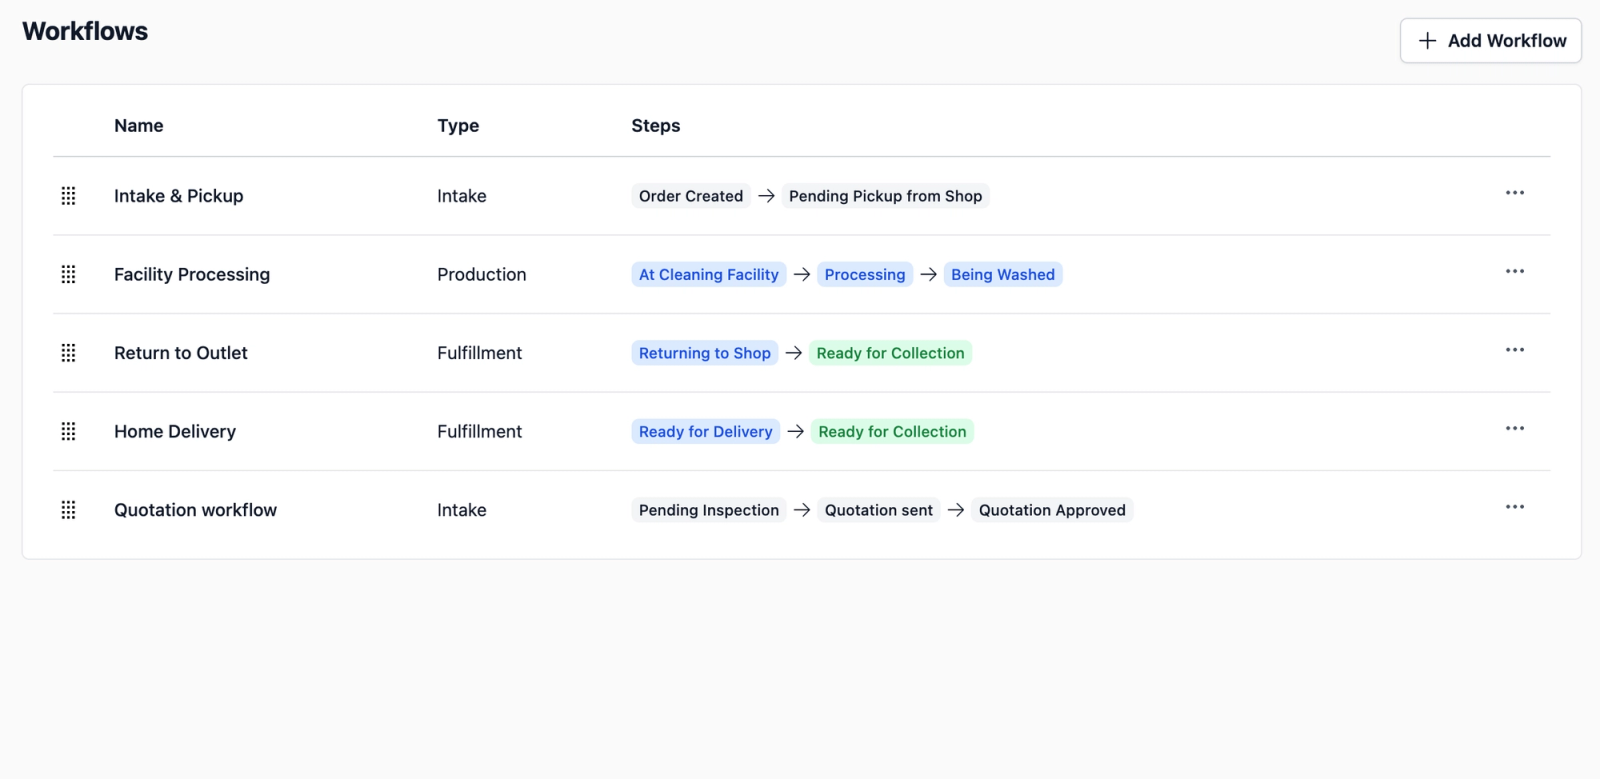
- Workflow Steps: Once you complete the status and added a trigger, a new step in your workflow will appear. Continue adding your statuses and defining the progress trigger for each transition, moving sequentially towards the final step for the specific workflow.
- Create: Click Create to add this new workflow in your Workflow tab when your sequence of steps and triggers is complete. A success message will appear on the bottom right of your screen, and you should now see the new workflow you just created in the table view.
Give feedback
Up next
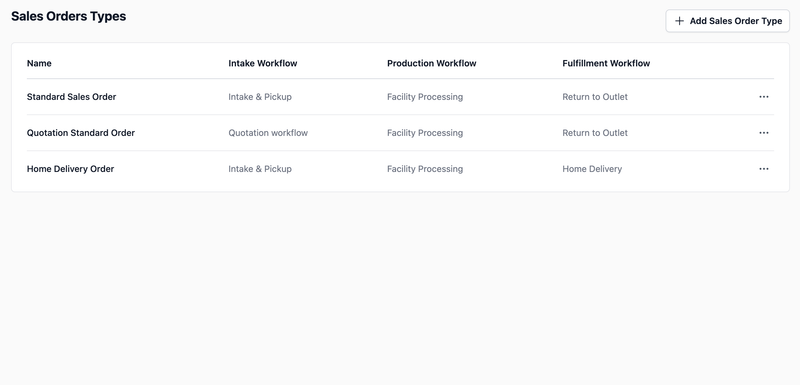
Configure Order TypesLink your workflows together to create a complete order process for each type of service you offer.
Read more