Set up the Order Entry Steps
In this article
When your team creates a new order, they need to follow a set of steps — such as selecting the customer, adding items, setting a date, and collecting payment. This guide shows you how to set up that process so every order is created the same way.
Contents
Contents
Prerequisites
To complete this setup successfully, please ensure that you have already configured your Price List. If you haven't done this yet, click here to follow the steps to creating a price list so that your services are ready to be selected.
What is an Order Entry?
An Order Entry is the process your team follows when creating a new order. It is the screen they see when they start a new order — whether they are at the POS counter, on the Workflow App, or in the console. By setting this up, you make sure everyone follows the same steps and captures the right information every time.
In EasyBiz, you set up your Order Entry using a tool called the Action Wizard. This is where you define and manage the steps for your order process.
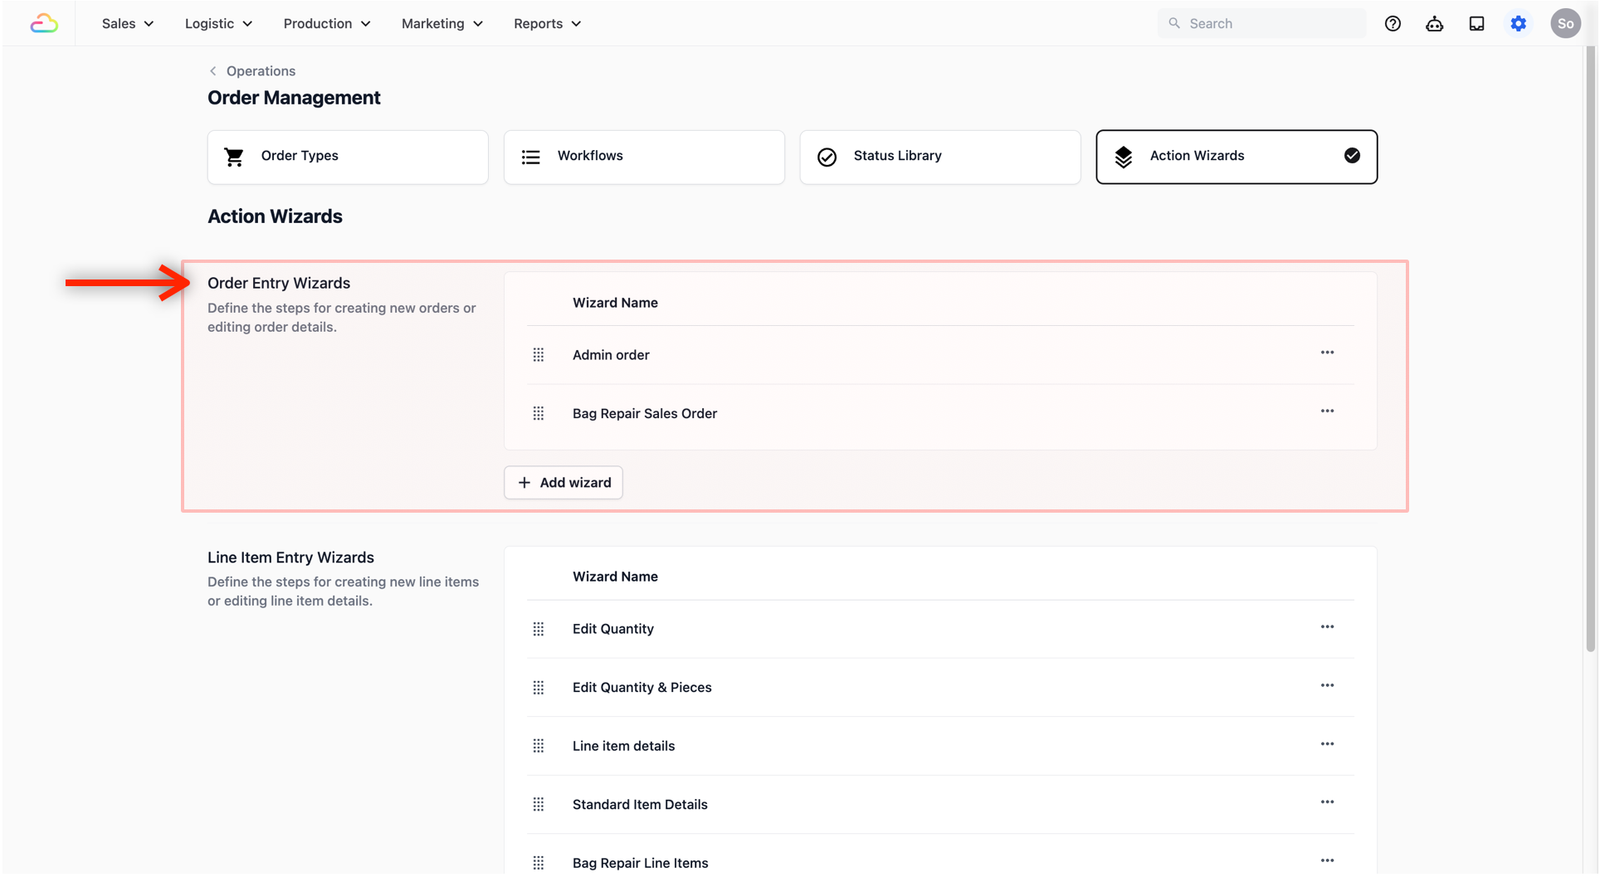
Access the Action Wizard
To define the steps your staffs follow when creating a new sales order, you will first need to set up a procedure in the Action Wizards.
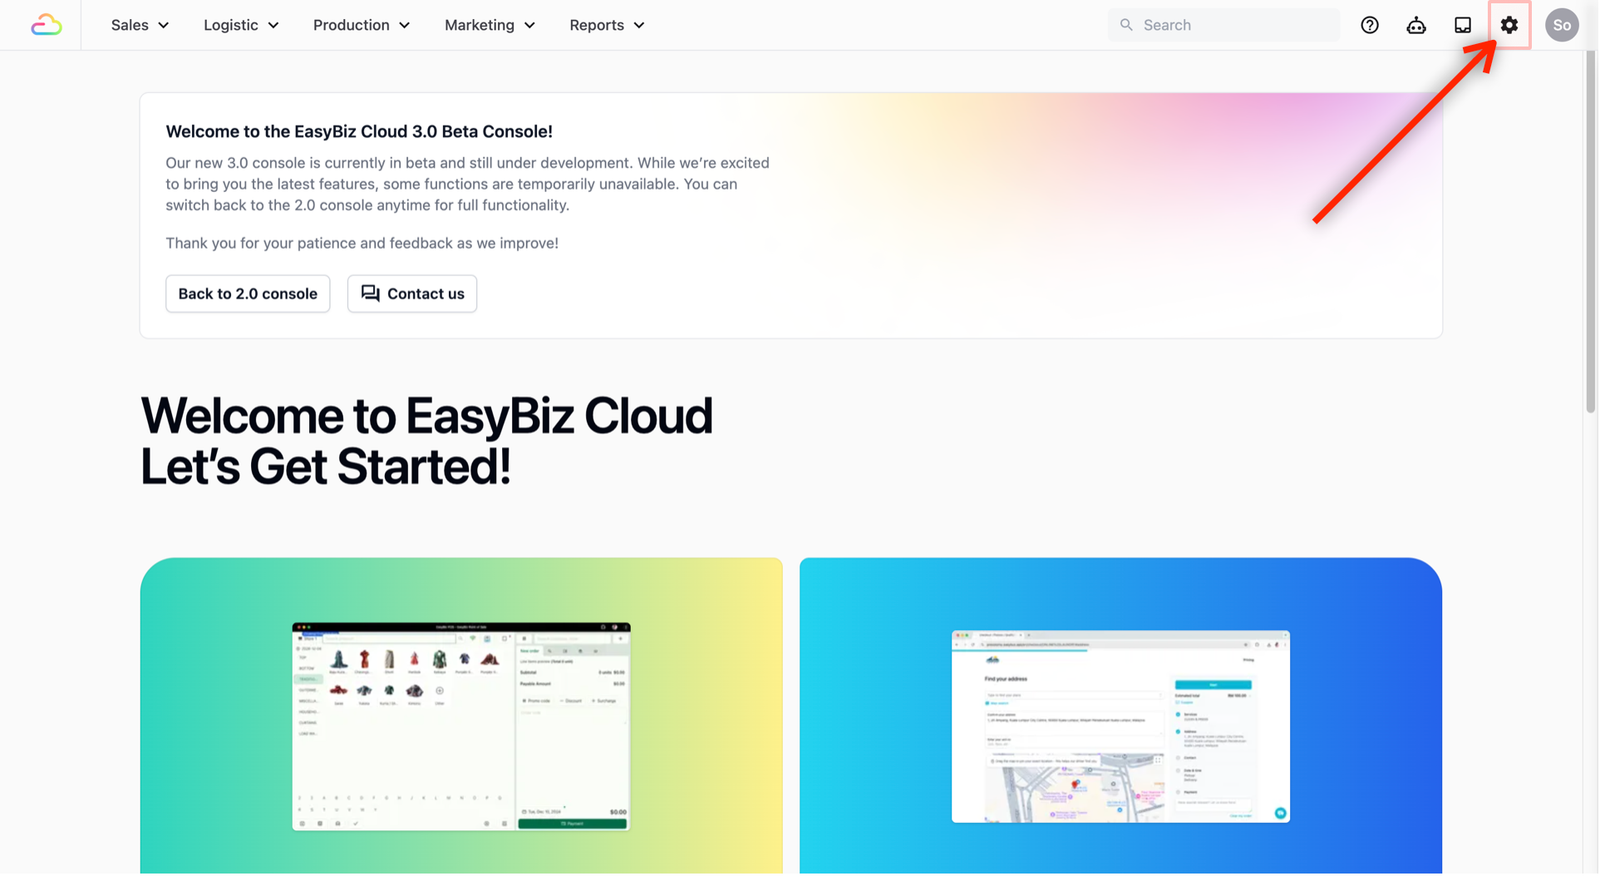
- On the top navigation bar, click the Gear Icon (Settings).
- Scroll down until you see Operations. Select Order Management.
- This is the central hub where you define your sales orders, the steps necessary for your team to create an order, and the processes tied to that order.
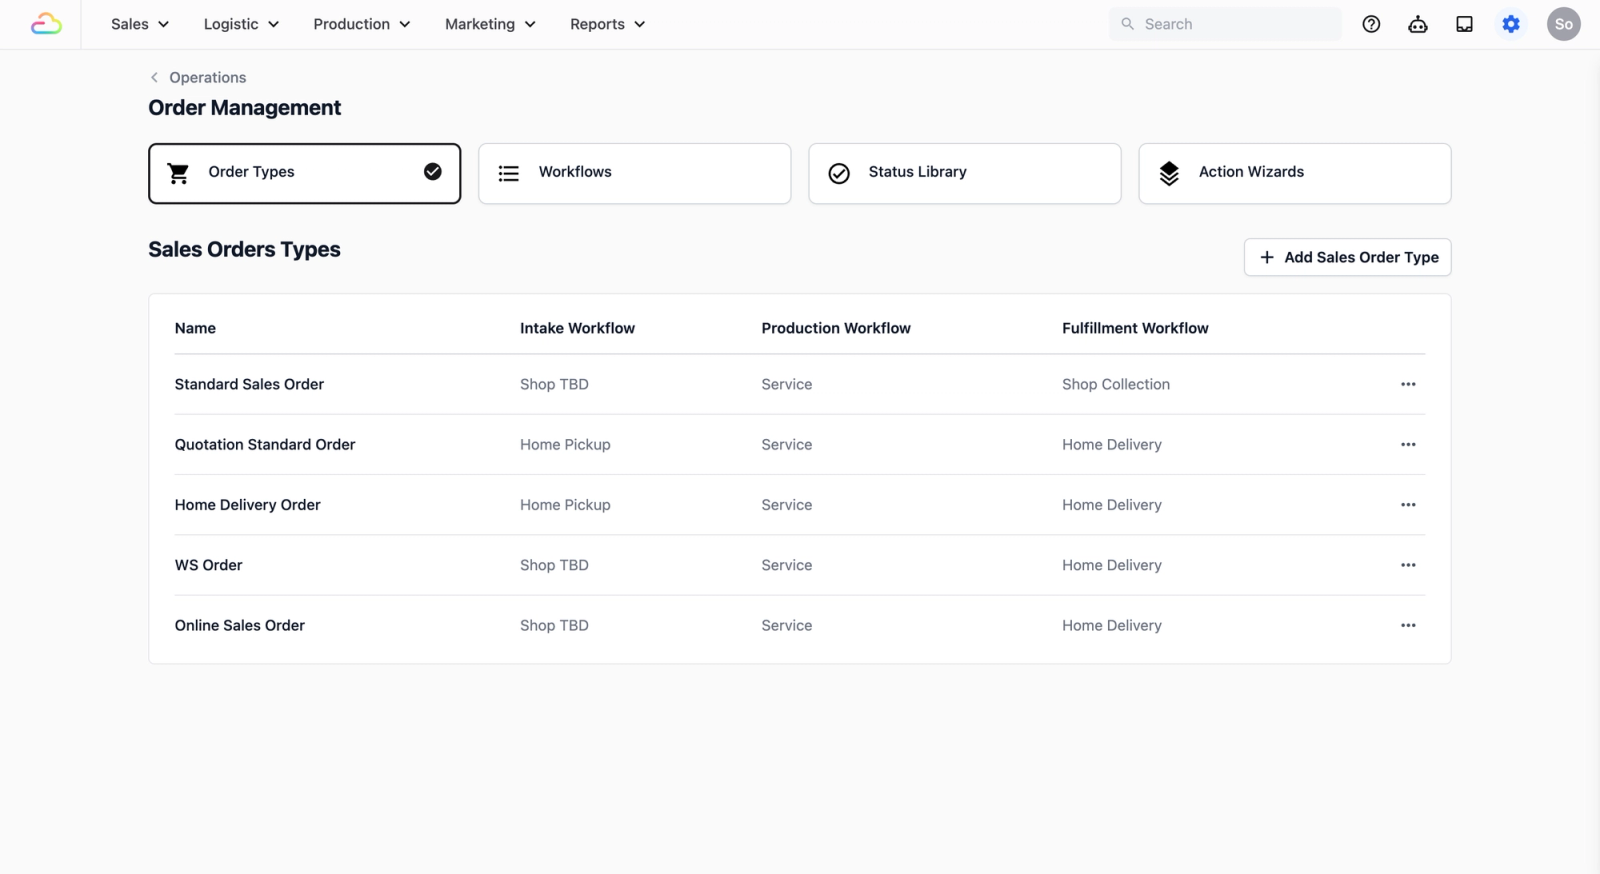
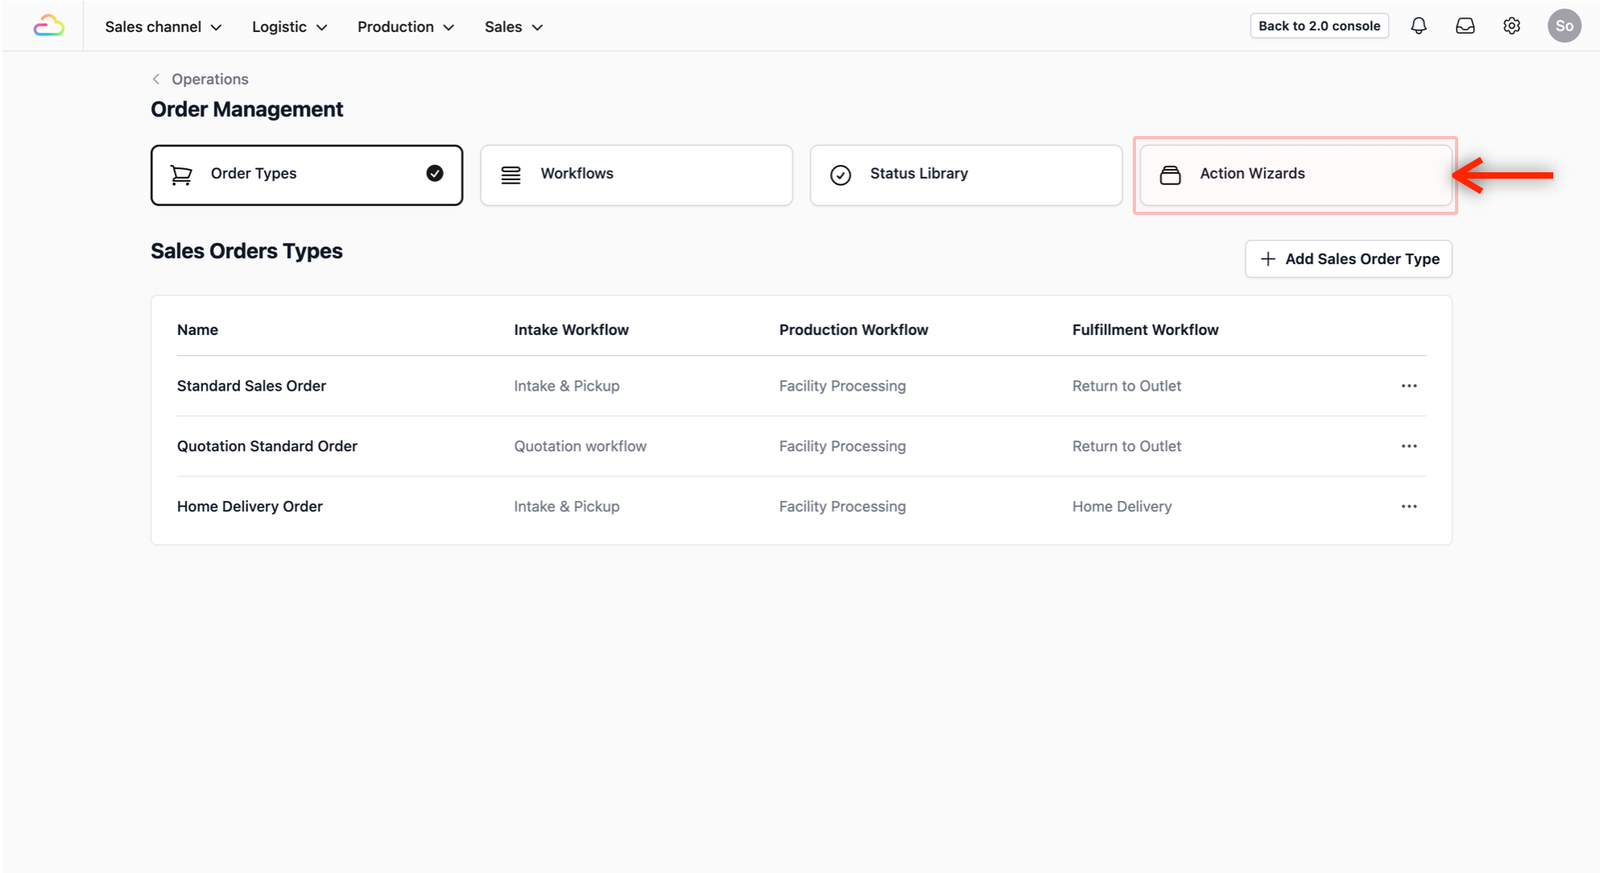
- Click on the Action Wizards tab to start creating a new Order Entry.
Set Up a new Order Entry
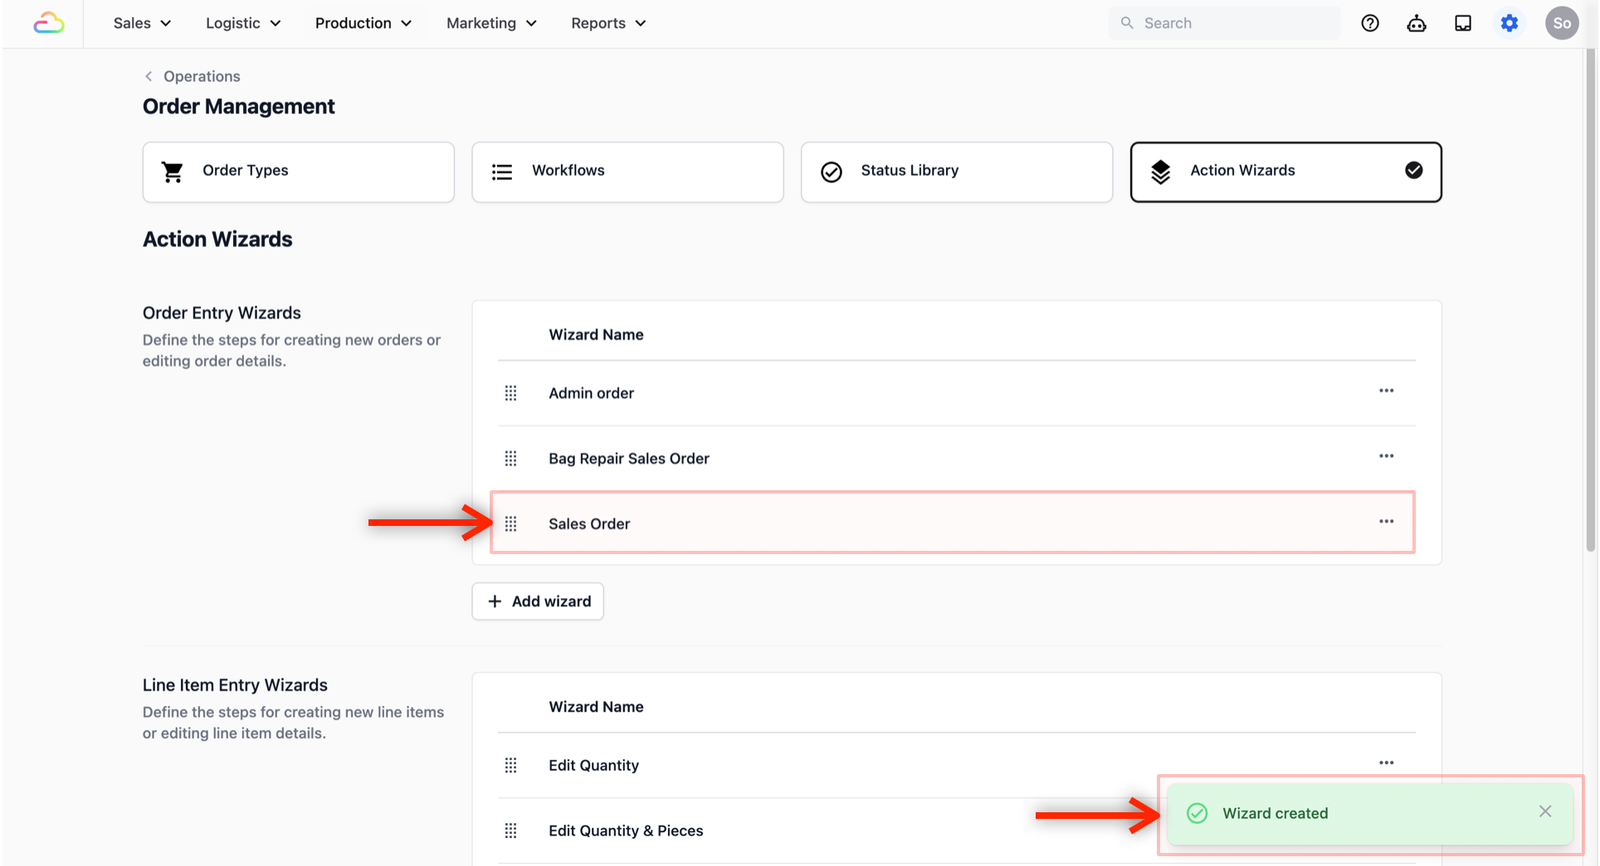
Locate the Order Entry Wizards section. This is where you define the Sales Order name and the order procedures.
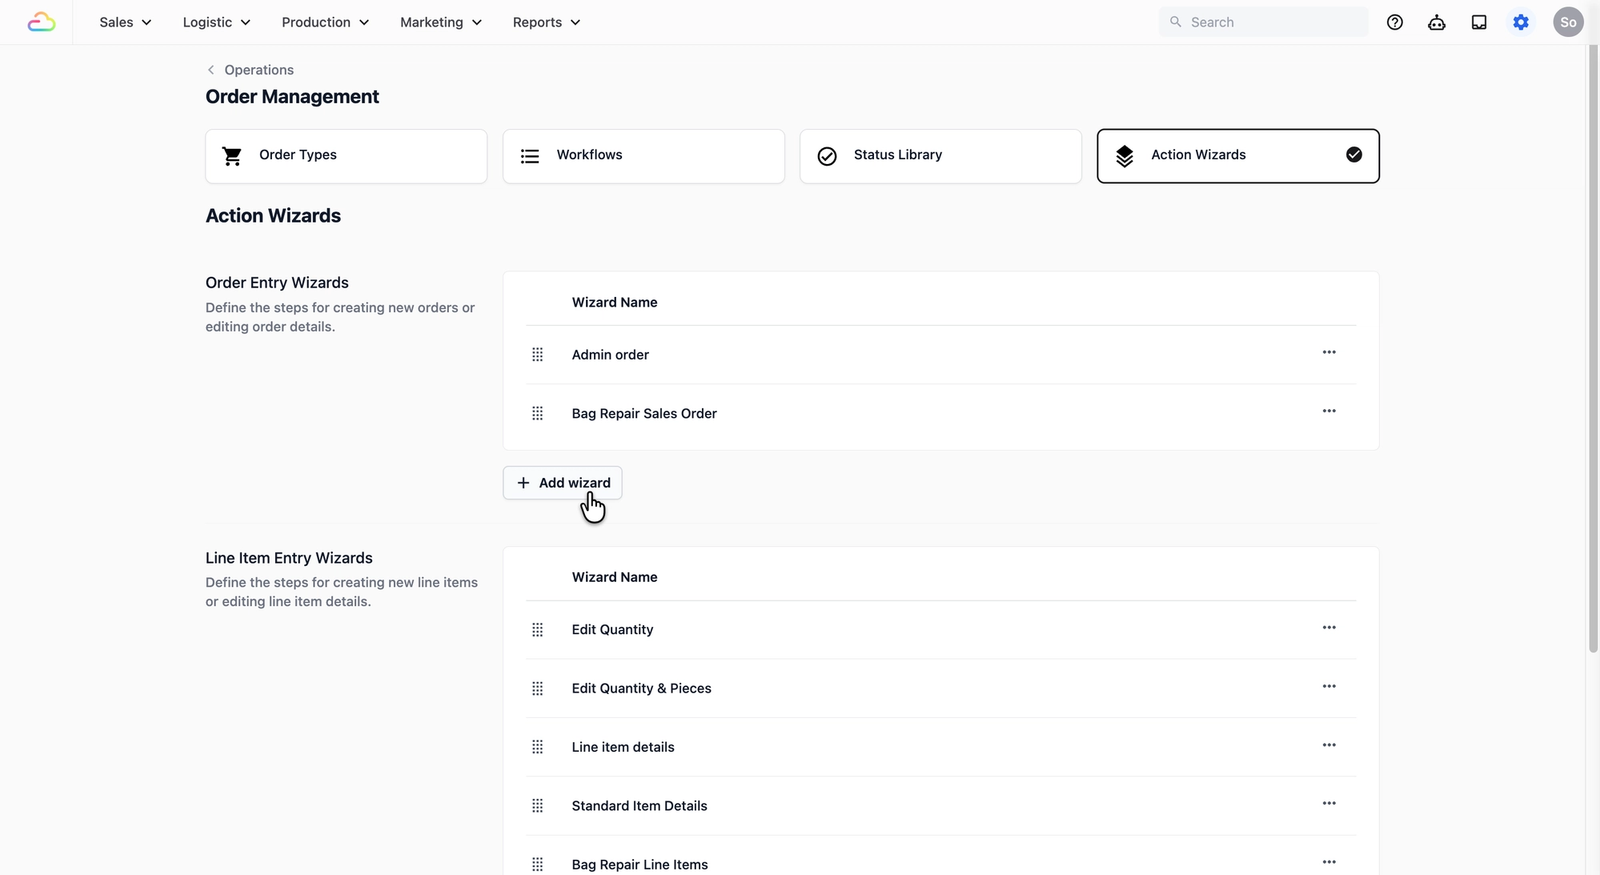
- Click on the + Add wizard button to create a new Order Entry.
- A pop-up window will appear for you to name your new Wizard (this is the name of your Sales Order form).
- For this demo, we will name this "Sales Order", but feel free to name it based on your current business terminology.
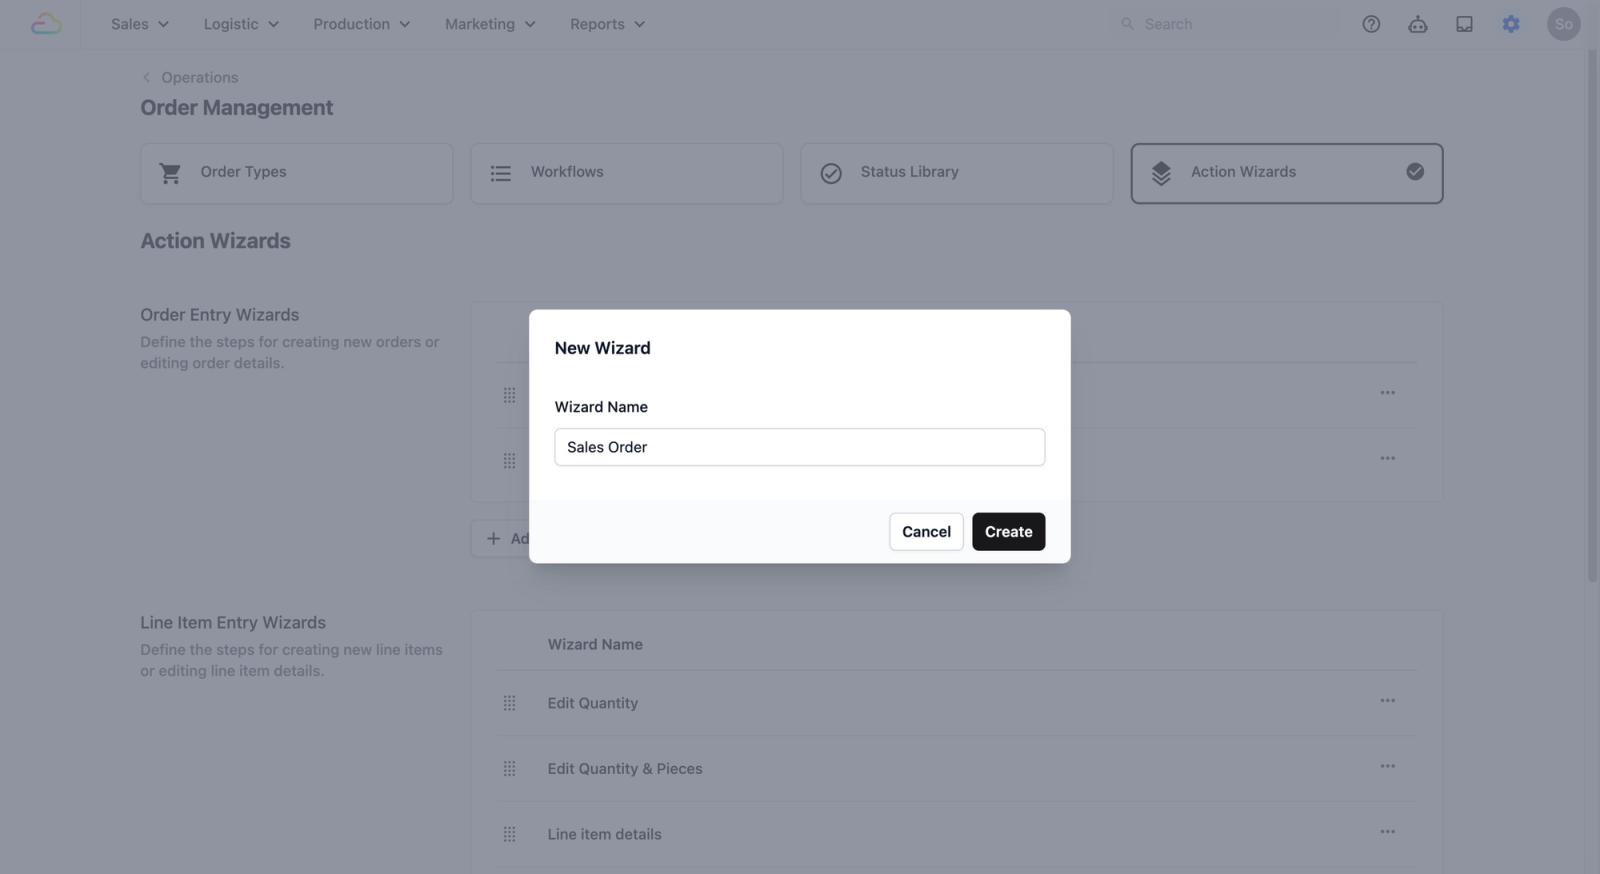
- Once done, click on the Create button.
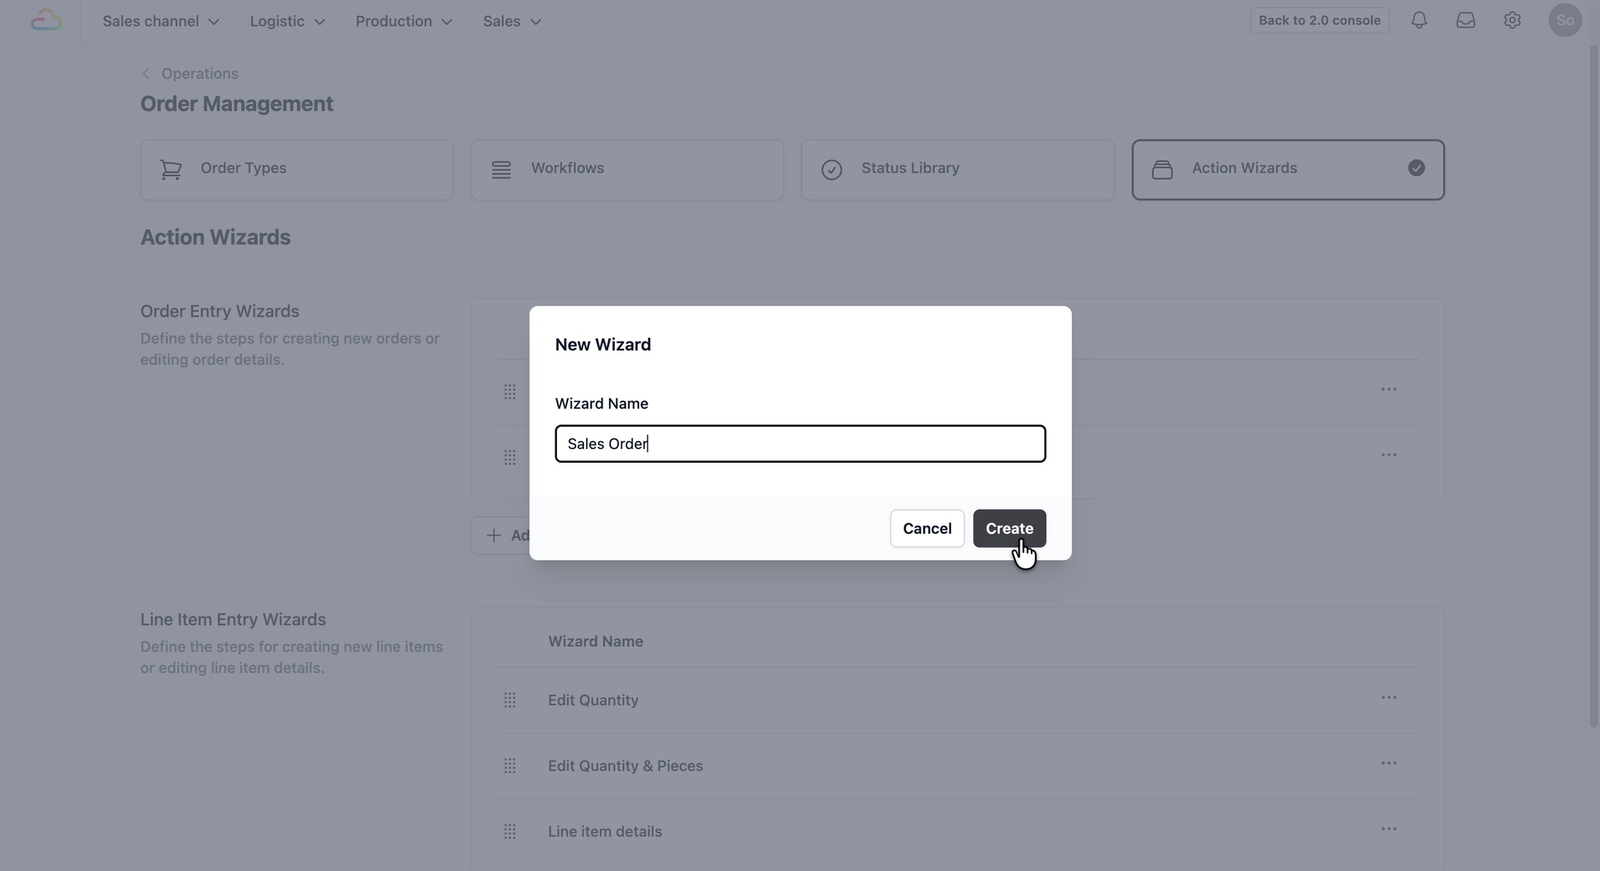
The pop-up will close and you will see a notification confirming the successful creation on the bottom right of your screen. Your new order entry will now appear in the list under the Order Entry Wizards section.
Define Order Entry Steps
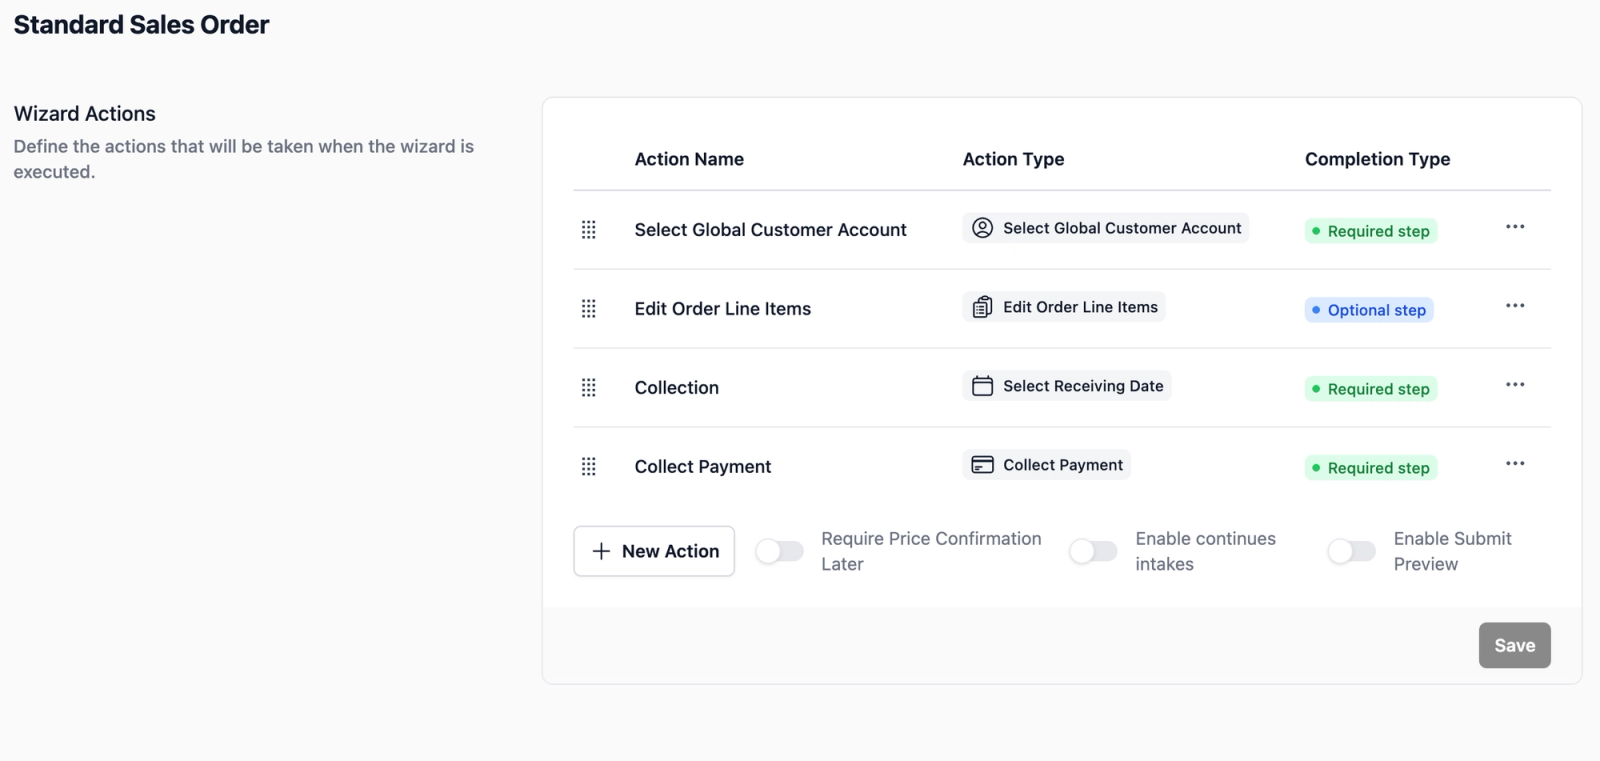
Now that you have created a new Order Entry, the system needs to know what steps the staff should follow to create a successful sales order.
For this demo, we will set up a 4-step workflow essential for most service businesses:
- Select customer: The customer to link the sales order to.
- Add items: Select the services and/or products.
- Fulfillment date: Set the date the items will be ready for customer to collect or be delivered.
- Payment Collection: Finalize the order.
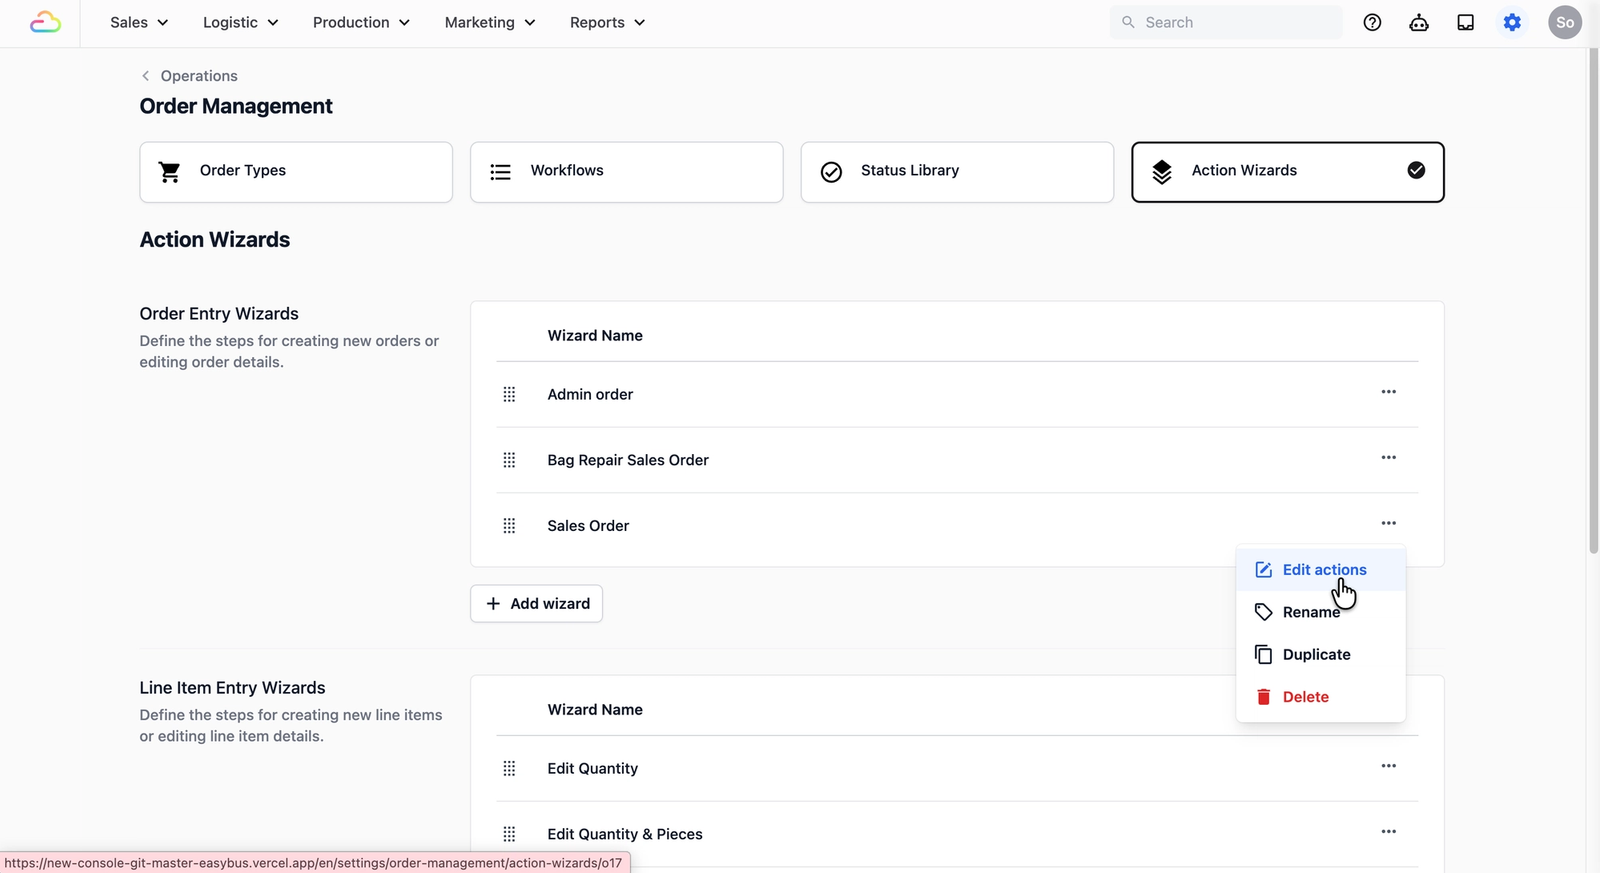
- Locate the Order Entry you have just created.
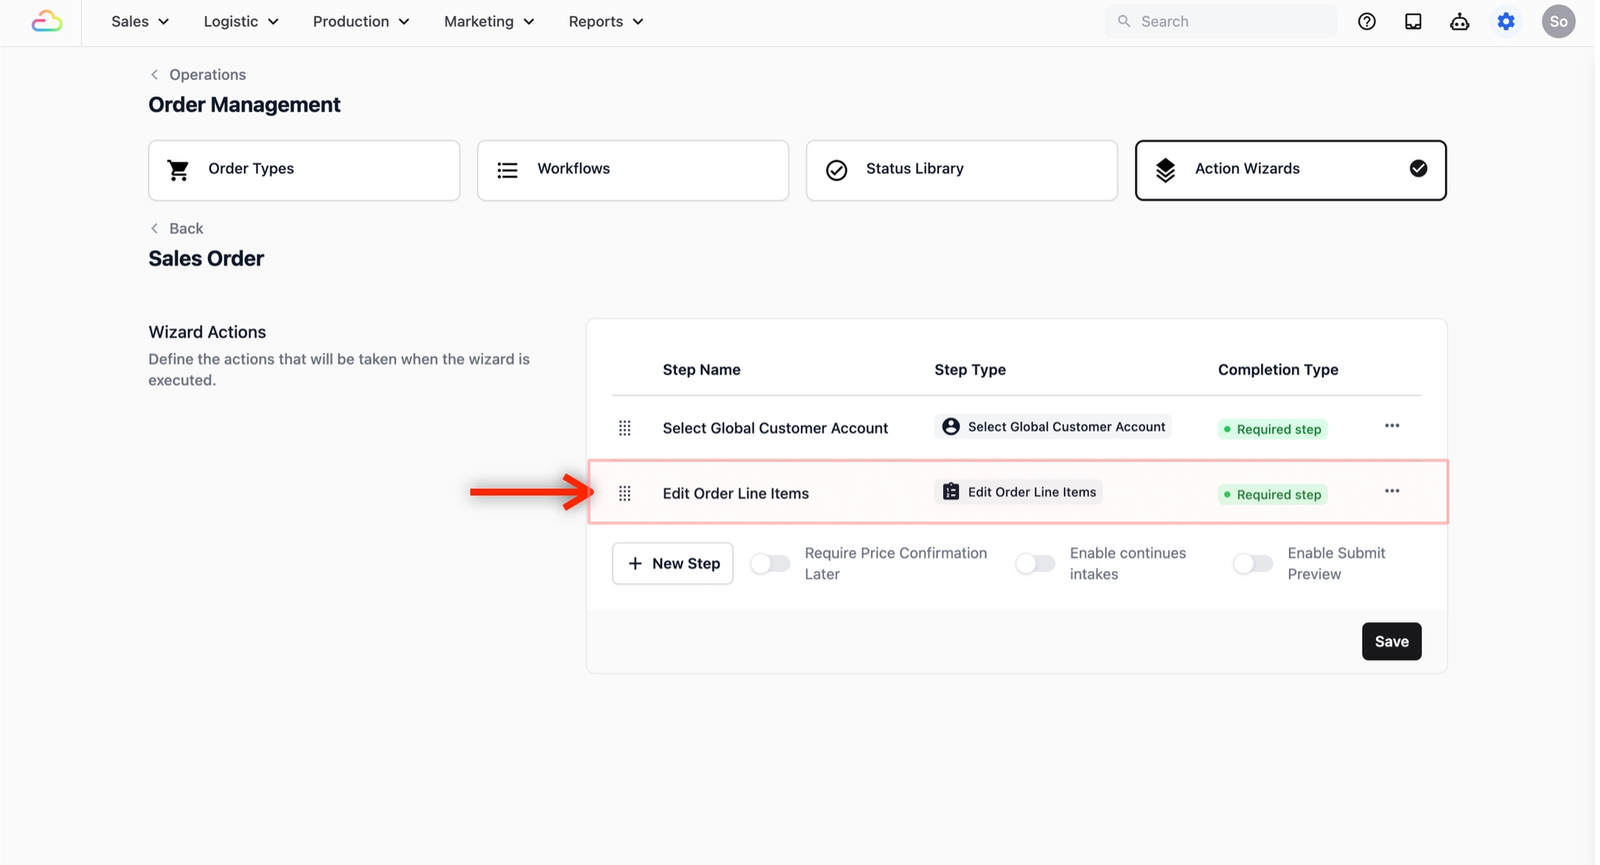
- Click on the ••• on the far right of the order entry that you want to define the steps to and select Edit Actions.
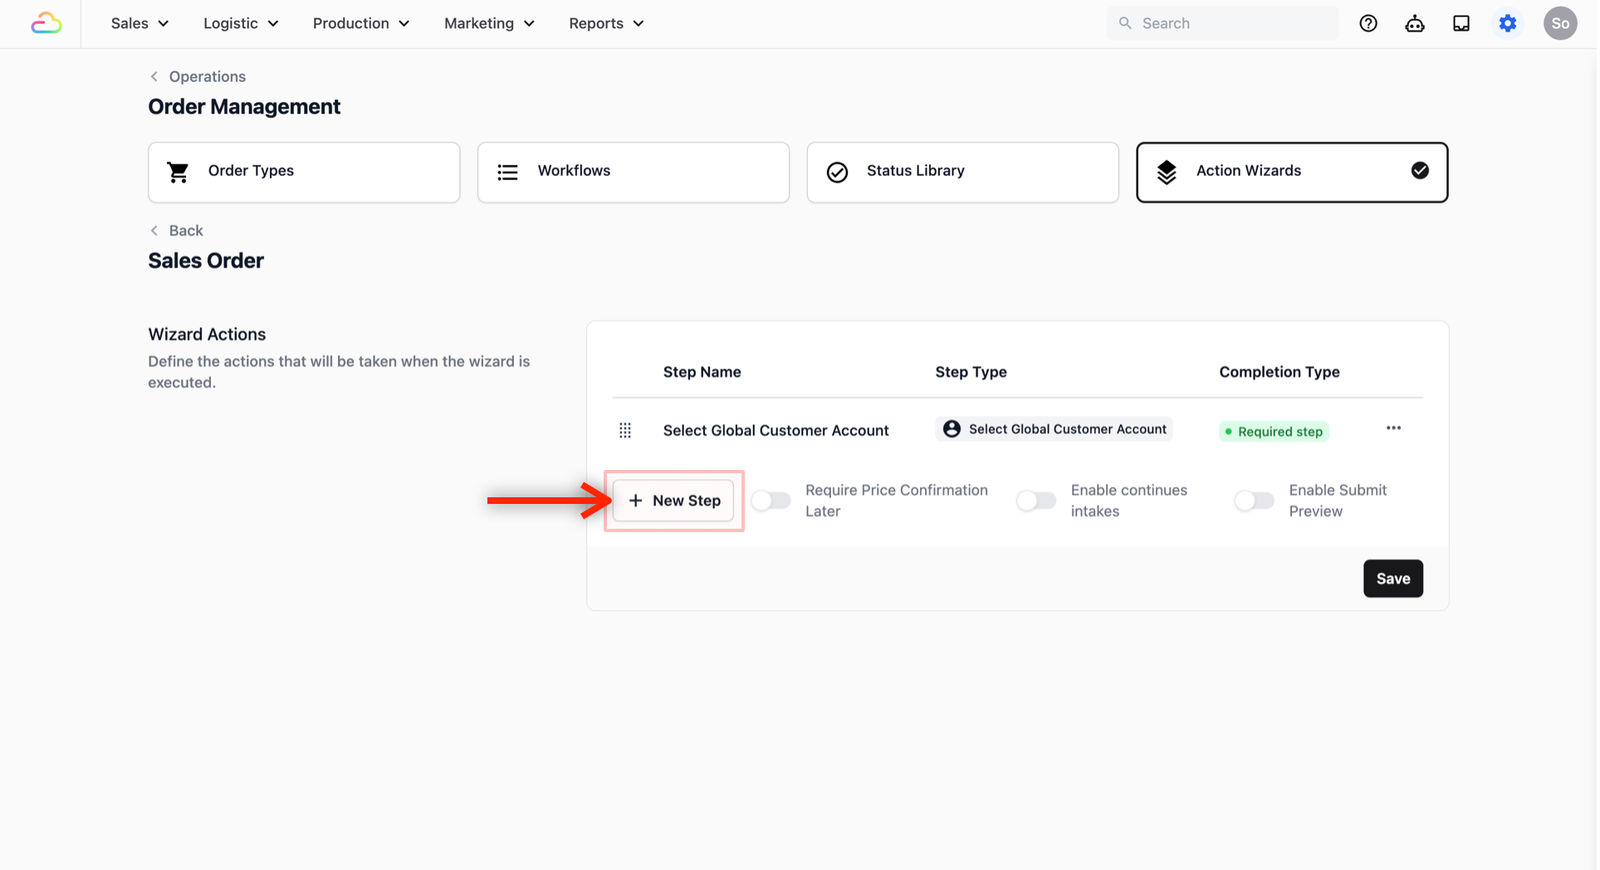
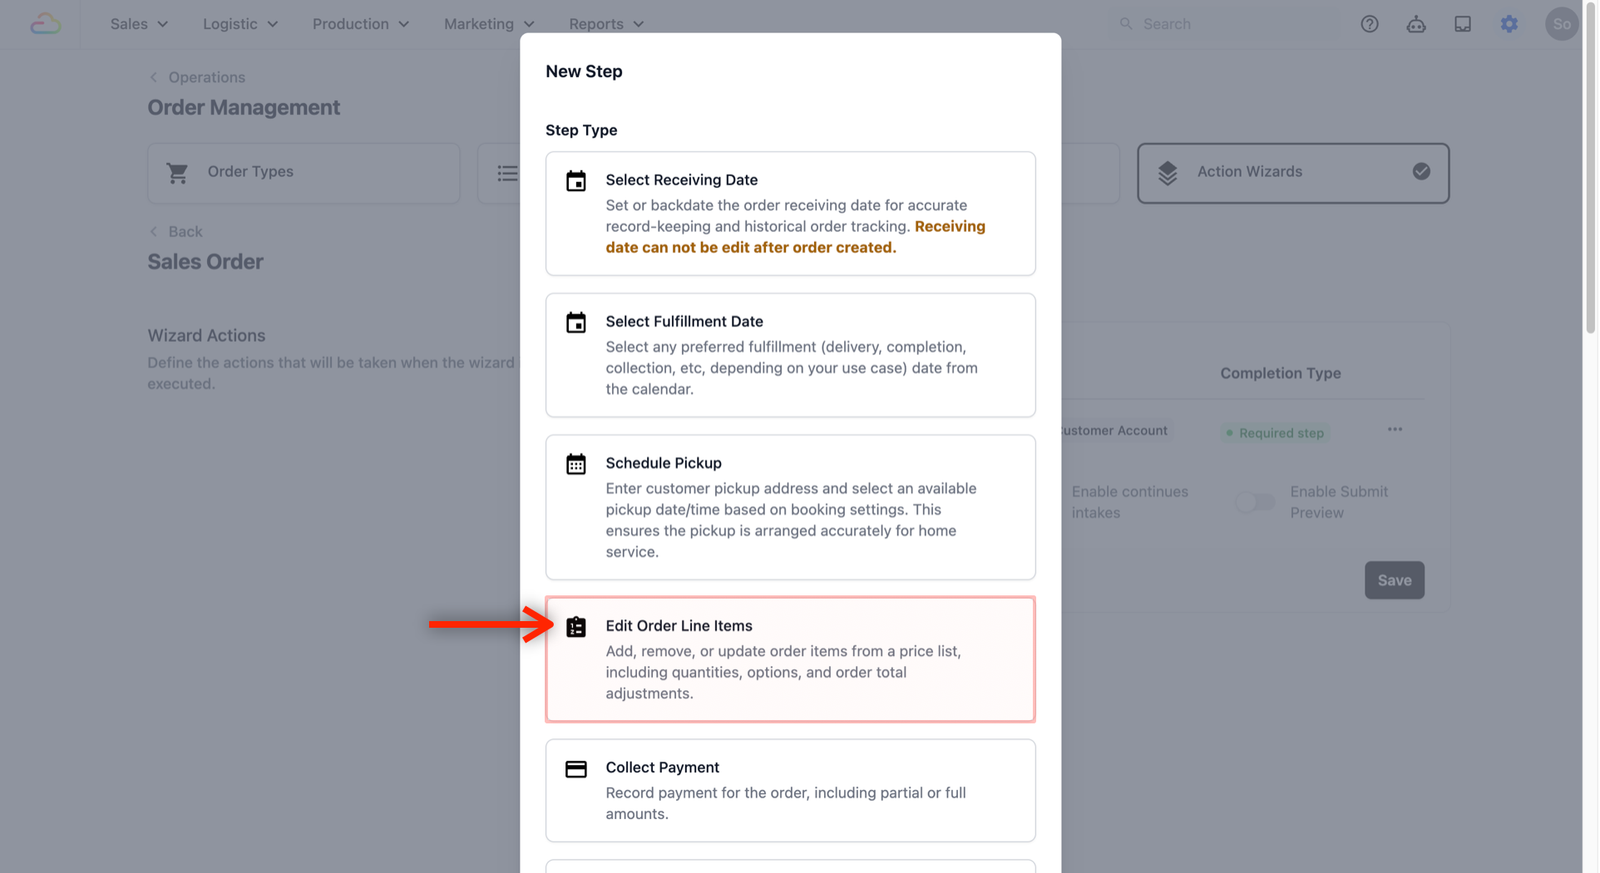
- In the Wizard Actions section, click on the + New Step button.
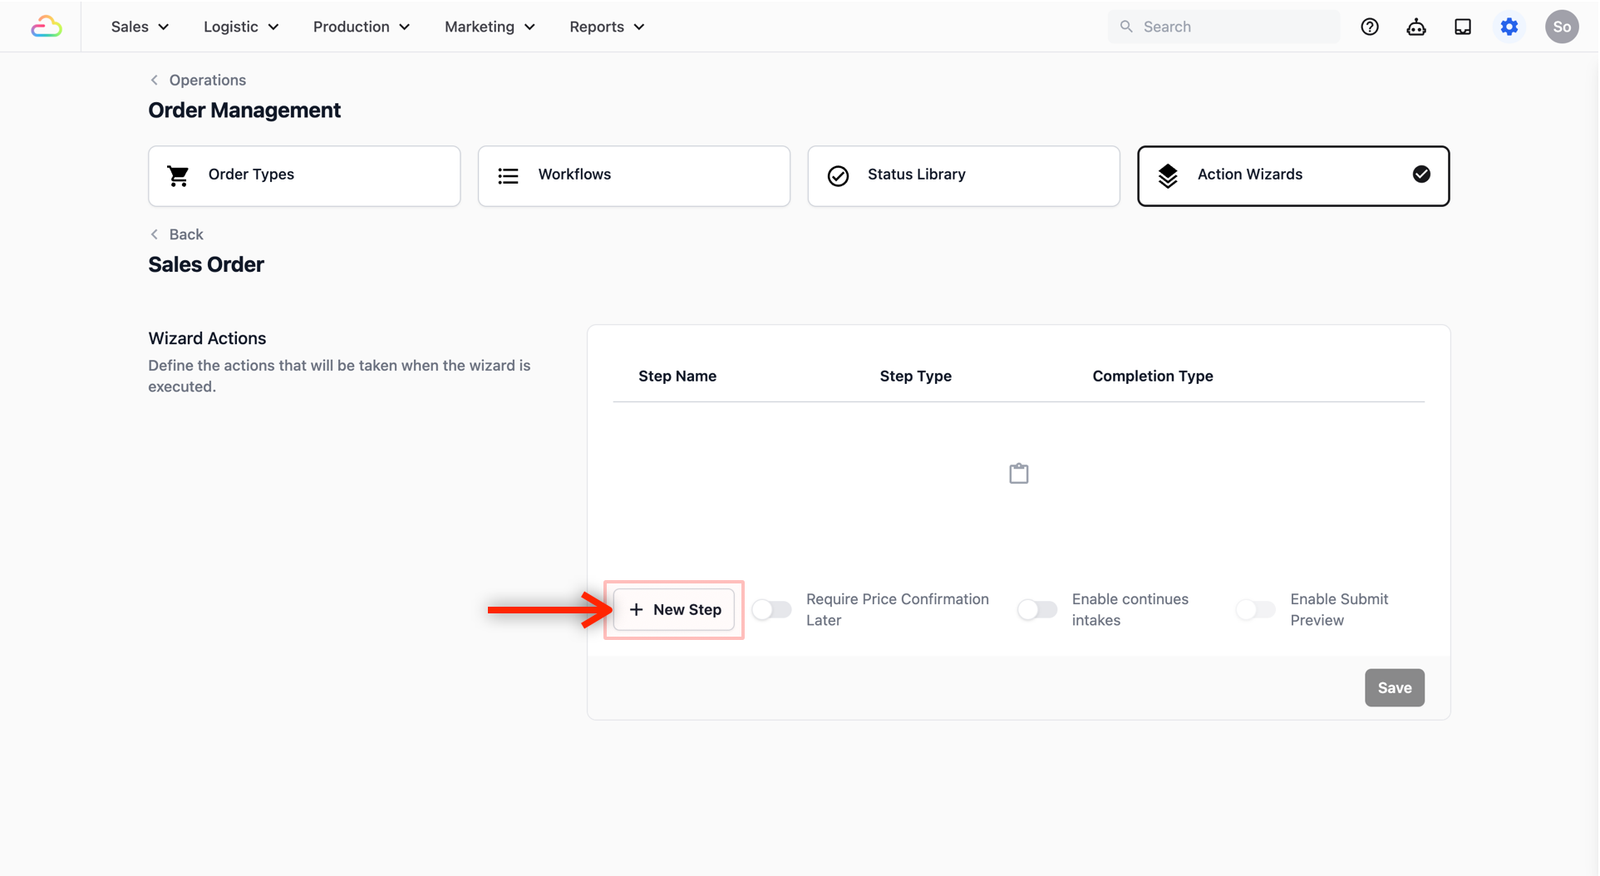
- You should now see a list of steps which is available for you to choose from depending on the use case of your order entry.
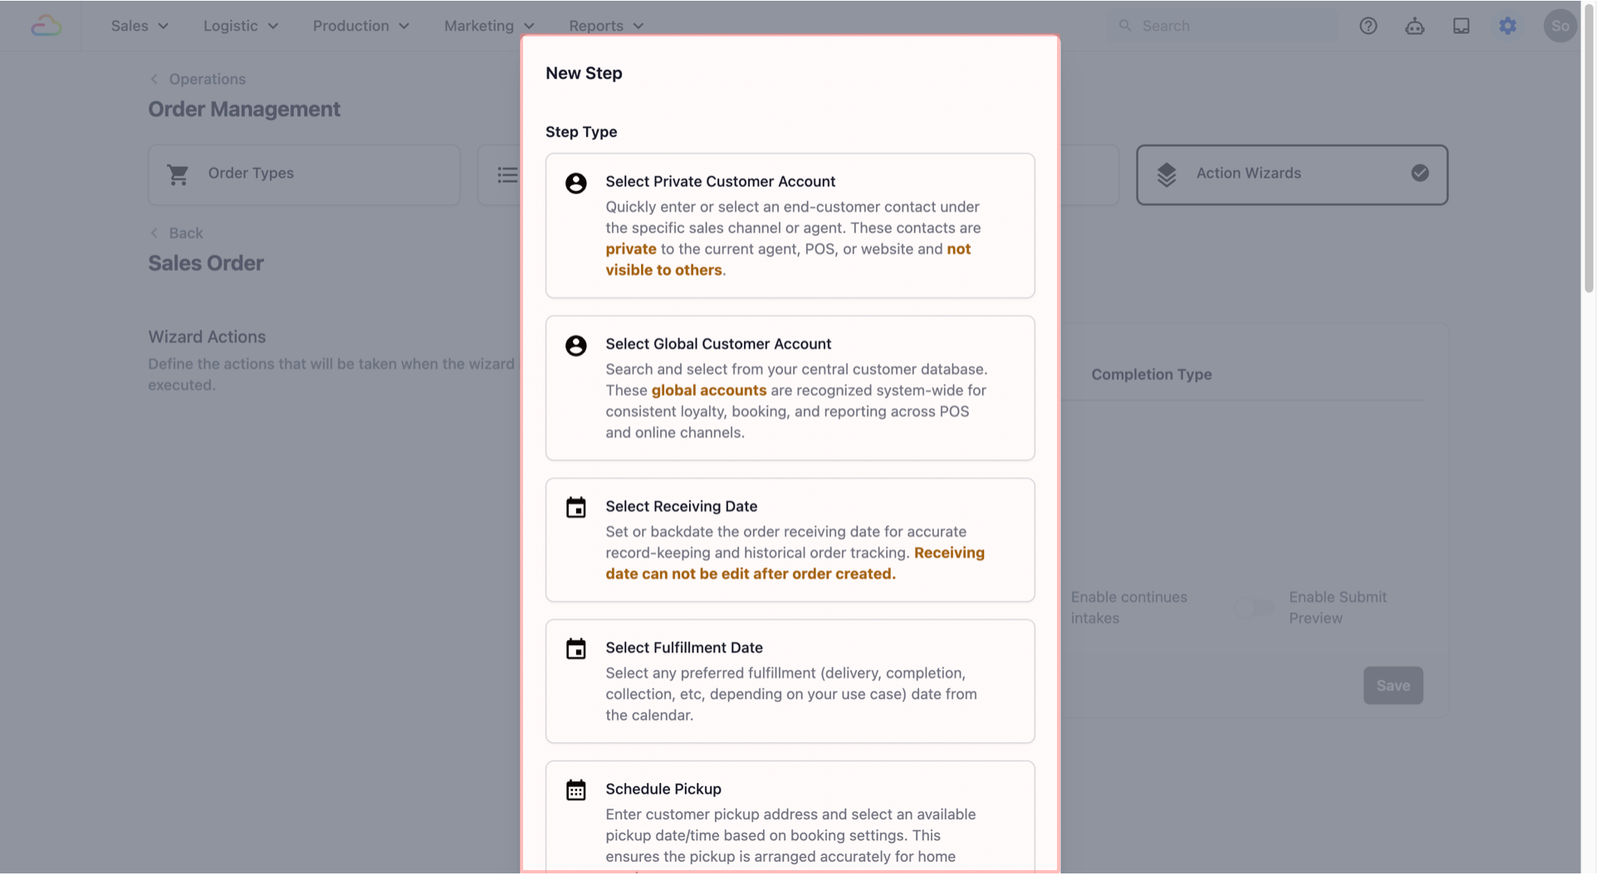
Select Global Customer Account
We will begin by setting up the step to identify the customer from your customer database. This ensures your staff links the order to the correct person in your system.
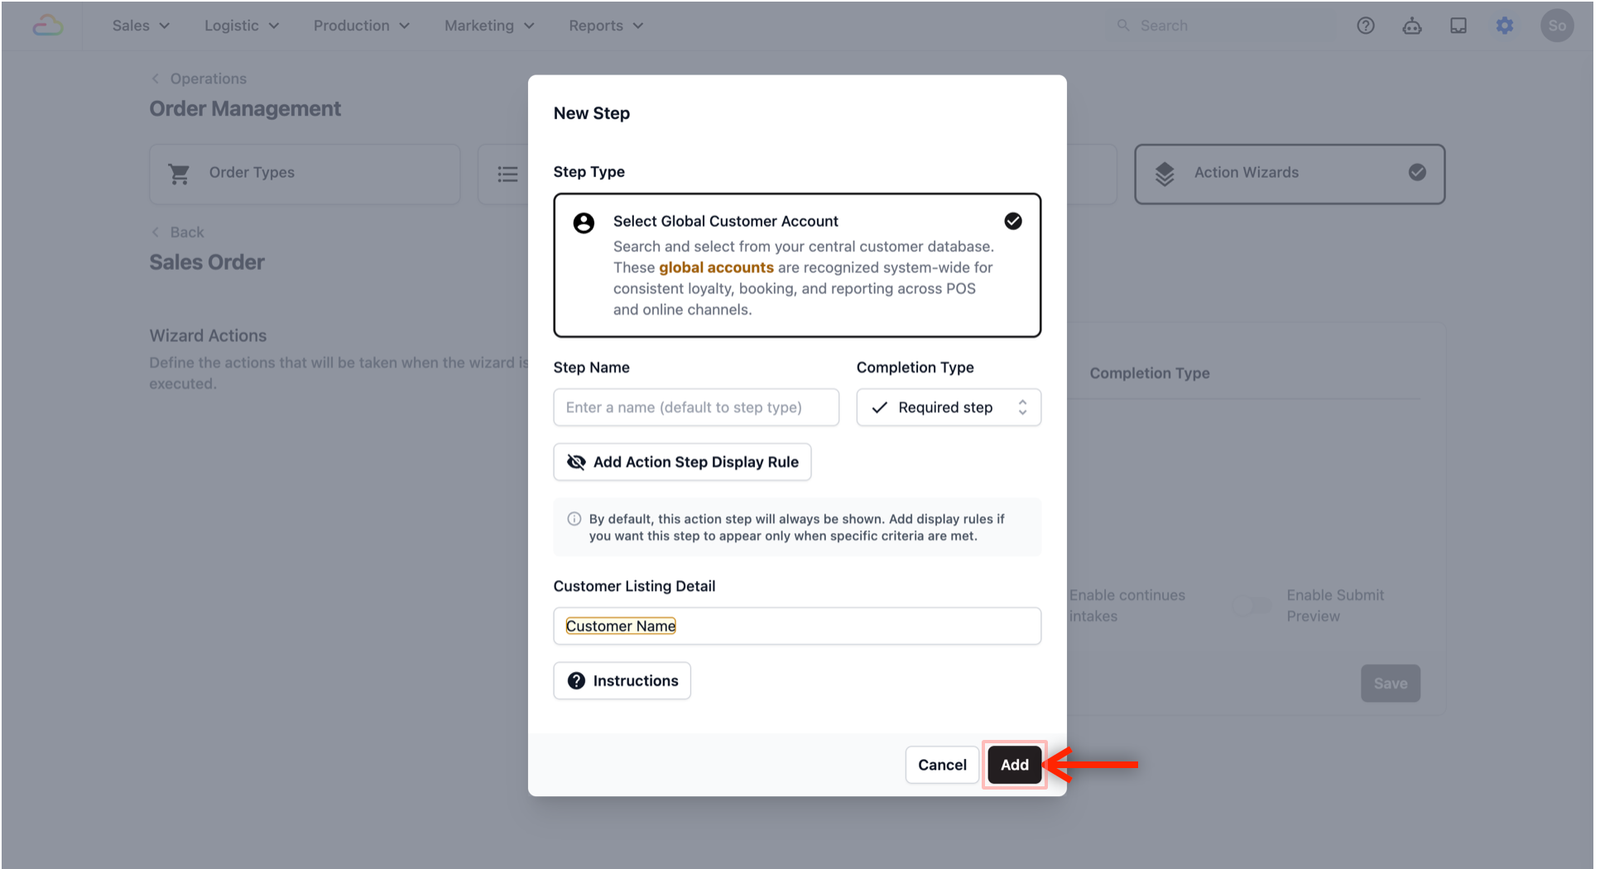
Select the Select Global Customer Account step type.
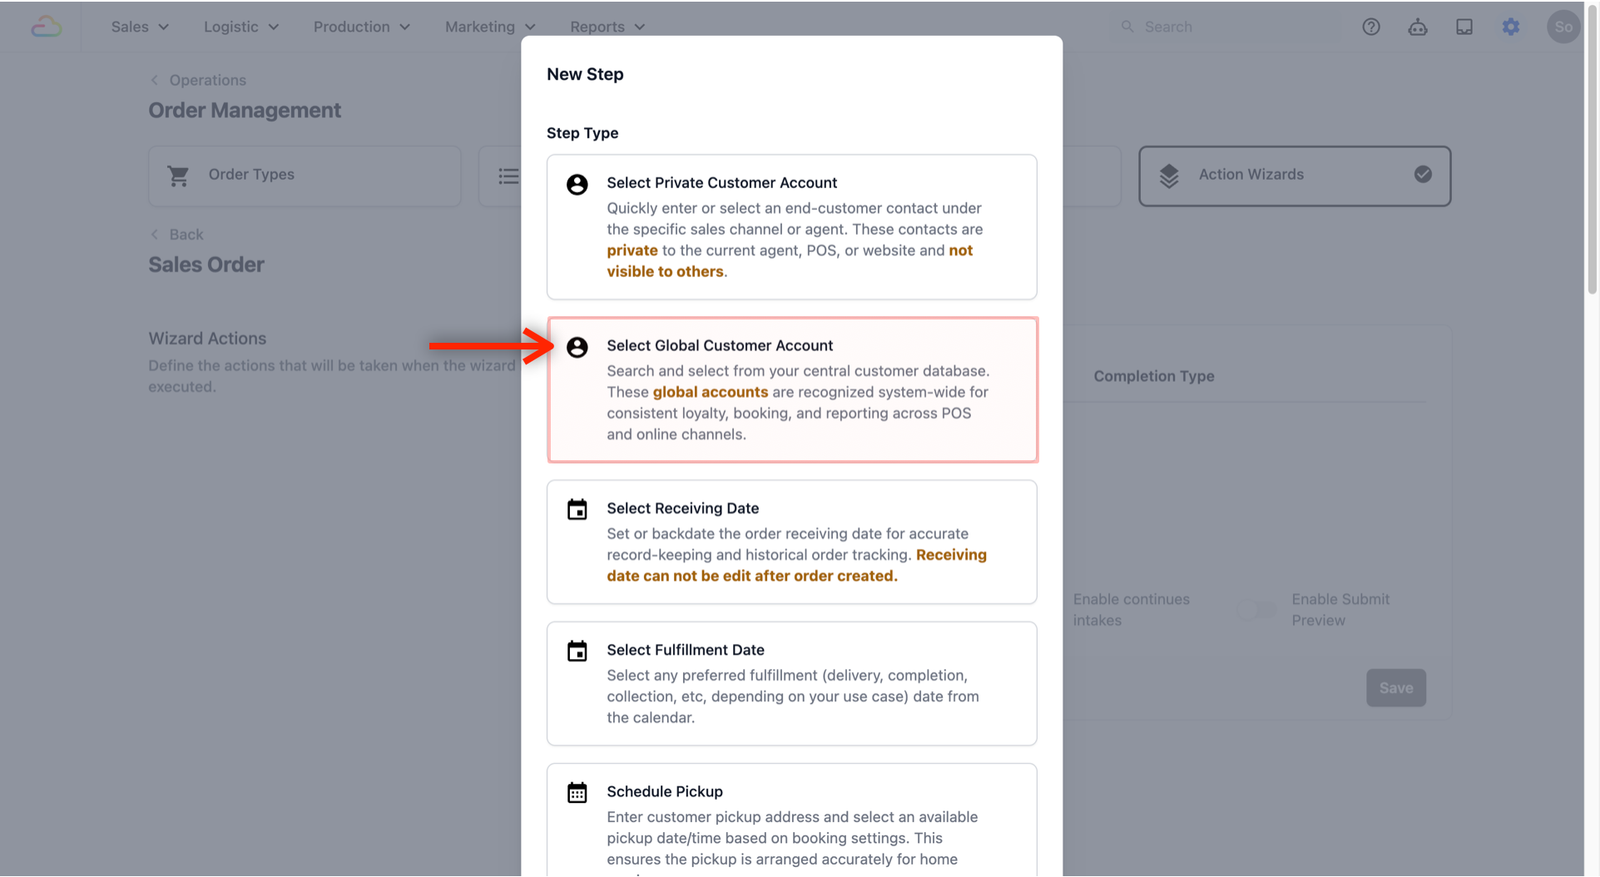
A pop-up window will appear. Here is how to set up your fields in the pop-up window:
- Step Name: The name appearing as a step in the process. Leave blank to use the default name.
- Completion Type: This decides if the step is mandatory.
- Required step: Staff must do this.
- Optional step: Can be skipped.
- On-demand: Available if needed.
- Add Action Step Display Rule: Used for hiding/showing steps based on specific criteria.
- Customer Listing Detail: The information displayed to the staff. Type the '@' symbol in the box and select the necessary information.
For this demonstration, we will leave everything as default and only fill in Customer Listing Detail to include the Customer's name.
When you are done, click on the Add button to add this new step.
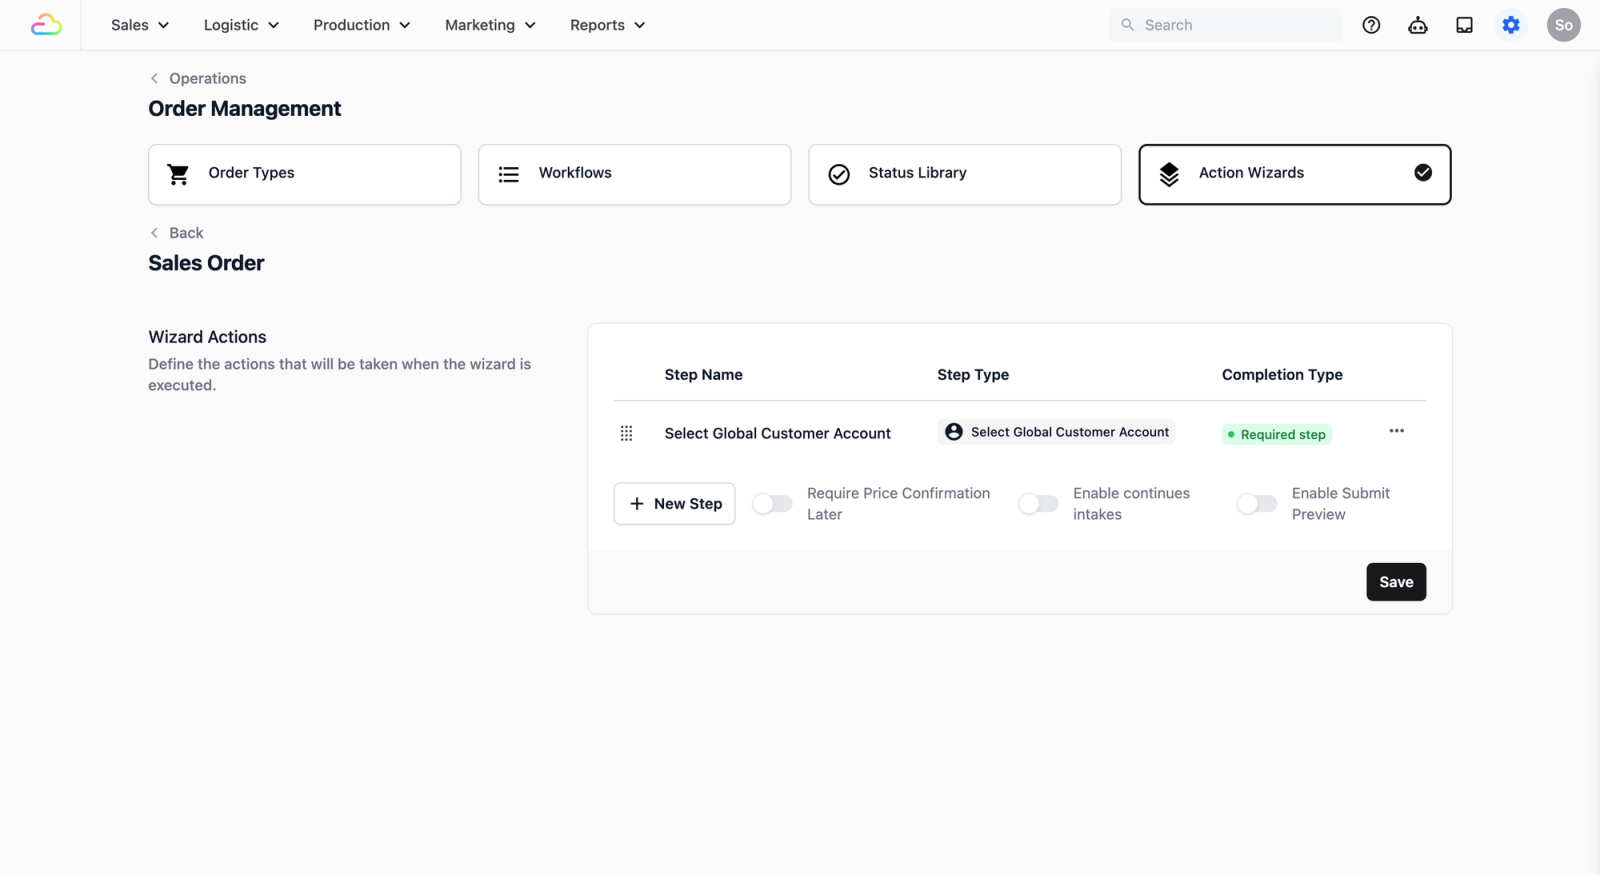
The new step should now show up in the table view of the Wizard Actions section.
Set up the Edit Order Line Items
Now that we have the customer linked to the sales order, the next step in this process is to use our price list to display the specific items (services or products) for the order.
Click on the + New Step button.
This time, select Edit Order Line Items from the Step Type list.
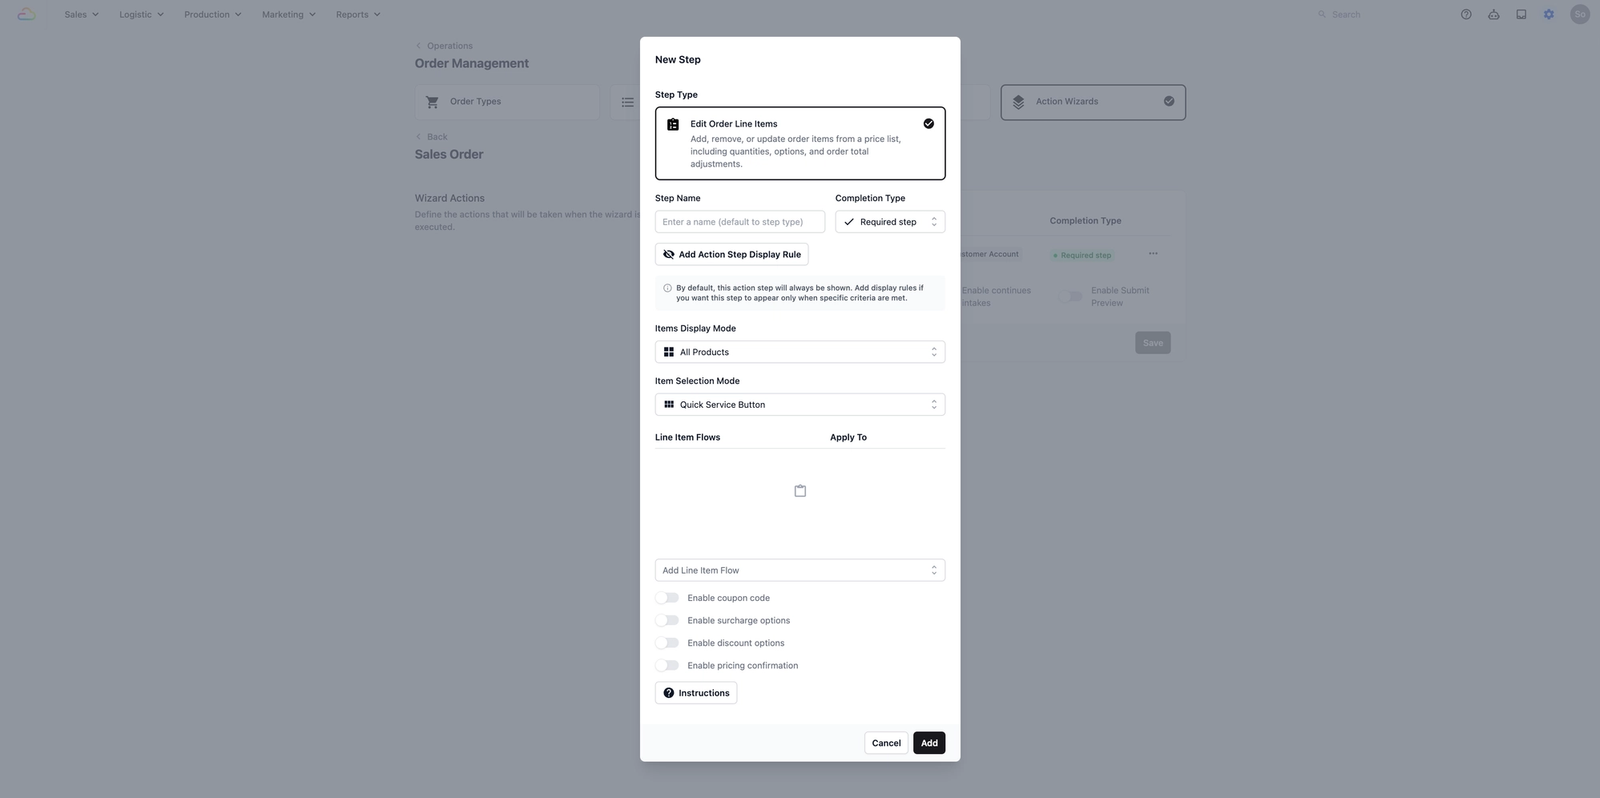
A pop-up window will appear. Here is how to set up your fields in the pop-up window:
- Step Name: The name appearing as a step in the process. Leave blank to use the default name.
- Completion Type: This decides if the step is required, optional, or on-demand.
- Add Action Step Display Rule: Used for hiding or showing steps based on specific criteria.
- Items Display Mode: This controls which items are shown. All Products shows everything, while Current Items Only limits the list based on your specific filters.
- Item Selection Mode:
- Quick Service Button: Best for fast selection with buttons directly under each item.
- Detailed Selection: Opens up a new page for items that require more complex choices.
- Line Item Edit Procedures: This allows you to add specific steps for individual items (See the note below for more information).
- Enable Toggles: You can switch the on/off buttons for Coupon codes, Surcharges, Discounts, or Pricing Confirmation depending on your workflow.
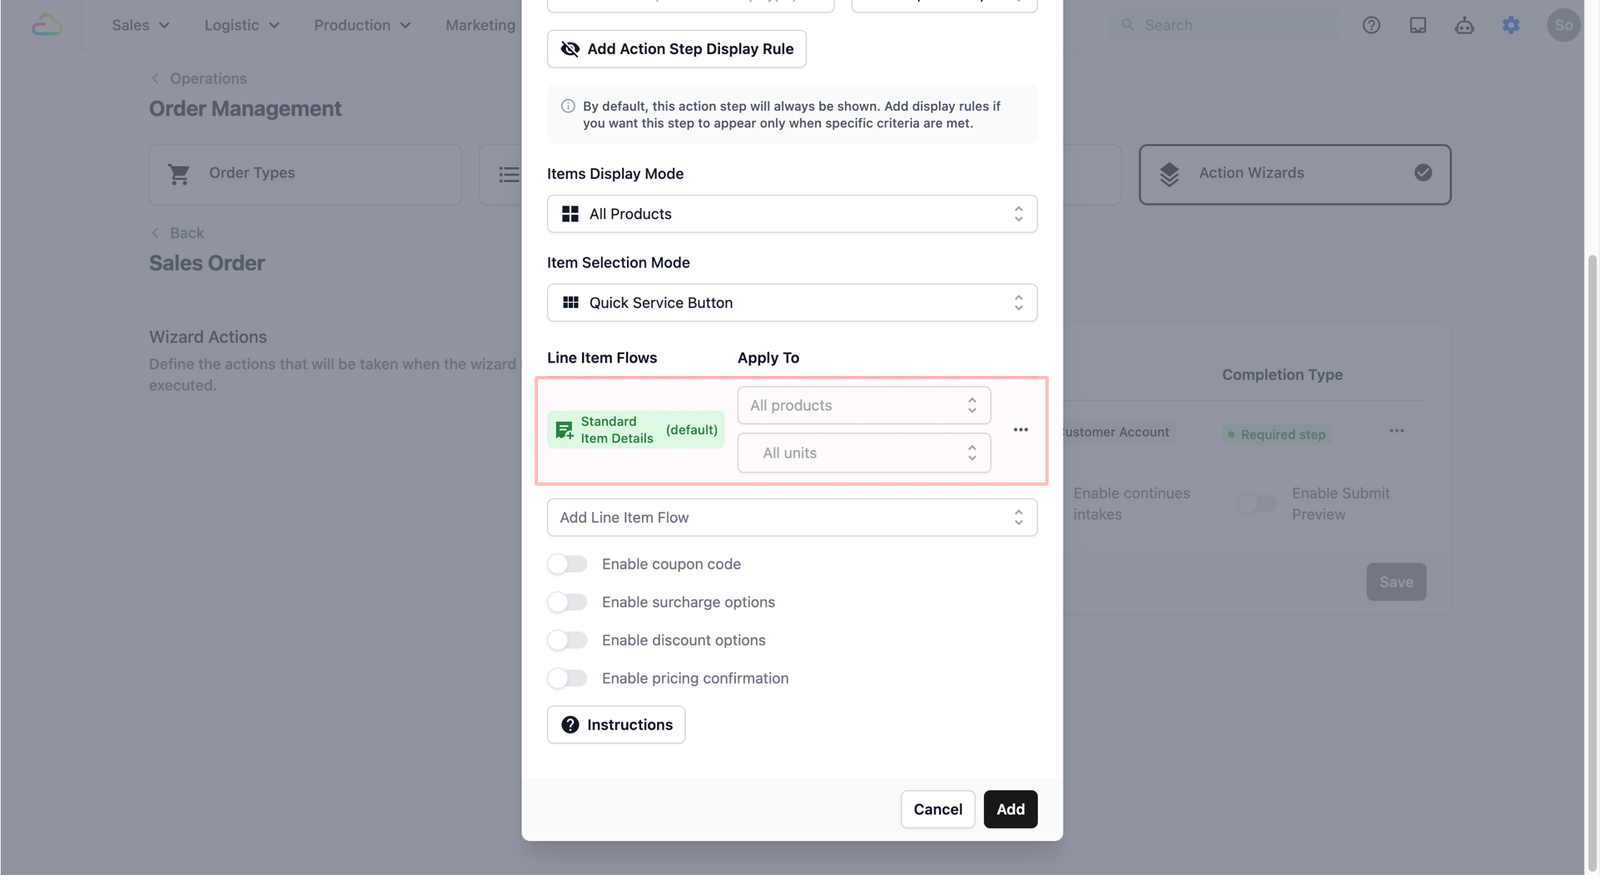
- For this demonstration, we will leave almost everything by default, and change the Line Item Edit Procedures to include what we have set up previously in the Line Item Entry Wizards section.
- When you select a procedure, you will also see an Apply To section appear next to it. This is where you can narrow down which items that procedure applies to — so the right steps show up for the right items automatically.
- There are two filters you can use:
- Product Type: Choose whether the procedure applies to All products (leave blank), only Service Items, or only Retail Products. For example, if your shop takes in garments for cleaning but also sells detergent over the counter, you might want one detailed intake procedure for service items (to capture things like garment type or stain notes) and a simpler one for retail products.
- Unit of Measure: Choose whether the procedure applies to All units (leave blank), or select one or more specific units such as pcs (pieces), pair, set, bundle, kg, sqft, ft, or inch.
- Click on the Add button when you are done with the set up for this step.
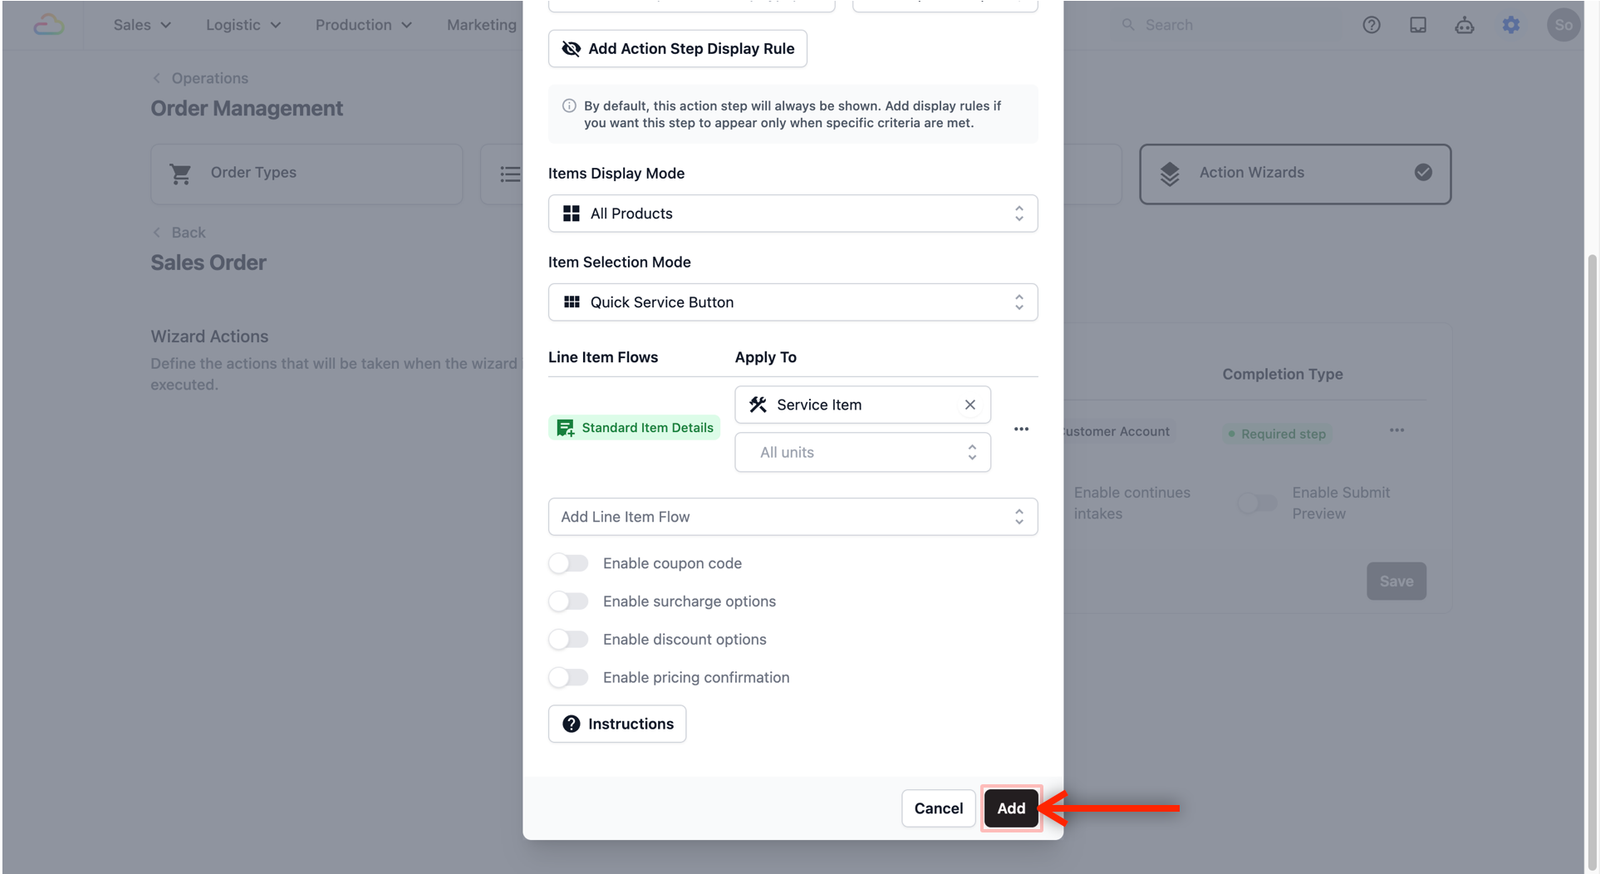
- The new step will now show up in the table view.
Closing the Order Entry Flow
To complete your Sales Order, you will add the final two steps: Fulfillment Date and Payment Collection. The process for adding these is exactly the same as the previous steps.
Fulfillment Date:
This ensures your staff records when the items will be ready for the customer.
- Click + New Step and select Select Fulfillment Date.
- A pop-up window will appear. Here is how to set up your fields:
- Step Name: The name appearing as a step in the process. Leave blank to use the default name.
- Completion Type: This decides if the step is required, optional, or on-demand.
- Add Action Step Display Rule: Used for hiding or showing steps based on specific criteria.
- Allow Past Dates: Check this box if you want to allow past dates, otherwise it is off by default.
- Click Add when done.
Payment Collection:
This allows you to finalize the order and record the transaction.
- Click + New Step and select Collect Payment.
- A pop-up window will appear. Here is how to set up your fields:
- Step Name: The name appearing as a step in the process. Leave blank to use the default name.
- Completion Type: This decides if the step is required, optional, or on-demand.
- Add Action Step Display Rule: Used for hiding or showing steps based on specific criteria.
- Payment Options: Choose from the dropdown menu the list of payment options you want tied to this sales order entry. The options will appear when the staff is settling payment with the customer.
- Click Add when done.
For a quick reference, we will show you how to find and add the Fulfillment Date and Collect Payment steps inside of the Wizard Actions section.
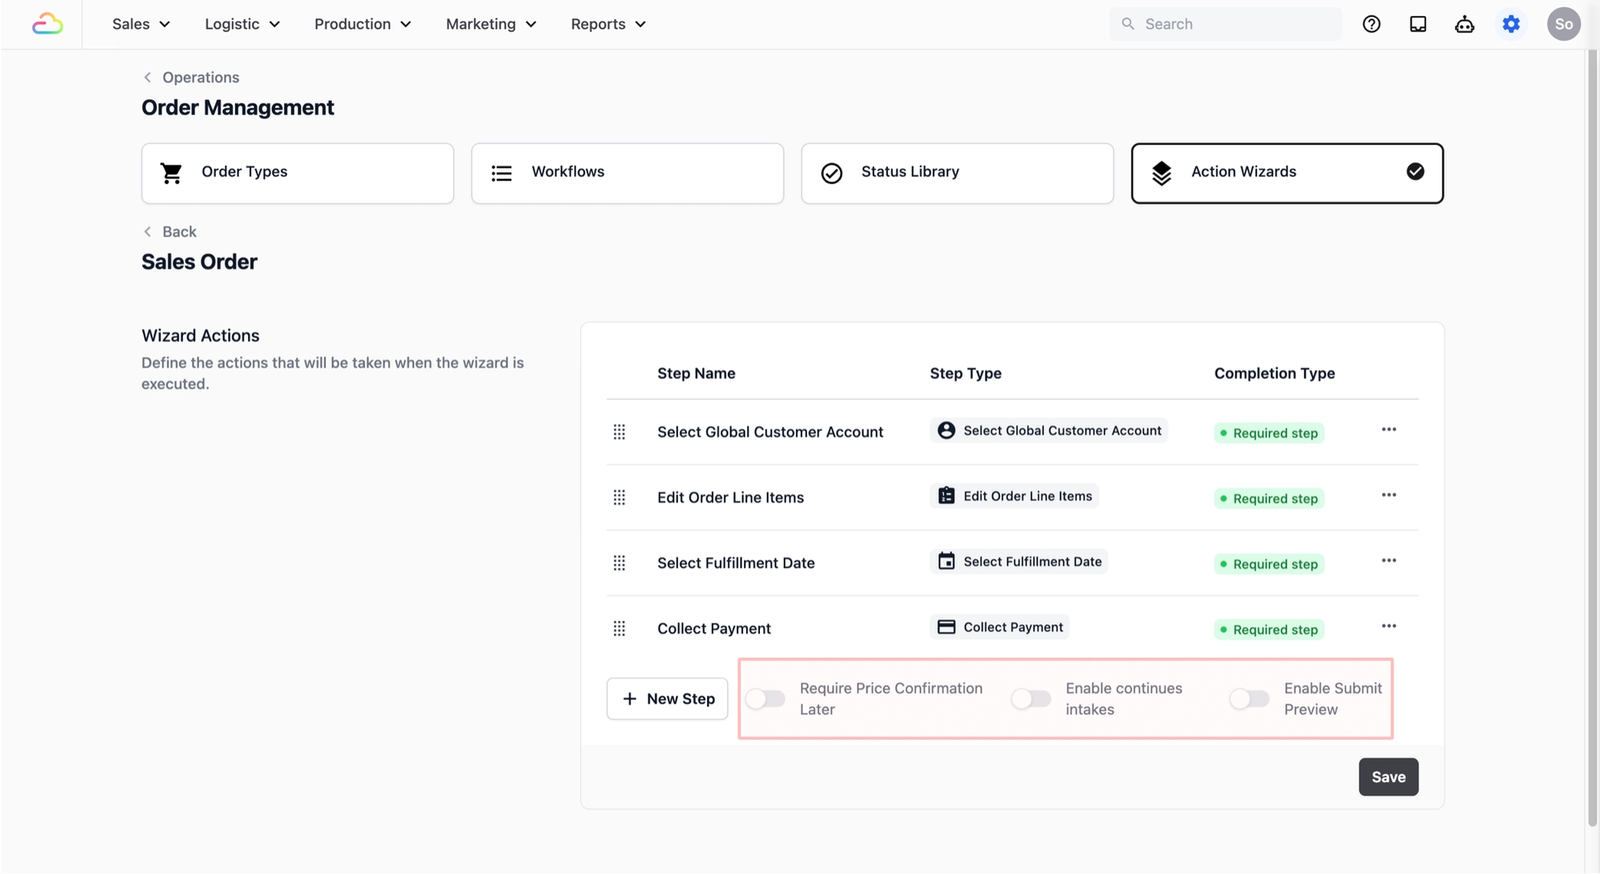
Additional Settings
Below the Wizard Actions table, you will see three toggle settings that control how the order entry behaves:
- Require Price Confirmation Later: Turn this on if the final price can only be determined after assessing the item (e.g., a bag repair or a laundry drop-off that needs to be sorted and weighed). Orders will be created as a draft marked Pending Confirm, and payment cannot be collected until the price is confirmed. Once your staff knows the final cost, they can update it from the Pending Price Confirmation panel and the order will continue as normal.
- Enable continues intakes: Turn this on if your staff frequently takes in multiple orders back to back. After completing one order, the system will automatically start a new order entry so your staff can keep going without navigating back.
Note: This is currently available on the mobile POS app only. On the web console and web POS, the system will redirect to the order that was just created instead.
- Enable Submit Preview: Turn this on to show your staff a summary of the order before it is submitted. This gives them a chance to review all the details and catch any mistakes before the order is created.
Save your Sales Order
Once you have added the steps necessary for your specific business use case, they will be listed in the Wizard Actions table.
- Rearrange: Simply drag and drop the steps if you want to change the order.
- Finalize: When you are done reviewing the list, click on the Save button at the bottom right to save your changes. This is now ready to link to your POS system, agents and more, ensuring your team captures the right details every time an order is created.
Step Types
When you clicked the + New Step button, you likely noticed many other options in the list. While we used the four most common steps for our demo, this section explains what each one does so you can choose the right steps for your business workflow.
Customer Identification
| Step Type | What It Does | When To Use It |
|---|---|---|
| Select Global Customer Account | Your staff selects a customer from your central database. | Use this to link orders to a customer for consistent loyalty points, order history, and reporting across all your locations. |
| Select Private Customer Account | Your staff selects a customer contact that is private to the specific POS, agent, or sales channel they are working on. These contacts are not visible to other parts of your system. | Use this if you want certain customer contacts to stay exclusive to a particular counter, agent, or channel — for example, walk-in customers registered only at a specific outlet. |
Order Items & Pricing
| Step Type | What It Does | When To Use It |
|---|---|---|
| Edit Order Line Items | Your staff adds, removes, or updates the services and products in the order from your Price List. | Use this as the standard way to build an order. This is the most common step for service businesses. (Note: Requires a Price List to be set up first.) |
| Enter Order Total Amount | Your staff types in a total price manually. | Use this if you want to skip adding individual items and just enter a lump sum (e.g., "$50.00" for a quick job). |
| Enter Order Total Items Quantity | Your staff enters how many items were received. | Use this if you only need to record the count (e.g., "5 items") without listing each one individually. |
Dates & Logistics
| Step Type | What It Does | When To Use It |
|---|---|---|
| Select Receiving Date | Records the date the order was received. | Use this for accurate record-keeping and historical tracking. Note: The receiving date cannot be edited after the order is created. |
| Select Fulfillment Date | Records when the order will be ready for the customer. | Use this to set a collection or delivery date (e.g., "Ready by Friday"). |
| Schedule Pickup | Prompts your staff to enter the customer's address and select an available time slot. | Use this for home pickup services where your team collects items from the customer's location. |
| Enter Tracking Number | Your staff enters a third-party tracking or reference number. | Use this if you ship items via an external courier and need to store the tracking number with the order. |
Documentation & Proof
| Step Type | What It Does | When To Use It |
|---|---|---|
| Take Photo | Your staff takes a photo for documentation. | Use this to record the condition of items before service — protects both you and your customer. |
| Capture Signature | The customer signs digitally on the screen. | Use this for order confirmations, service approvals, or proof of delivery. |
| Enter Note | Your staff adds remarks or special instructions. | Use this for anything extra that needs to be recorded with the order (e.g., "Customer requests express service" or "Deliver to side gate"). |
| Enter Order Number | Your staff types in an order number manually. | Use this only if you do not want the system to auto-generate order numbers and prefer to use your own numbering system. |
Finalizing & Customizing
| Step Type | What It Does | When To Use It |
|---|---|---|
| Collect Payment | Your staff collects payment using the methods you have configured. | Use this to finalize the order and record the transaction. You can choose which payment methods are available (e.g., Cash, Visa, PayNow, Store Credit). |
| Data Entry | Capture data using system fields (e.g., signature) or custom data fields you have created for your business. | Use this when you need to collect specific information — such as a signature, an estimated completion date, or any custom fields you have set up. If your business has unique requirements, you can create your own fields and they will appear here. Click here to learn how to set up Custom Data Fields → |
| Block | Use a flow block to define what this step does. | Use this when you need your staff to complete a specific action during the order entry — such as capturing a signature, filling in a text field, or taking a photo. Blocks are flexible and can be configured for different purposes depending on your business needs. |
Give feedback
Up next
Set up the Status LibraryDefine the stages your orders go through, from the moment they come in to when they are completed.
Read more