Setting up your Price Lists
In this article
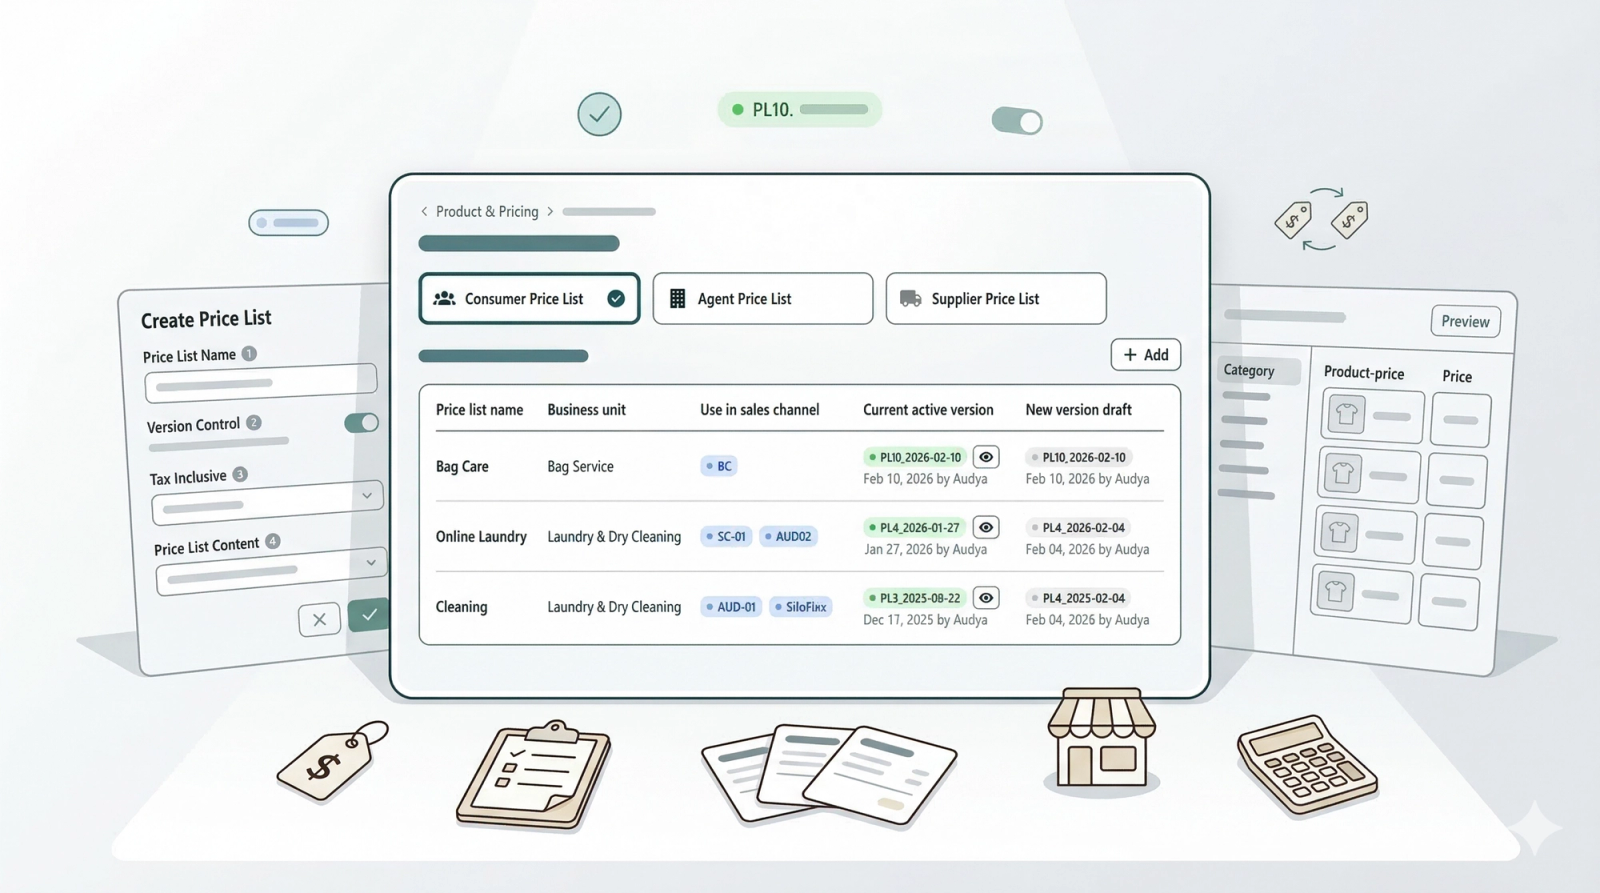
Use the Price Lists page to manage different pricing structures for your customers and agents. You can create multiple price lists to handle different scenarios, such as standard pricing, express service rates, or VIP memberships.
Contents
Contents
Before You Start
Make sure the following are set up before creating your first price list:
- Product Catalog — Your products and services need to exist before you can add them to a price list. Set up your Product Catalog if you haven't already.
- Business Portfolio (including tax settings) — Your tax name and rate must be configured so the price list knows how to handle tax. Go to Settings > Business Portfolio, click the three dots on your portfolio > Edit, scroll to Sales Tax, enable it, and enter your tax name and rate.
- Sales Channels — You'll need at least one sales channel (e.g. POS, Mobile App) configured so you can assign the price list when you publish.
Consumer Price Lists
How to access Price Lists
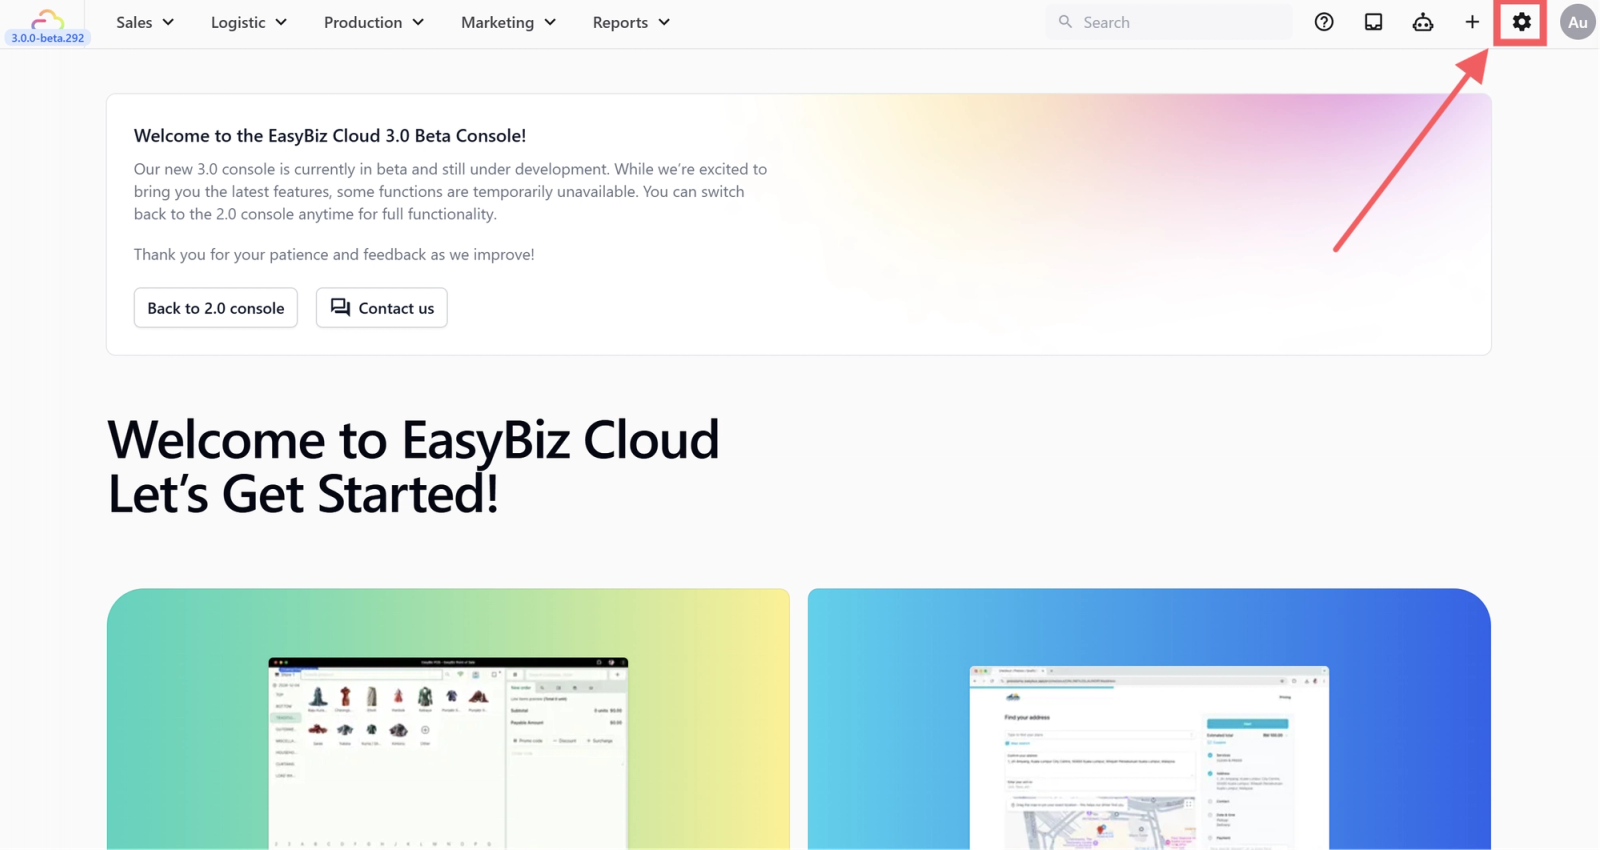
1. Go to Settings from the top navigation bar
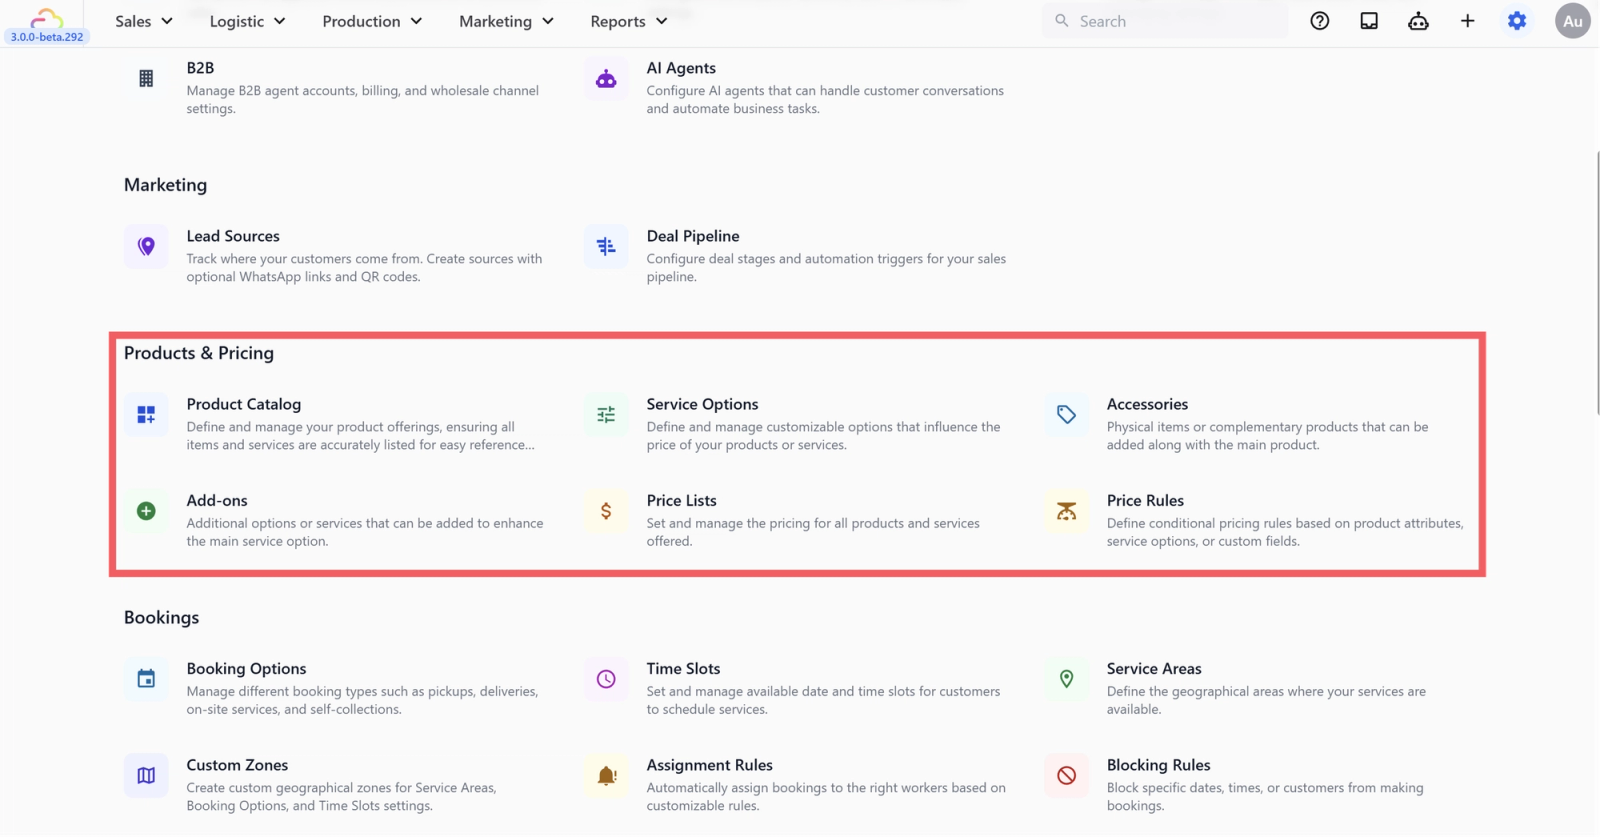
2. Scroll down to the Products & Pricing section
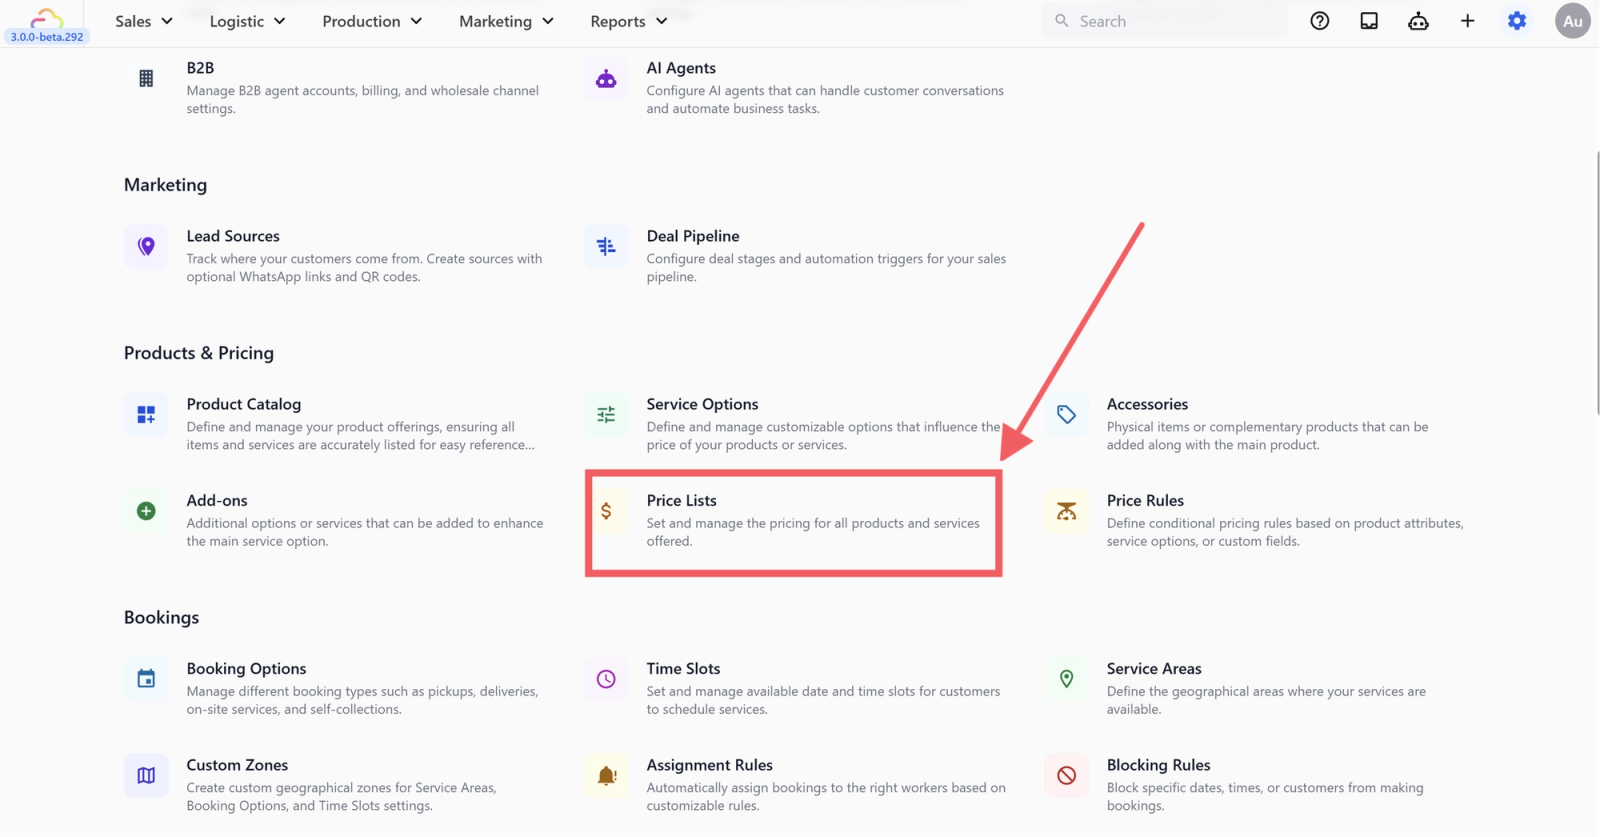
3. Click Price Lists
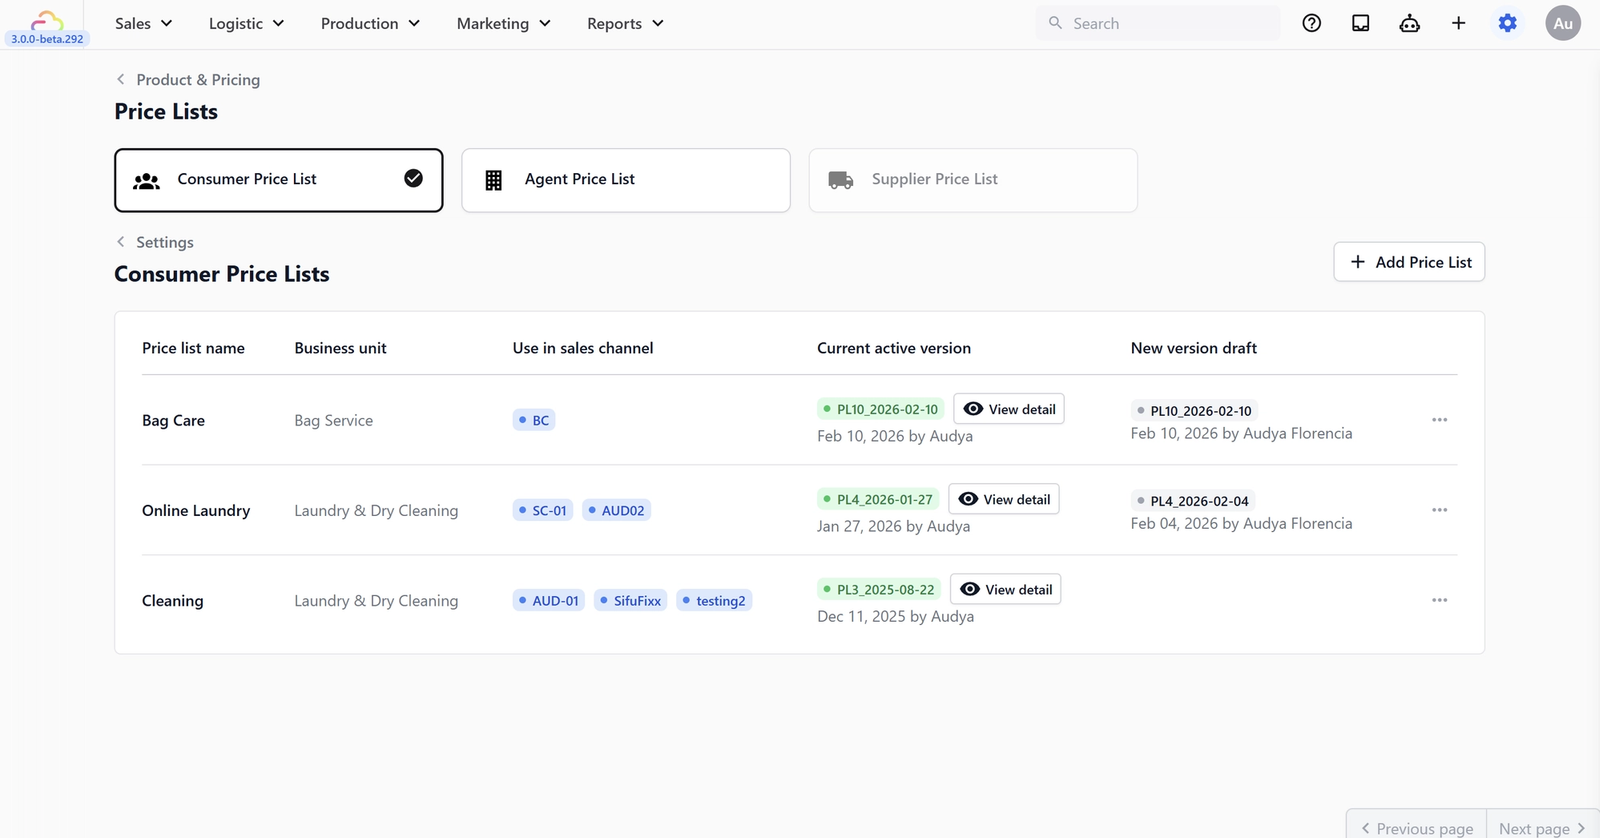
You will enter the Consumer Price Lists tab by default. Here, you can view all existing lists.To create a new list, click the +Add Price List button in the top right corner.
Creating a New Price List
When creating a price list, complete the following fields:
1. Price List Name — Enter a name that clearly identifies your pricing level (e.g. "Standard," "Express," or "VIP").
2. Enable Version Control (Change Tracking) — This controls what happens to existing orders when you update prices:
- Yes: Price list updates apply only to new orders. Previous orders keep their original pricing. This is best for maintaining historical accuracy.
- No: Price list updates apply to all orders, including open ones. This is useful if you are correcting a pricing error.
3. Are Prices Tax Inclusive? Determine how tax is calculated:
- No, Tax Excluded: The price shown is the base price. Tax is calculated at checkout based on your settings.
- Yes, GST Included: The price shown is the final amount the customer pays. You must input the specific GST rate.
- Yes, VAT Included: The price shown is the final amount. You must input the specific VAT rate.
4. Price List Content
- Copy from existing: Select an existing price list from the dropdown to duplicate its structure and prices.
- Leave empty: Start from scratch. You will manually add products from your Product Catalog.
Editing the Price List
Once created, the editor page will open.
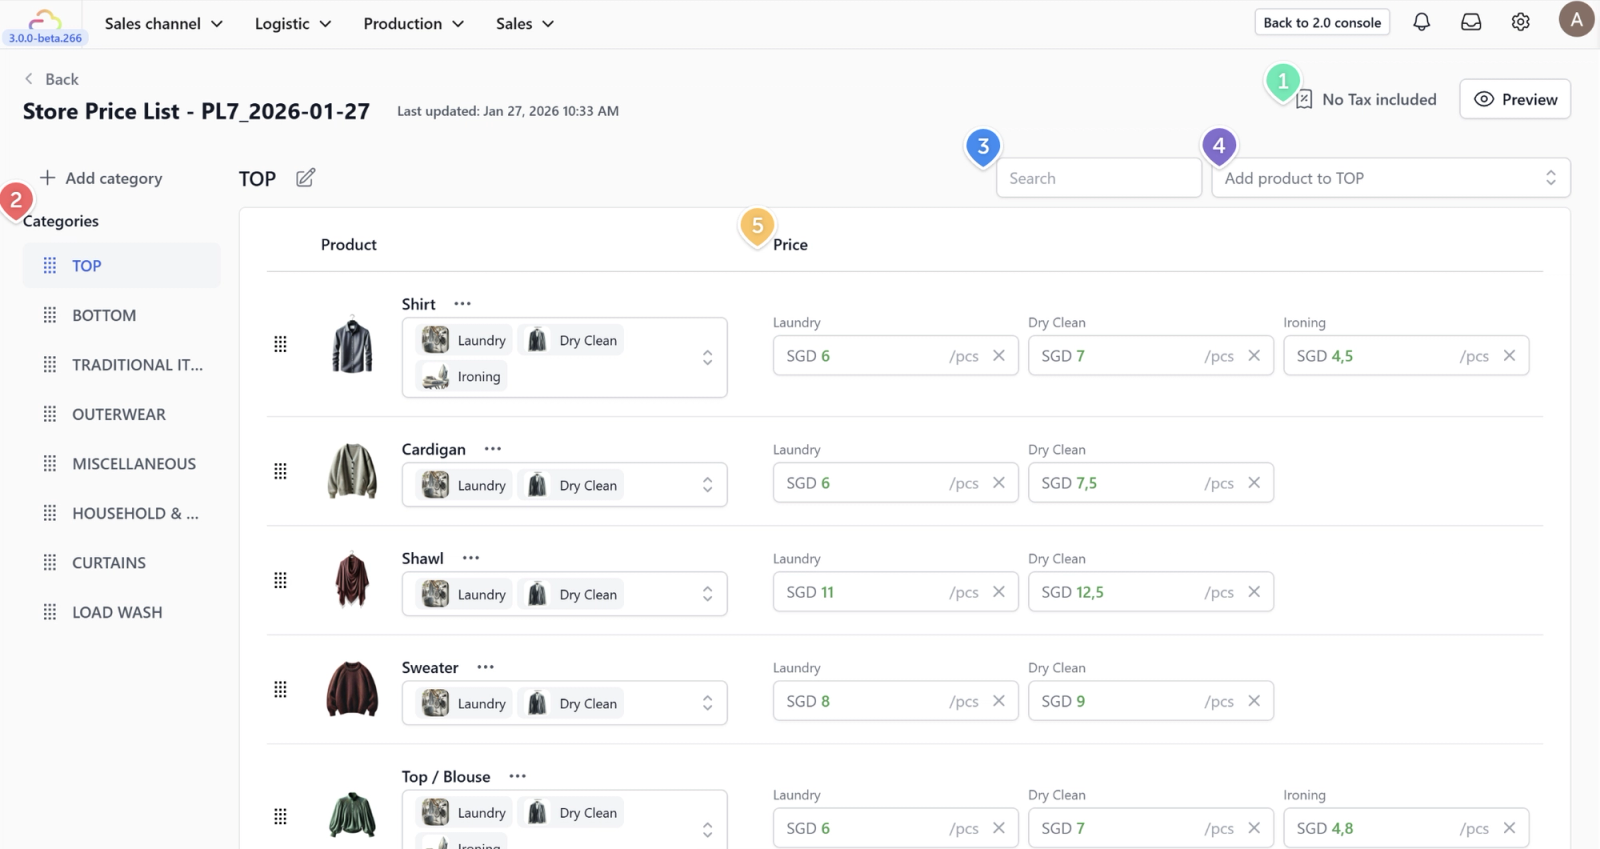
If you copied an existing price list:
- Tax Toggle: You can switch between tax-inclusive or exclusive modes here.
- Categories: View your service categories. You can rename them or drag to reorder.
- Search Bar: Use this to quickly find a specific item to edit.
- Add Product: Click the dropdown to manually add items from your Product Catalog.
- Pricing Column: Click on any price field to adjust the value for that product.
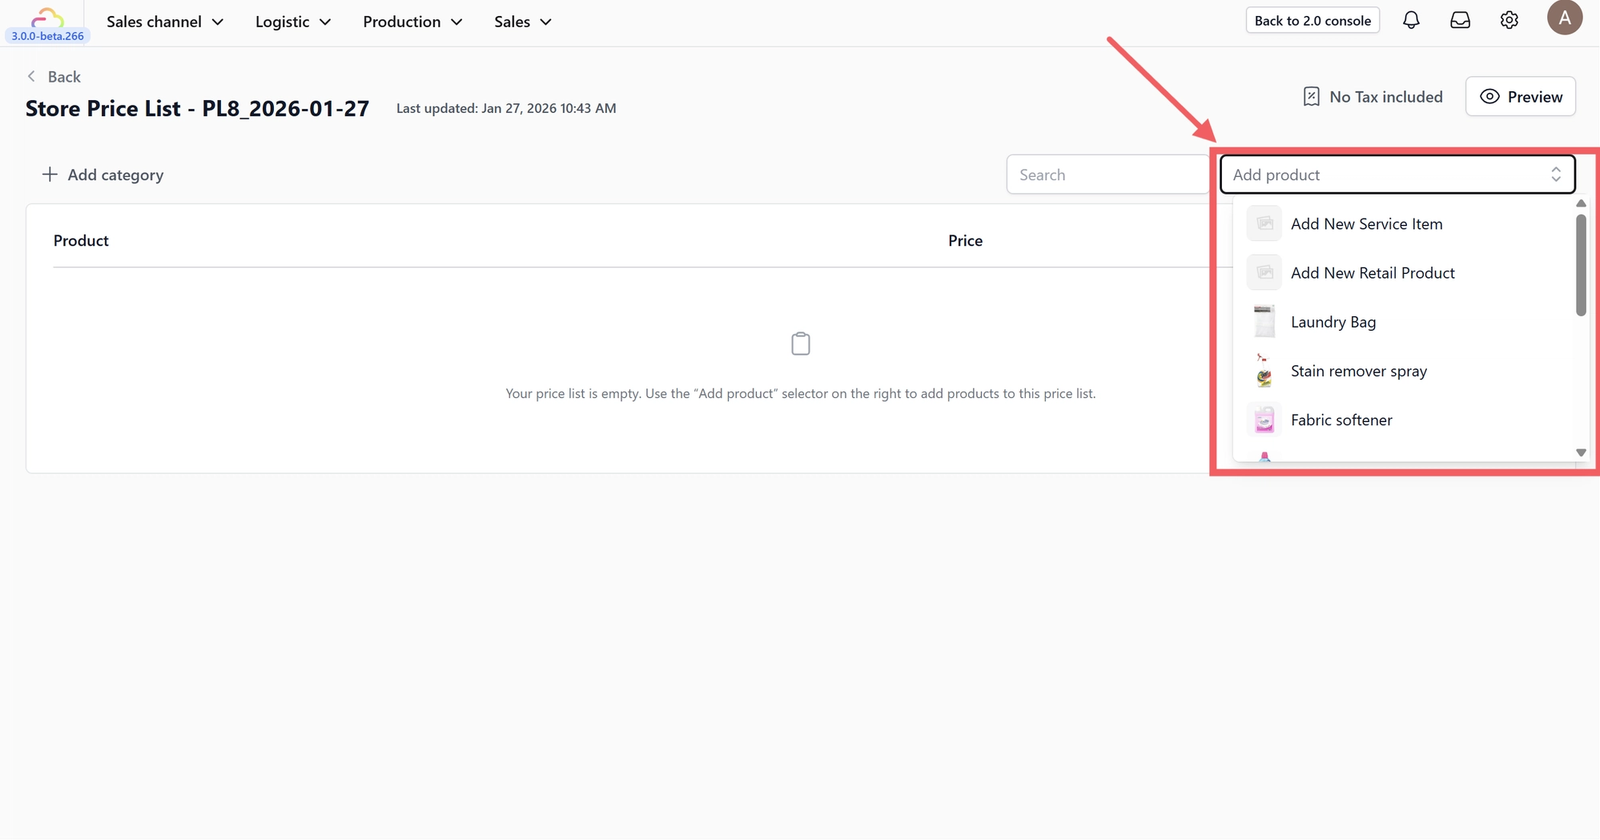
If you started with an empty price list:
The table will be blank. Here's how to build it up:
- Click the Add Product dropdown in the top-right corner
- Select Add New Service Item or Add New Retail Product, or pick an existing product from the list (e.g. "Laundry Bag," "Stain remover spray")
- Once added, click on the Price field next to each product to enter your pricing
- Repeat for all products you want to include
Preview & Publish
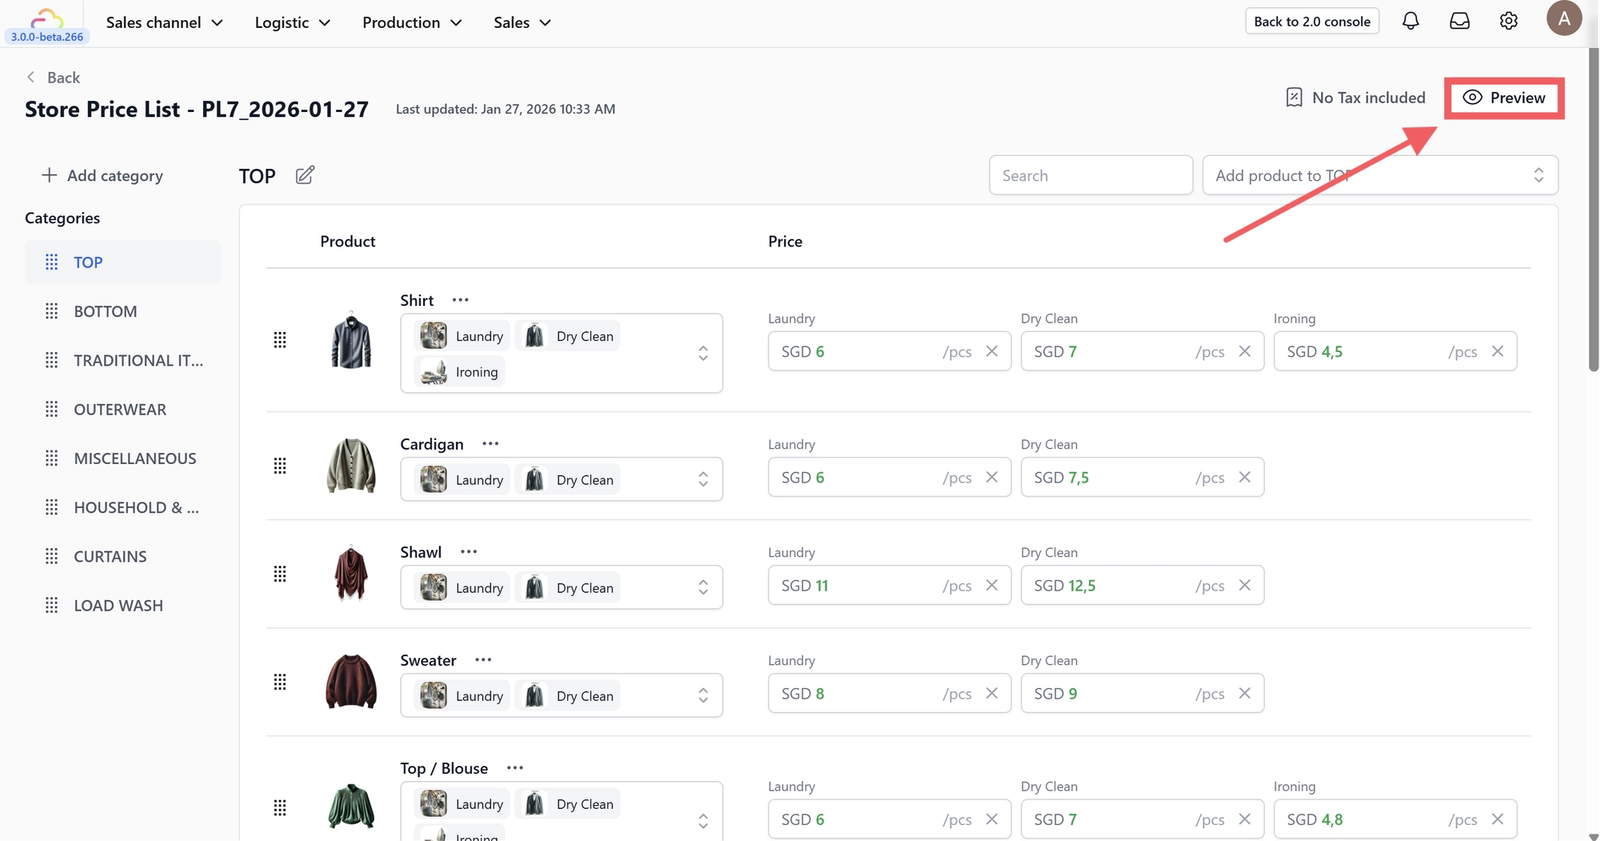
Preview: Click the Preview button to review how the prices will look to the end-user.
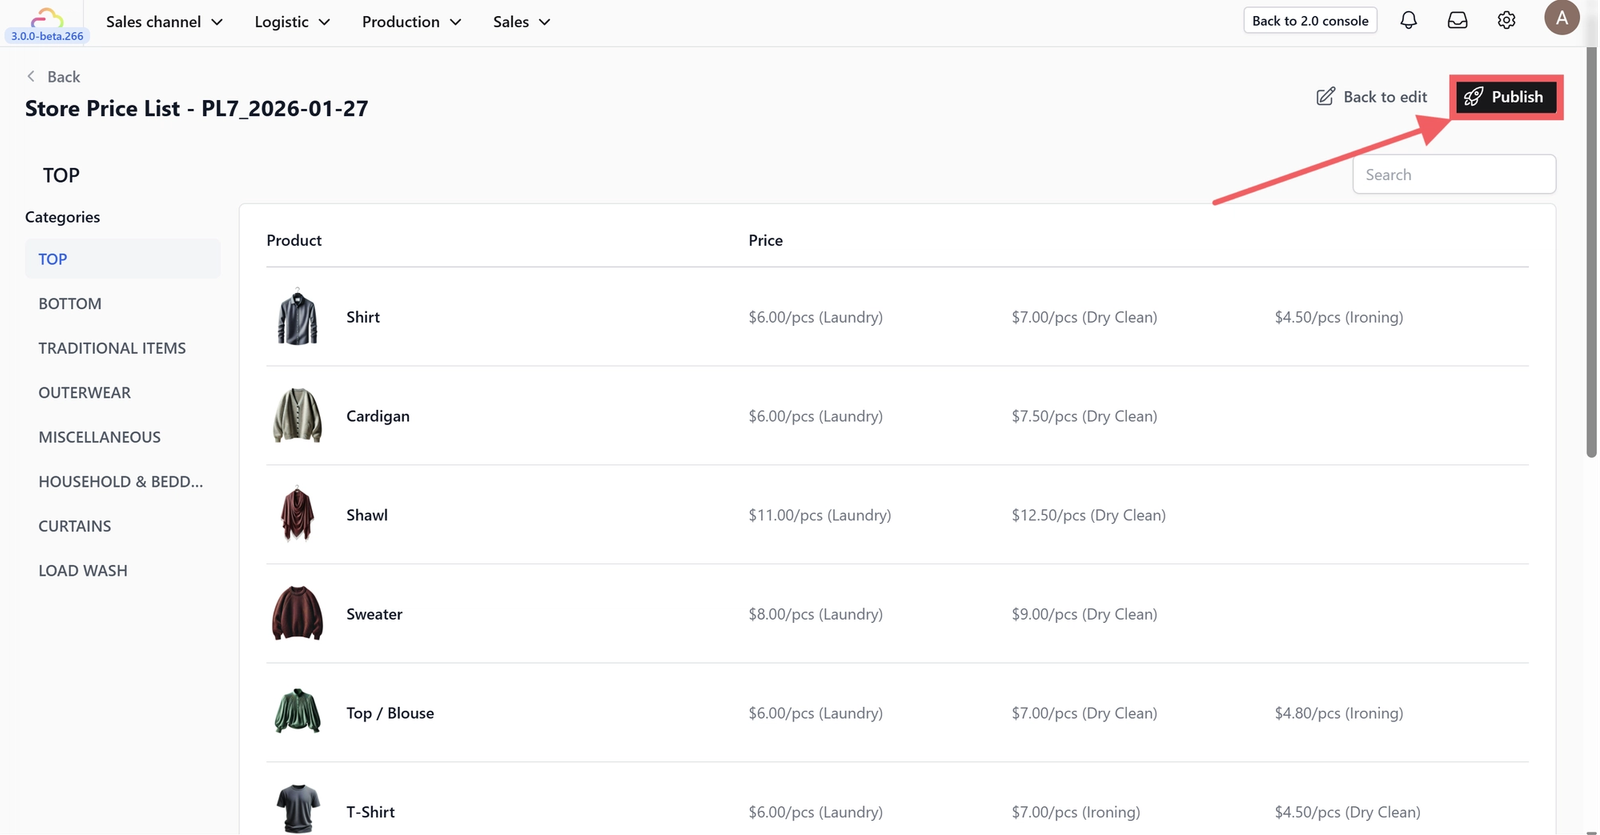
Publish: Click Publish.
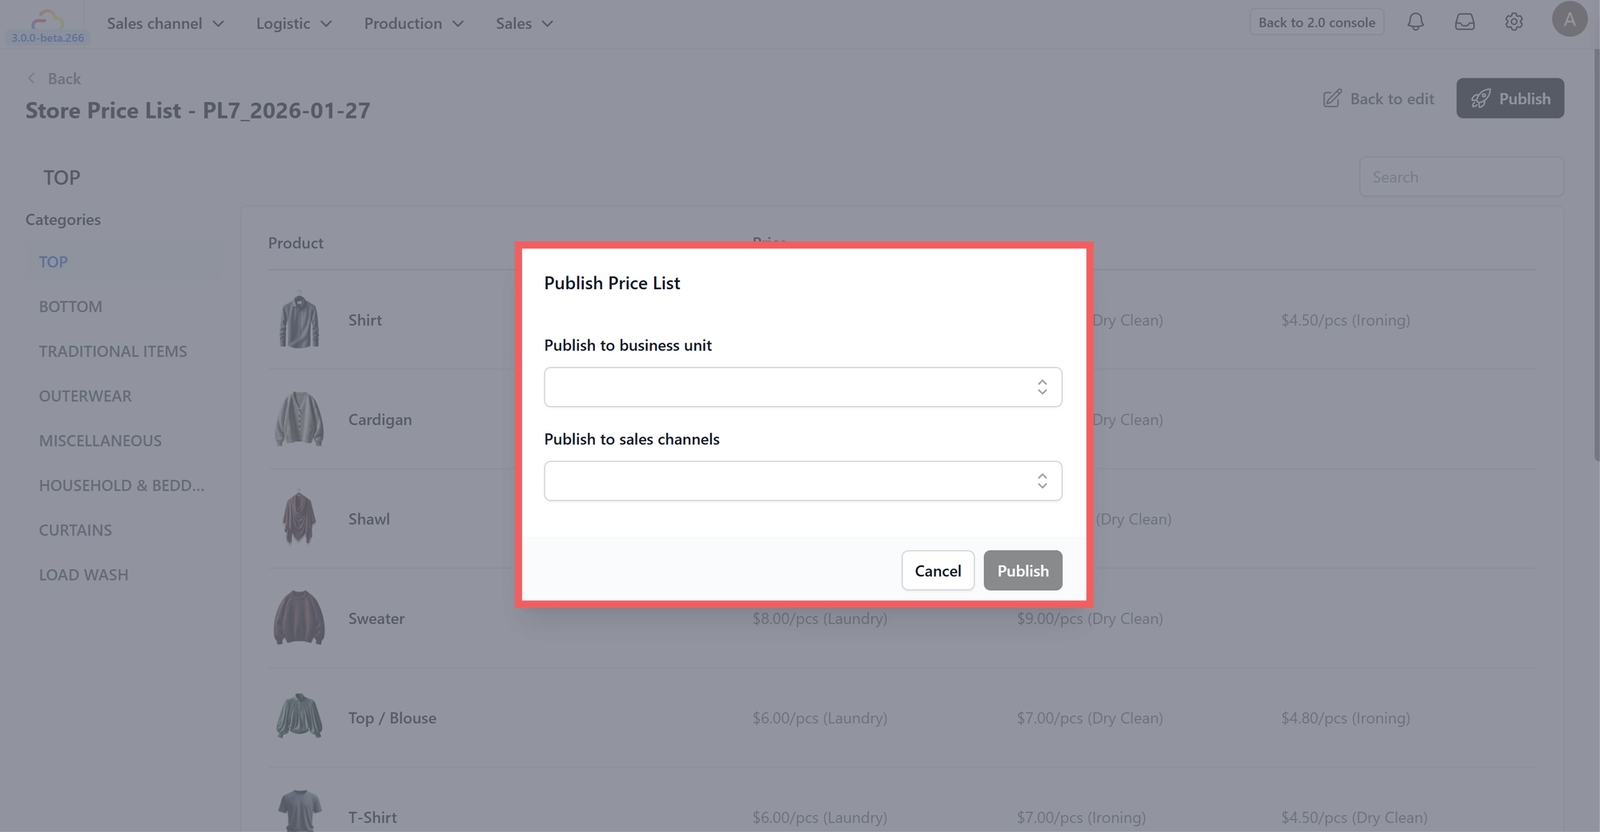
A pop-up window will appear asking for two settings:
- Business Unit — This is the branch or division of your business that will use this price list (e.g. "Laundry & Dry Cleaning" or "Bag Service"). You set these up in Settings > Business Portfolio. If you only have one business unit, select it.
- Sales Channel — This determines where your customers will see these prices. For example, selecting "POS" means the prices will be used at your shop counter; selecting "Mobile App" means online customers will see them. You can select multiple channels.
Once you click Publish, the price list goes live immediately — your staff and customers will see the new prices on the channels you selected. The list will appear in the main table with its active version number.
Managing Active Price Lists
On the main Consumer Price Lists page, you can manage published lists using the table actions:
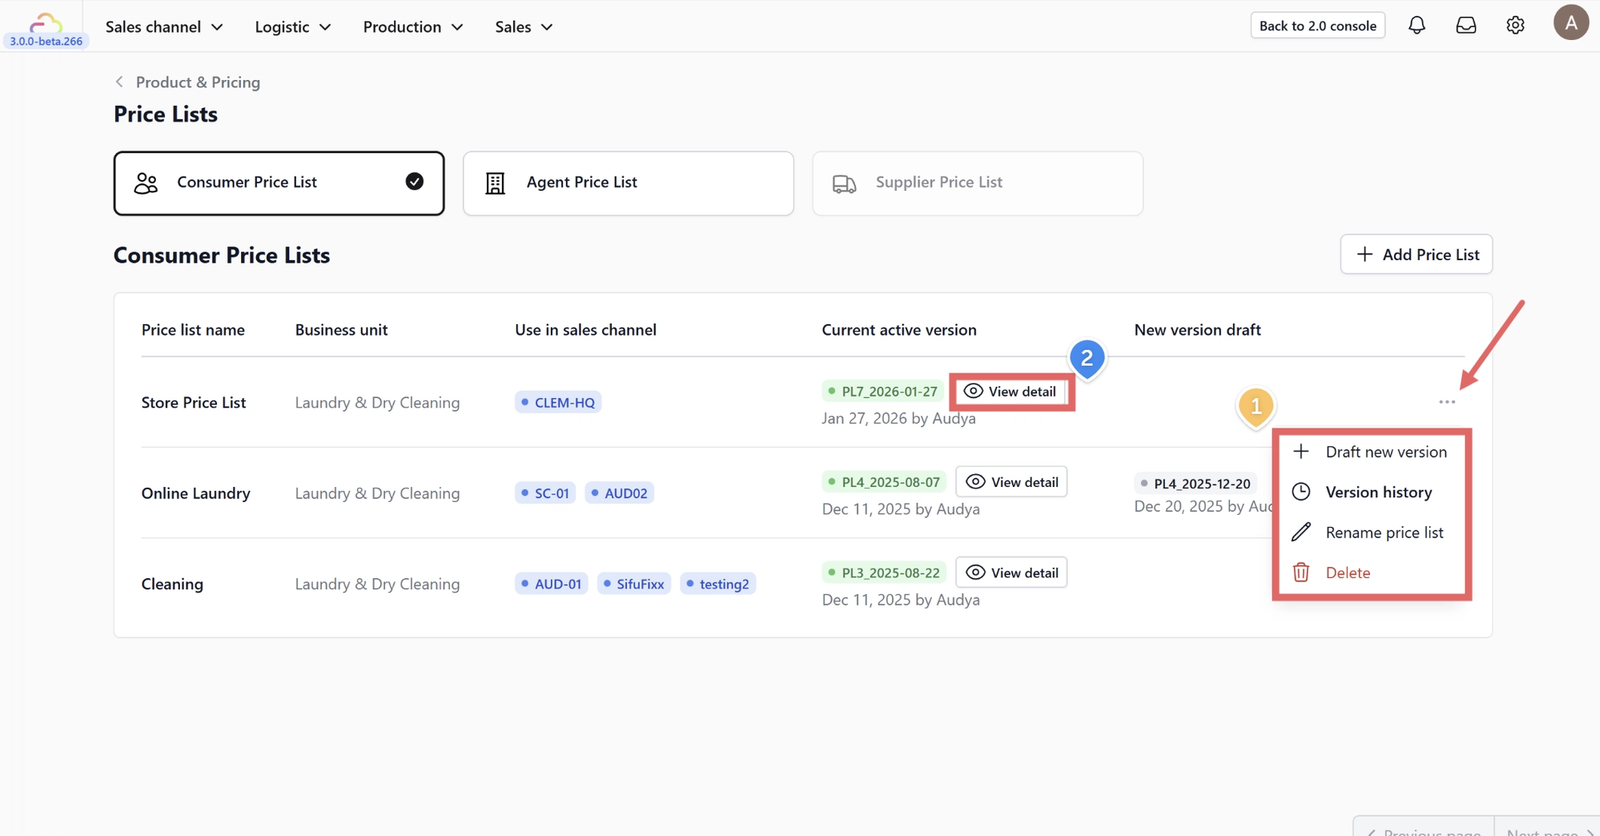
- More Options (Three Dots Menu):
- Draft New Version: Edit the current price list. This creates a new draft without affecting the live version immediately.
- Version History: View a log of previous versions and changes made to this list.
- Rename: Change the internal display name of the list.
- Delete: Permanently remove the price list. A confirmation step will appear before anything is deleted. Deleting a price list does not affect orders that were already placed using it — those orders keep their original pricing. However, any sales channel currently using this list will no longer have pricing assigned, so make sure you've published a replacement list first.
2. View Detail: Click the View Detail button to see the full price list. From here, you can also Export the data.
Agent Price Lists
What is an Agent Price List? Agent Price Lists are separate pricing structures designed for B2B partners, franchisees, or resellers — anyone who isn't your direct end customer. These typically feature wholesale rates or commission-based pricing that differ from what your walk-in customers pay.
For example, if you work with a laundry collection agent who picks up orders on behalf of customers, you might offer them lower rates since they're bringing you volume. The Agent Price List lets you maintain those special rates separately from your consumer pricing.
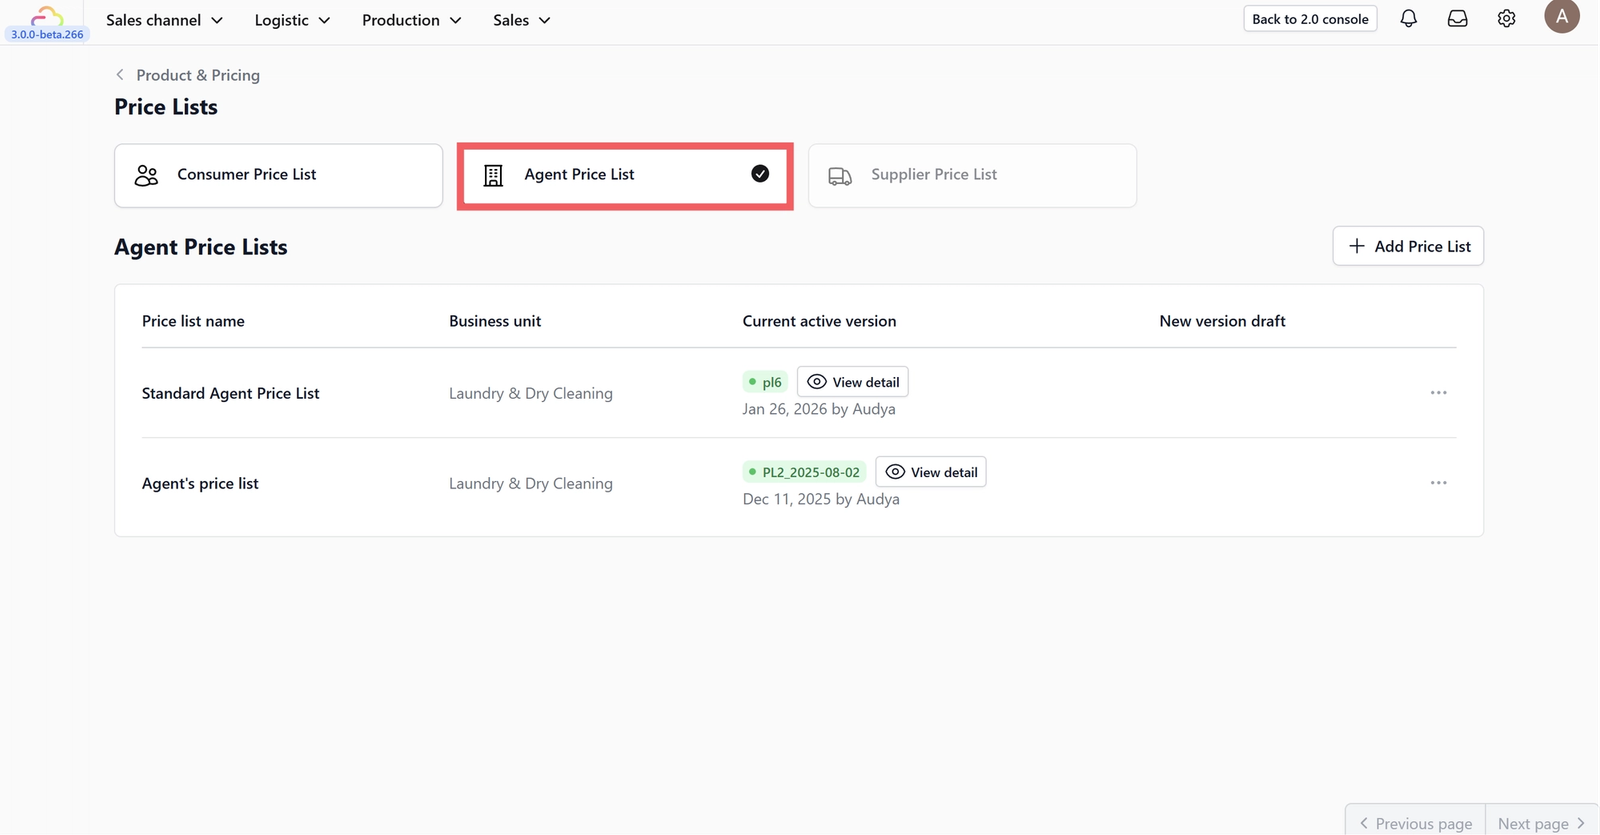
How to set it up: The process is the same as creating a Consumer Price List — click on the Agent Price List tab and follow the steps above. The only difference is that when you publish, you'll assign it to the sales channels your agents use rather than your customer-facing channels. For a more detailed walkthrough, see Create an Agent Price List.
Give feedback
Up next
Recurring SchedulerSet up repeat pickup or delivery orders so your regular customers do not need to book again every week or month.
Read more