
Setting Up Customer Notifications
In this article
Customer Notifications work by connecting a customer event to a message template. After you set one up, EasyBiz watches for that event and sends the selected Email or WhatsApp template to the customer automatically. This guide walks you through creating one notification, then gives you ready-to-copy setups for the most common customer moments.
Contents
Contents
How the setup works
Each notification needs three choices.
| Choice | What it does |
|---|---|
| Trigger Event | Decides when the message is sent |
| Email Template | The email to send. Optional. Must be published |
| WhatsApp Template | The WhatsApp message to send. Optional. Must be approved |
You can choose an Email template, a WhatsApp template, or both.
Set up a customer notification
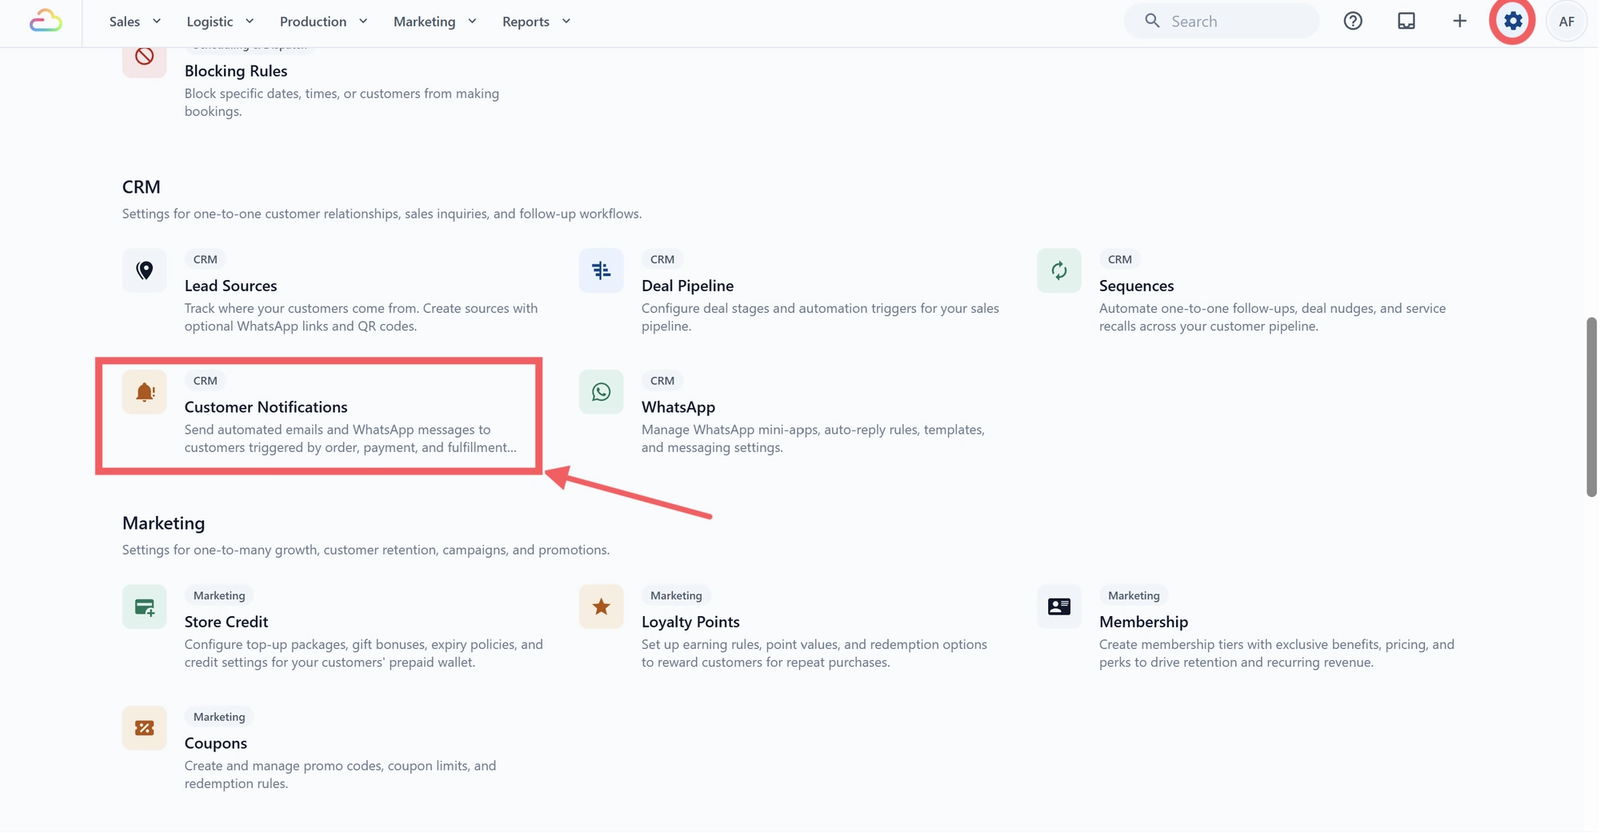
- Click the ⚙️ Settings icon in the top-right corner.
- Under the CRM section, click Customer Notifications.
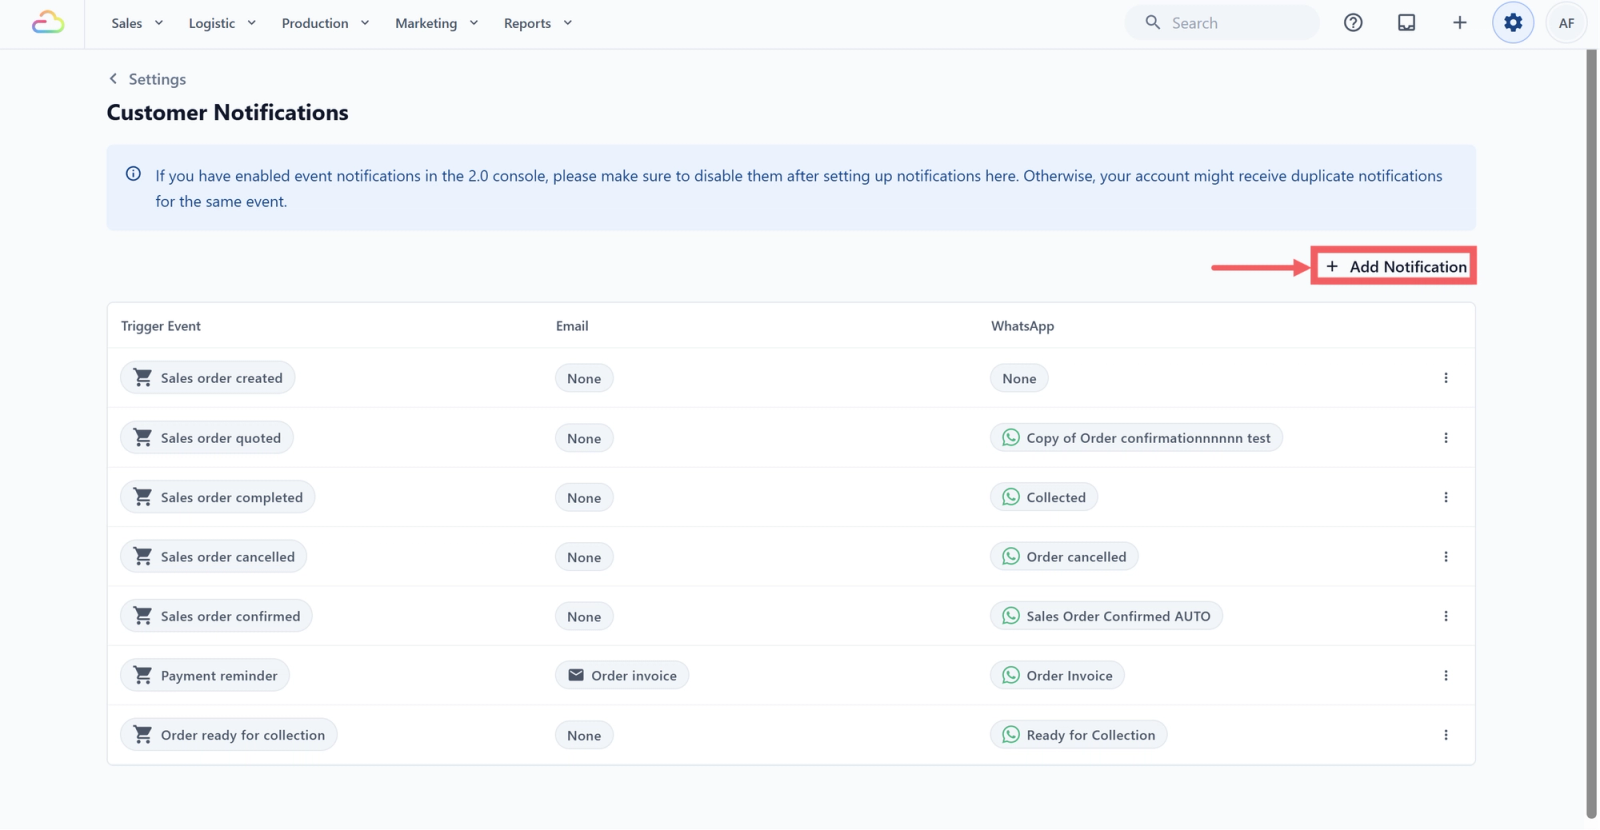
- On the Customer Notification page, click Add Customer Notification.
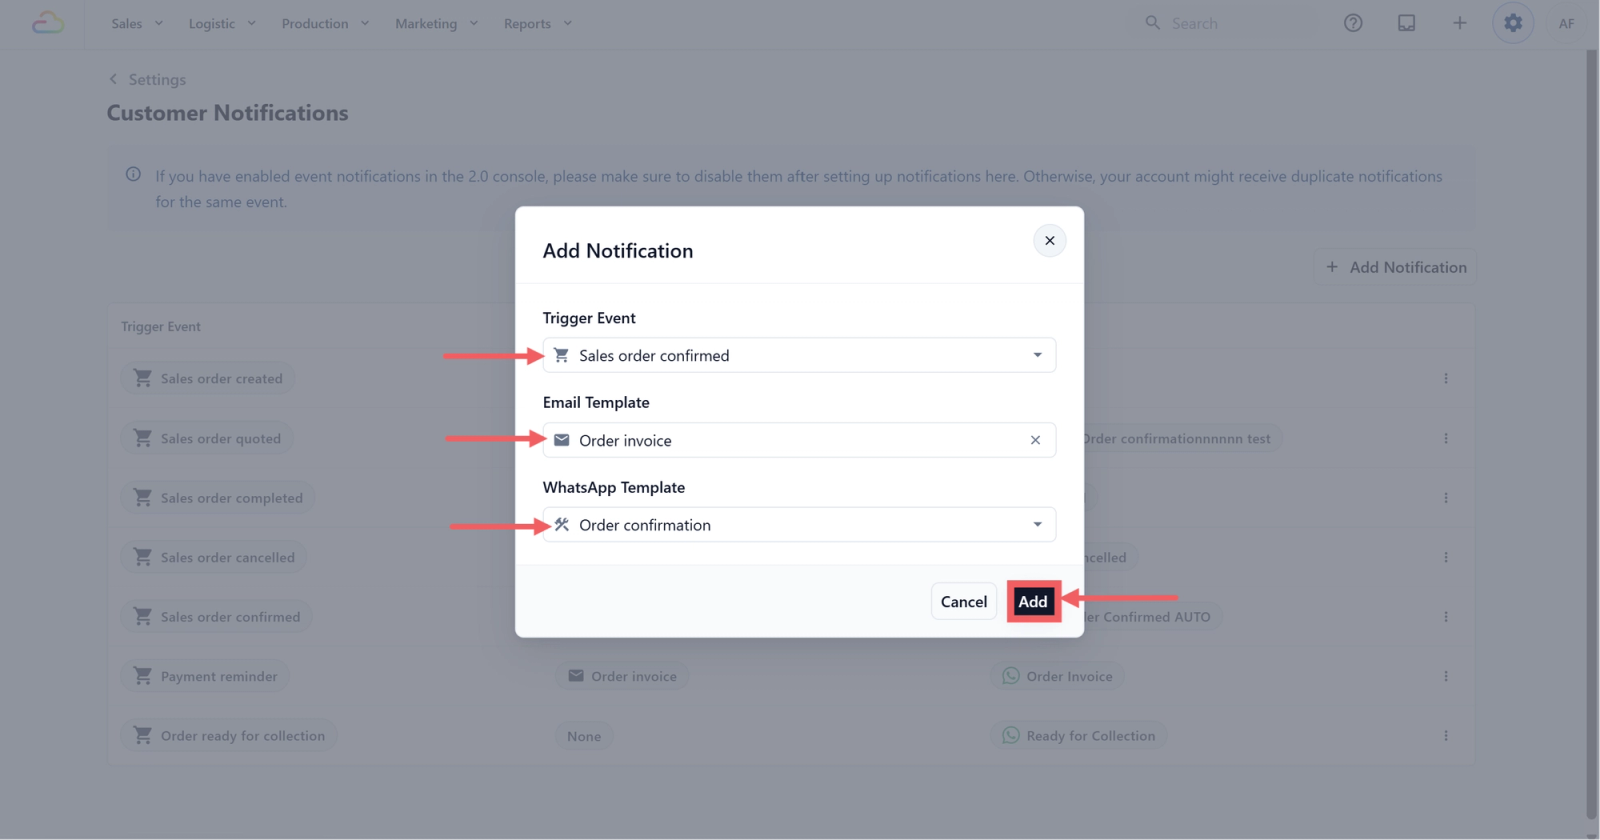
- Choose the Trigger Event you need, then select an Email Template, a WhatsApp Template, or both.
- Click Add.
Common notifications to set up
Every notification follows the same pattern: pick the trigger event, then connect the template you want to send. Here are five common setups to start with.
| Customer moment | Trigger Event | Template to choose |
|---|---|---|
| Order confirmed or invoice | Sales order confirmed | Email: Order invoice / WhatsApp: Order confirmed |
| Ready for collection | Order ready for collection | WhatsApp: Ready for collection |
| Payment receipt | Payment succeeded | Email: Payment receipt / WhatsApp: Payment receipt |
| Pickup completed | Logistic pickup completed | WhatsApp: Pickup completed |
| Delivery completed | Logistic delivery completed | WhatsApp: Delivery completed |
Editing and Deleting
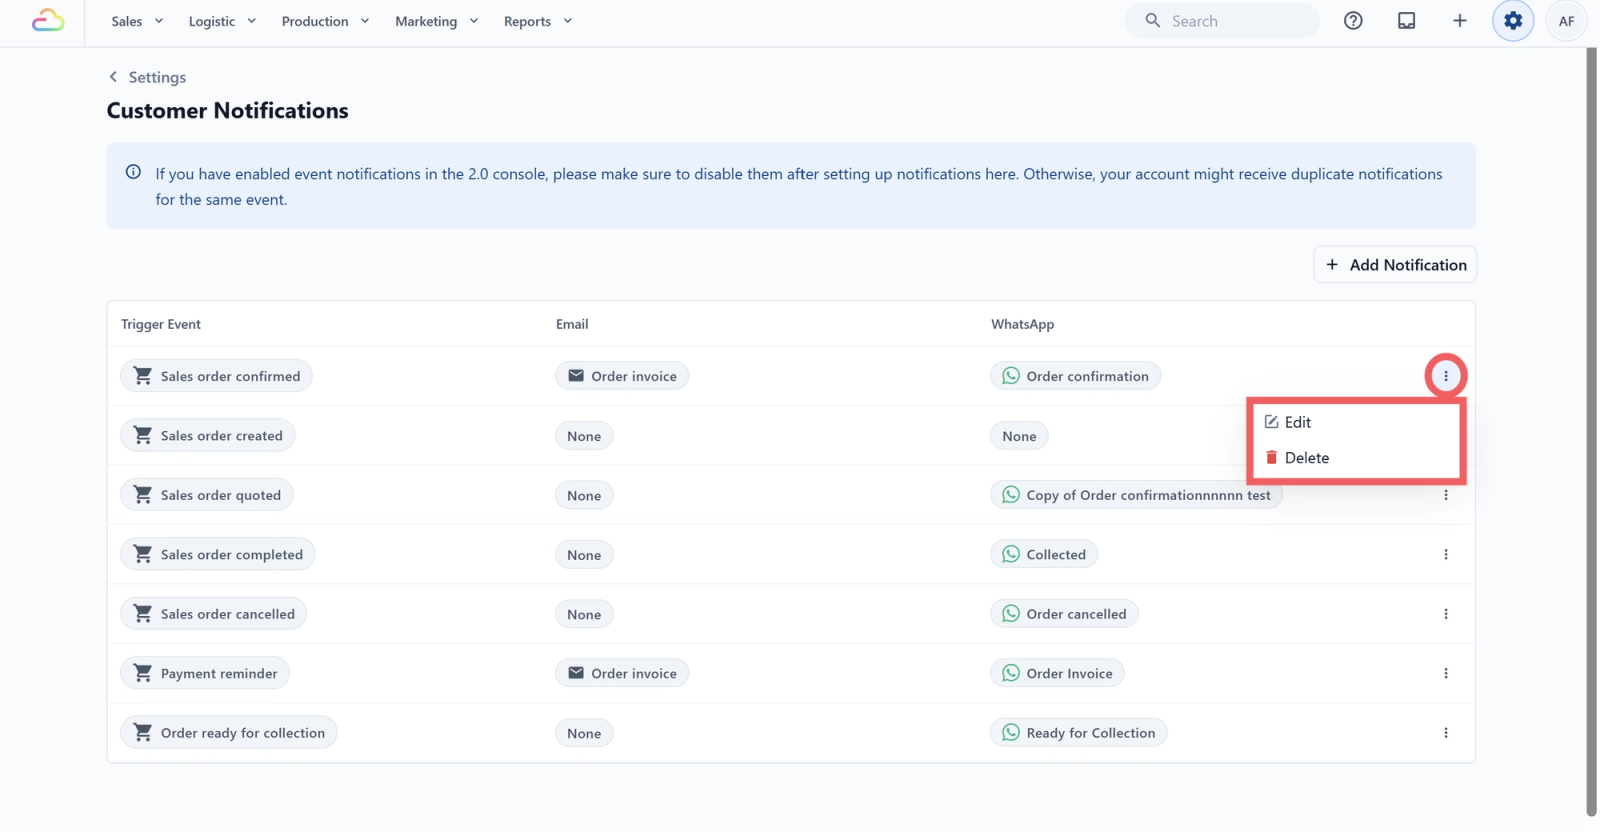
To open an existing notification, click the ⠇ three-dot button at the end of the row, then choose:
- Edit: opens an Update Customer Notification screen with every field pre-filled. You can change the Trigger Event, swap the Email or WhatsApp template. Click Update to save.
- Delete: opens a "Delete customer notification?" confirmation. Click Delete to confirm, or Cancel to back out.
FAQ
Do I need to set up every trigger?
No. Start with the customer updates you use most often, such as order confirmation, ready for collection, payment receipt, pickup completed, and delivery completed. You can add more later.
Can I use both Email and WhatsApp for the same trigger?
Yes. A single notification can use an Email template, a WhatsApp template, or both at the same time.
Why can't I see my Email template in the dropdown?
Only published Email templates can be selected. Check that your template is published, then try again.
Why can't I use my WhatsApp template?
WhatsApp templates must be approved before they can be used here. See Introduction to WhatsApp Message Templates.
Where do I edit the message content?
Edit the wording inside the Email Template or WhatsApp Template itself. Customer Notifications only controls when the message is sent, not what it says.
Why did the customer receive the same message twice?
This usually means the same notification is still enabled in the 2.0 console. Disable the old version after setting it up here.
Give feedback
Up next
Event NotificationsSend the right message the moment something happens in your shop, without anyone having to remember.
Read more