Connecting HitPay to EasyBiz
In this article
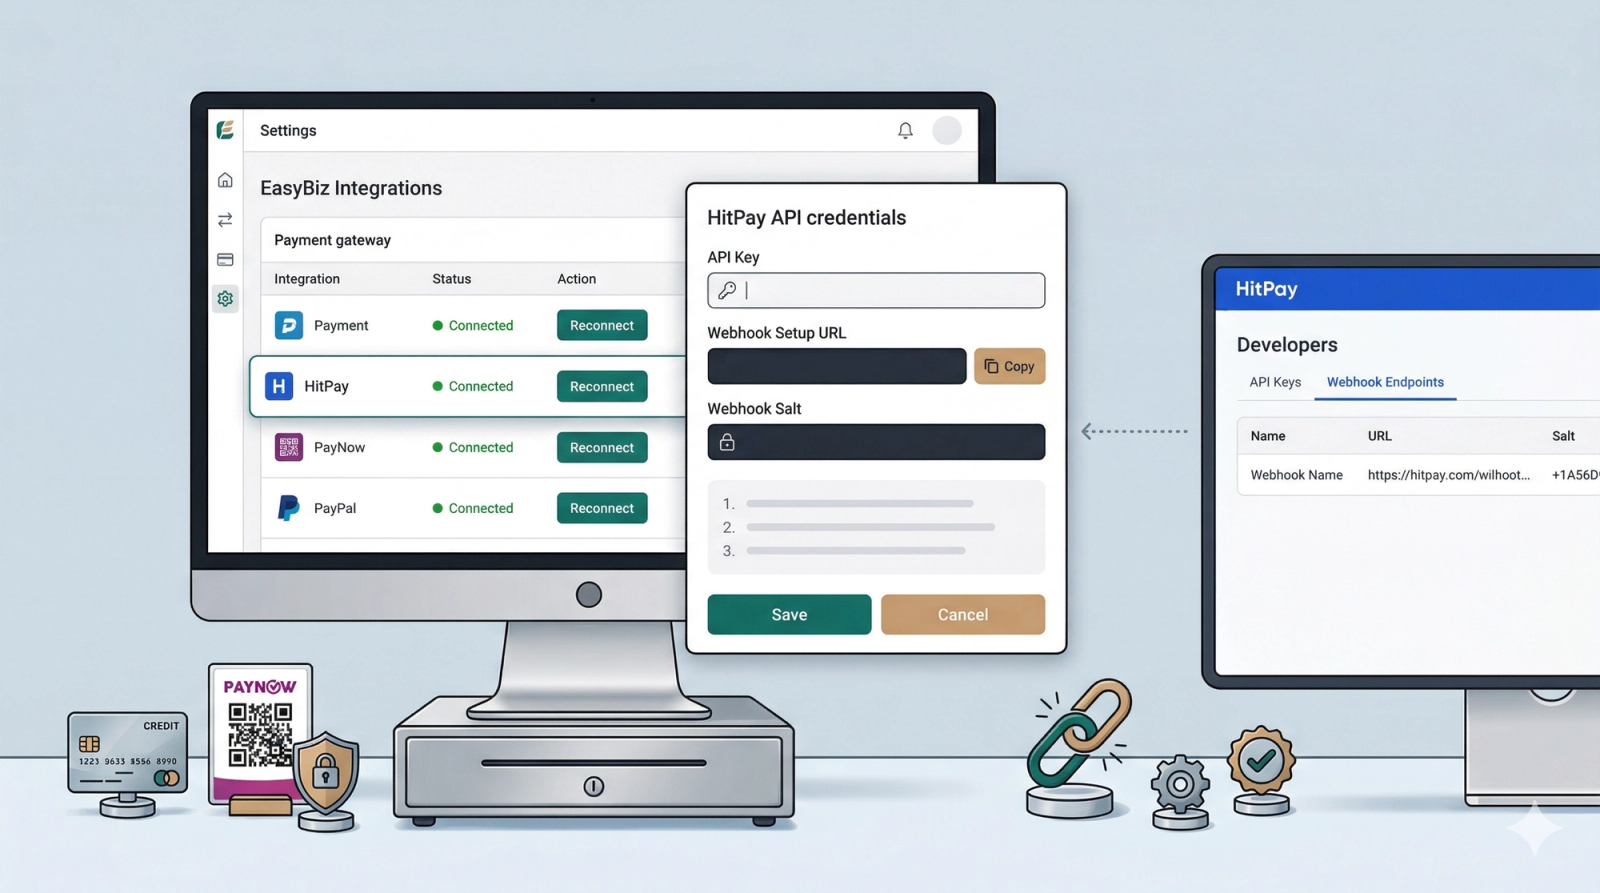
HitPay is a Singapore payment gateway that lets your customers pay by PayNow, credit card, and other local methods. Once connected to EasyBiz, payments made at your counter or through your online store will be processed through HitPay automatically. This guide walks you through the full setup — from creating your HitPay account to making your first connection.
Contents
Contents
What You Need Before Starting
- A HitPay account (instructions below)
- Access to your EasyBiz Console
Step 1 — Create a HitPay Account
If you already have a HitPay account, skip to Step 2.
- Go to HitPay and click Sign Up / Get started for free
- Enter your email address and create a password
- Check your email for a verification code and enter it
- Fill in your business details — select the category that best matches your business (e.g. Retail, Laundry, or use Other if nothing fits exactly)
- Complete the onboarding steps until you reach your HitPay dashboard
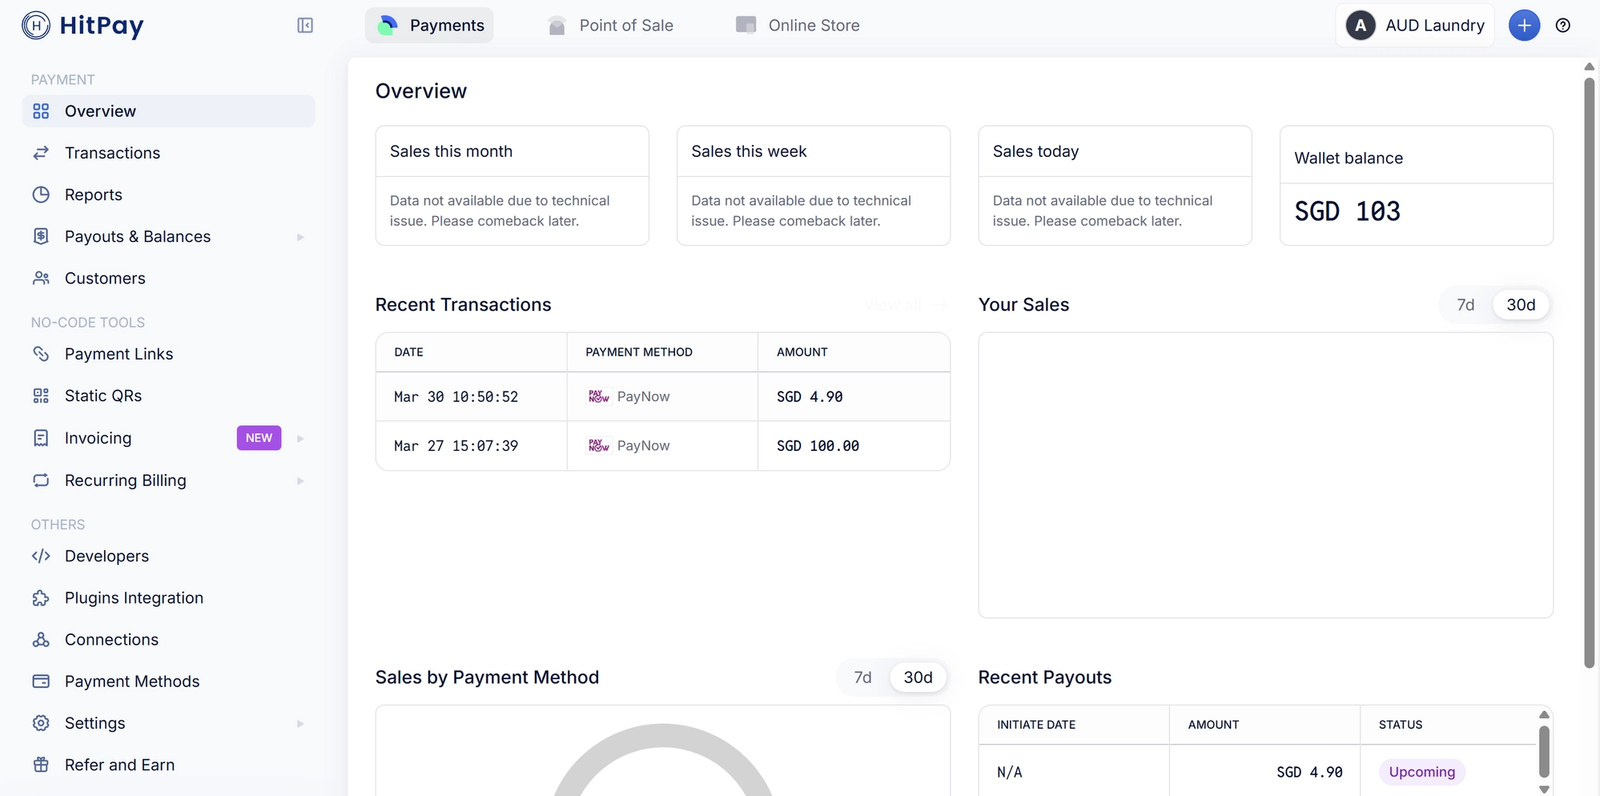
This is how your HitPay dashboard looks
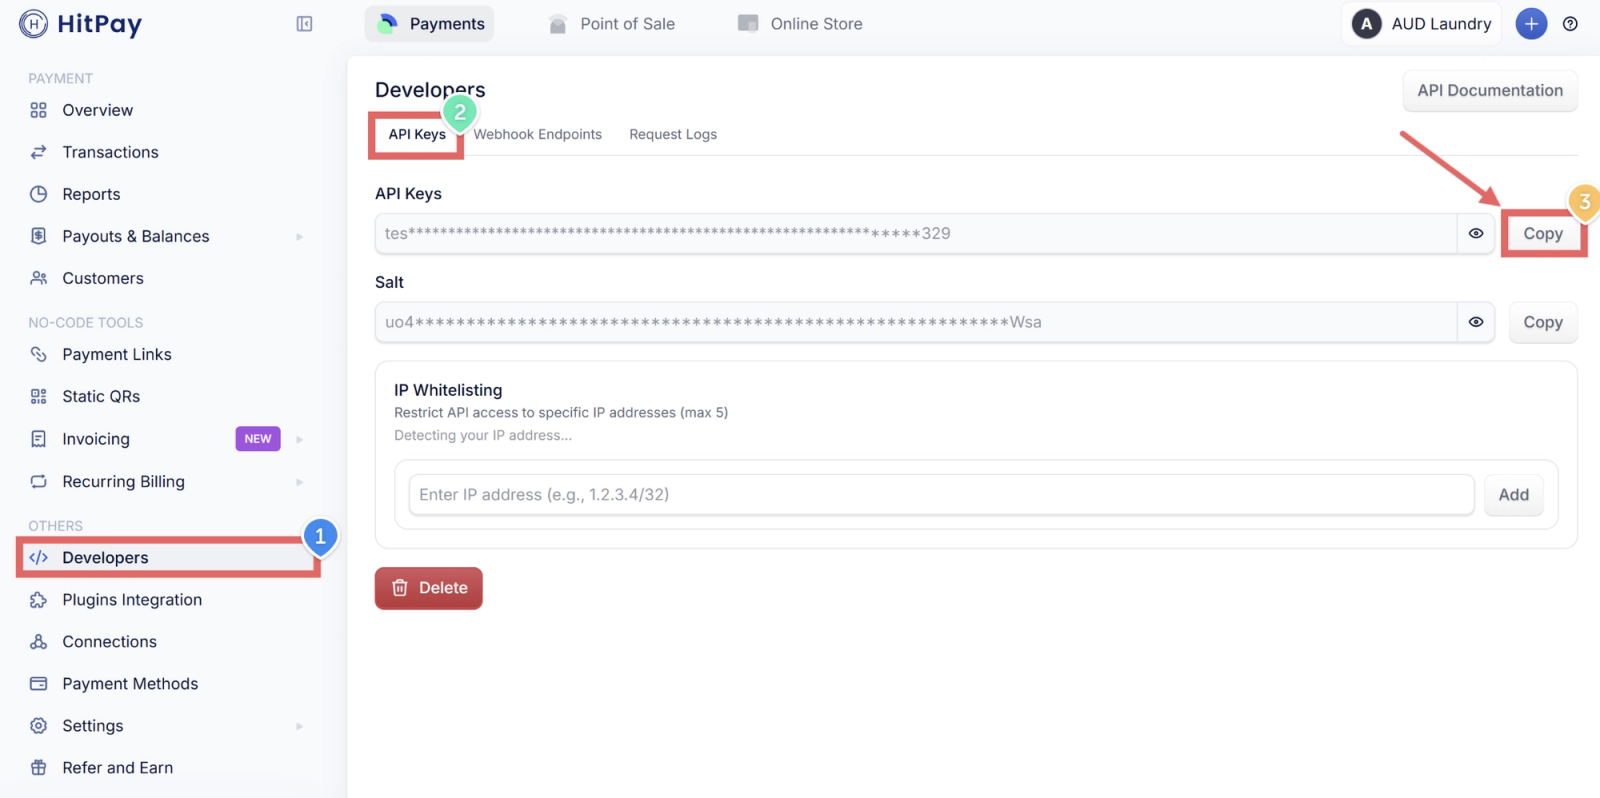
Step 2 — Get Your HitPay API Key
- In your HitPay dashboard, click Developers in the left menu
- Click the API Keys tab
- Copy your API key
Step 3 — Set Up a Webhook in HitPay
A webhook is how HitPay notifies EasyBiz when a payment is completed or fails. You need to set this up so EasyBiz knows when a customer has paid.
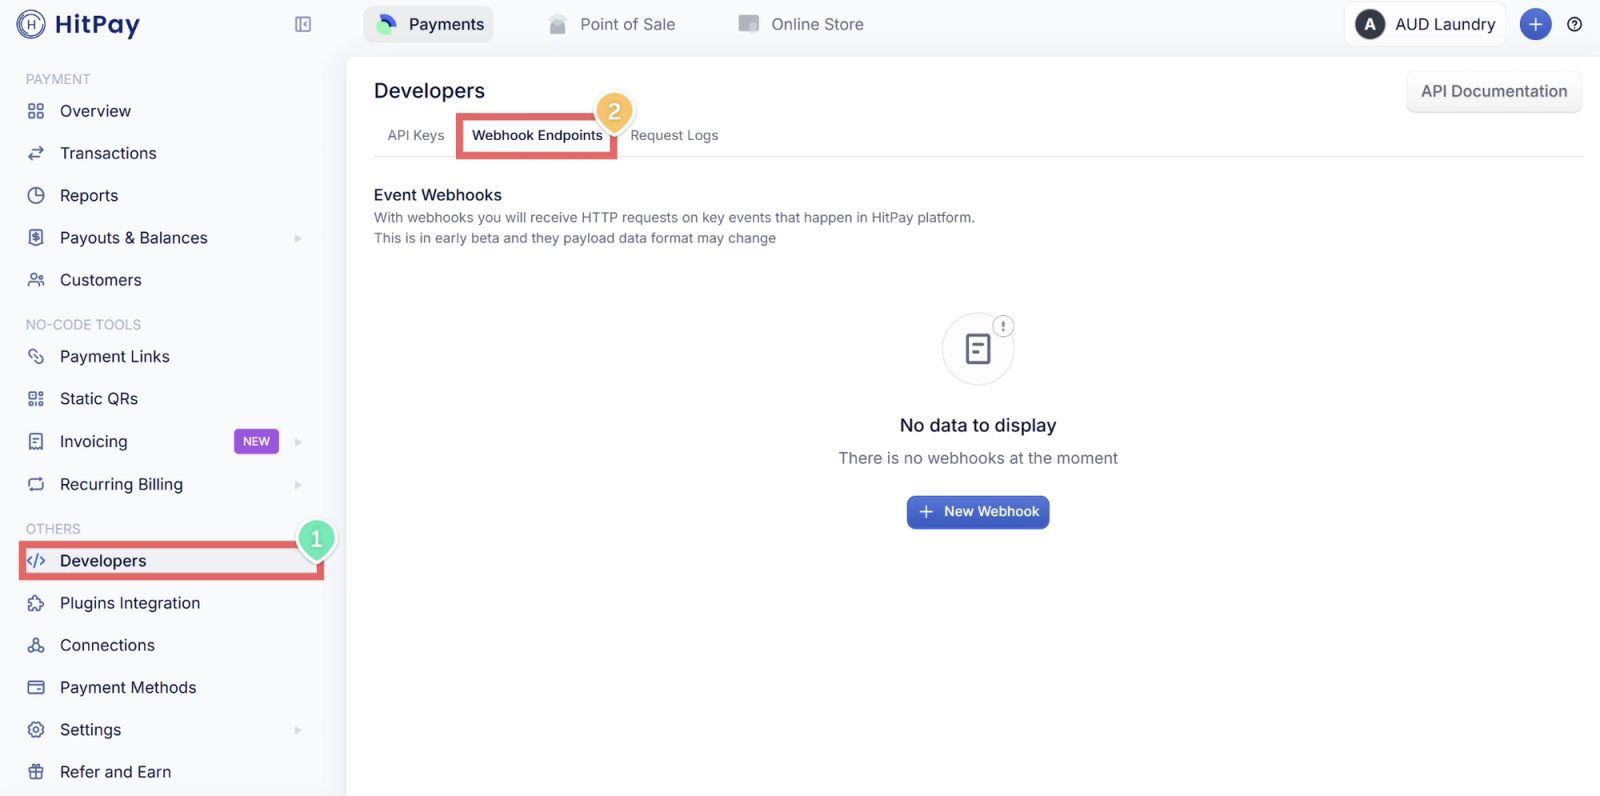
- In your HitPay dashboard, click Developers → Webhook Endpoints tab
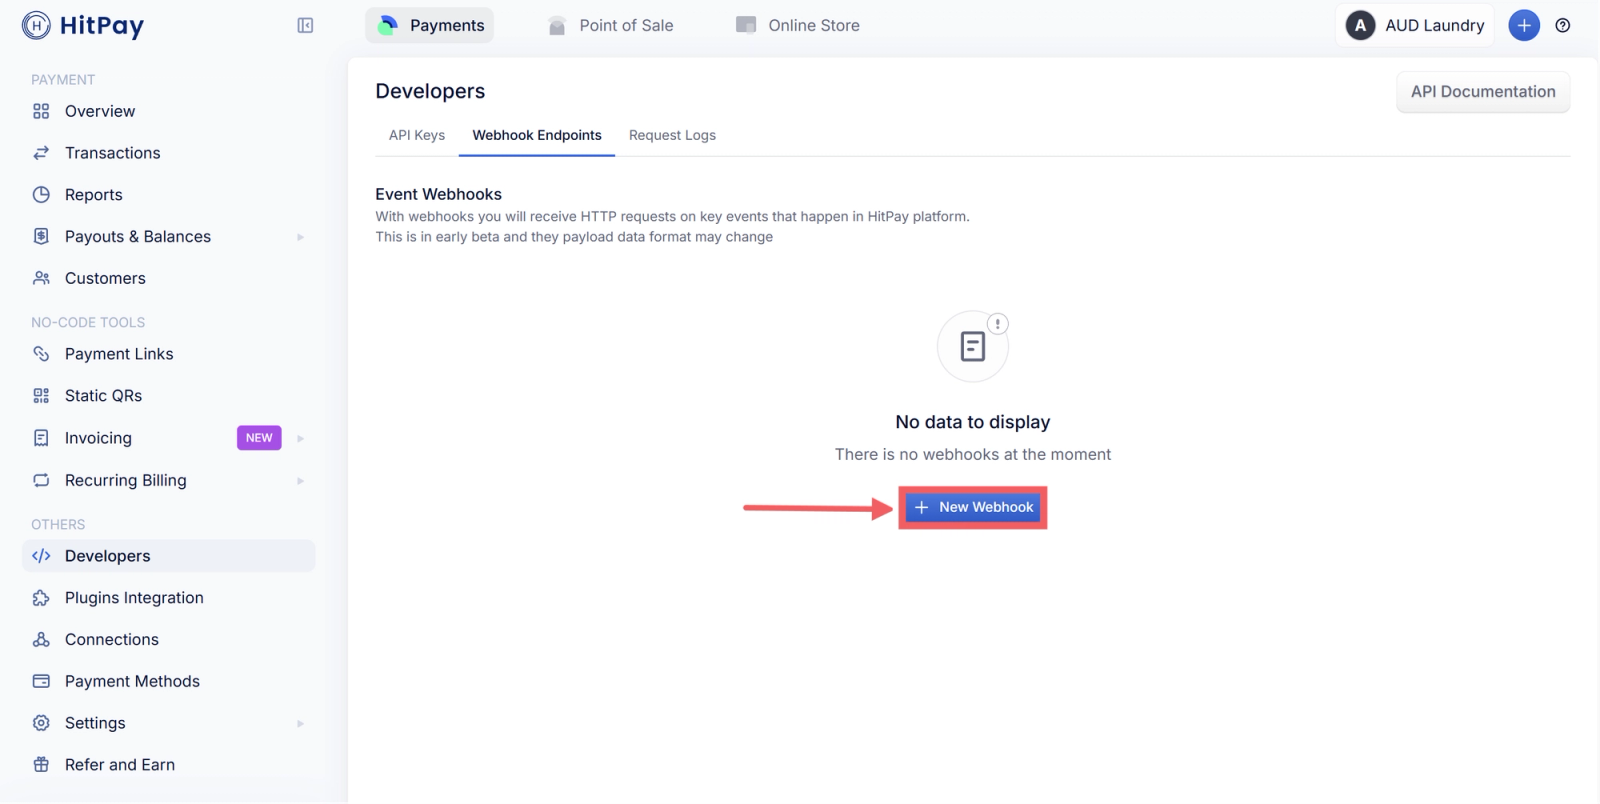
- Click + New Webhook
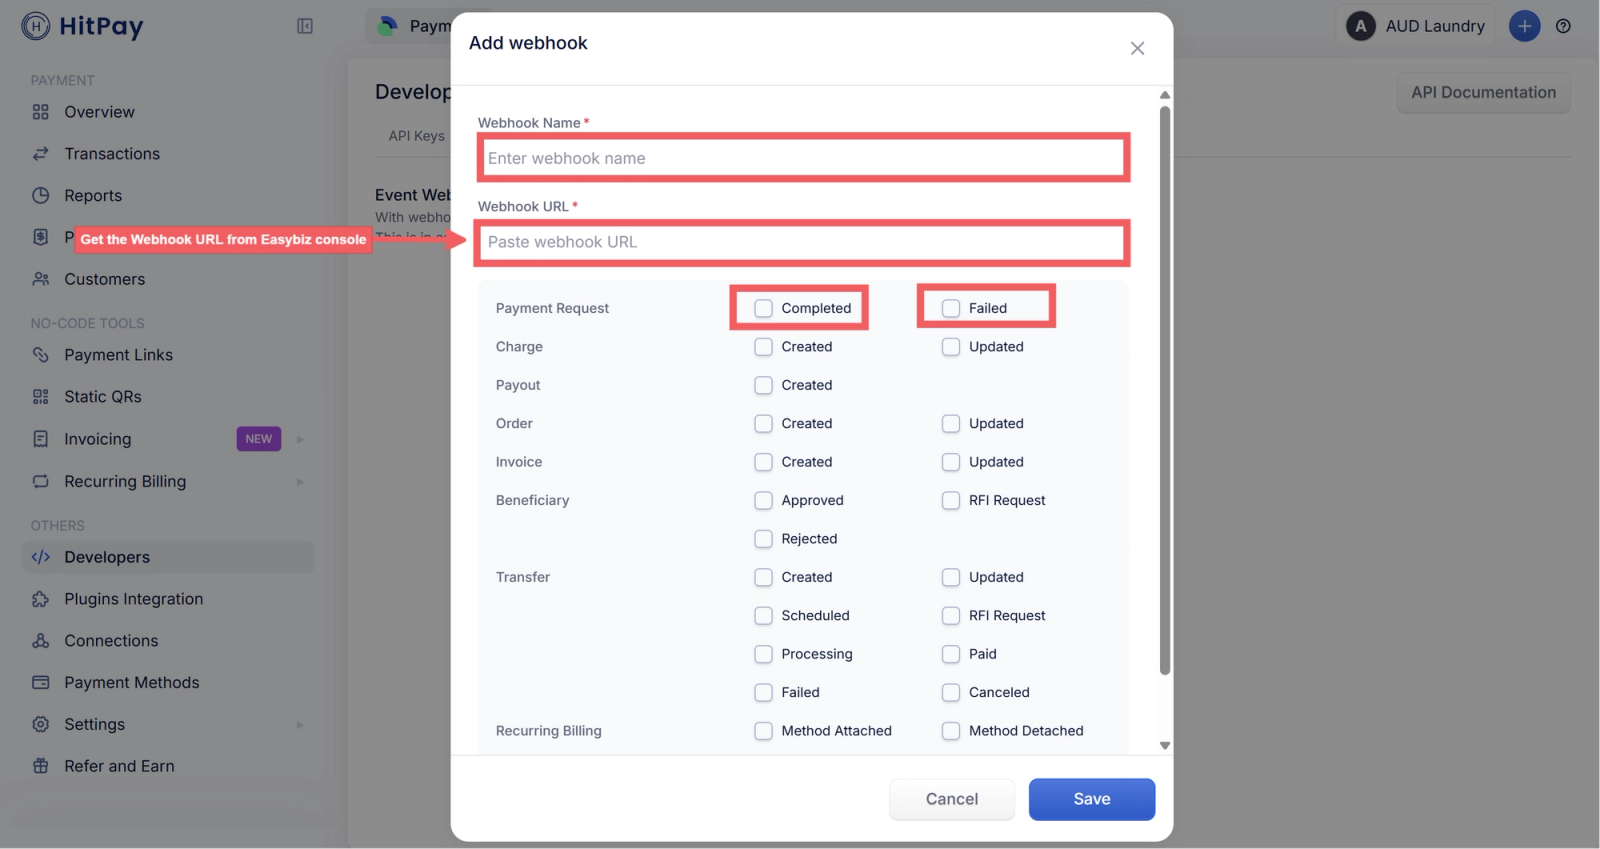
- Fill in the following:
- Webhook Name — enter anything you like, for example: EasyBiz
- Webhook URL — copy this from the EasyBiz connect dialog (see Step 4 below — you'll need to open EasyBiz first to get this URL)
- Under Payment Request, tick both Completed and Failed
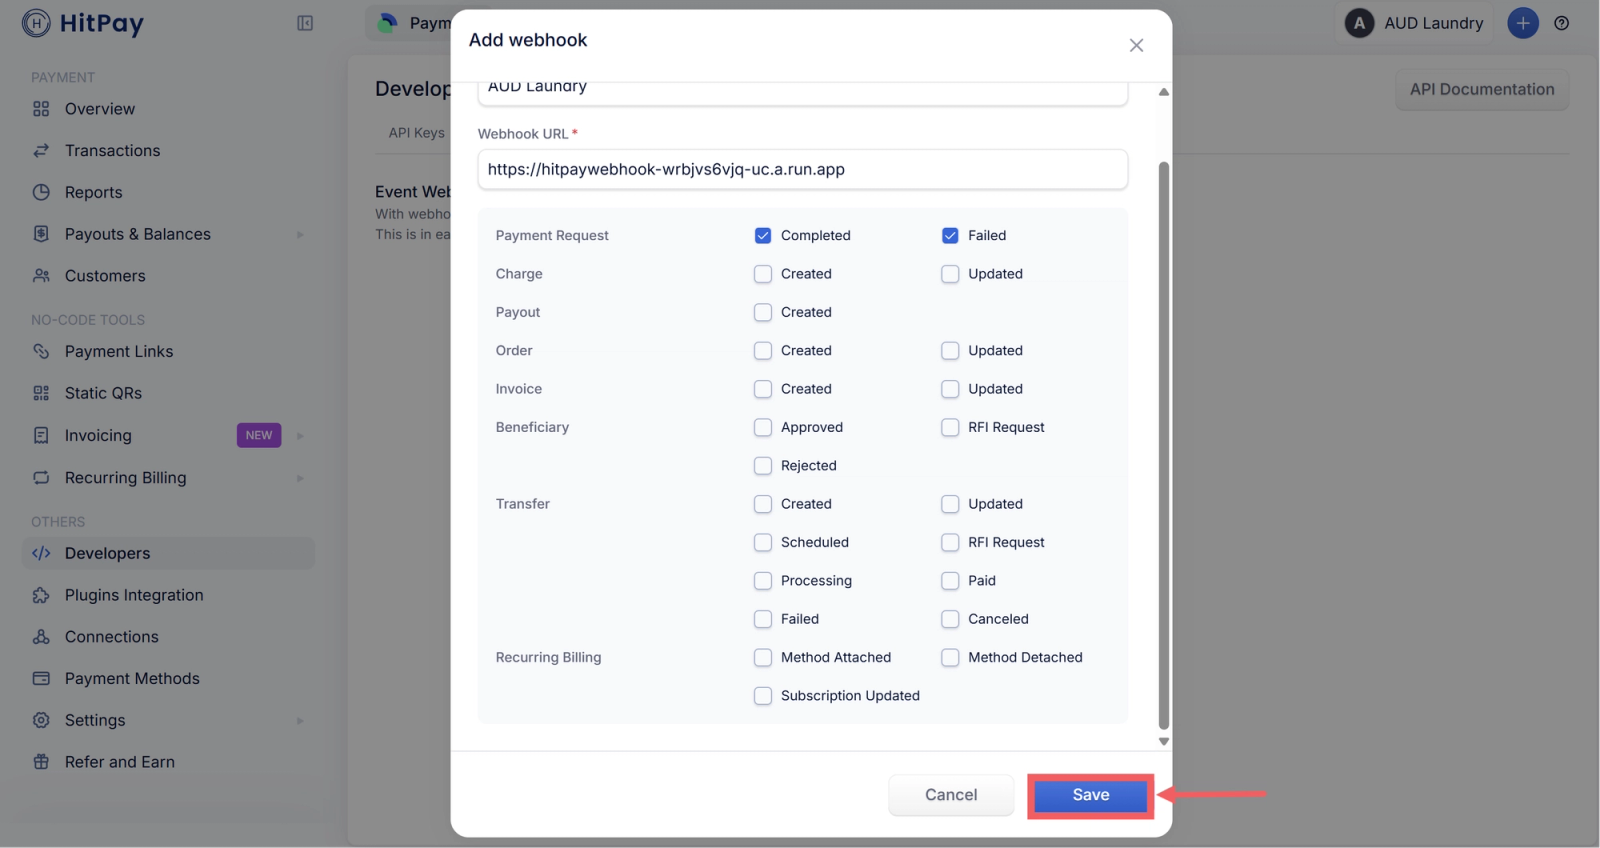
- Click Save
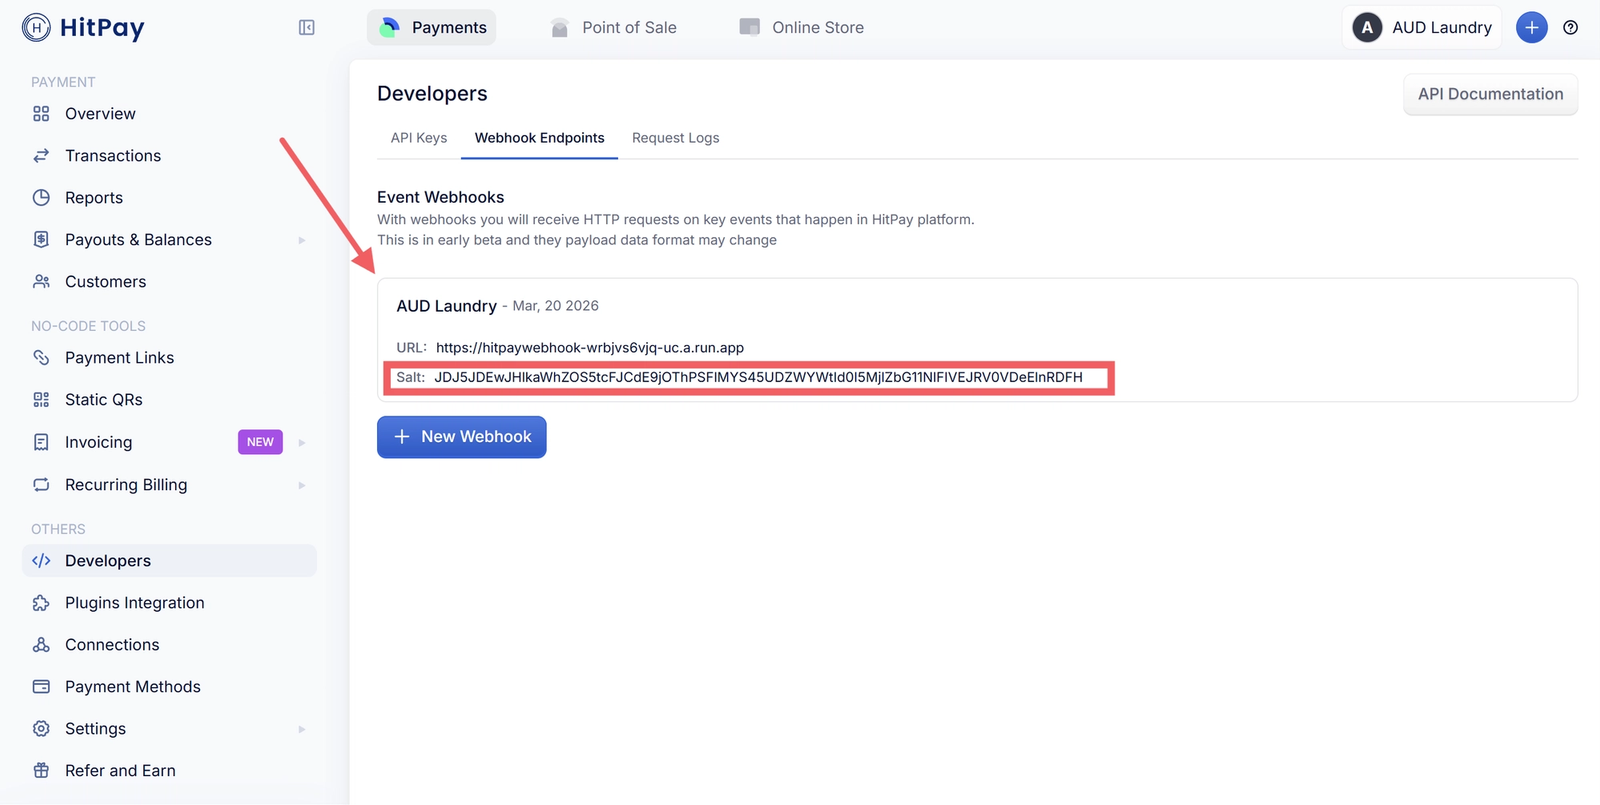
- Your new webhook will now appear in the list — you will see a Salt value next to it. Copy this Salt — you will need it in the next step.
Step 4 — Get Your HitPay API Key
Now you need to copy your API key from HitPay. This is what lets EasyBiz communicate securely with your HitPay account.
- In your HitPay dashboard, click Developers in the left menu
- Click the API Keys tab
- Click Copy next to your API key
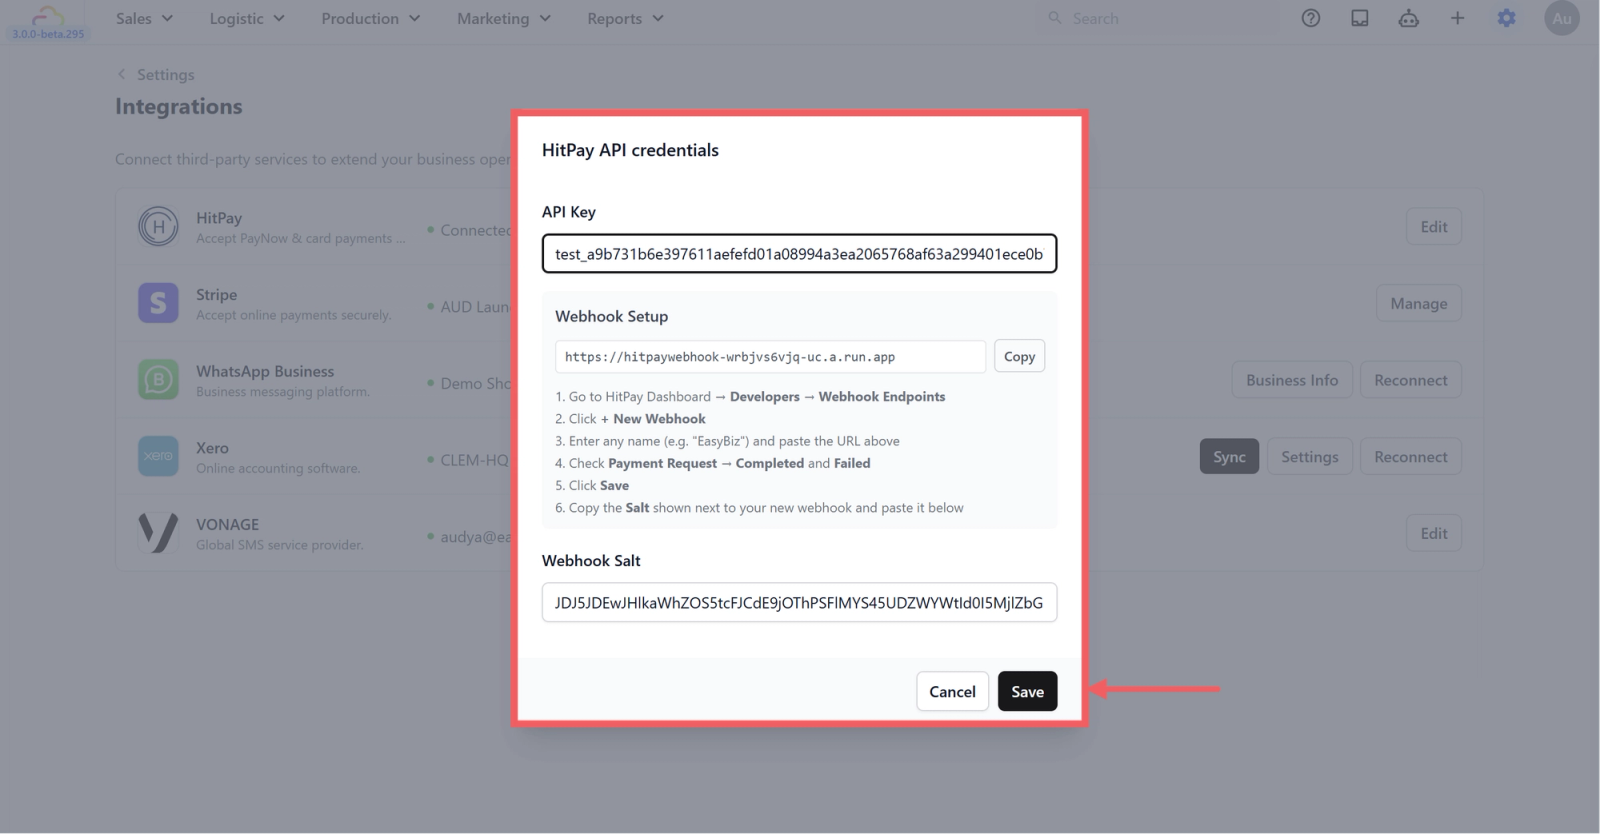
Step 5 — Connect HitPay in EasyBiz
Now go back to the EasyBiz dialog you left open in Step 2. If you closed it, navigate back to Settings > Integrations > HitPay > Connect.
- Paste your API Key from Step 4 into the API Key field
- Paste the Salt you copied from Step 3 into the Webhook Salt field
- Click Save
You're All Set
Once you click Save, HitPay is connected to your EasyBiz account. Your POS and online store will now process payments through HitPay.
What's Next?
Now that HitPay is connected, your staff can start accepting payments at the counter and through your online store.
👉 How to Enable HitPay as a Payment Method on Your POS (coming soon)
👉 How to Enable HitPay as a Payment Method on Your Online Store (coming soon)
Give feedback

Up next
Inventory ManagementSet up the places where stock and work are handled, then track what is available across your business.
Read more