Configuring Label Templates
In this article
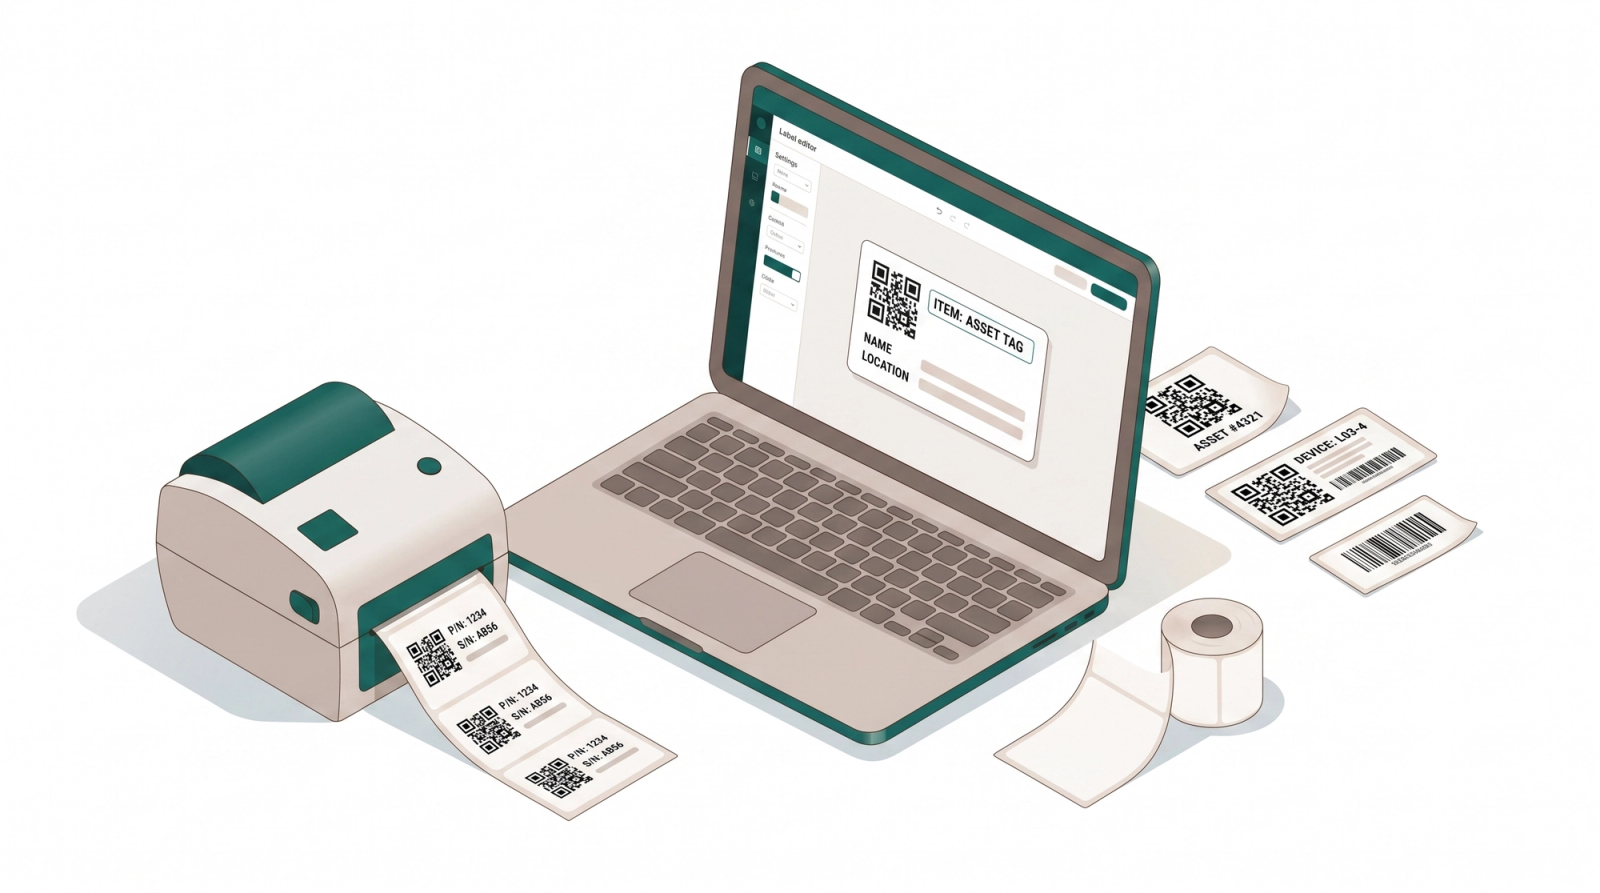
The Passport for Your Items. Label Templates determine how your item tags and package stickers look when printed. In a busy operation, the physical label is often the only link between the digital order and the actual item.
Contents
Contents
Why configure your labels?
A default label might print, but a customized label speeds up your workflow:
- Faster Identification: Increase the font size for critical info so staff can read it from a distance.
- Prevent Lost Items: Ensure QR codes are large enough to be scanned instantly by the POS or mobile app for tracking.
- Reduce Errors: Choose exactly what info appears like "Color," "Brand," or "Defects" so your production team knows exactly what to do without asking.
Accessing Label Templates
Go to Settings > Templates and select the Label card. By default, EasyBiz provides pre-made templates:
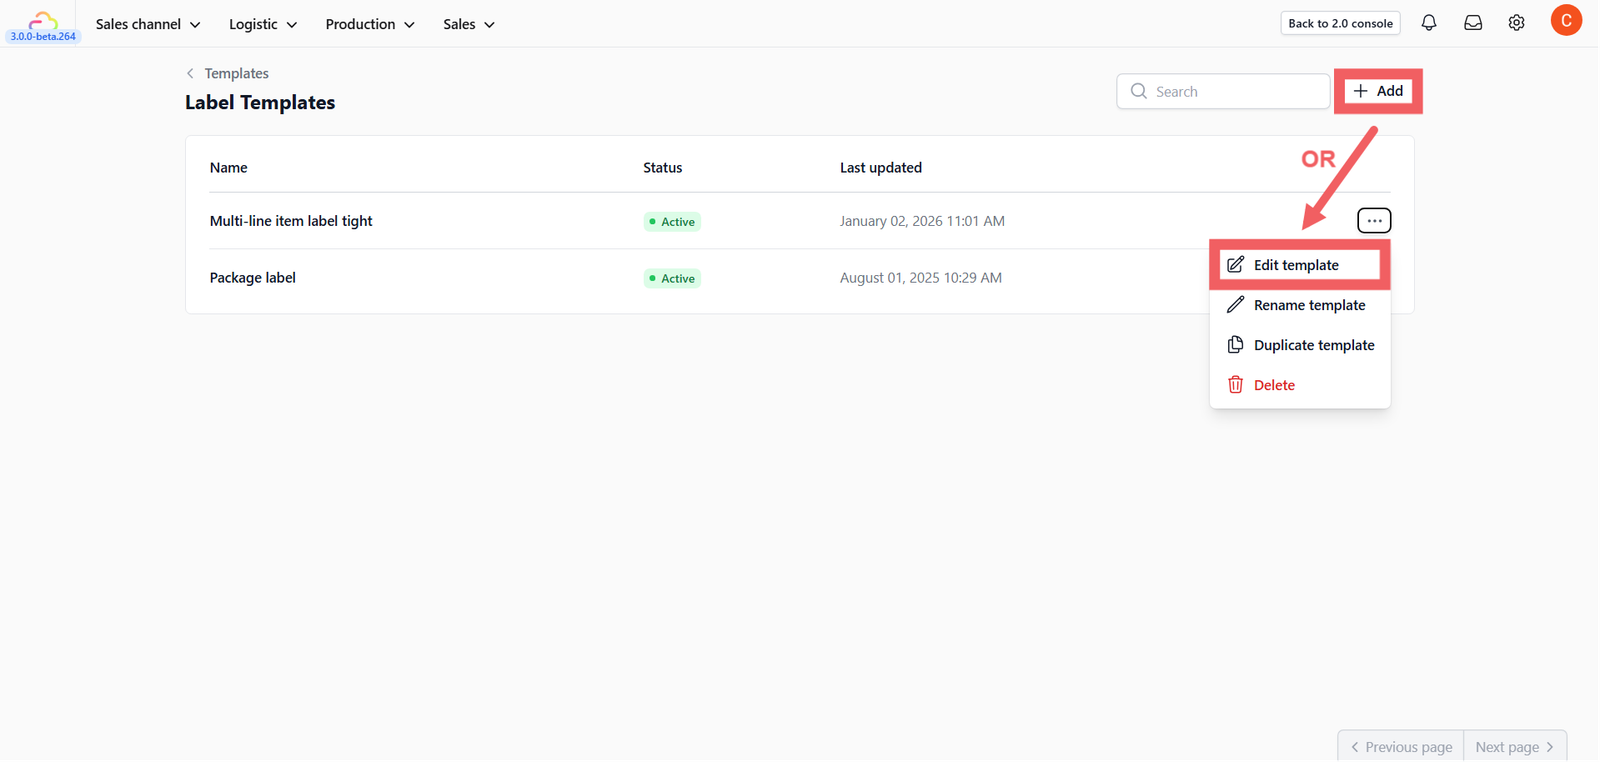
- Multi-line item label tight: Optimized for individual items.
- Package label: Optimized for grouping items (bags/boxes).
You can edit these existing templates or click + Add to create a new one based on standard layouts.
Printer & Layout Configuration
When editing a template, you must configure the "Global Settings" on the left sidebar to match your physical printer's specifications.
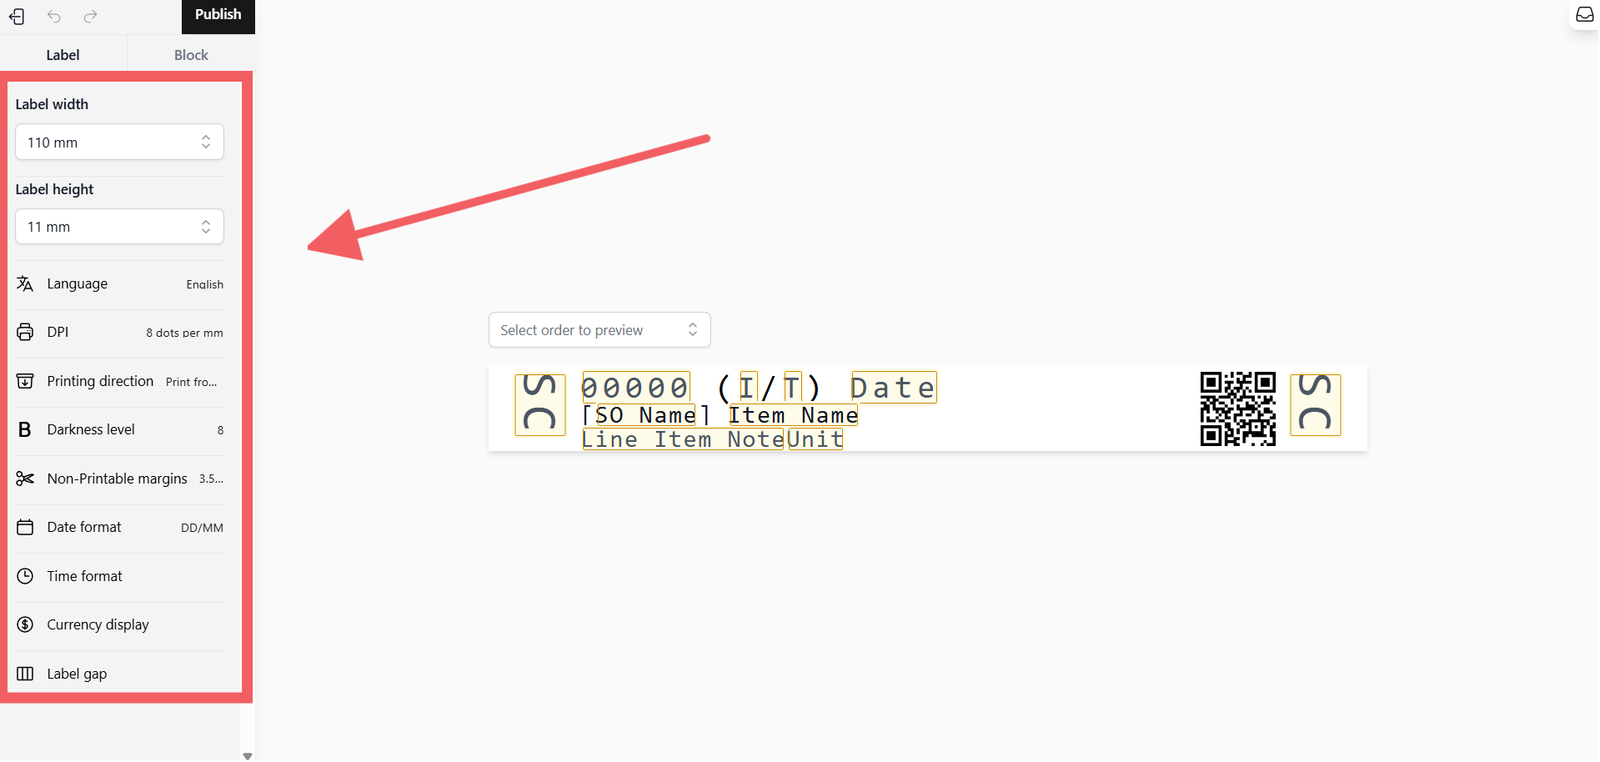
A. Dimensions & Quality
- Label Width & Height: Set this to match your physical sticker size (Range: 4mm to 150mm).
- DPI (Dots Per Inch): Set this according to your printer’s capability for the best quality:
- 203 DPI (8 dots/mm)
- 300 DPI (12 dots/mm)
- 600 DPI (24 dots/mm)
- Darkness Level: Adjust between 0 (lightest) to 15 (darkest). Increase this if your prints are fading.
B. Language & Printing Direction
- Language: Select the language your printer supports.
- Troubleshooting: If your printer does not support a specific local language (e.g., Chinese characters), enable ‘Print text as image’ inside the Text Block settings to prevent printing errors.
- Printing Direction:
- Print from top: Text prints upside down compared to feed direction.
- Print from bottom: Text allows with feed direction.
C. Formatting & Gaps
- Date & Time Format: Choose your preferred display (e.g., DD/MM/YYYY, 24-hour format).
- Currency Display: Choose how prices appear (e.g., Symbol
$10.00or CodeSGD 10.00). - Label Gap: For non-continuous paper (stickers), adjust the gap (1-5mm) so the printer detects where one label ends and the next begins.
Customizing the Design
The visual editor allows you to drag, drop, and configure blocks.
Previewing Your Design
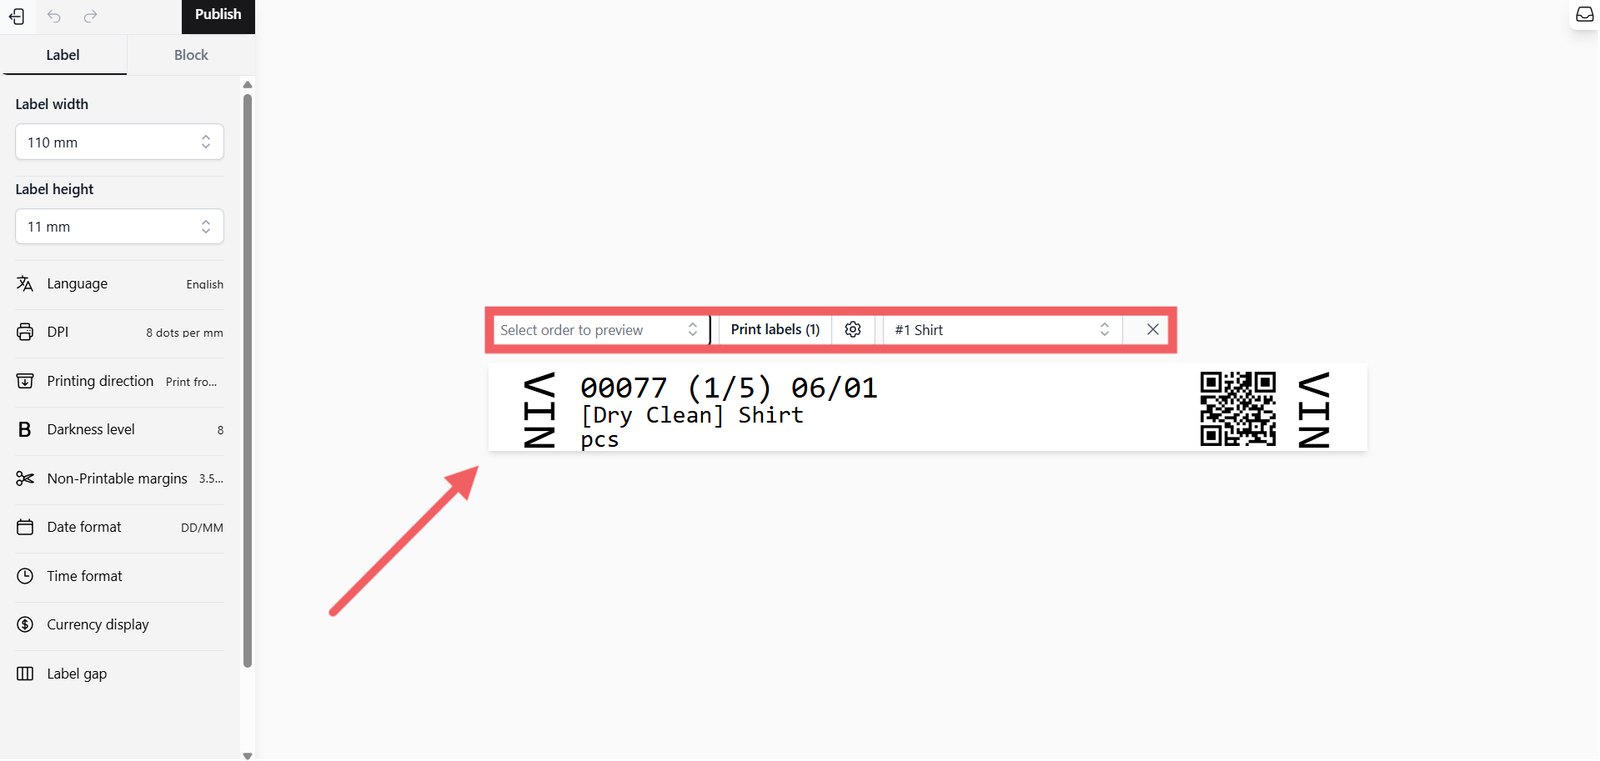
Use the preview bar at the top to select a real Order and Line Item (e.g., #1 Shirt). This allows you to test how dynamic data looks before publishing.
Dynamic Variables
You can insert variable data that changes for every order by typing "@" symbol that will show a dropdown list of common variables including:
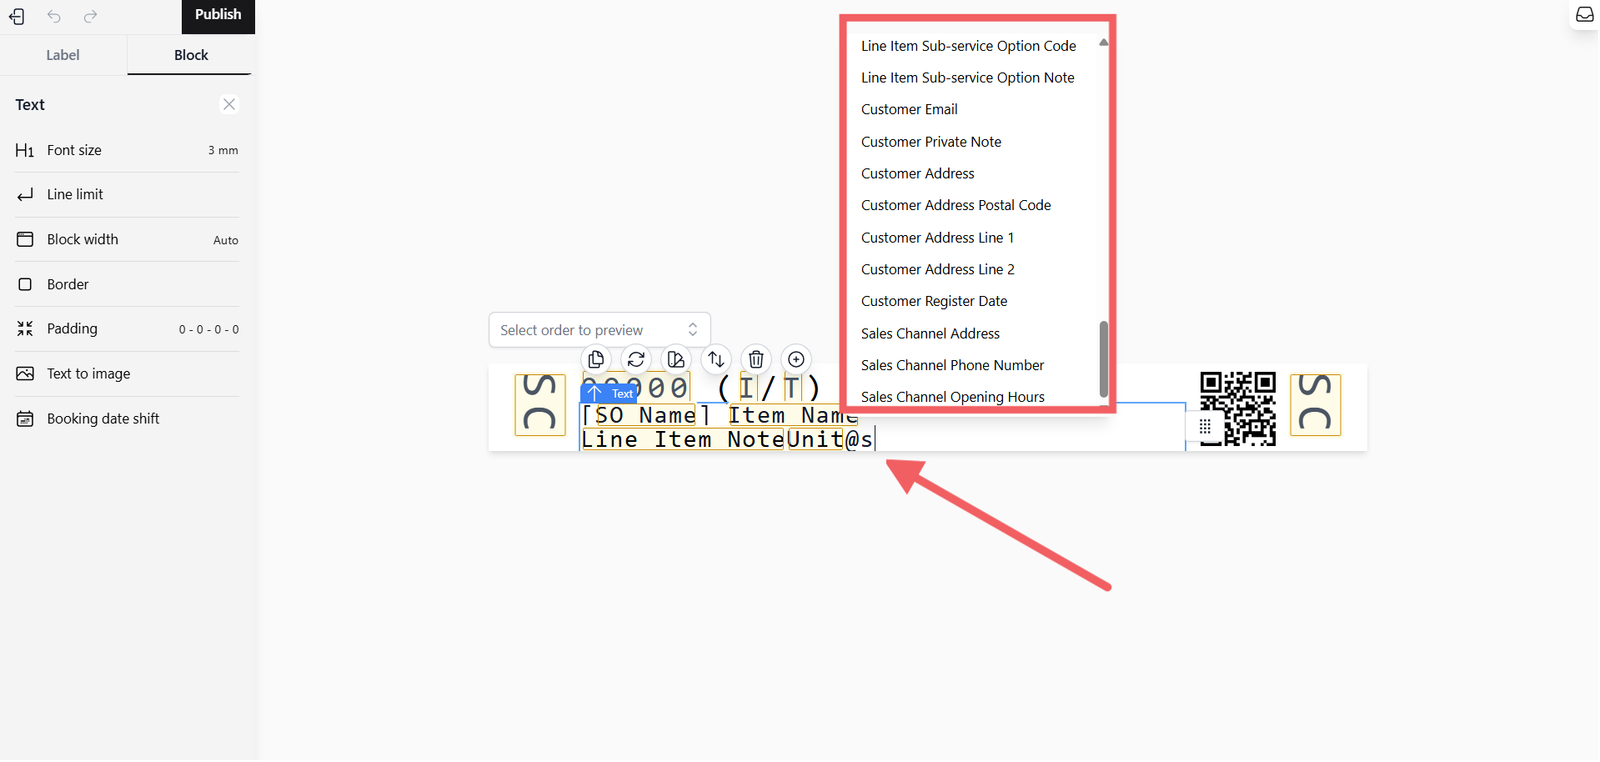
- Order Details: Order No, Order Due Date, Total Units.
- Customer Details: Customer Name, Phone Number, Address.
- Item Details: Item Name, Service Option, Notes, Color/Brand (Detail Content).
- Tracking: QR Code, Barcode.
Block Settings (Text & QR)
Click on any element in the preview (e.g., Item Name or Date) to open its specific properties on the left sidebar.
A. Text Settings
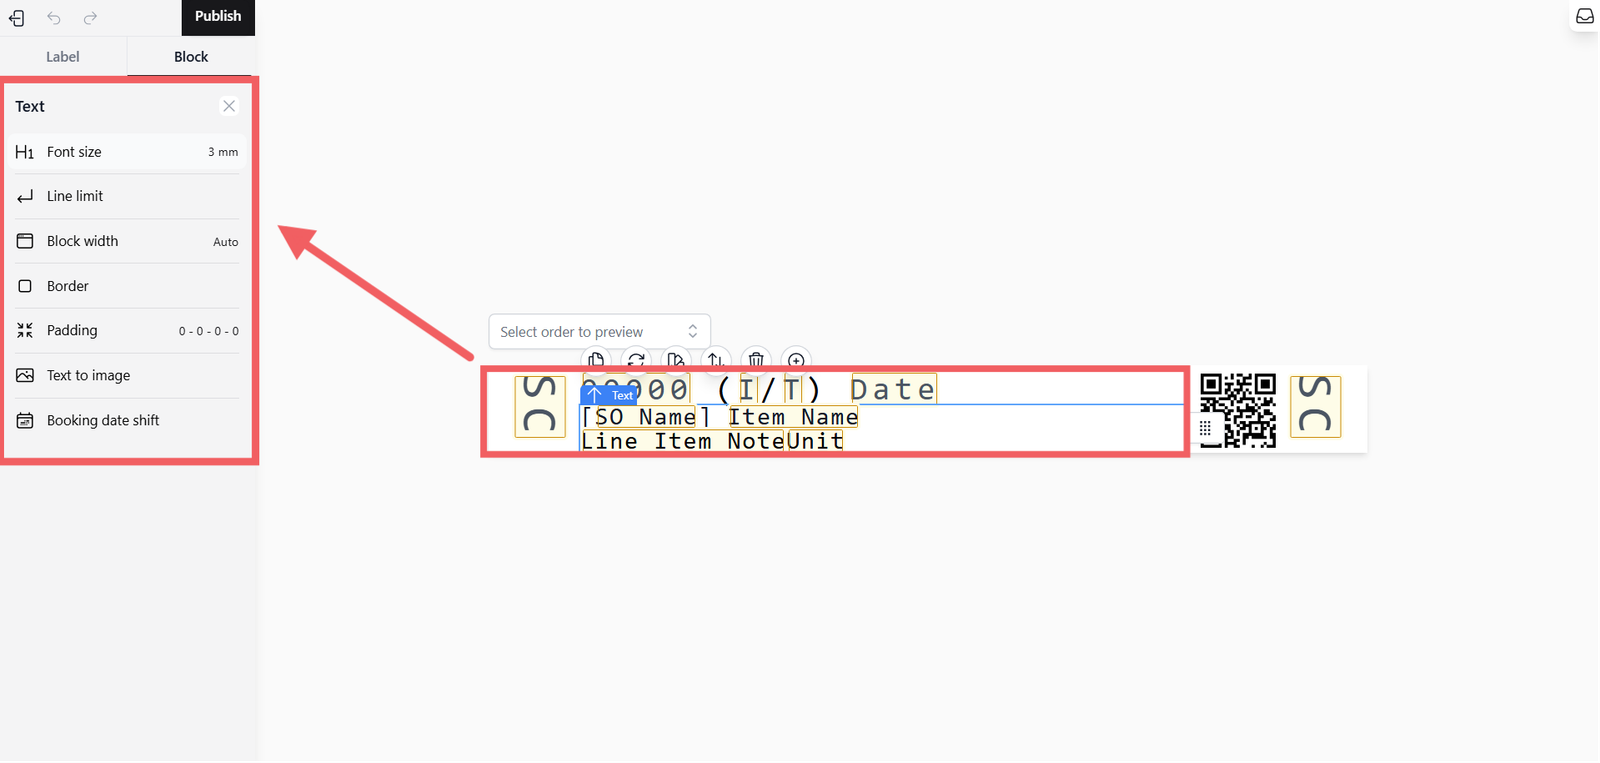
Customize how text appears on the label. You can adjust the following parameters:
- Font Size: Choose the text size ranging from 1.5mm to 12mm to ensure readability based on your label size.
- Line Limit: Control vertical space by limiting how many lines a text block can occupy.
- Select between 1 to 10 lines.
- Choose No limit to allow the text to expand fully.
- Block Width: Define the horizontal width of the text area.
- Auto: Automatically adjusts to the content.
- Fractions: Set a relative width (e.g., 1/2, 1/3, 2/3, 1/4, 3/4, 1/5, 2/5, 3/5, 4/5 of the label width).
- Fixed Width: Set a specific size from 1mm to 150mm (adjustable in 1mm increments).
- Border: Add a box outline around the text block for emphasis. Options range from 1 dot (thin) to 4 dots (thick).
- Padding: Adjust the white space inside the border. You can set Top, Bottom, Left, or Right padding from 1mm to 6mm (1mm increments).
- Text to Image:
- Enable this option if you need to print text containing characters or languages (like Chinese) not natively supported by your printer.
- How it works: The system converts the text into an image before sending it to the printer, ensuring all characters are printed accurately without glitches.
- Booking Date Shift: (Available on Date variables) Adjust the displayed date by shifting it backward by a specified number of days.
- Range: -1 day to -7 days.
- Useful if you want to print a "Start Processing Date" (e.g., 2 days before the due date) instead of the actual Due Date.
B. QR Code Settings
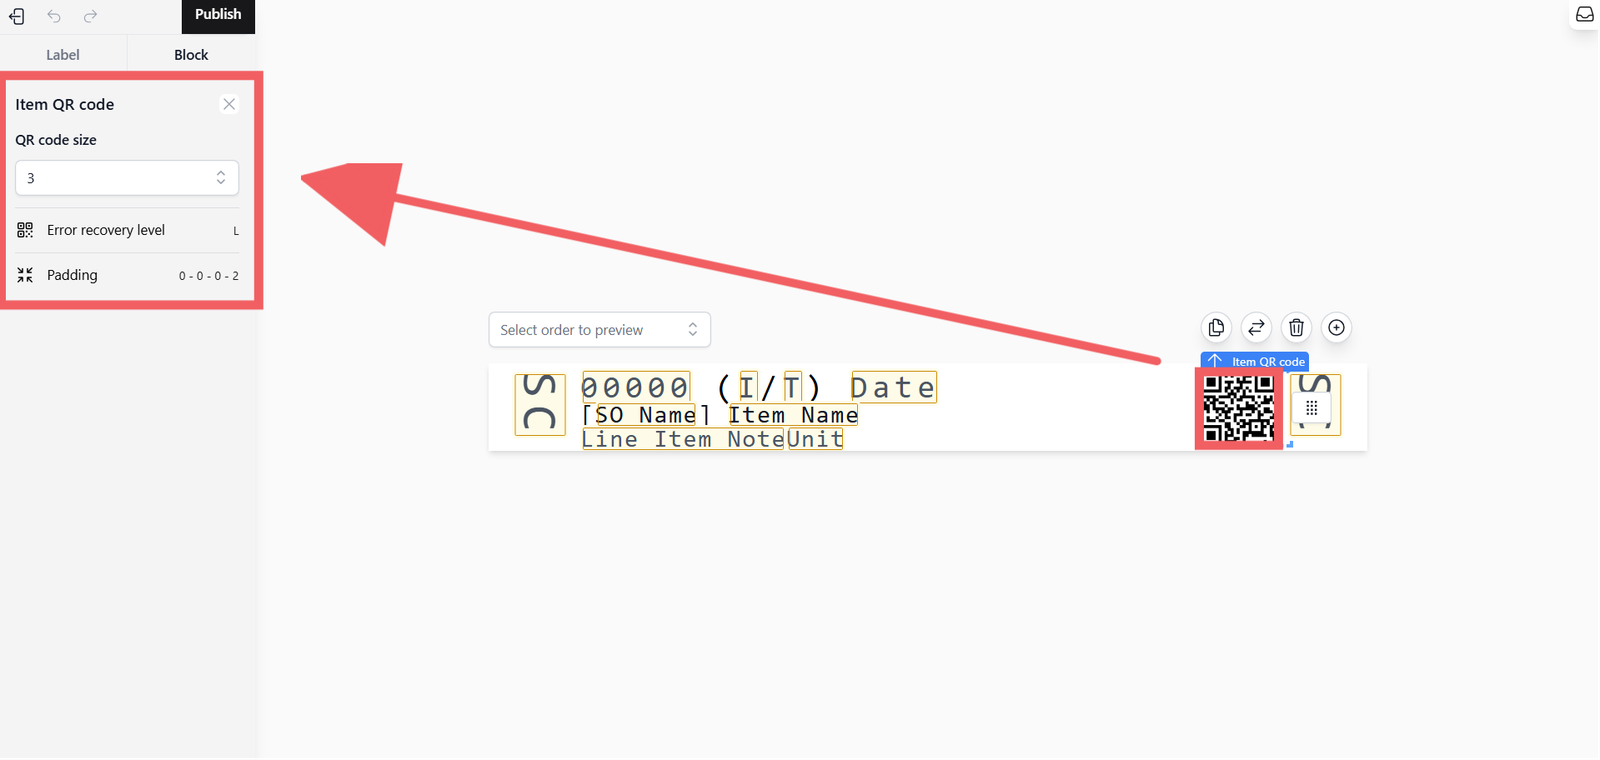
If you select the QR block, you can configure:
- QR Code Size: Adjust from 1 to 10.
- Error Recovery Level: Choose between L (7%), M (15%), Q (25%), or H (30%). Higher levels make the code easier to scan if damaged but increase its physical size.
- Padding: Adjust spacing around the QR code (0-6mm).
Publishing the Template
Once your design is configured:
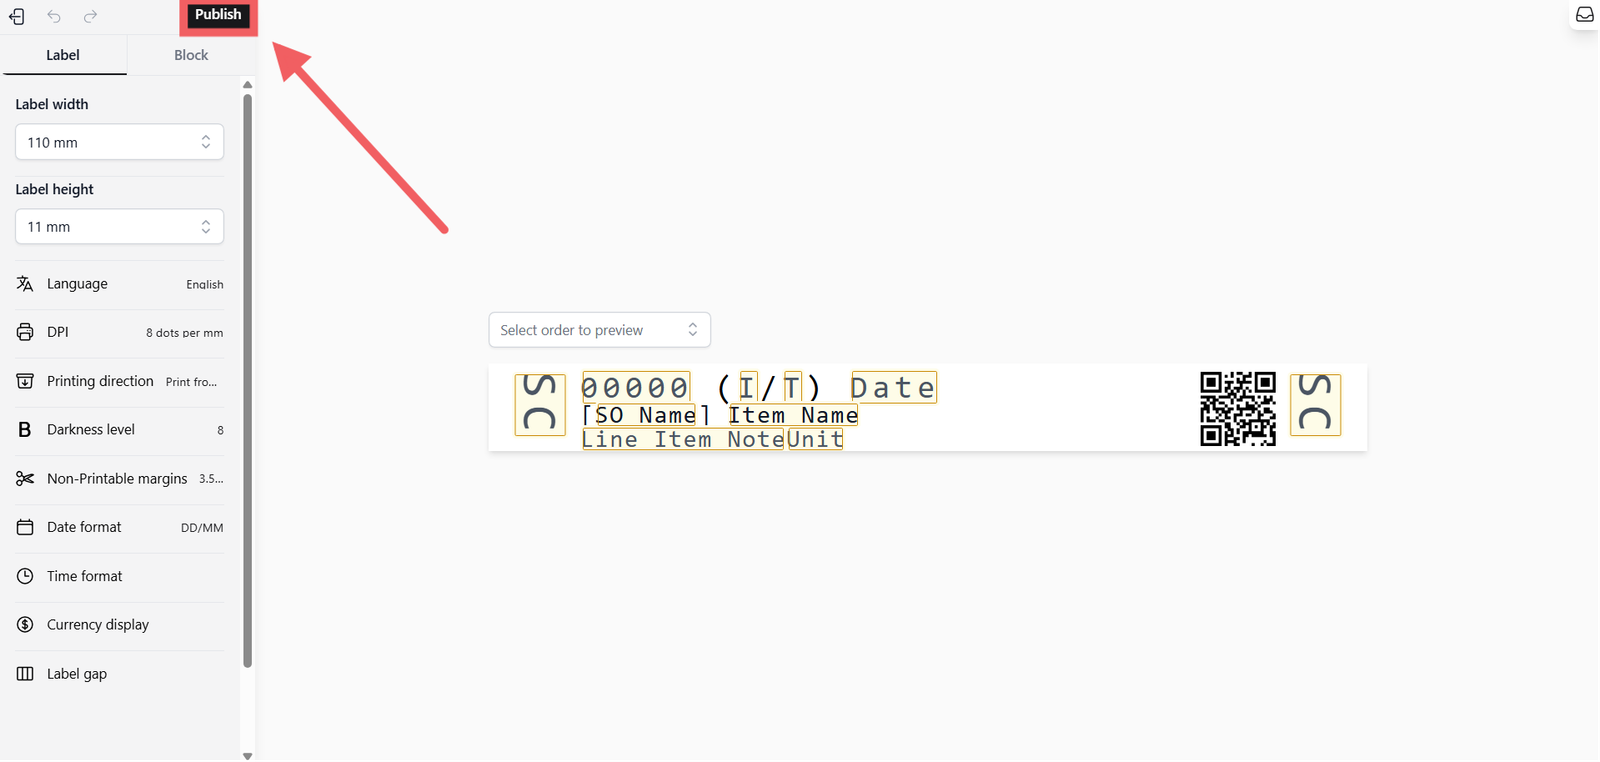
- Click the black Publish button in the top right corner.
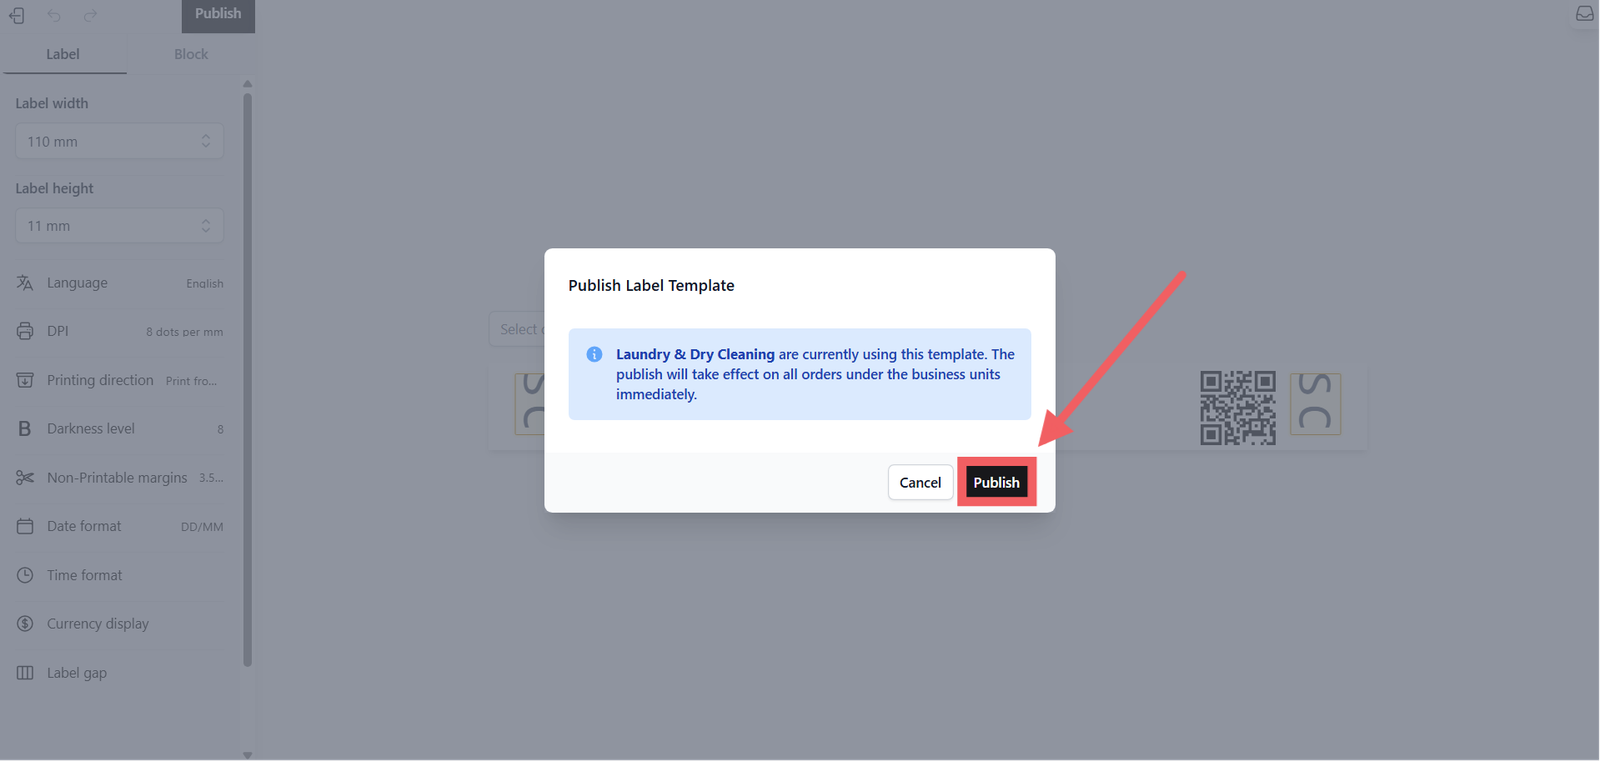
2. A confirmation pop-up will appear showing which business units are currently using this template type.
3. Click Publish to confirm.
Assigning to Business Units
Creating a template does not automatically apply it to your store. You must assign it manually.
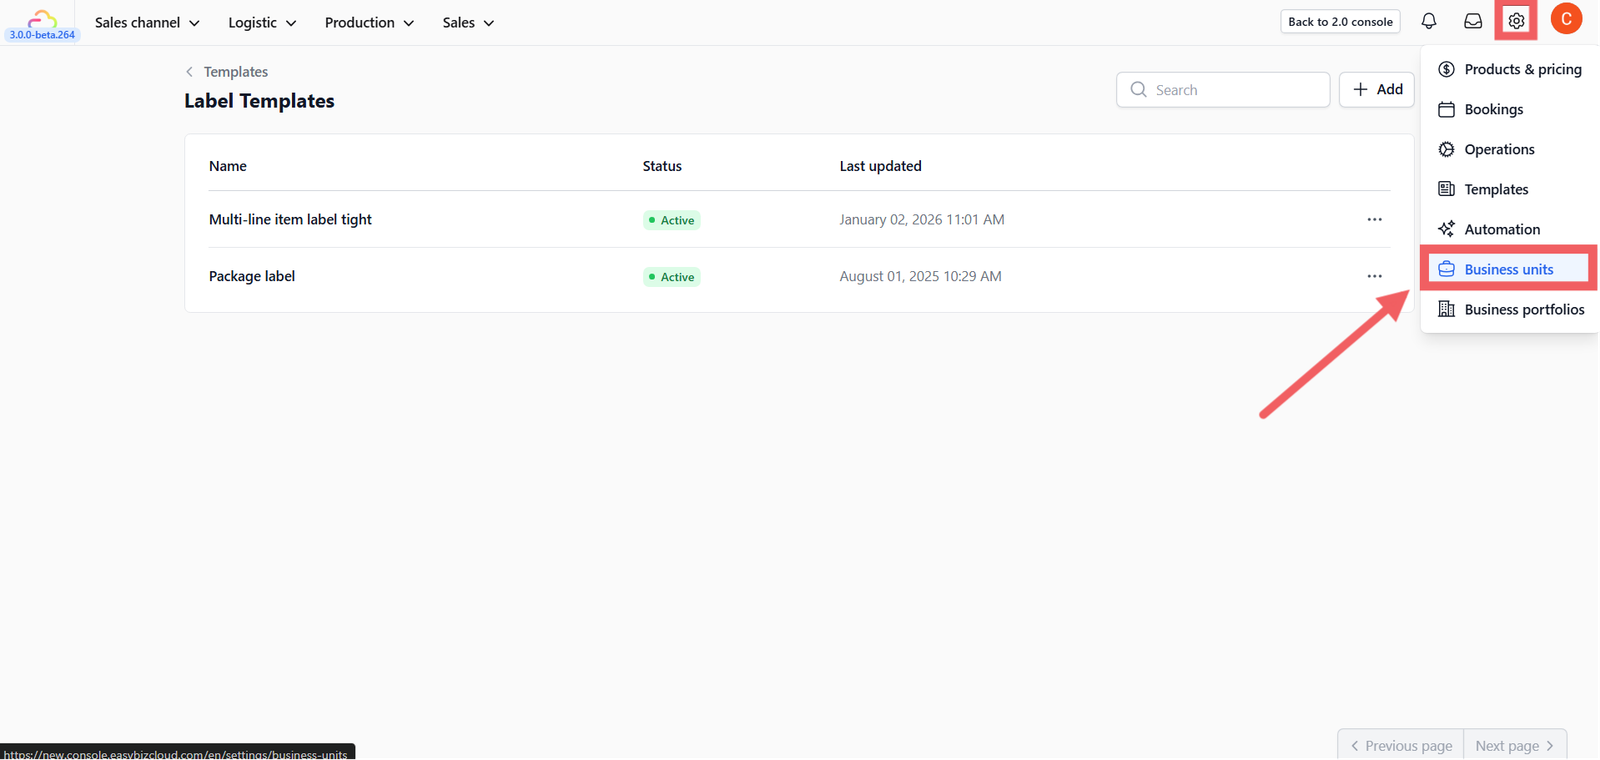
- Navigate to Settings > Business Units.
- Select the specific unit (e.g., Laundry & Dry Cleaning).
- Select the Labels section and configure the following:
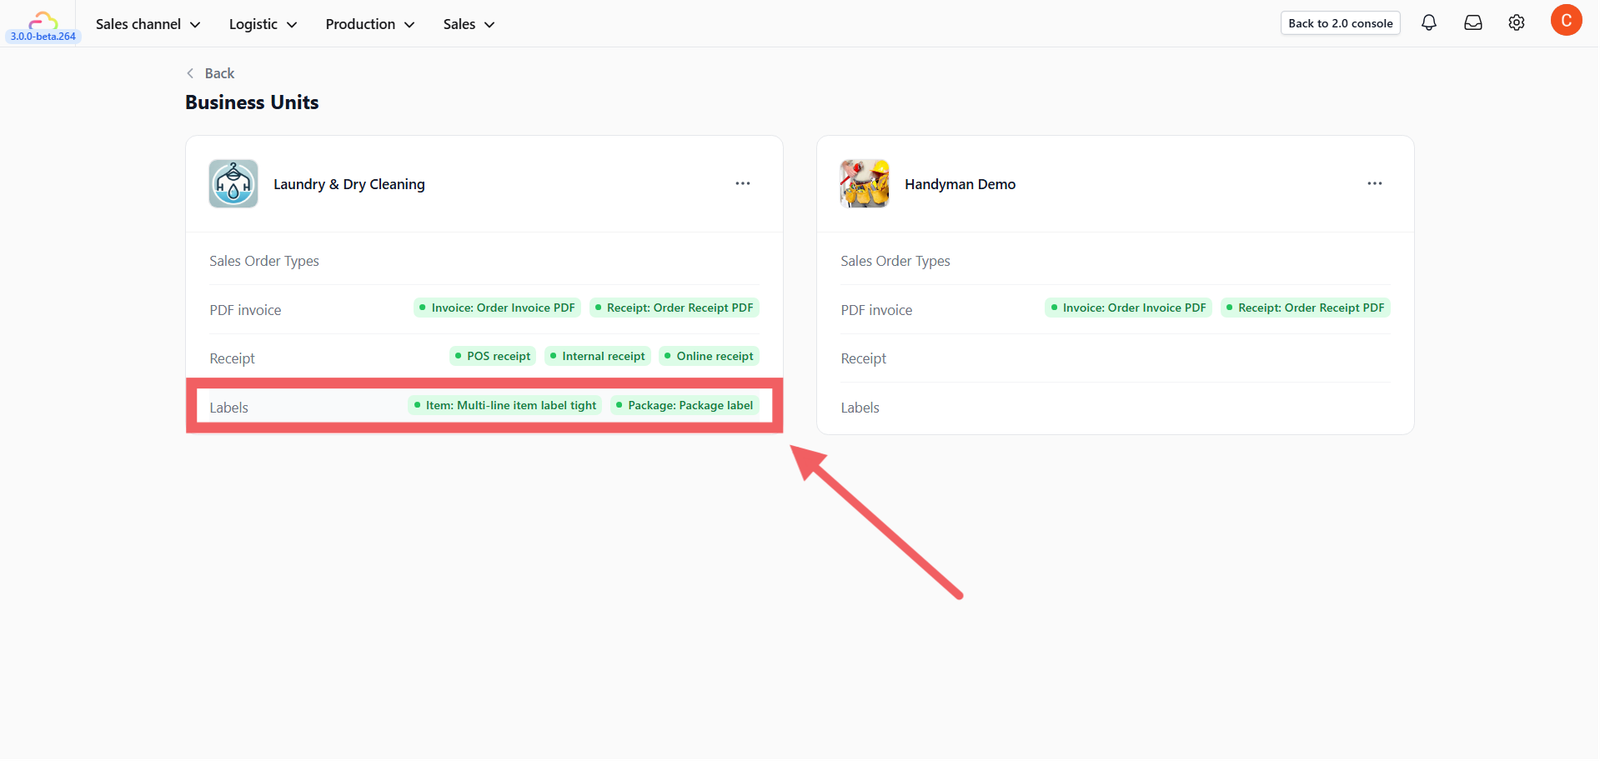
- Item Label: Select your newly published template (e.g., Multi-line item label tight). This is used to identify individual items in an order for tracking.
- Package Label: Select your template (e.g., Package label). This is used for grouping items that will be delivered or returned to the customer.
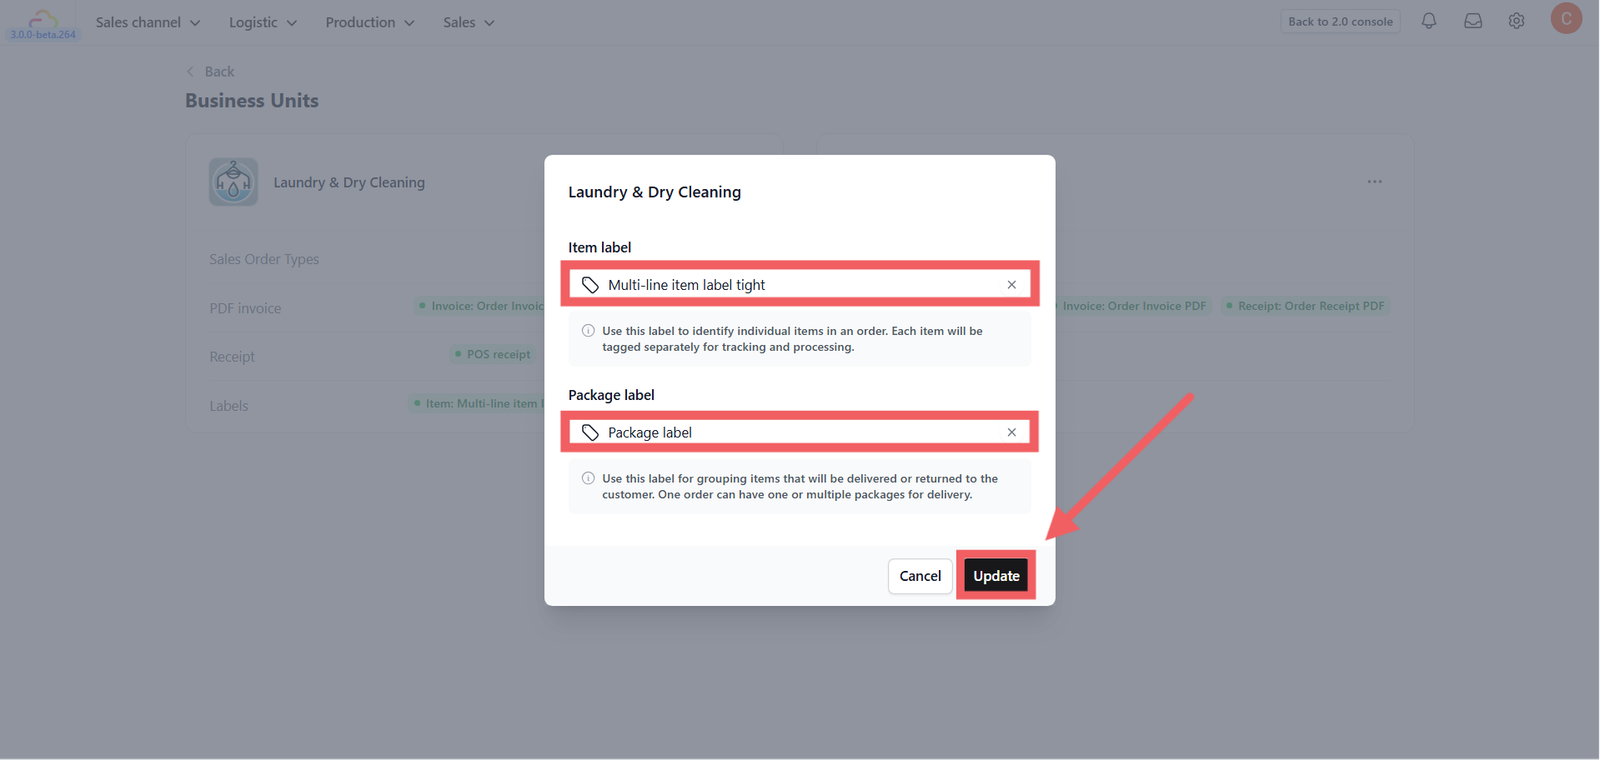
4. Click Update. Now, all orders under this business unit will use your new label design.
Give feedback
Up next
Configuring Email TemplatesStreamline your customer communication with customizable, on-brand email templates for every notification.
Read more