Setting Up Customer Event Notifications
In this article
Customer Event Notifications send an email or WhatsApp message to the customer the moment something happens on their order, job, or conversation. The customer is picked up automatically from the record, so you do not need to type any address or phone number. This guide walks through the full setup of one notification, then gives five working examples you can replicate.
Contents
Contents
Before You Start
Check these three things before creating a notification. Without them the notification either cannot save or will never send.
| What you need | Why |
|---|---|
| At least one customer record with an email address or phone number | The notification sends to the customer on the order. No contact details means nothing is delivered. |
| A published email template | Required if you want to send via email. Follow Step 1 below if you do not have one yet. |
| An approved WhatsApp template | Required if you want to send via WhatsApp. See [Introduction to WhatsApp Message Templates] then come back here. |
Step 1: Create and Publish an Email Template
A full guide for managing email templates is available at [Configuring Email Templates] (Coming Soon). The steps below cover the minimum needed to get one published for use here.
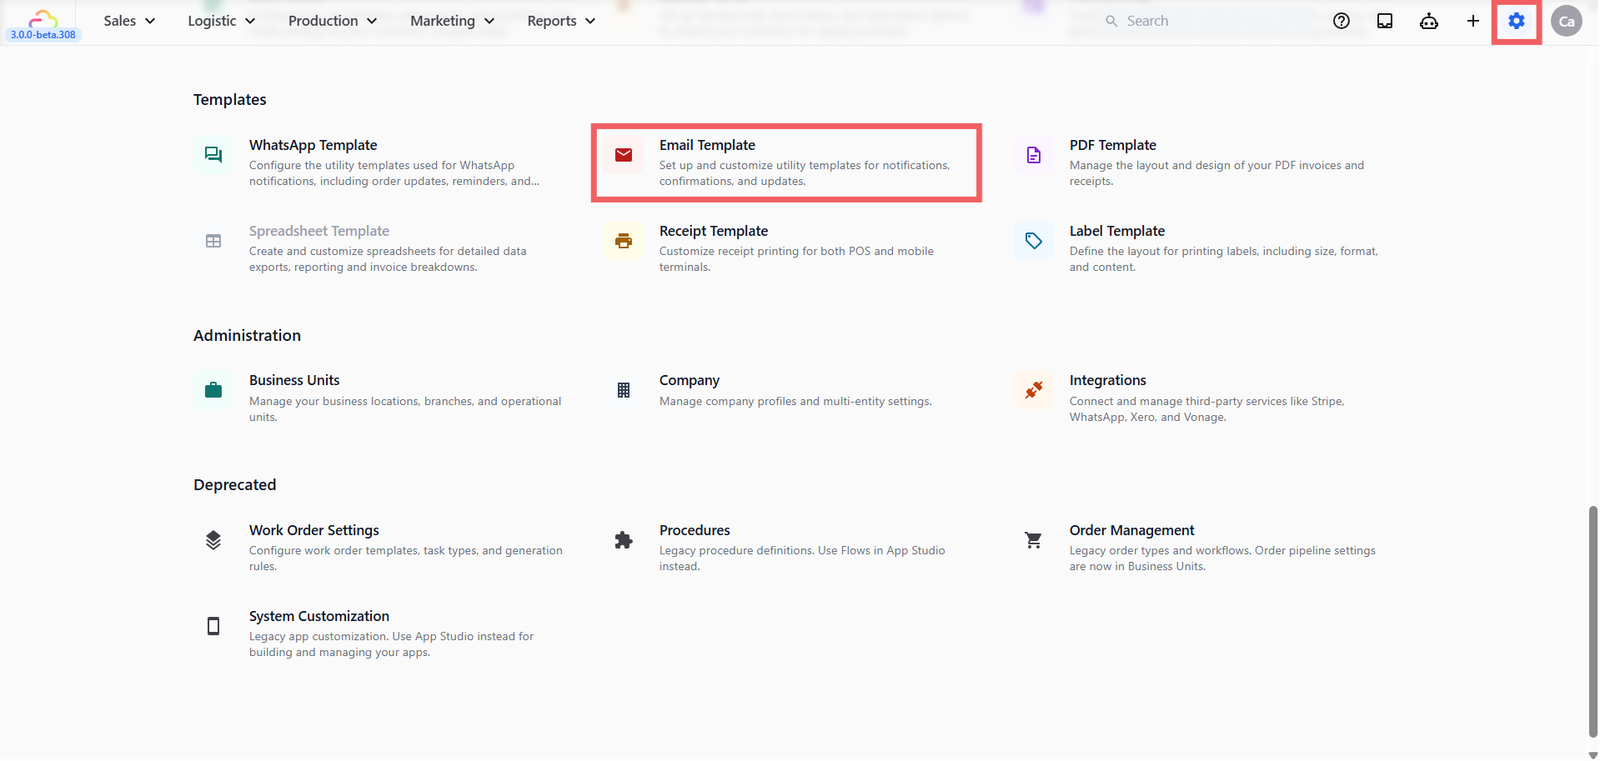
- Click the ⚙️ Settings icon in the top-right corner.
- Under the Templates section, click Email Template.
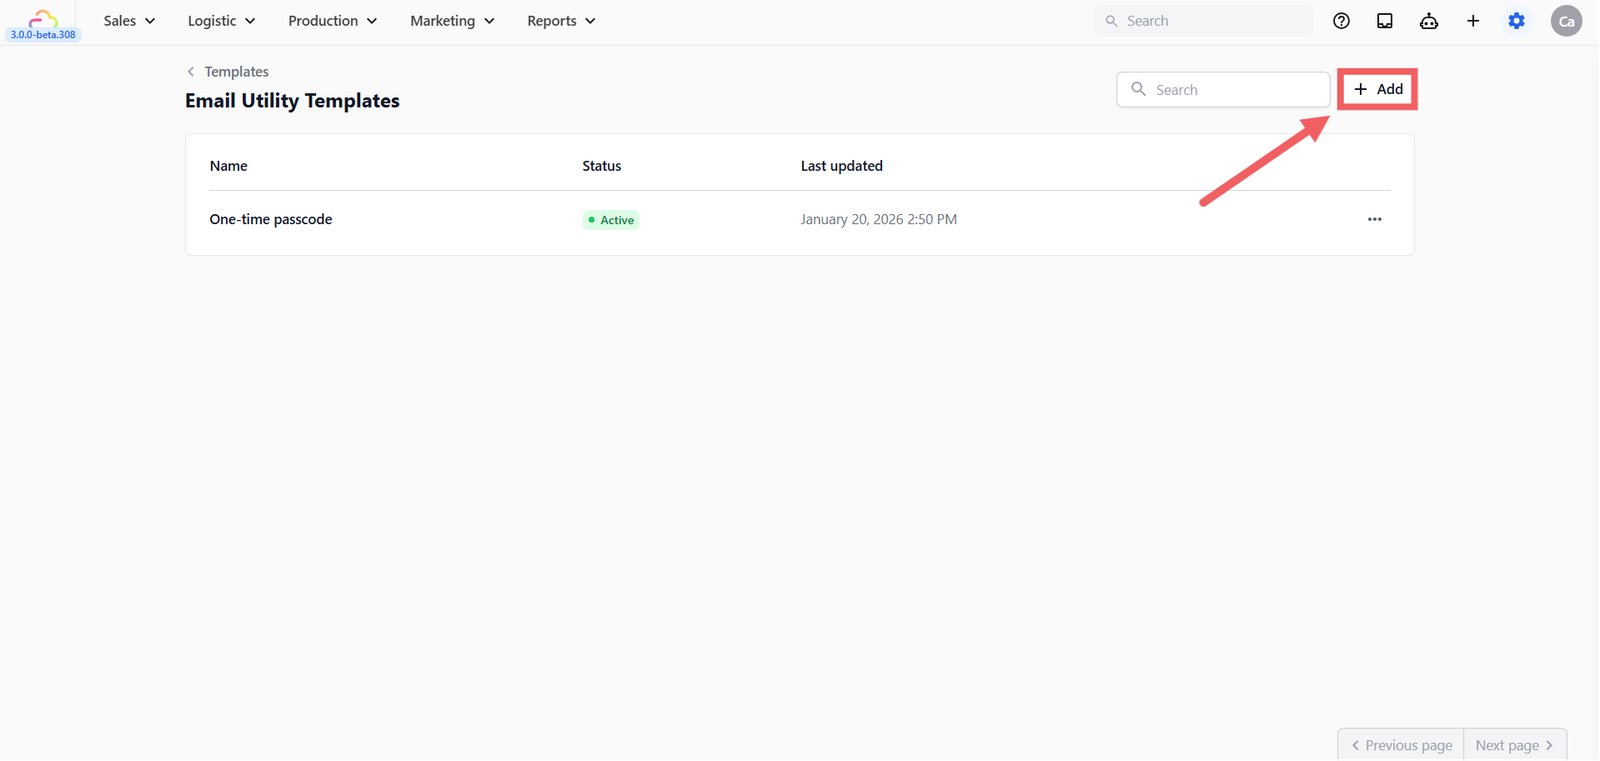
- Click + Add.
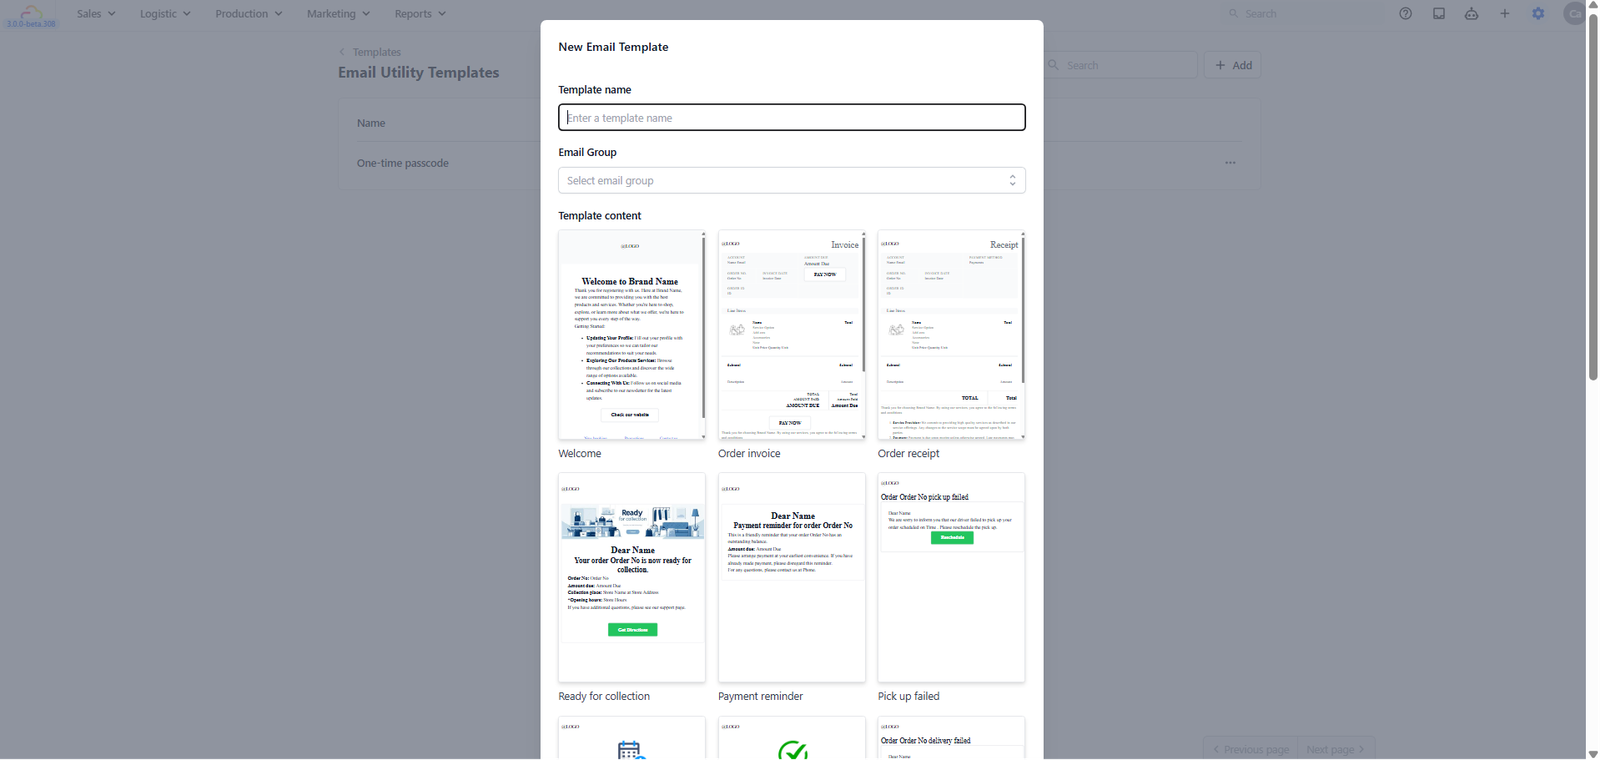
- Enter a Template name.
- Pick an Email Group (or leave empty).
Email Group
| Pick this | Use for |
|---|---|
| Empty | General use, no group label |
| Marketing & Promotions | Campaigns and offers |
| Status Update | Order updates |
| Newsletter & Information | Announcements |
| Account & Transactions | Receipts and invoices |
- Pick a Preconfigured template content.
Preconfigured Template Content
| Pick this | Use for |
|---|---|
| Welcome | Welcoming a new customer |
| Order invoice | Sending an invoice for payment |
| Order receipt | Confirming a completed paid order |
| Ready for collection | Telling the customer to come pick up |
| Payment reminder | Chasing an overdue payment |
| Pick up failed | Notifying the customer when a pickup could not be completed |
| Pick up rescheduled | Letting the customer know their pickup has been moved |
| Pick up complete | Confirming items collected from the customer |
| Delivery failed | Notifying the customer when a delivery could not be completed |
| Delivery rescheduled | Letting the customer know their delivery has been moved |
| Delivery complete | Confirming items delivered to the customer |
| Order collected | Confirming the customer has collected their order in store |
| Order cancelled | Notifying the customer that their order has been cancelled |
| One-time passcode | Sending a verification code to the customer |
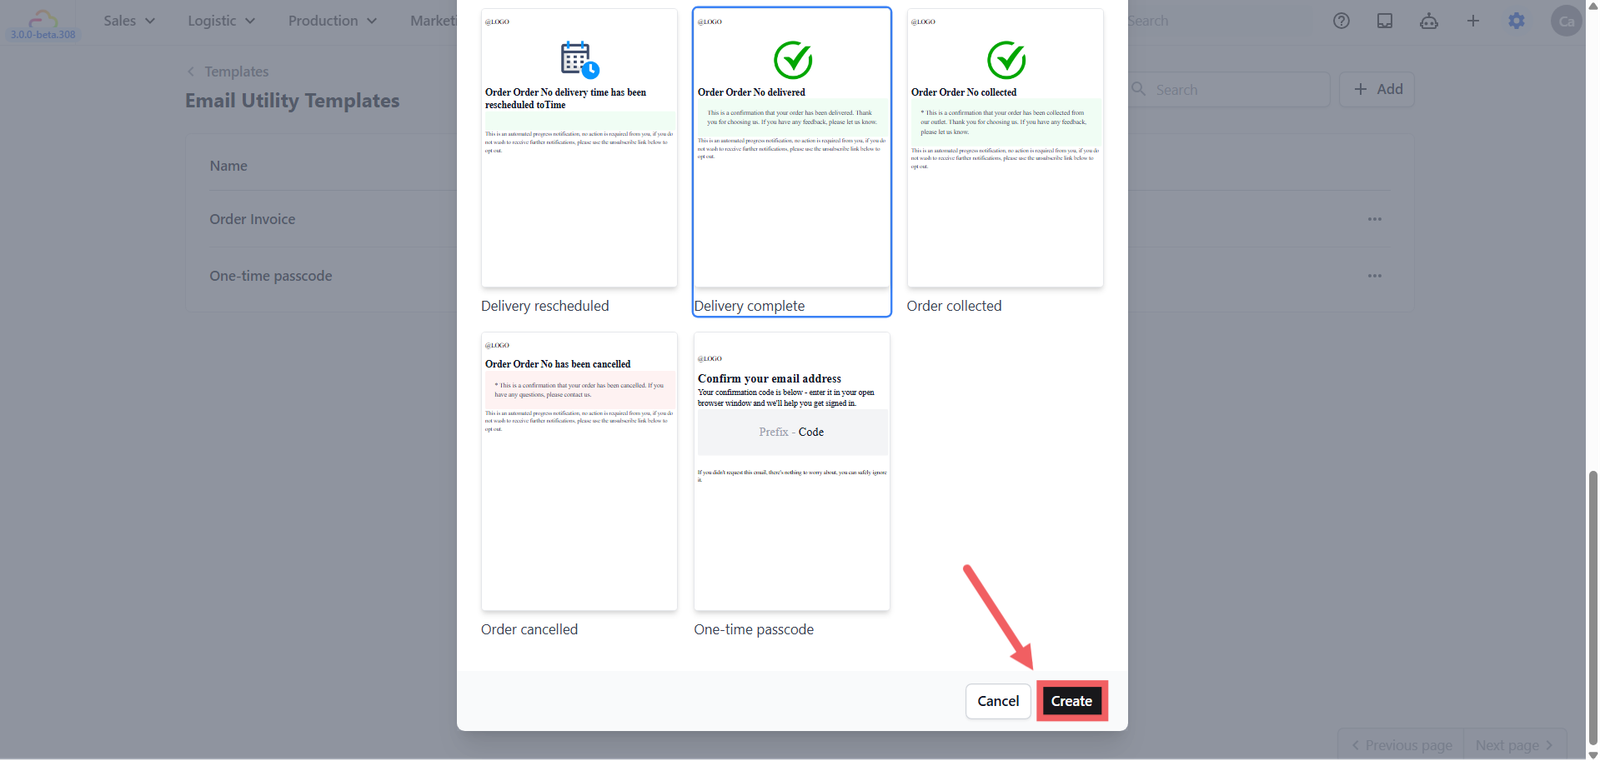
- Click Create
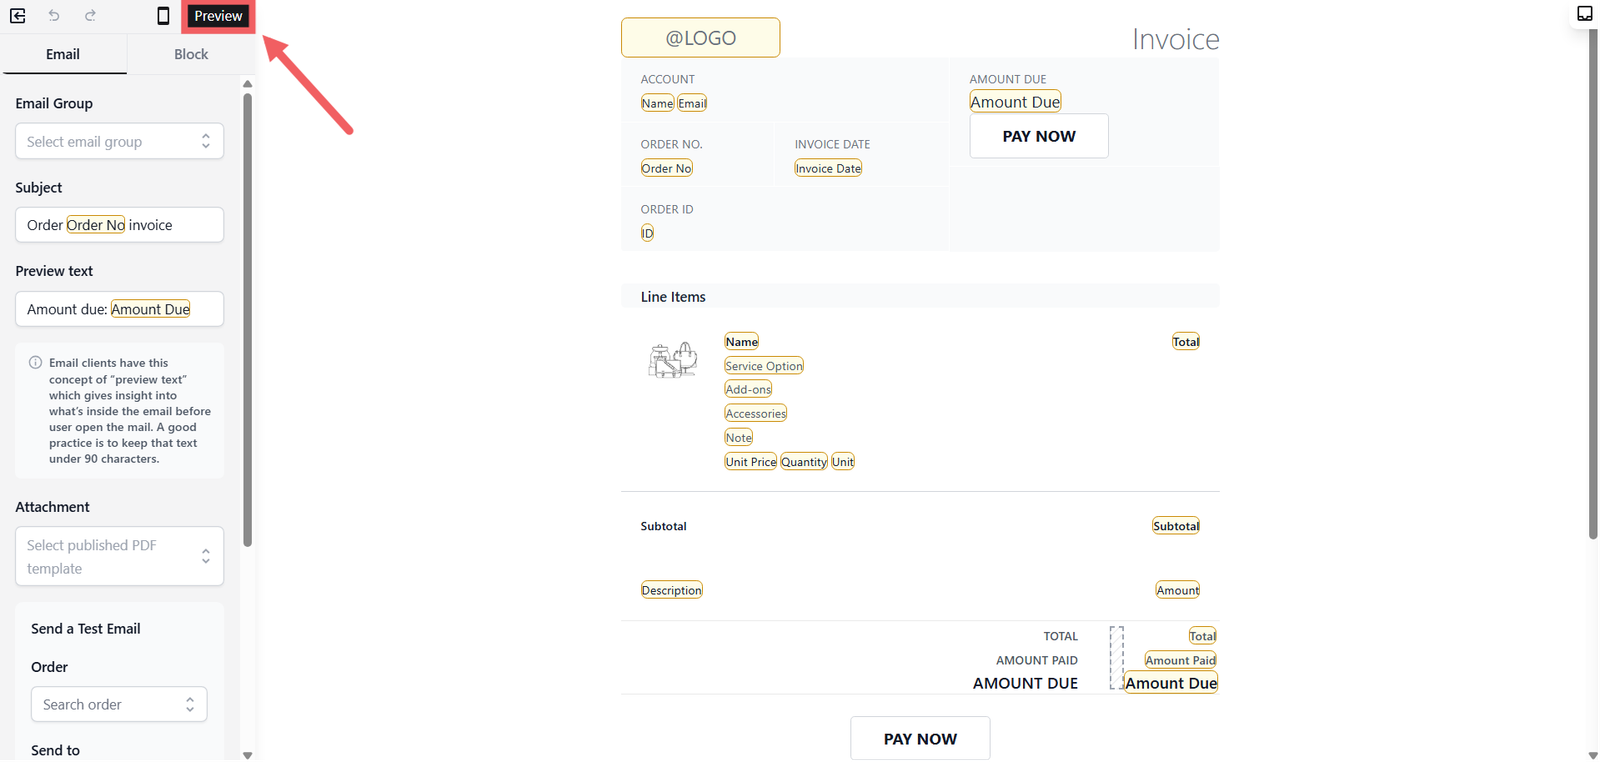
- The editor opens, review the content and edit if needed.
- Click Preview in the top left of the editor toolbar.
- In the preview screen, select an existing order to check and click the Publish icon (rocket icon, top-right corner).
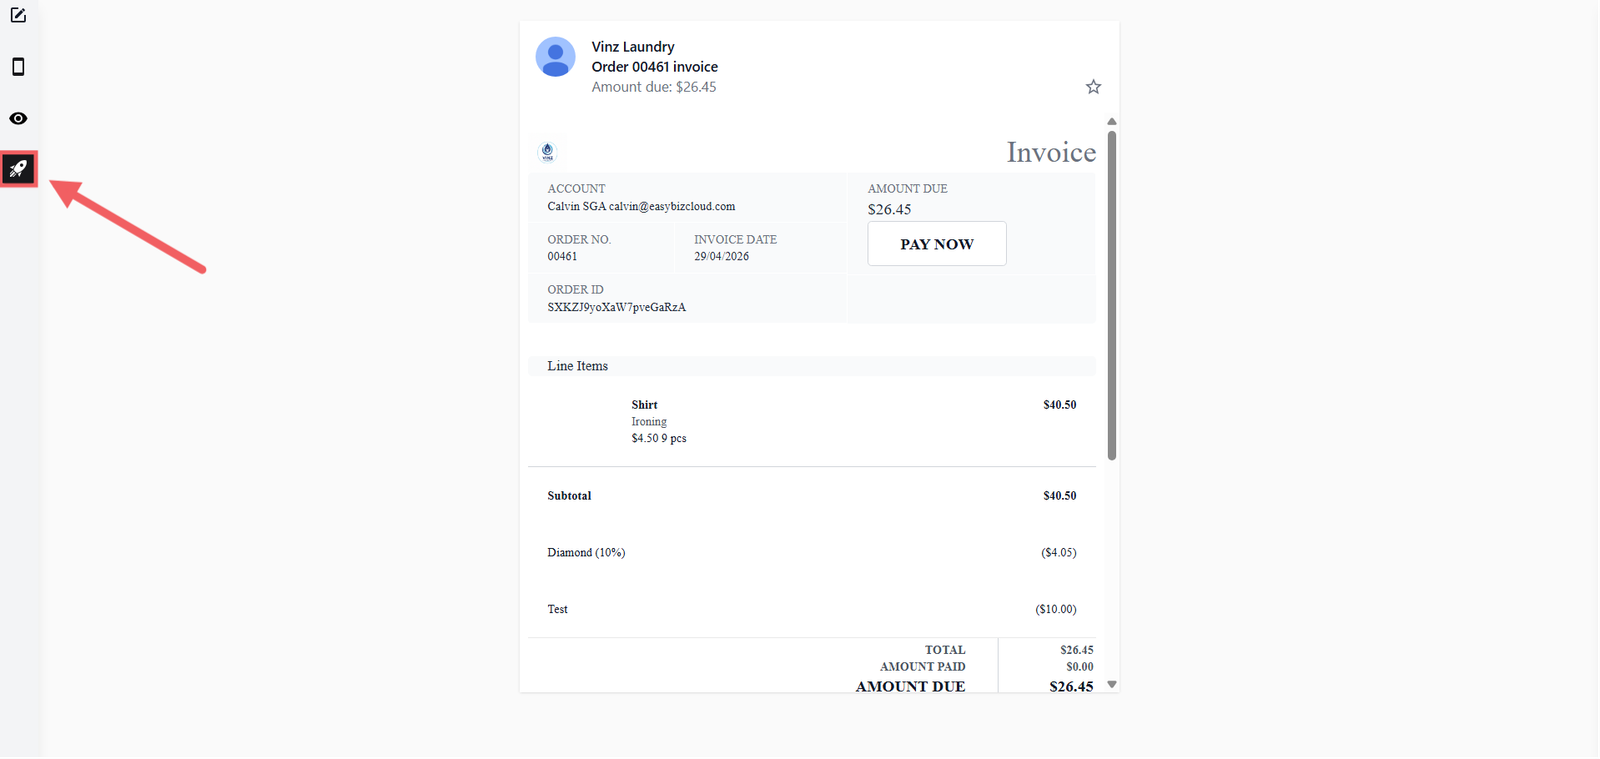
- Confirm in the dialog.
Your template is now ready to use in Event Notifications.
Step 2: Open Event Notifications
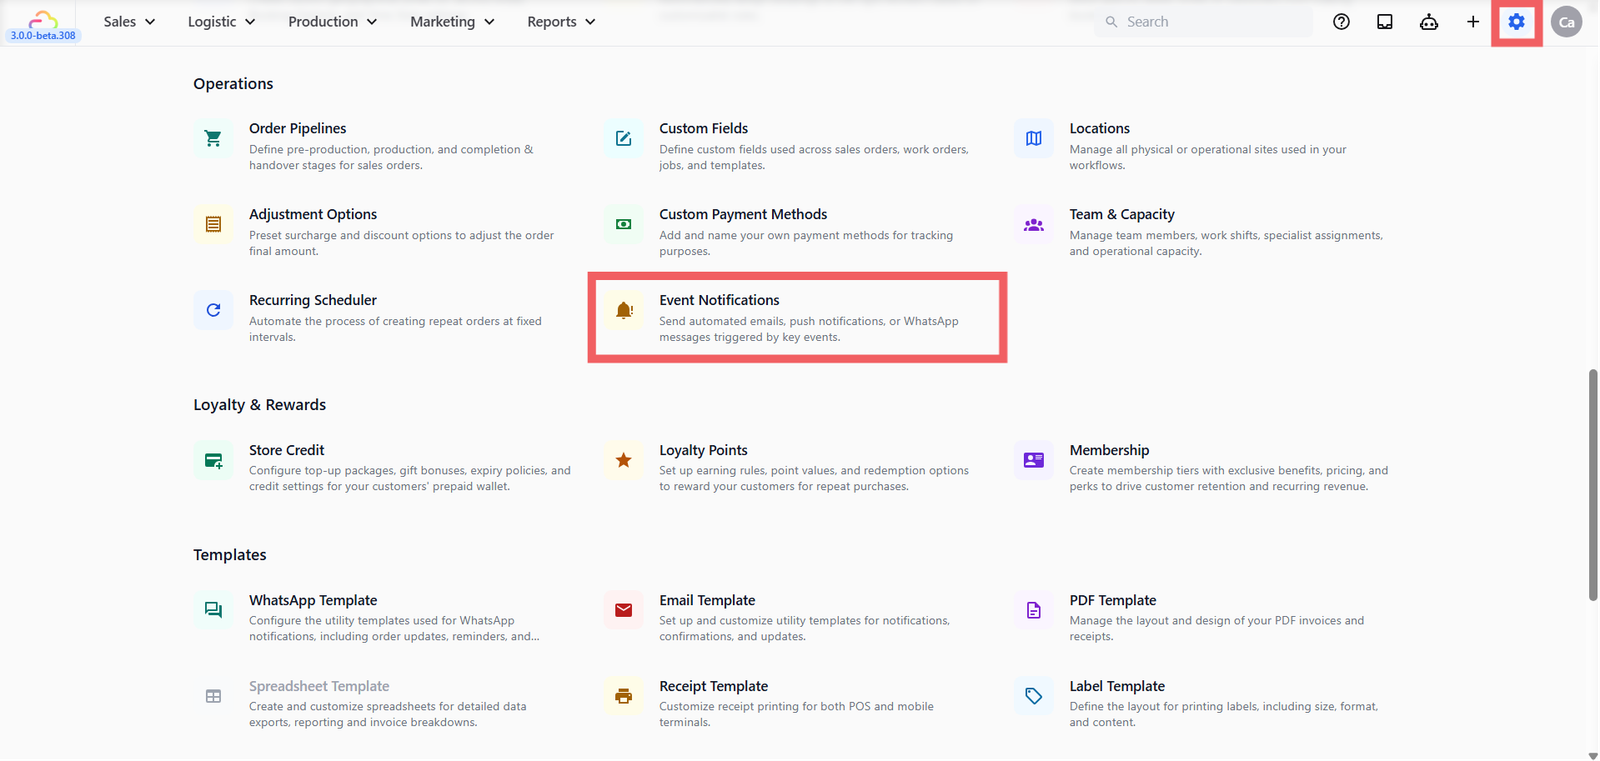
- Click the ⚙️ Settings icon in the top-right corner.
- Under the Operations section, click Event Notifications.
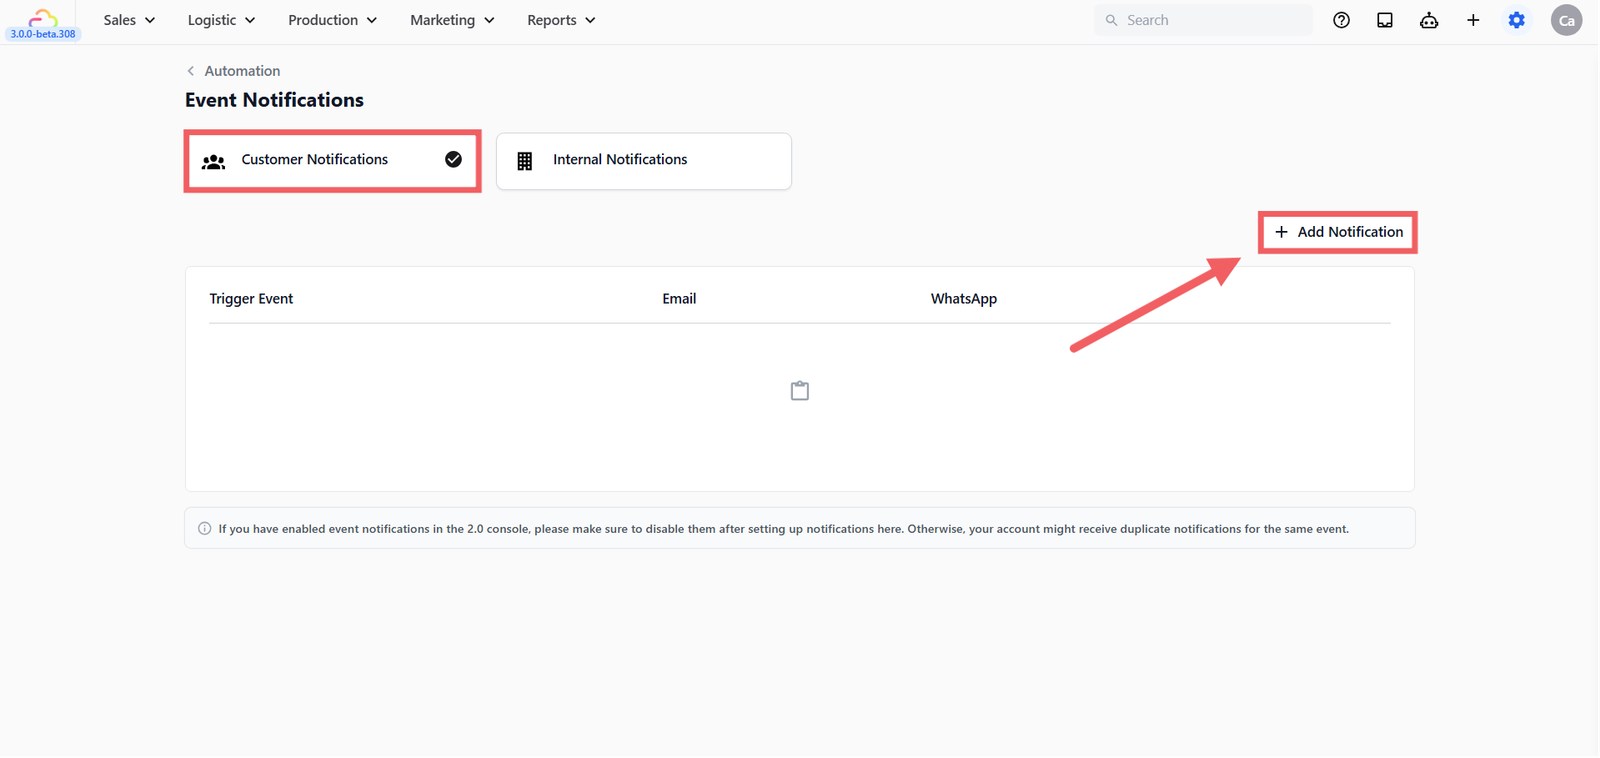
- Click the Customer Notifications tab.
- Click + Add.
Step 3: Fill In the Notification
The Add Notification dialog has three fields.
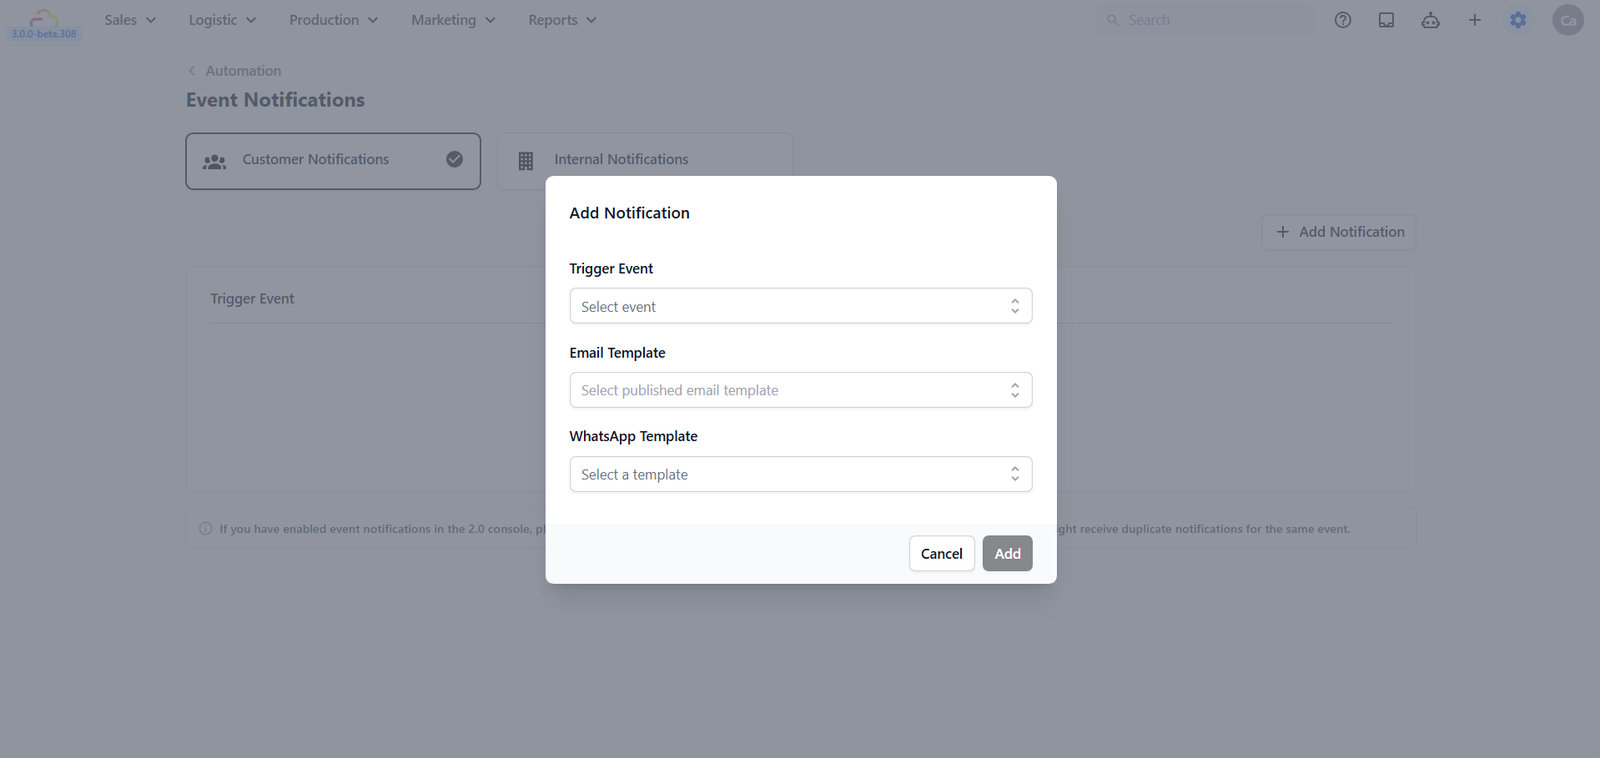
Trigger Event
| Pick this | Result |
|---|---|
| Sales order created | Fires the moment a new order is saved |
| Sales order confirmed | Fires when an order is confirmed by staff |
| Sales order completed | Fires when an order is fully closed and paid |
| Order ready for collection | Fires when an order is marked ready |
| Payment succeeded | Fires after a payment is captured |
| Logistic pickup completed | Fires when a pickup job is marked done |
| Logistic delivery completed | Fires when a delivery job is marked done |
| All other events | Type a keyword or scroll the search field to find any event |
Email Template
| Pick this | Result |
|---|---|
| Empty | No email is sent for this event |
| Any published email template | The selected email is sent to the customer's email on file |
WhatsApp Template
| Pick this | Result |
|---|---|
| Empty | No WhatsApp Template message is sent for this event |
| Any published email template | The selected message template is sent to the customer's phone number on file |
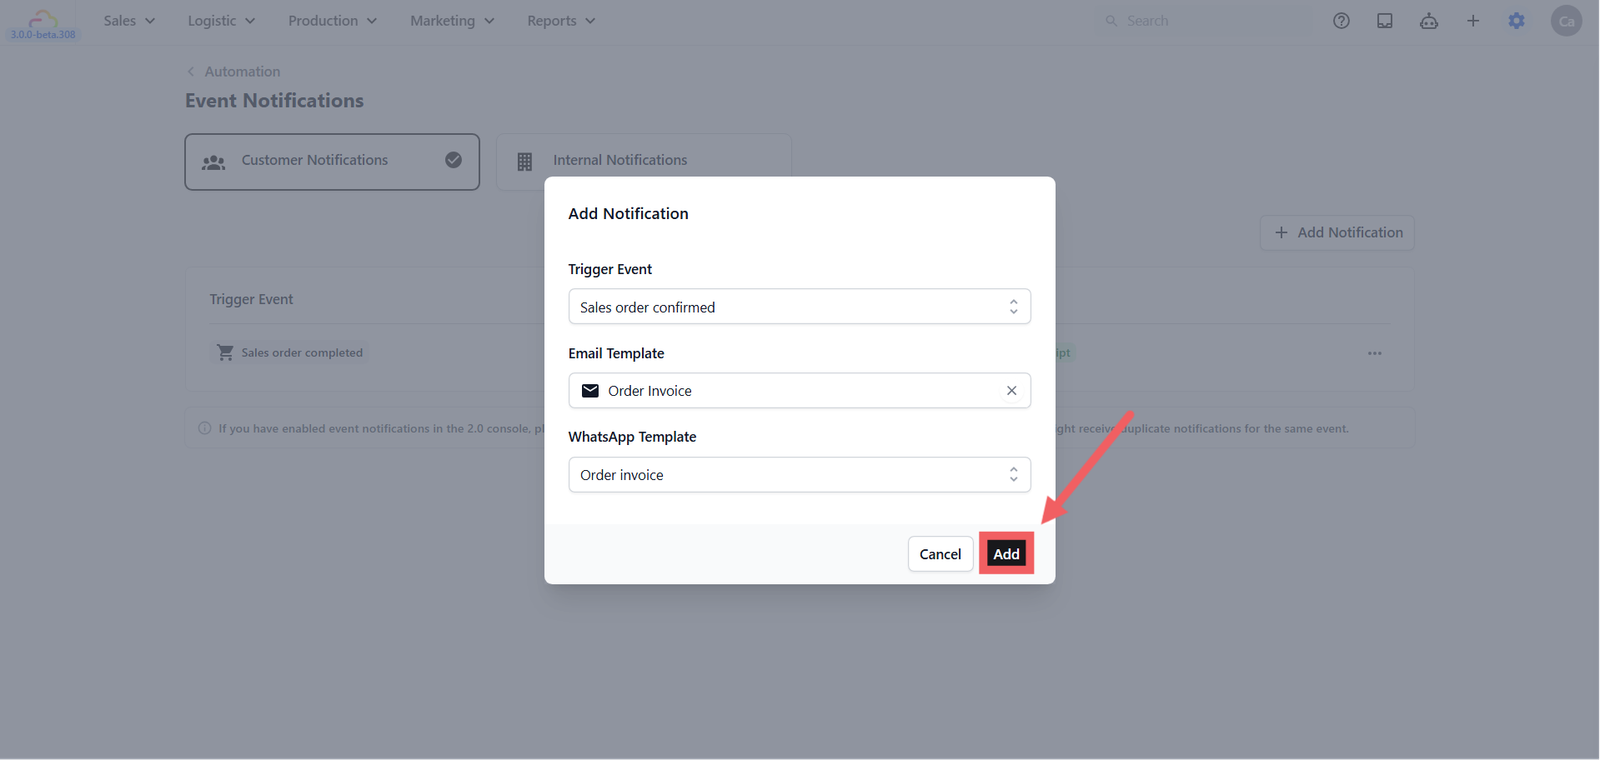
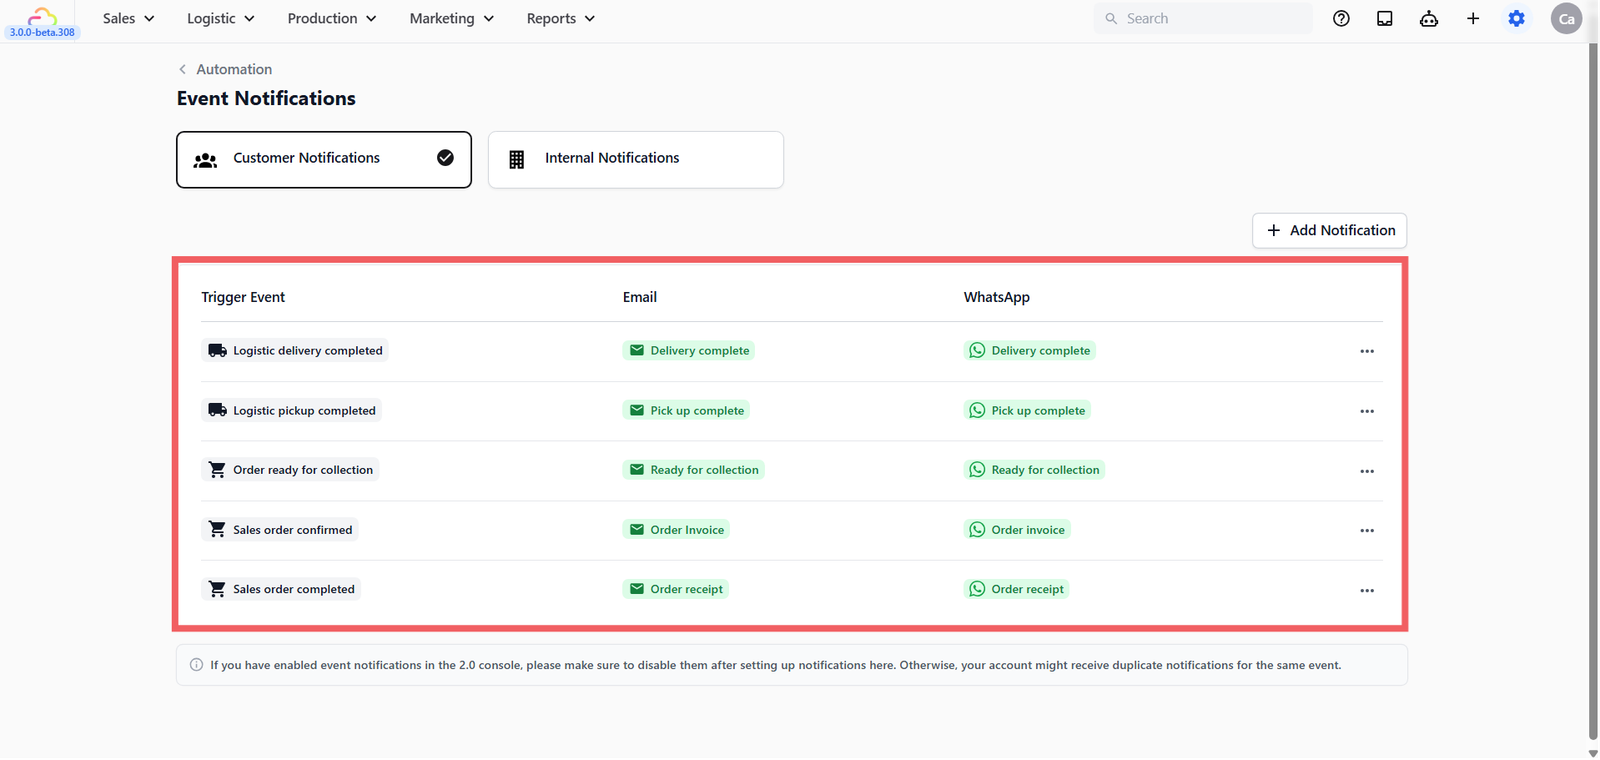
Click Add and the notification appears in the table on the Customer Notifications tab.
Five Examples to Copy
Pick any of these and replicate the setup in your shop. You can attach both an email and a WhatsApp template to the same notification — the system sends both at the same time.
Example 1 -> Send a receipt when an order is completed
| Field | Value |
|---|---|
| Trigger Event | Sales order completed |
| Email Template | Order receipt |
| WhatsApp Template | Order receipt |
Example 2 -> Send an invoice when an order is confirmed
| Field | Value |
|---|---|
| Trigger Event | Sales order confirmed |
| Email Template | Order invoice |
| WhatsApp Template | Order invoice |
Example 3 -> Tell the customer when their order is ready for store collection
| Field | Value |
|---|---|
| Trigger Event | Order ready for collection |
| Email Template | Ready for collection |
| WhatsApp Template | Ready for collection |
Example 4 -> Confirm a successful pickup (online order)
| Field | Value |
|---|---|
| Trigger Event | Logistic pickup completed |
| Email Template | Pick up complete |
| WhatsApp Template | Pick up complete |
Example 5 -> Notify the customer when a delivery is completed (online/store order)
| Field | Value |
|---|---|
| Trigger Event | Logistic delivery completed |
| Email Template | Delivery complete |
| WhatsApp Template | Delivery complete |
Confirming It Works
Trigger the event in a test order. For example mark a test order as completed to fire Example 1. The message should arrive within a minute. If nothing arrives, check:
- The template is Published, not in draft, if you are not sure, open the template and check the status at the top
- The customer record has an email address for email, or a valid phone number for WhatsApp
- The trigger event matches what actually happened — Sales order completed and Order ready for collection are different events
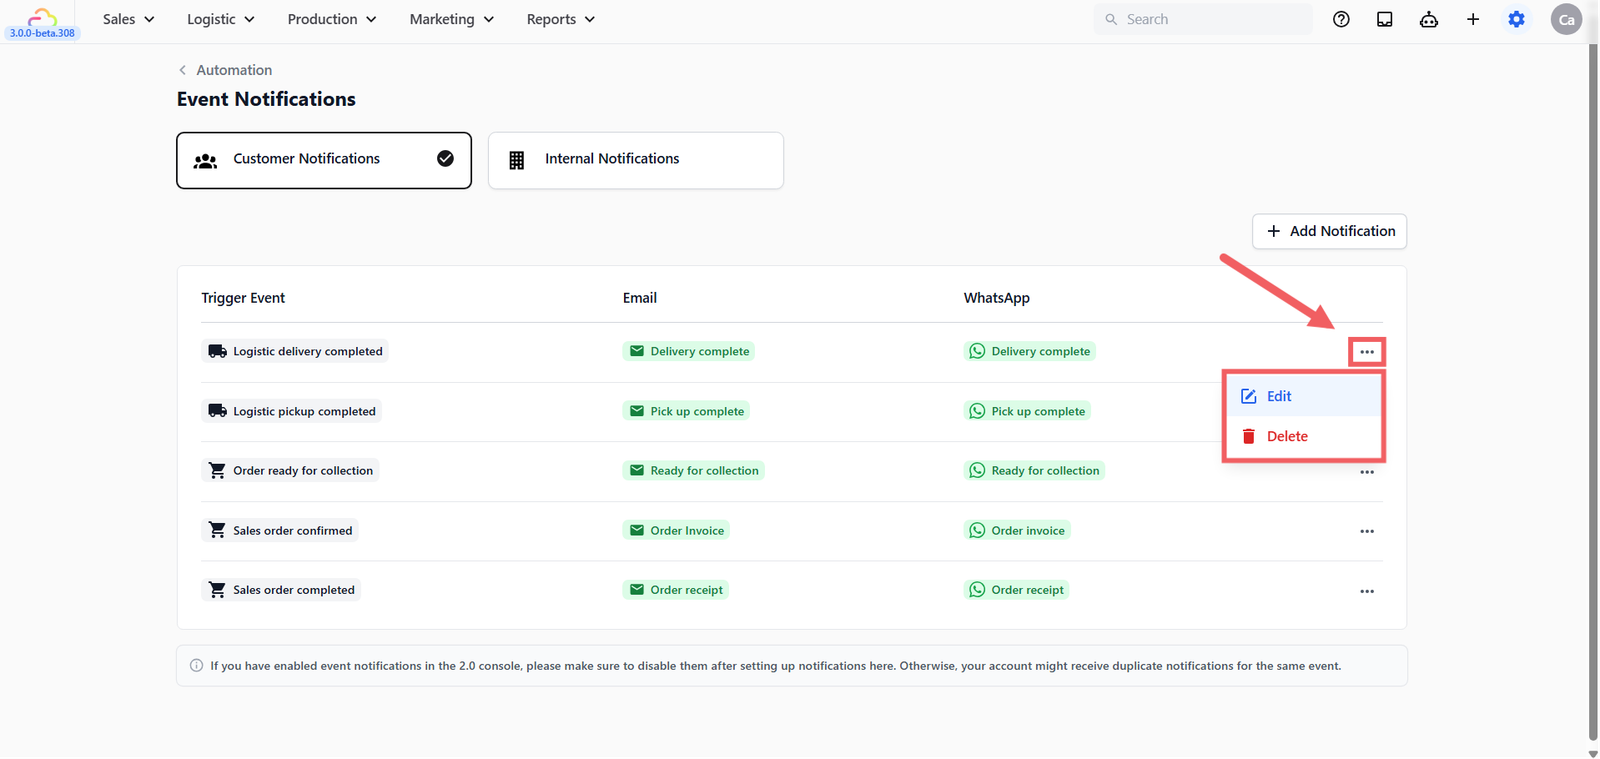
Editing or Deleting
Each row in the notifications table has an Edit and Delete option in its menu.
- Edit -> re-opens the same dialog. Change the trigger or templates and save.
- Delete -> is permanent. Re-adding it does not restore the previous configuration.
FAQs
Do I have to set up every event?
No. Most shops start with three to five customer notifications. The most useful starting set is Sales order confirmed (for invoices), Order ready for collection, and Payment succeeded (for receipts). Add more later.
What if my customer has no email address?
The email is skipped for that customer. WhatsApp still sends if a phone number is on file. Attach both an email and a WhatsApp template to the same notification to cover both cases.
Why does my notification show "None" under WhatsApp?
You saved without picking a WhatsApp template. Edit the row and pick an approved template, or leave it on email only.
I saved a notification but no message arrived. Why?
Three things to check: the template is Published and not in draft, the customer has a valid email address or phone number on their record, and the trigger event you picked matches what actually happened in the system.
Can one notification fire twice in the same minute?
Yes. The notification is tied to the event. If two orders complete in the same minute, two messages are sent.
Can I pause a notification without deleting it?
Not yet. As a workaround, unpublish the linked template. The channel will show "None" until you publish the template again.
Can I filter by sales channel or business unit?
Not yet. Every notification fires for every order across every sales channel.
What is the difference between Sales order confirmed and Payment succeeded for sending an invoice?
It depends on your shop's payment flow. If you confirm the order first and collect payment after — the typical quote-then-pay flow — use Sales order confirmed. Pricing is locked at that point and it fires once per order, making it the right moment to send the invoice. If your shop takes payment before confirming, use Payment succeeded instead and attach a receipt template — the confirmed trigger will be silent in that path because the order auto-confirms without emitting the event. For unpaid order reminders, use Payment reminder, but note that this one is staff-triggered by clicking Send Payment Reminder on the order, not automatic.
Give feedback

Up next
HitPay IntegrationAccept PayNow and card payments from your customers by connecting HitPay to EasyBiz in a few simple steps.
Read more