Driver App
In this article
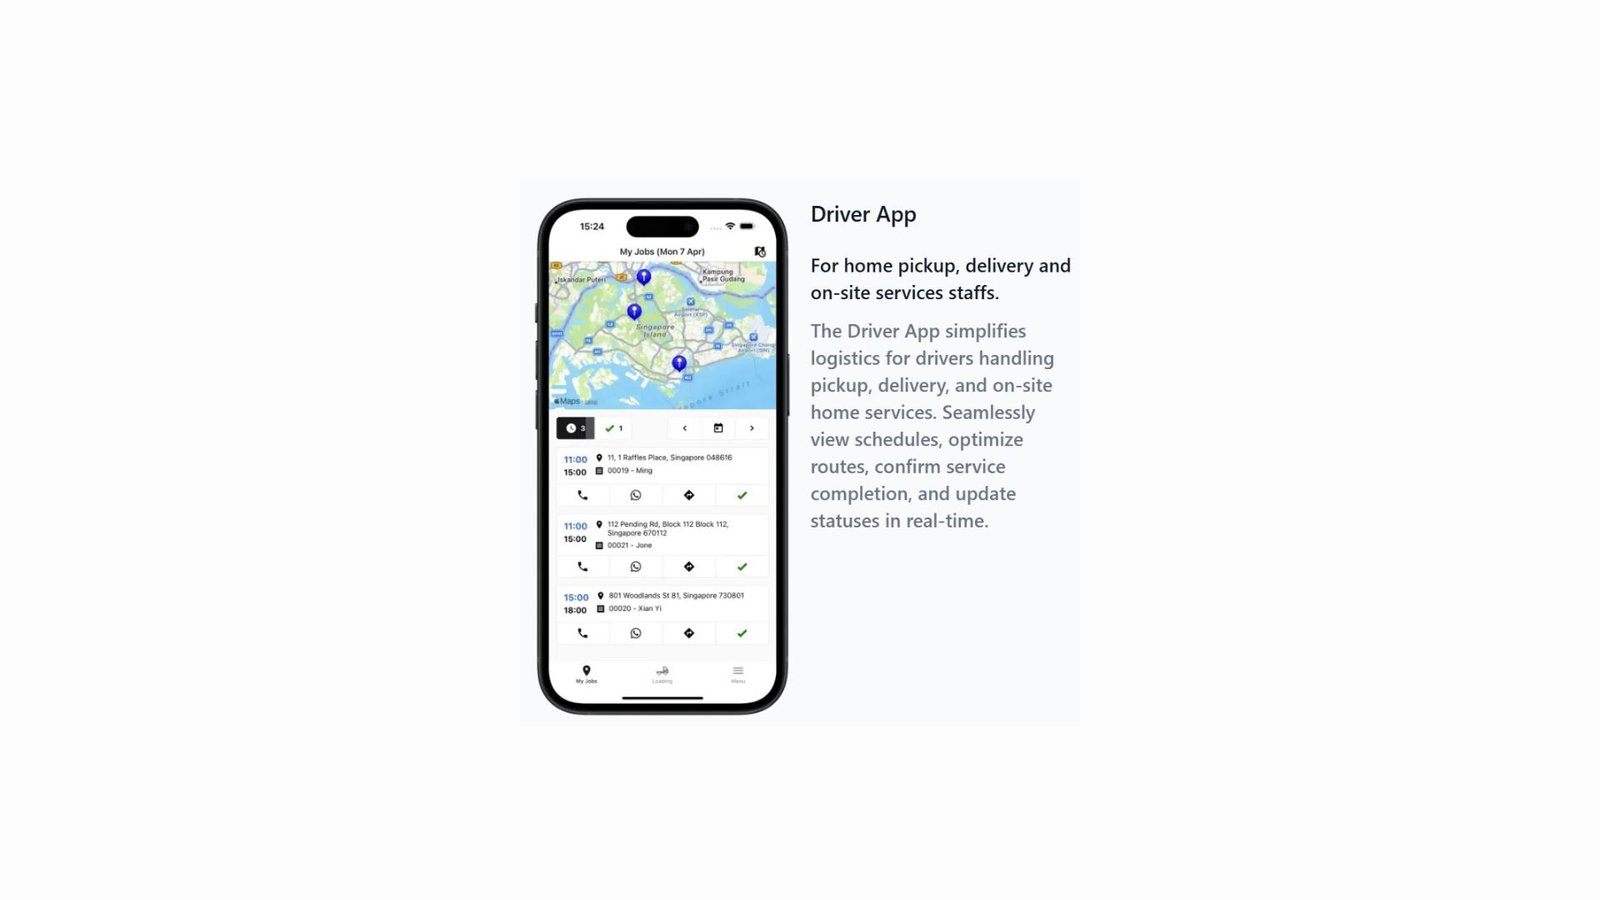
The Driver App is the essential mobile companion for your logistics team. Unlike the static interfaces used in the factory, this app is built for mobility. It simplifies the complex task of home pickups, retail store collections, and final deliveries. By providing drivers with live maps and digital manifestos, the app ensures that every movement of a high-value item is tracked from the moment it leaves a customer's hands.
Contents
Contents
Why create the Driver app?
Setting up a dedicated Driver App transforms your logistics from a manual guessing game into a precise, digital operation:
- Route Efficiency: Drivers can view their entire day's schedule on a map, reducing travel time and fuel costs.
- Error Reduction: Digital "Transfer" and "Check-in" pages prevent items from being misplaced during the handoff between stores and the factory.
- Real-Time Updates: As soon as a driver clicks "Complete" on a doorstep, your customer service team and the customer are instantly notified.
- Proof of Service: Drivers can attach photos and notes directly to a job, providing a digital paper trail for every pickup and delivery.
Creating the Driver Mobile App
Follow these steps to deploy your logistics interface:
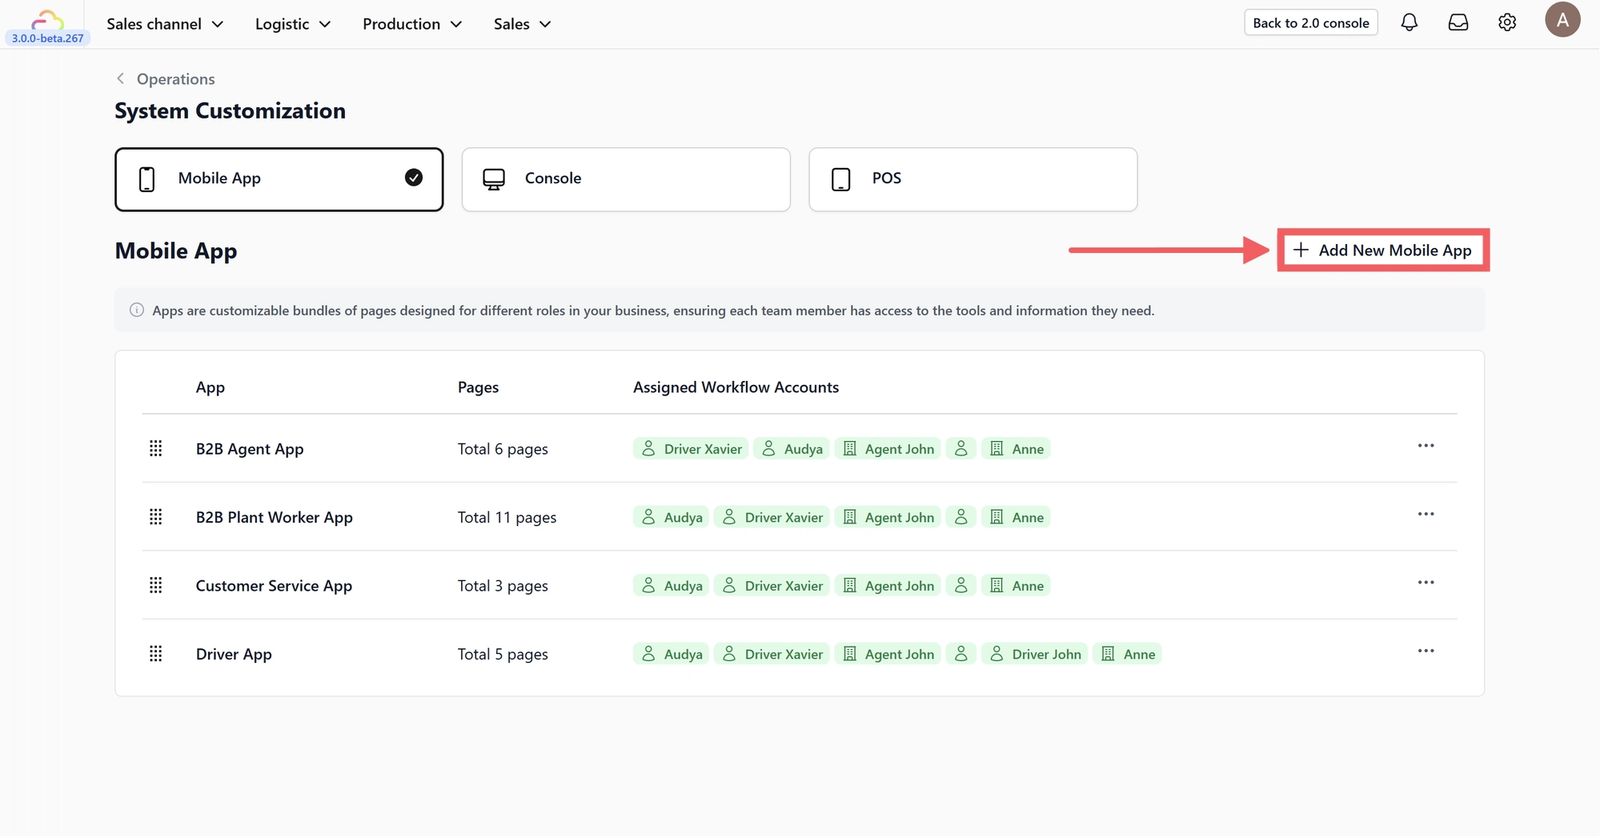
Click on the + Add New Mobile App button in the System Customization dashboard.
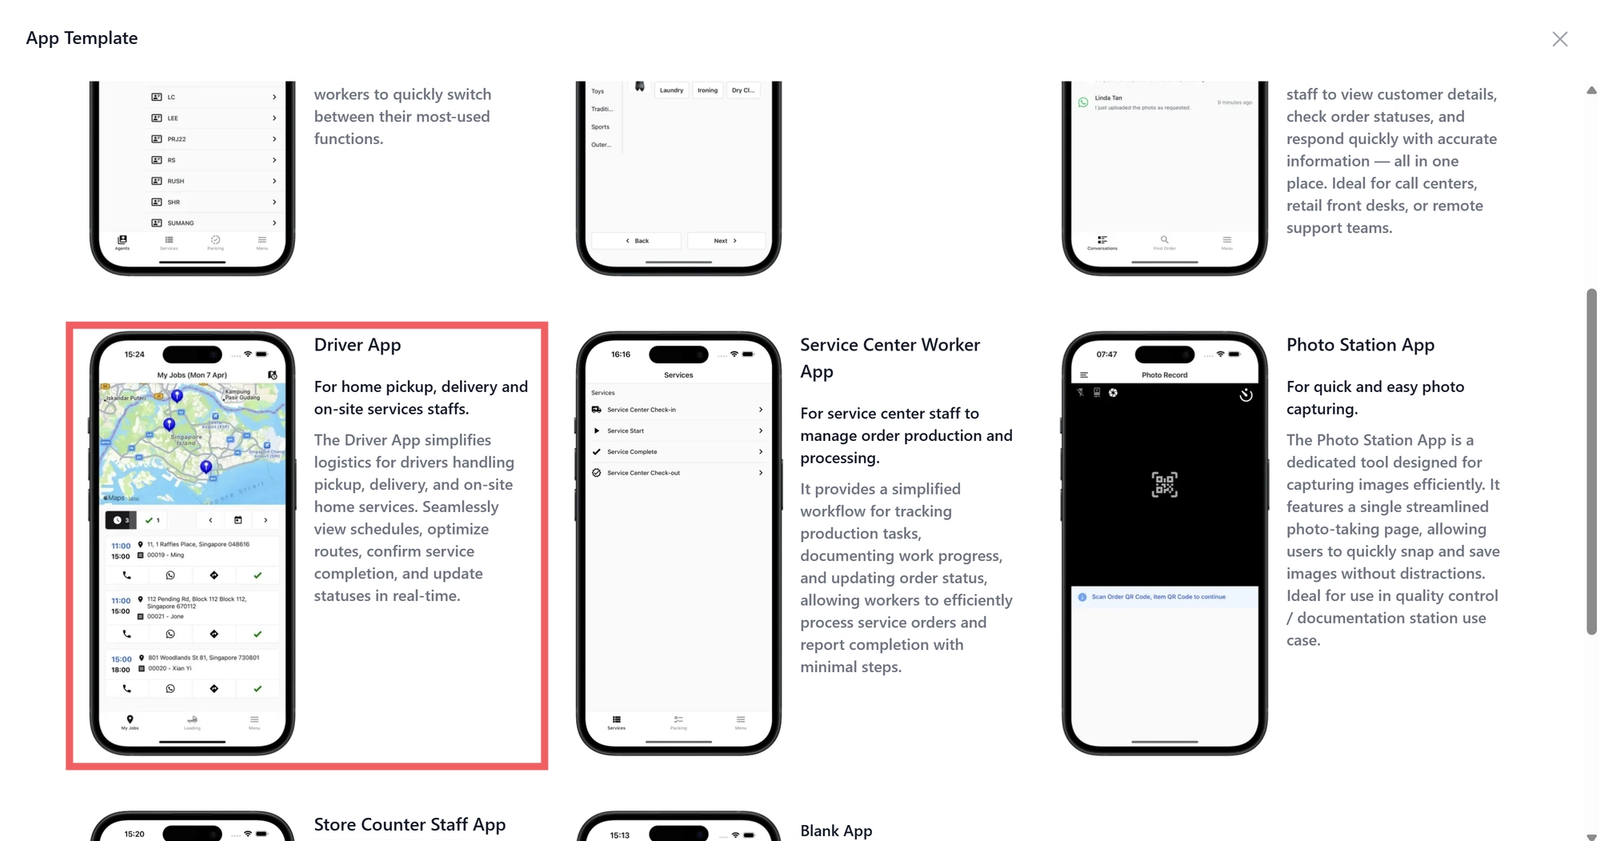
Scroll through the templates and choose the Driver App.
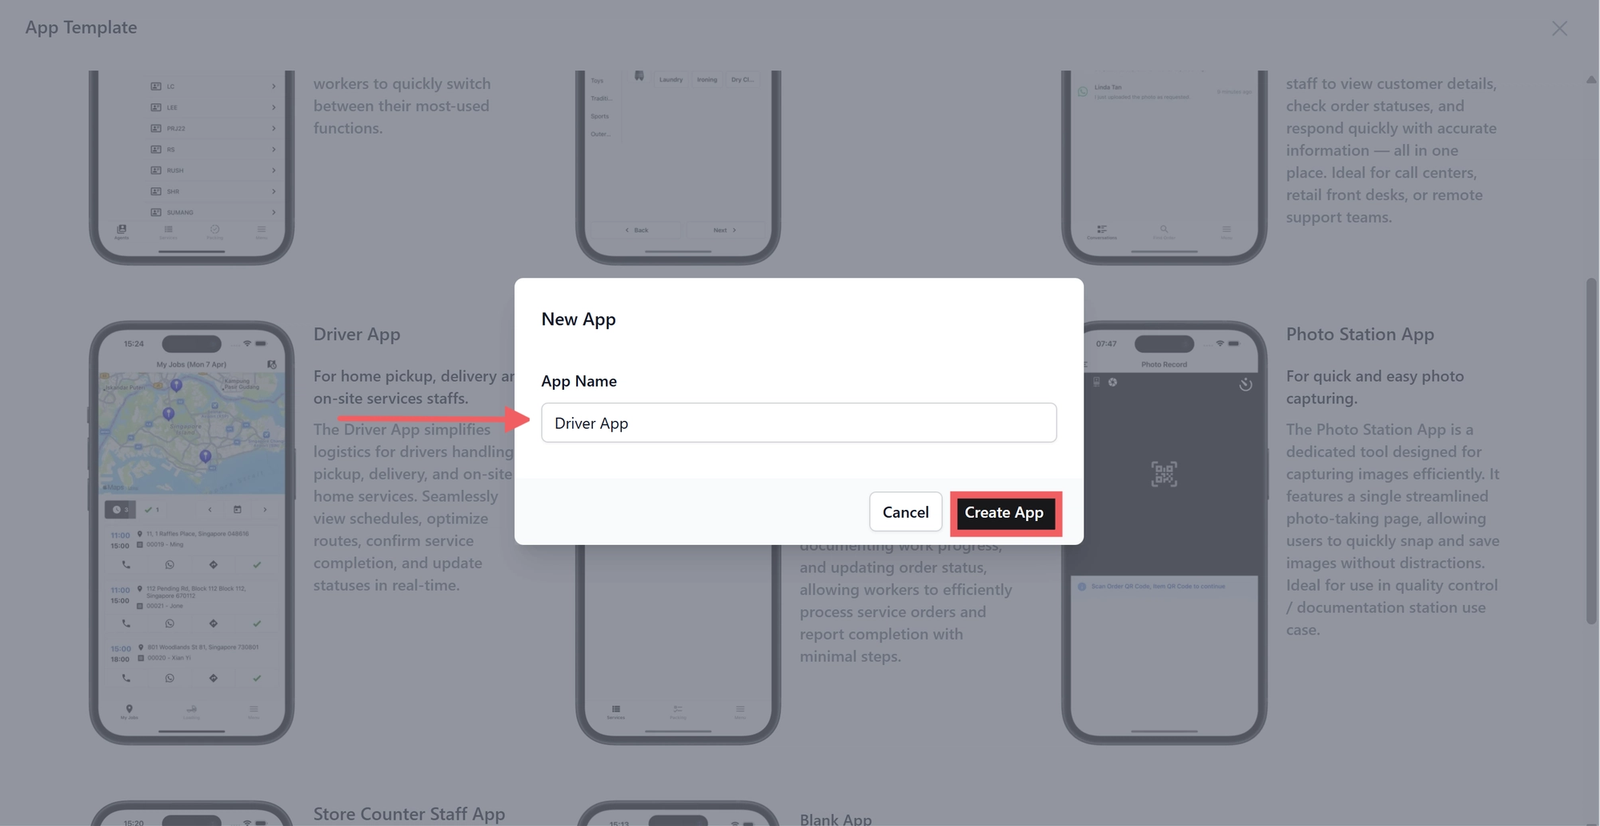
Rename your app: Keep the default "Driver App" or give it a custom name, then click Create App.
Home Layout Options
Scroll down to the App Home section to configure your navigation style.
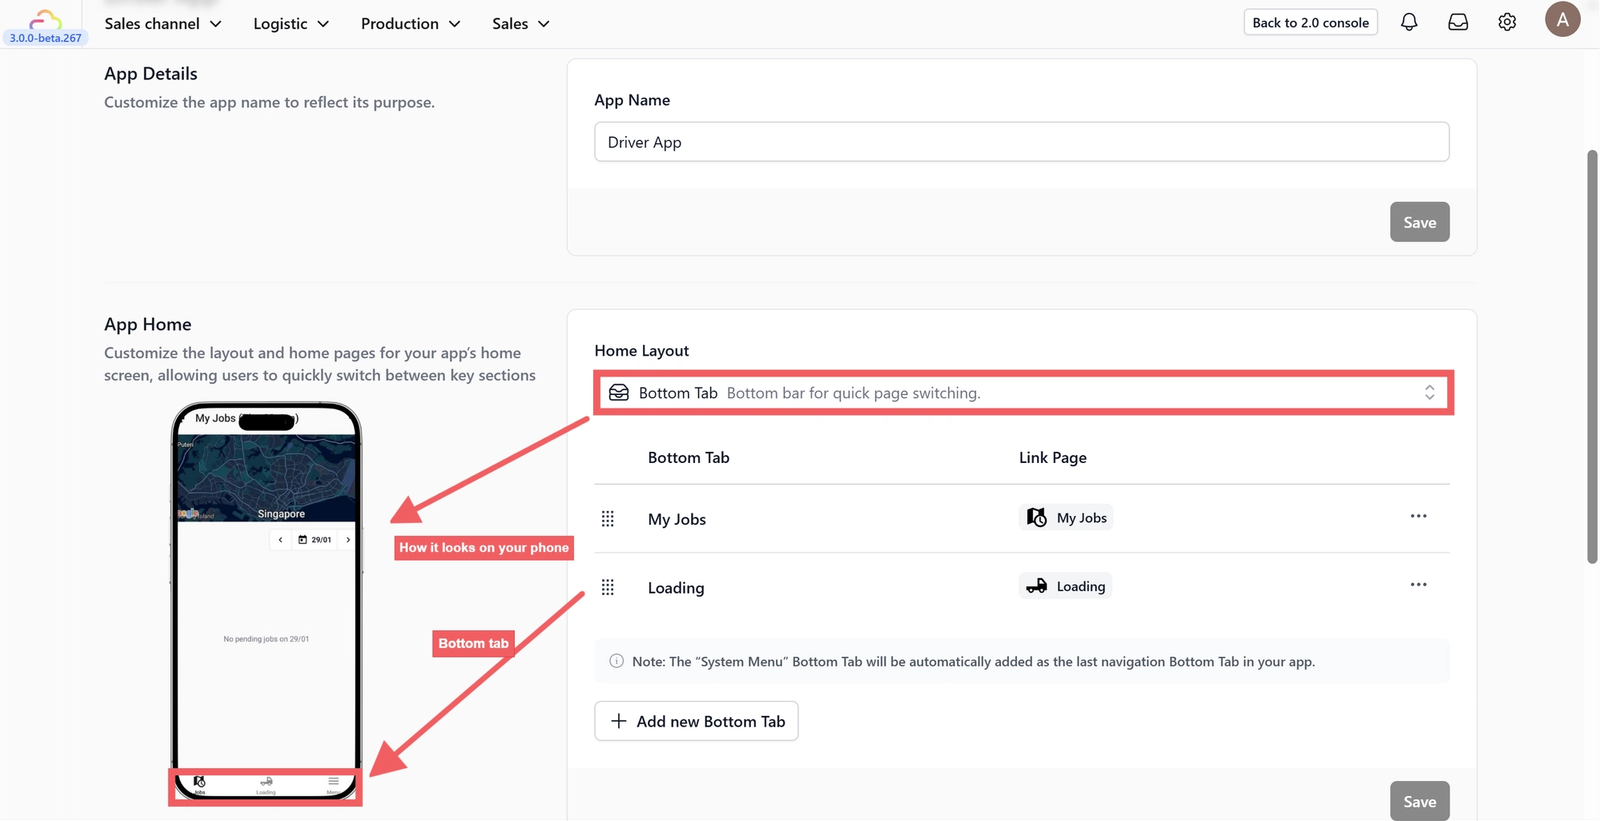
You can choose how your drivers navigate the app based on their device usage:
- Bottom Tab: This displays up to 4 primary icons at the bottom of the screen. It is the most efficient layout for quick, one-handed switching between maps and loading lists while on the go.
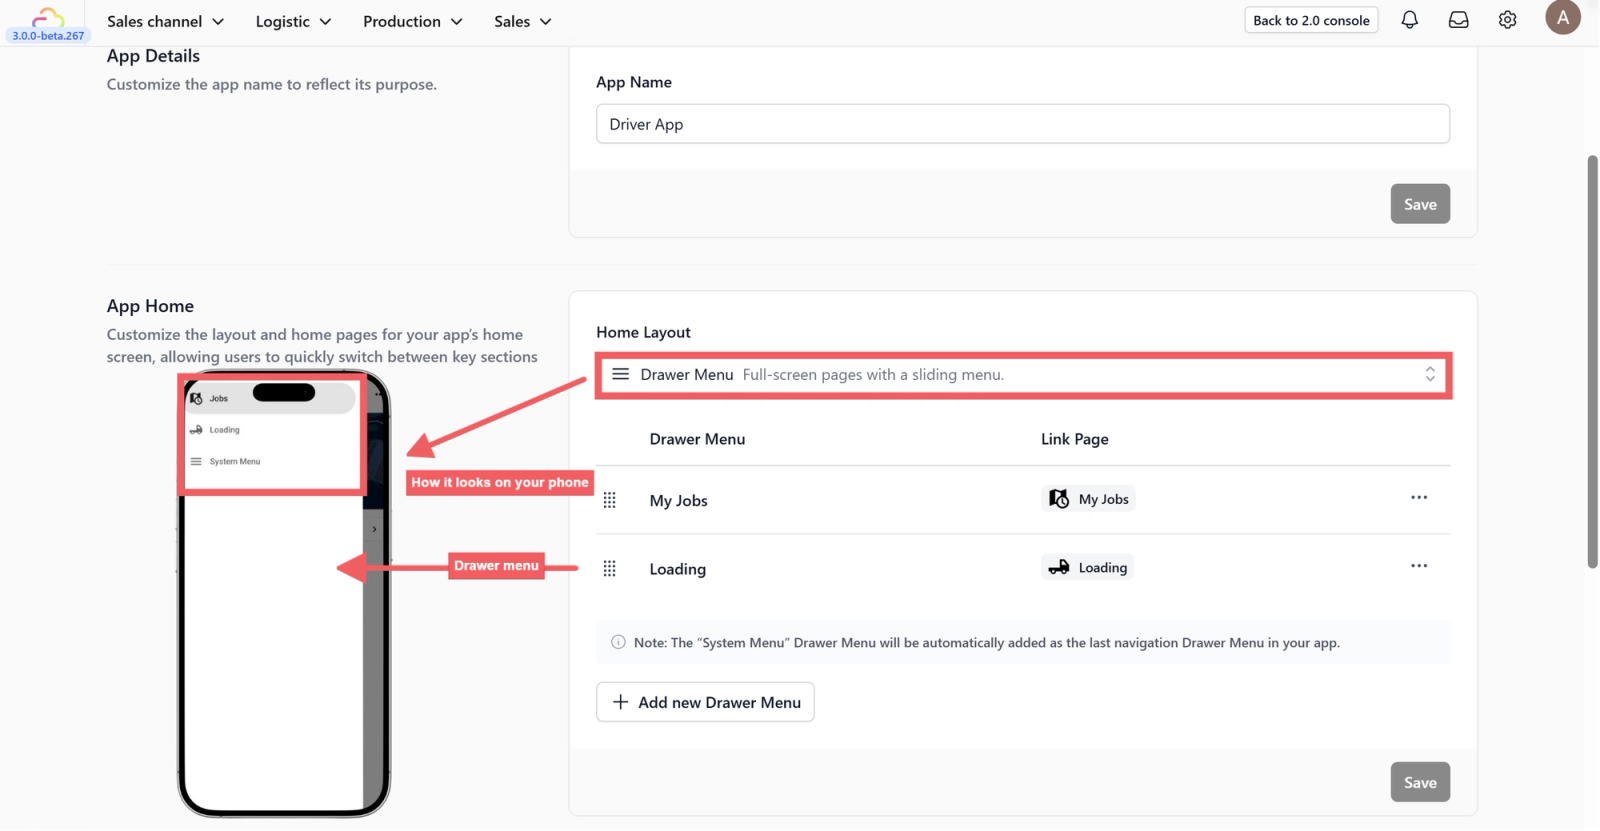
- Drawer Menu: This hides your navigation behind the "three-line" (hamburger) icon at the top left. Use this if you have many pages (more than 4) and want a cleaner map view.
App Home Menu
This section defines what your drivers see first. It acts as the "Quick Access" bar for their most frequent tasks.

- Drawer Menu / Bottom Tab Column: This area lists your active menu items. You can click and drag the "six-dot" icon to rearrange them in the order of importance.
- Link Page: This defines which functional page opens when the driver taps the menu item. These links connect to the "App Pages" configured below.
- 3 Dots (Options): Click here to edit the display name and icon of a menu item, or to delete it entirely.
- + Add New Menu: Use this to expand your app's capabilities if you've created custom pages.
App Pages
App Pages are the functional templates that drive the app.
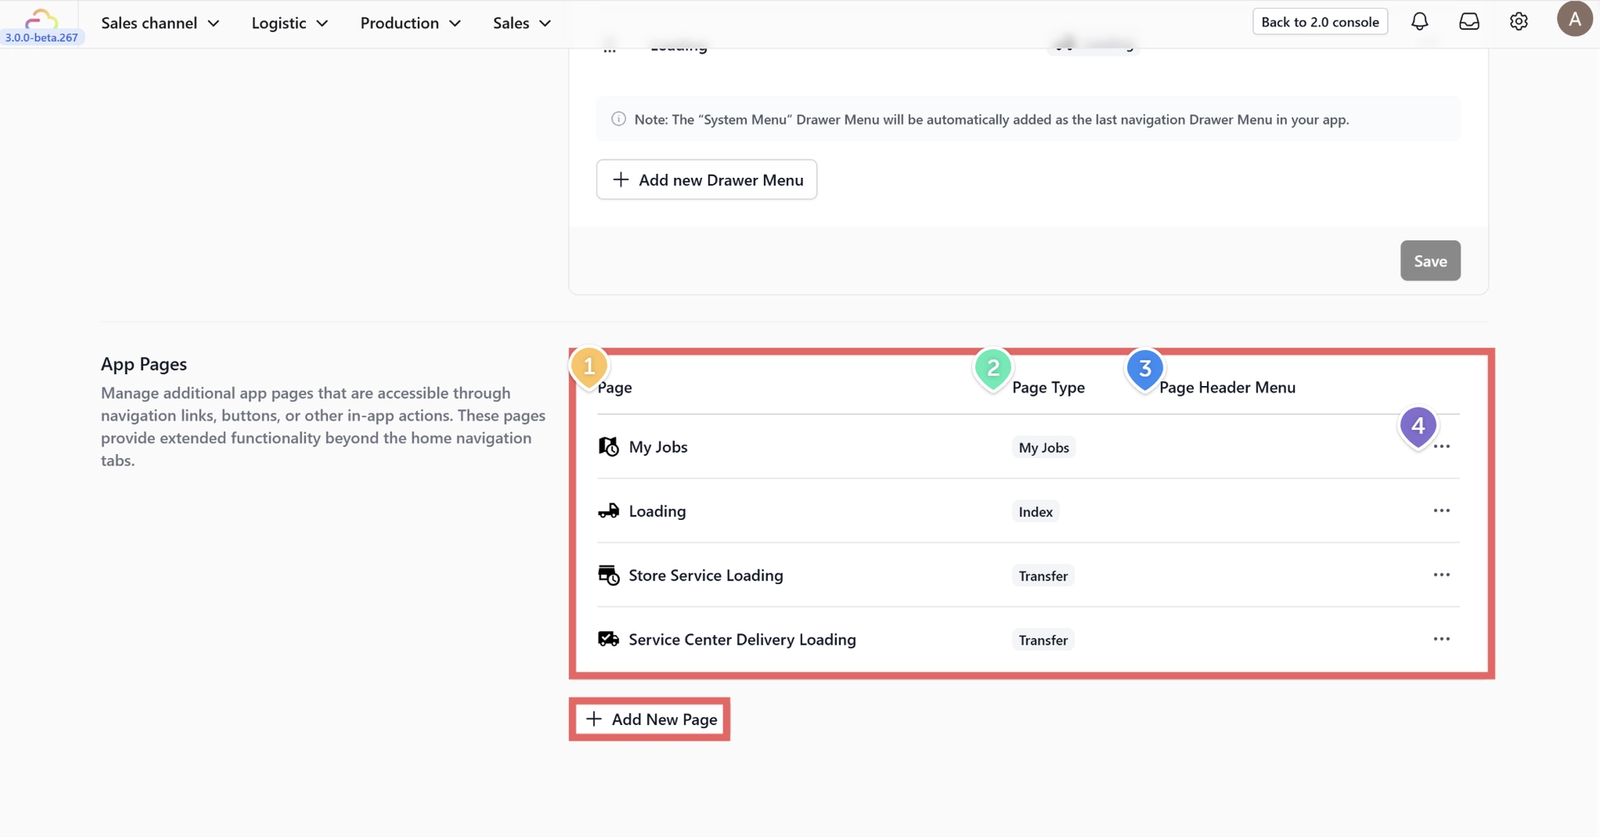
- By default, the Driver App includes 4 essential pages, but you can always + Add New Page to further customize the workflow.
- Page Type: This defines the "logic" of the page.
- Page Header Menu: You can add secondary buttons to the top right of any page to link to support tools or help documents.
- 3 Dots (Options Menu): This icon gives you the power to manage your page settings.
- Edit: Click this to dive back into the configuration.
- Delete: Use this to remove a page entirely if your workflow changes and that step is no longer needed.
My Jobs Page
Page type: My jobs Page
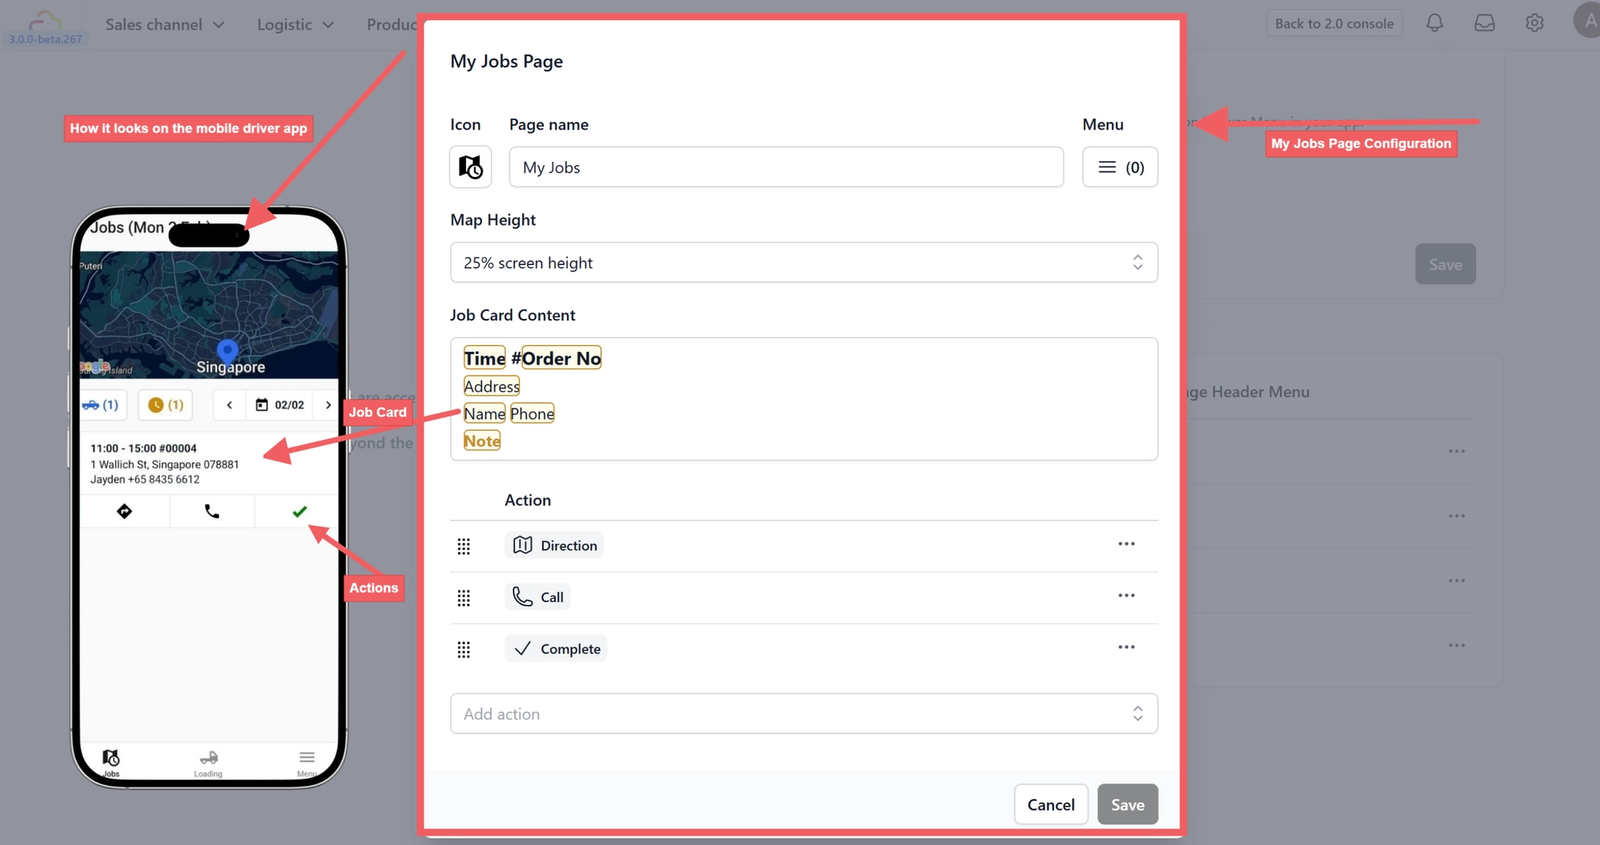
What is this page? This is the driver’s primary dashboard. It combines a GPS map with a chronological list of tasks for the day.
Configuration Options:
- Map Height: Adjust how much of the screen is dedicated to the map (e.g., 25% or 50%) versus the job list.
- Job Card Content: Customize what information is visible at a glance. Type ‘@’ to insert placeholders like
Time,Order No,Customer Name, orAddress. This allows drivers to see critical details without clicking into every job. - Actions: Define the buttons available on each job card, such as Direction (opens GPS), Call (contacts customer), or Complete (marks the job as done).

Loading Page
Page type: Index Page
What is this page? The Index page acts as a sub-menu or a "Folder." It is used to group related logistics tasks in one place.
Configuration Options:
- Index Layout: The List Layout is recommended for drivers as it allows for easy reading and scrolling while handling physical items.
- Index Item: These are the clickable links within the page. For a "Loading" index, you might include items like "Store Service Loading" and "Service Center Delivery Loading".
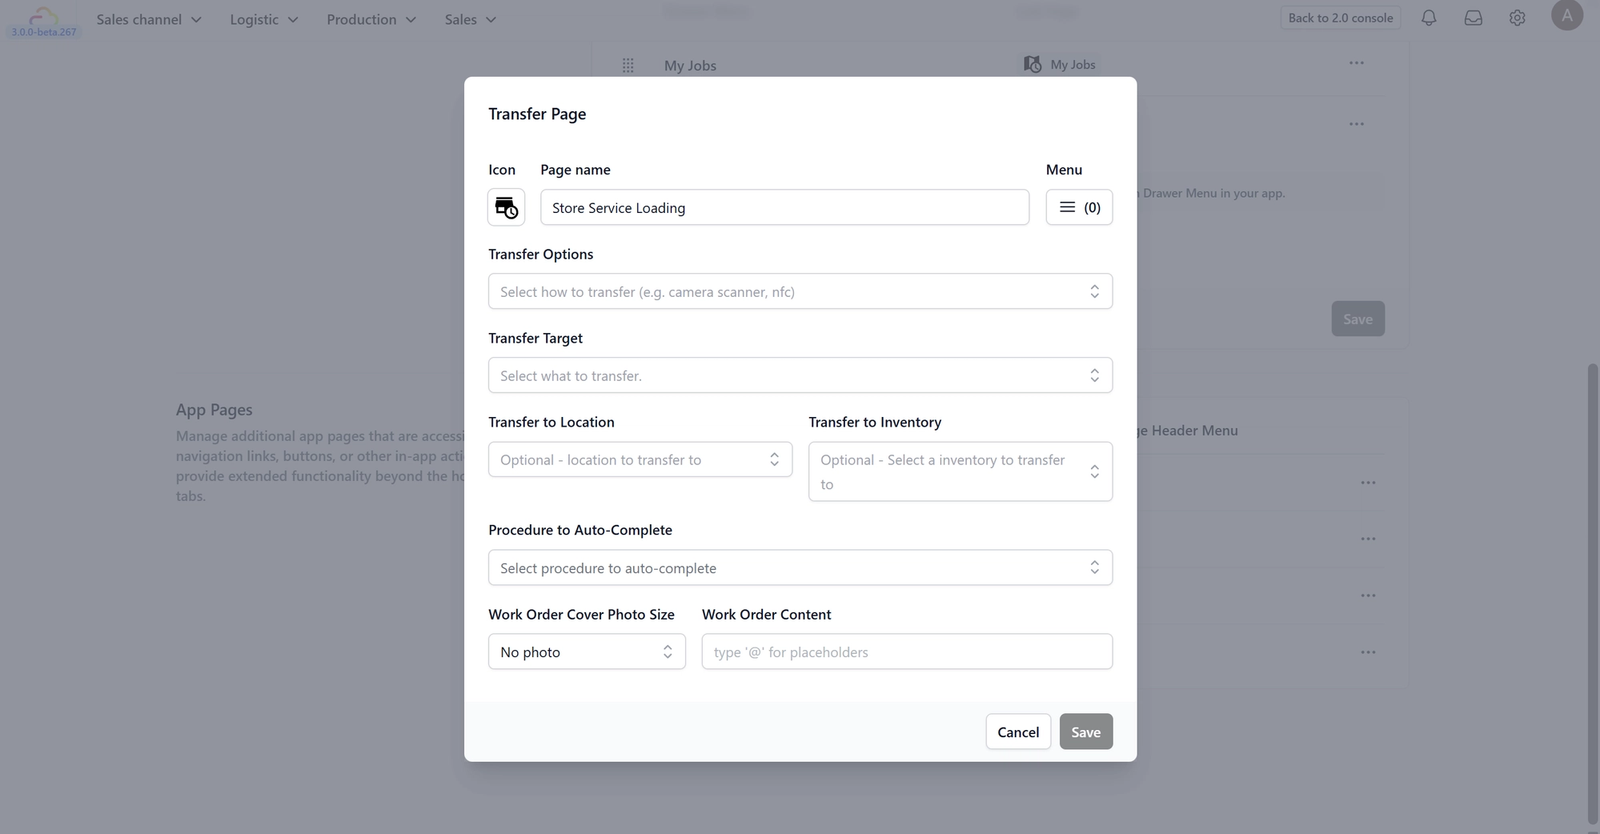
Store Service Loading & Service Center Delivery Loading Page
Page type: Transfer Page
What is this page? This is the "Security Guard" of your inventory. It handles the scanning of items as they move from one location to another (e.g., from a truck into the factory).
Configuration Options:
- Transfer Options: Choose the scanning method, such as Camera Scanner or NFC, to identify items.
- Transfer Target: Define what is being moved (e.g., individual Work Orders or entire Totes).
- Transfer to Location/Inventory: Set a default destination (e.g., "Factory 1") so the driver doesn't have to select it every time.
- Procedure to Auto-Complete: Link the scan to a system status. For example, scanning an item "into" the factory can automatically change its status to "Arrived at Plant".
- Work Order Content: Use the '@' placeholder to define what item info appears on the screen during a scan to help the driver verify they have the right bag.
Give feedback
Up next
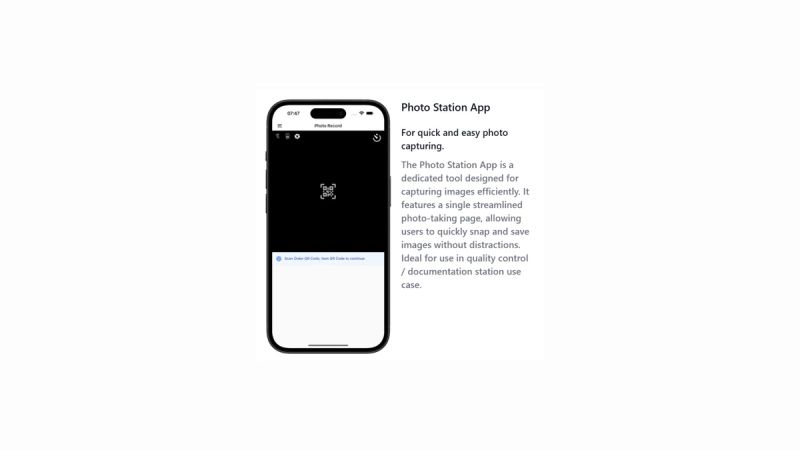
Photo Station AppCapture quality documentation on the go. > Use this page to document item conditions with high-quality photos before, during, or after service, ensuring a clear visual record for every order.
Read more