B2B Plant Worker App

In this article
The B2B Plant Worker App is designed specifically for staff working in the factory or production plant. Unlike the POS used by front-line retail staff, this app focuses on high-volume processing and logistics. It enables workers to create new orders for multiple B2B agents, track service progress, manage photo documentation, and handle the packing and transfer of goods efficiently all from a mobile device on the factory floor.
Contents
Contents
Why create the B2B Plant Worker App?
Setting up this app correctly ensures your production line runs smoothly by giving workers exactly what they need, right when they need it. A well-configured app helps you achieve:
- Centralized Order Creation: Workers can input orders on behalf of multiple agents directly from the floor, removing the need for a back-office admin to re-type data.
- Production Visibility: It provides a clear, real-time view of what needs to be serviced, packed, and shipped, preventing bottlenecks.
- Inventory Security: It simplifies the complex process of checking items in and out of the service center, ensuring no item is lost in transit between the store and the plant.
Creating the B2B Plant Worker Mobile App
Follow these steps to deploy your production interface:
- Click on the + Add New Mobile App button in the System Customization dashboard.
- Scroll through the templates and choose the B2B Plant Worker App.
- Rename your app: Keep the default "B2B Plant Worker App" or give it a custom name, then click Create App.
Home Layout Options
Scroll down to the App Home section to configure your navigation style.
You can choose how your workers navigate the app based on their device usage:
- Bottom Tab: This displays up to 4 primary icons at the bottom of the screen. It is the most efficient layout for quick, one-handed switching between scanning tasks and order lists while moving around the factory floor.
- Drawer Menu: This hides your navigation behind the "three-line" (hamburger) icon at the top left. Use this if you have many pages (more than 4) and want a cleaner interface.
App Home Menu
This section defines what your workers see first. It acts as the "Quick Access" bar for their most frequent tasks.
- Drawer Menu / Bottom Tab Column: This area lists your active menu items. You can click and drag the "six-dot" icon to rearrange them in the order of importance.
- Link Page: This defines which functional page opens when the worker taps the menu item. These links connect to the "App Pages" configured below.
- 3 Dots (Options): Click here to edit the display name and icon of a menu item, or to delete it entirely.
- + Add New Menu: Use this to expand your app's capabilities if you've created custom pages.
App Pages
App Pages are the functional templates that drive the app.
By default, the B2B Plant Worker App includes 11 essential pages, but you can always + Add New Page to further customize the workflow.
- Page Type: This defines the "logic" of the page (e.g., an Agent List vs. a Transfer Scanner).
- Page Header Menu: You can add secondary buttons to the top right of any page to link to support tools or help documents.
- 3 Dots (Options Menu): This icon gives you the power to manage your page settings.
- Edit: Click this to dive back into the configuration (like changing your Transfer Options or Order Listing Detail).
- Delete: Use this to remove a page entirely if your workflow changes and that step is no longer needed.
Agents
Page Type: Agent List
This is the starting point for B2B workflows. Workers use this page to select a specific Agent (e.g., "Hotel A") from a list. This page is automatically linked to the Create Order page, ensuring that any new job started here is assigned to the correct client account.
Create Order
Page Type: Create Order
This digital form replaces manual paper forms for logging new items. It allows workers to start a new order following your Business Process Management (BPM) settings.
Key Settings to Configure:
- New Order Sales Channel: You must select the channel for these orders (e.g., set to "Online/App").
- New Order Business Unit: Define the service line, such as "Laundry and Dry Cleaning" or "Bag Service".
- New Order Procedure: Select the specific Order Entry Wizard that defines the input steps (e.g., select service -> input quantity).
- Line Item Edit Procedure: Select the Line Item Entry Wizard to define what details are needed per item (e.g., photos or damage notes).
Order History
Page Type: Order History
A searchable archive of past transactions. Workers can use this page to check the status of previous batches or review transaction details.
Key Settings to Configure:
- Filter by Item Status: Choose which orders appear in the list. For example, select "Pending", "Ready", and "In Delivery", but uncheck "Delivered" to keep the list focused on active jobs.
- Show Pending Confirm Orders: Toggle this ON if you want workers to see draft orders that haven't been finalized yet.
- Order Listing Detail: Customize what info appears on the card (e.g., Order Number, Customer Name, or Order Note).
Packing
Page Type: Procedure Status
This page acts as the final gatekeeper before an item leaves the production floor. Workers use this page to mark items as "Packed".
Key Settings to Configure:
- Sorting Date: Currently set to Fulfillment Date by default, prioritizing items that are due soonest.
- Check Procedure: Select the main procedure you want to track (e.g., Service Start).
- Readiness Procedure: This is the most critical setting. Choose a prerequisite procedure (e.g., Service Complete).
- Logic: If an item has not passed the "Service Complete" scan, the system will block the worker from packing it. This prevents unfinished items from being shipped.
Services
Page Type: Index
This page acts as a visual menu for production actions. Instead of searching for buttons, workers can navigate to specific tasks from a clean interface.
Key Settings to Configure:
- Index Layout: Choose List (vertical, easy reading) or Grid (compact visual overview).
- Index Item: You can add Sections to group links together (e.g., "Washing Phase") or drag and drop to rearrange the order.
Order Detail
Page Type: Sales Order Details
The "identity card" for every order. It centralizes all crucial information—customer details, line items, photos, and payment status.
Key Settings to Configure:
- Sections: You can enable or disable sections depending on worker needs. Common sections include Customer Details, Receipts, Line Items, Labels, Photos, and Payment.
- Quick Action Buttons: You can add buttons for Call, WhatsApp, Email, or Payment.
Photo Record
Page Type: Manual Completion
Used for documentation purposes. Workers use this page to capture "Before" or "After" photos of an item. This ensures you have visual proof of the item's condition at specific stages of the workflow.
Service Start
Page Type: Manual Completion
Used to mark the beginning of a process. Workers scan a barcode or take a photo here to update the system status to "Processing". This timestamp helps track how long items spend in production.
Service Complete
Page Type: Manual Completion
Used to mark a job as finished. Scanning an item here updates the status to "Done".
Service Center Check-in
Page Type: Transfer
Used when items arrive at the plant. Workers scan items here to confirm they have physically entered the facility.
Key Settings to Configure:
- Transfer Target: Select what the worker is scanning. You can choose Line Items (for individual items) or Transfer Tote [Understanding Tote Based Processing].
- Procedure to Auto-Complete: Select a procedure (e.g., Received) here. When the worker scans an item, the system will automatically update the item's status to "Received" without requiring extra clicks.
Service Center Check-out
Page Type: Transfer
Used when items leave the plant. Workers scan items here to confirm they are "In Transit" back to the store or customer.
Key Settings to Configure:
- Transfer to Location (Optional): Define if this scan moves the item's digital location to a specific store.
- Transfer to Inventory (Optional): Enable this to track stock levels. You must select which Inventory Location the items are moving to (e.g., from Plant Inventory to Store Inventory).
Give feedback
Up next
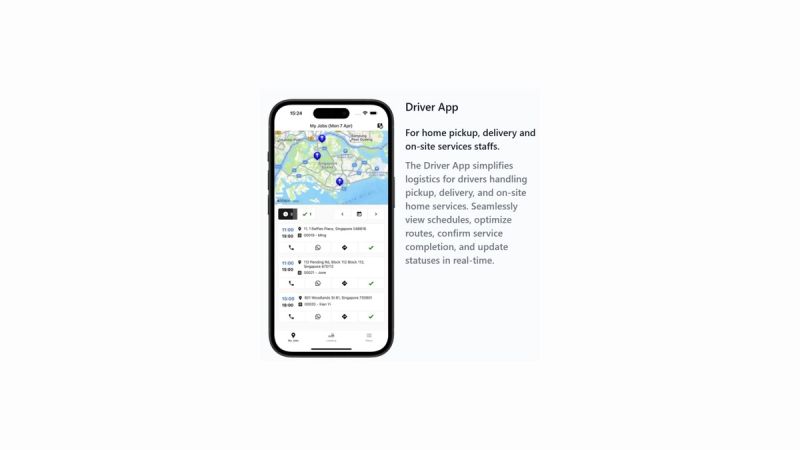
Driver AppOptimize your logistics and field operations. Equip your drivers with a powerful tool to manage pickup schedules, navigate delivery routes, and track item transfers in real-time, ensuring nothing gets lost between the customer and the plant.
Read more