Photo Station App

In this article
The Photo Record Page is a specialized tool used for visual documentation within your workflow. It is technically a Manual Completion Page, meaning that the act of taking and saving a photo serves as the "completion" of a specific step in your business process. Whether you are documenting pre-existing stains at a retail counter or verifying a finished repair in the factory, this page ensures that every high-value item has a digital "identity card" backed by photographic proof.
Contents
Contents
Why create the Photo Station App?
Setting up a dedicated station with this app creates a "fast lane" for your documentation process:
- Maximum Focus: By featuring only a single streamlined page, workers can snap and save images without being distracted by other app functions.
- Reduced Training Time: New staff or temporary workers can use the station immediately because there is no navigation to learn—they just scan and shoot.
- Stationary Efficiency: Ideal for mounting on a stand or tripod at a QC desk, allowing workers to keep their hands free to handle items while the app stays ready for the next scan.
- Consistent Documentation: It ensures that every item passing through a specific point in the plant is visually recorded, which is essential for handling customer disputes or verifying item condition.
Creating the Photo Station Mobile App
Follow these steps to deploy your logistics interface:
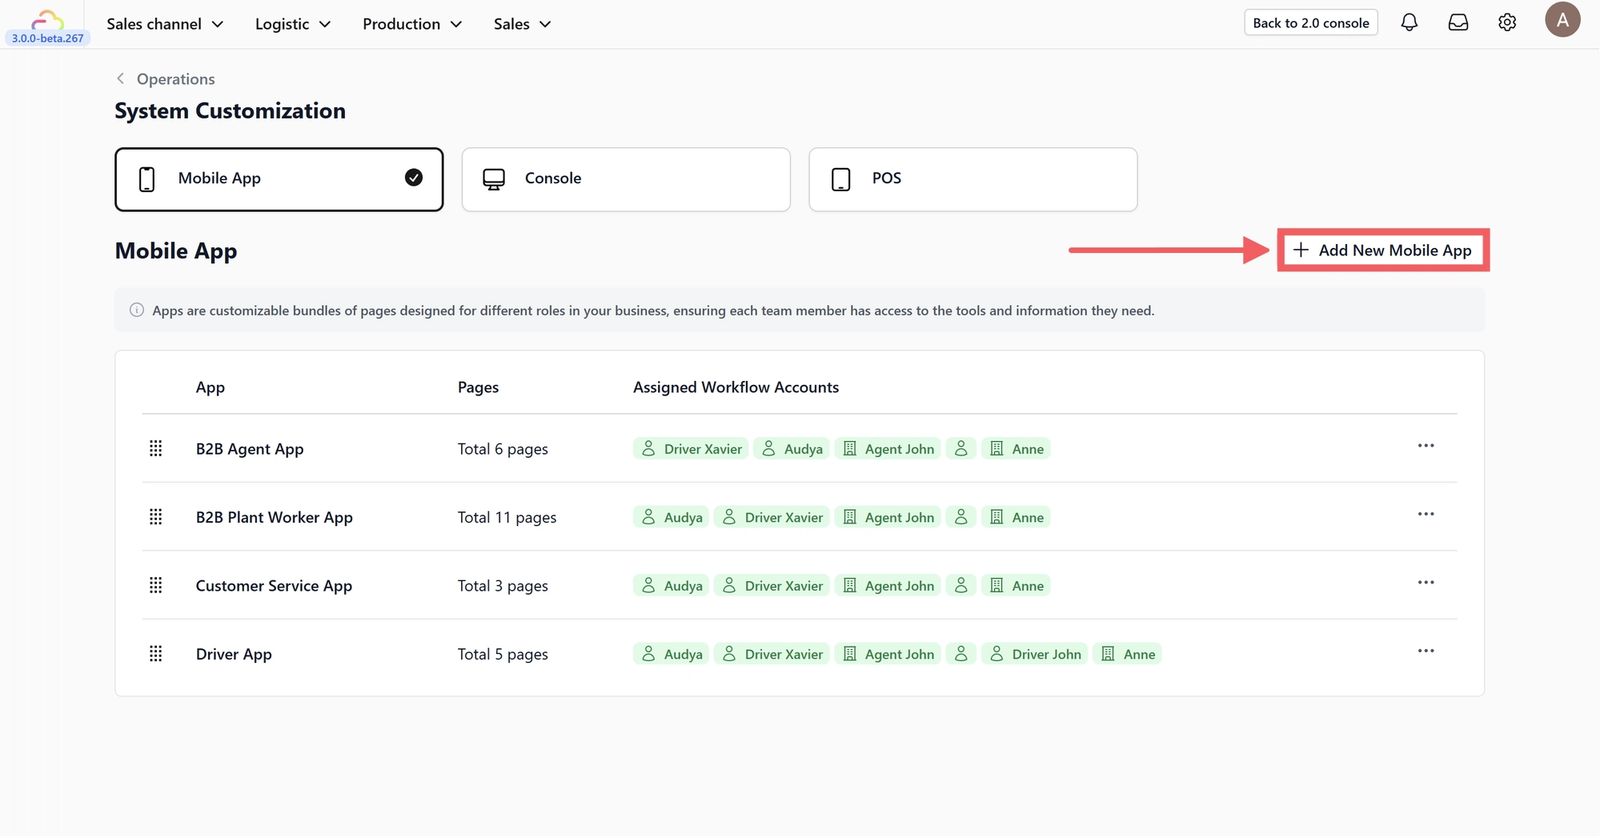
Click on the + Add New Mobile App button in the System Customization dashboard.

Scroll through the templates and choose the Photo Station App.
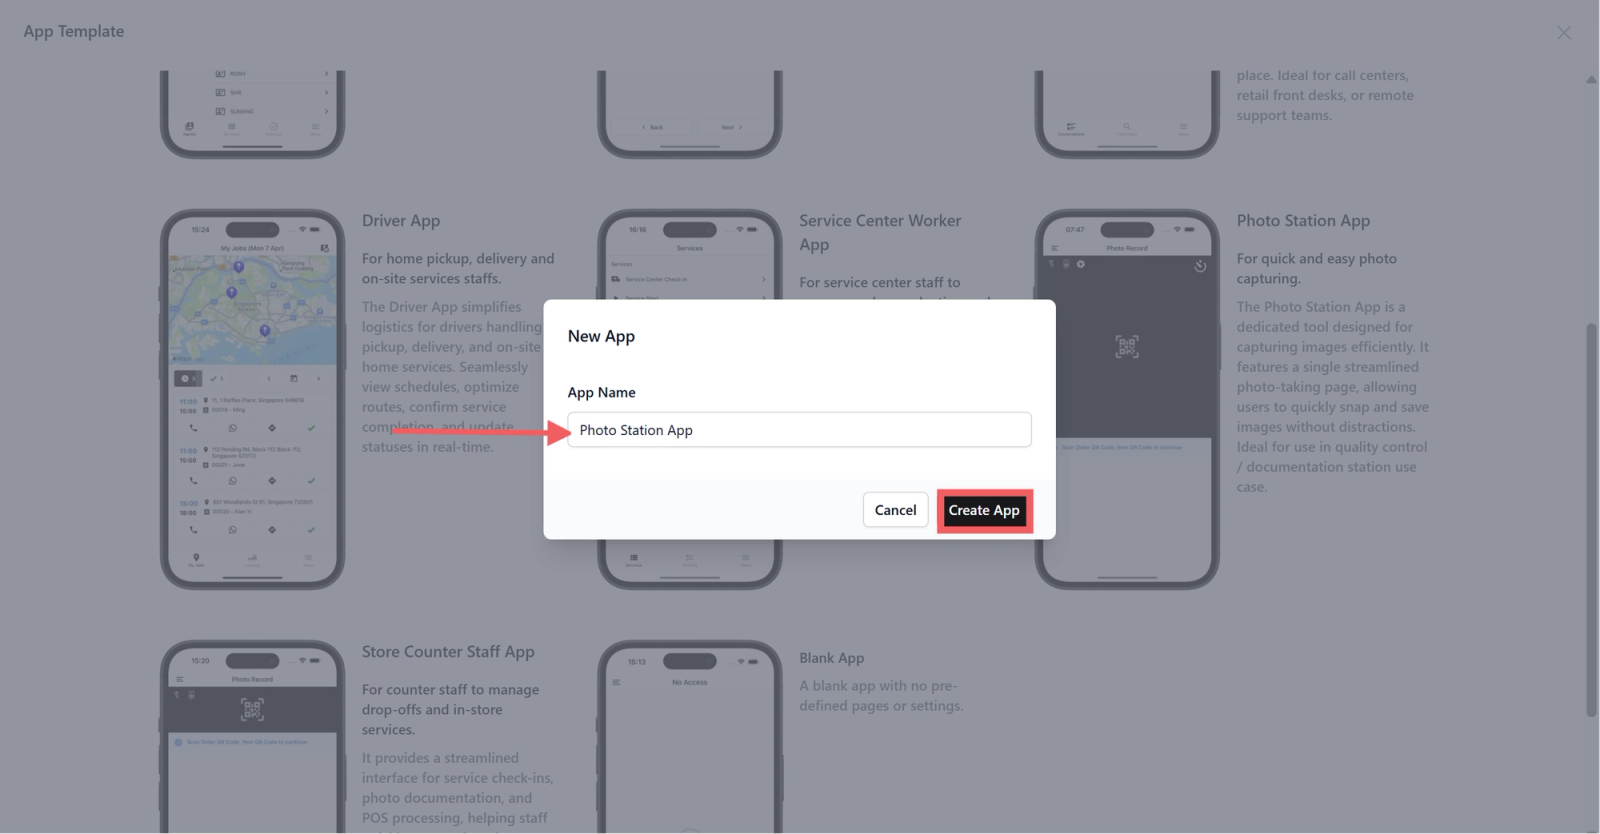
Rename your app: Keep the default "Photo Station App" or give it a custom name, then click Create App.
Home Layout Options
Scroll down to the App Home section to configure your navigation style.
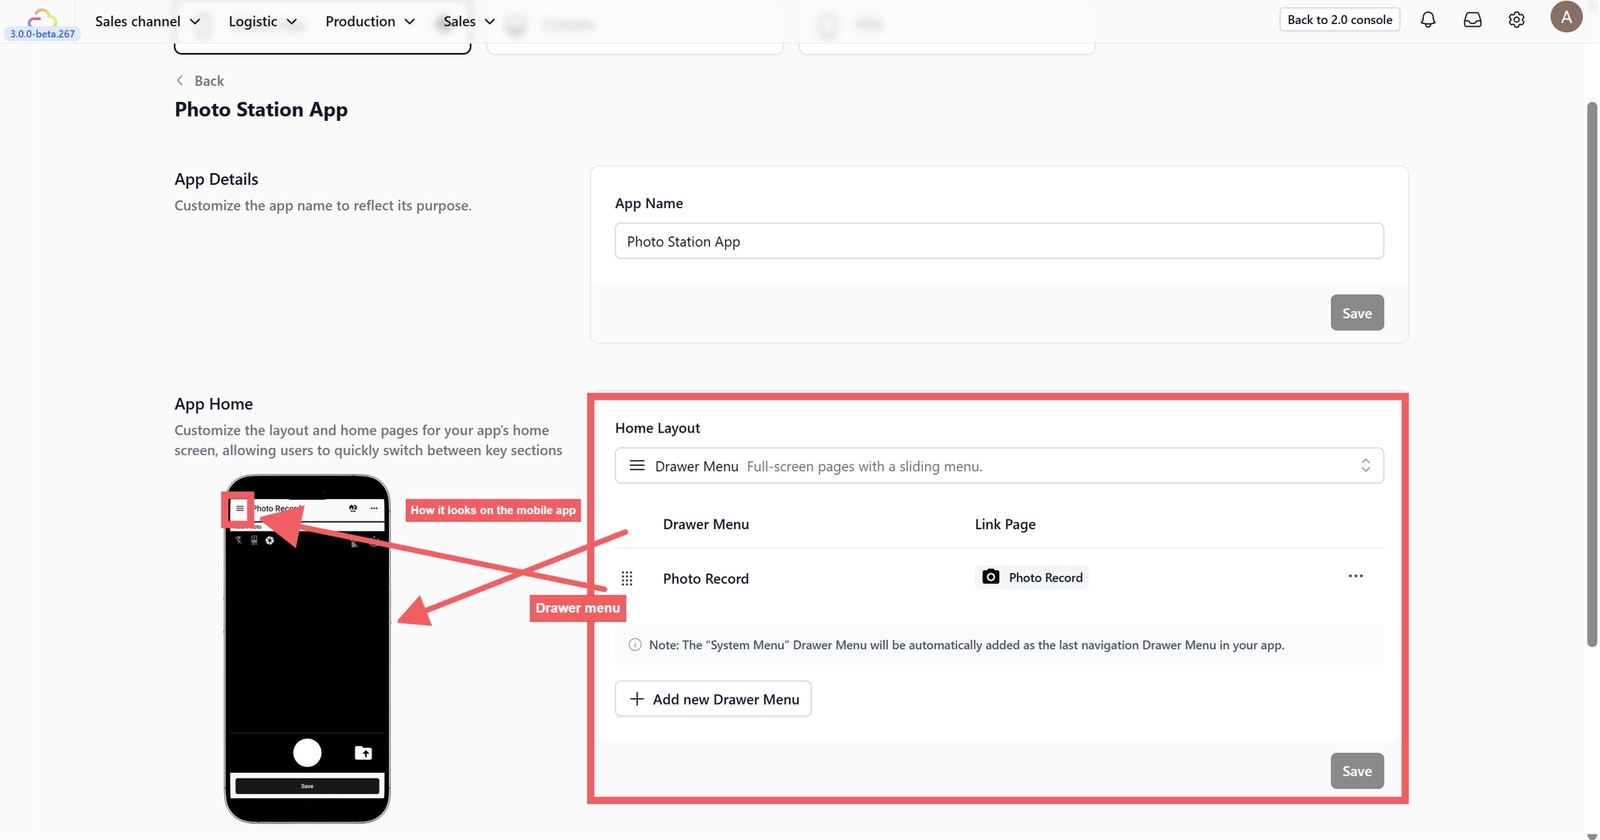
You can choose how to navigate the app based on the device usage:
- Drawer Menu: This hides your navigation behind the "three-line" (hamburger) icon at the top left. Use this if you have many pages (more than 4) and want a cleaner map view.
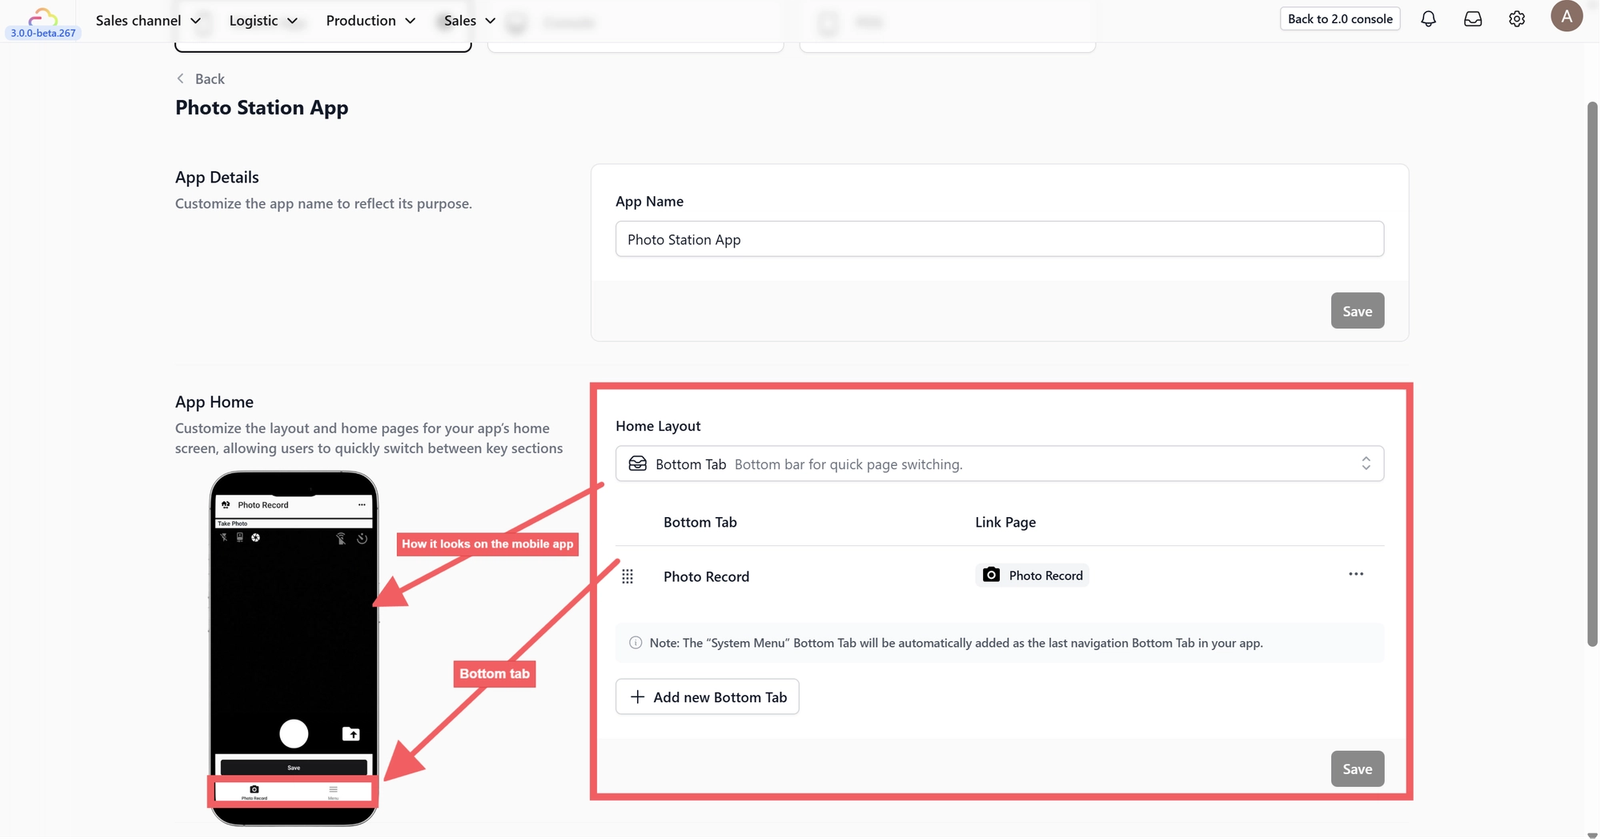
- Bottom Tab: This displays up to 4 primary icons at the bottom of the screen. It is the most efficient layout for quick, one-handed switching between maps and loading lists while on the go.
App Home Menu
This section defines what your co-worker see first. It acts as the "Quick Access" bar for their most frequent tasks.

- Drawer Menu / Bottom Tab Column: This area lists your active menu items. You can click and drag the "six-dot" icon to rearrange them in the order of importance.
- Link Page: This defines which functional page opens when the driver taps the menu item. These links connect to the "App Pages" configured below.
- 3 Dots (Options): Click here to edit the display name and icon of a menu item, or to delete it entirely.
- + Add New Menu: Use this to expand your app's capabilities if you've created custom pages.
App Pages
App Pages are the functional templates that drive the app.
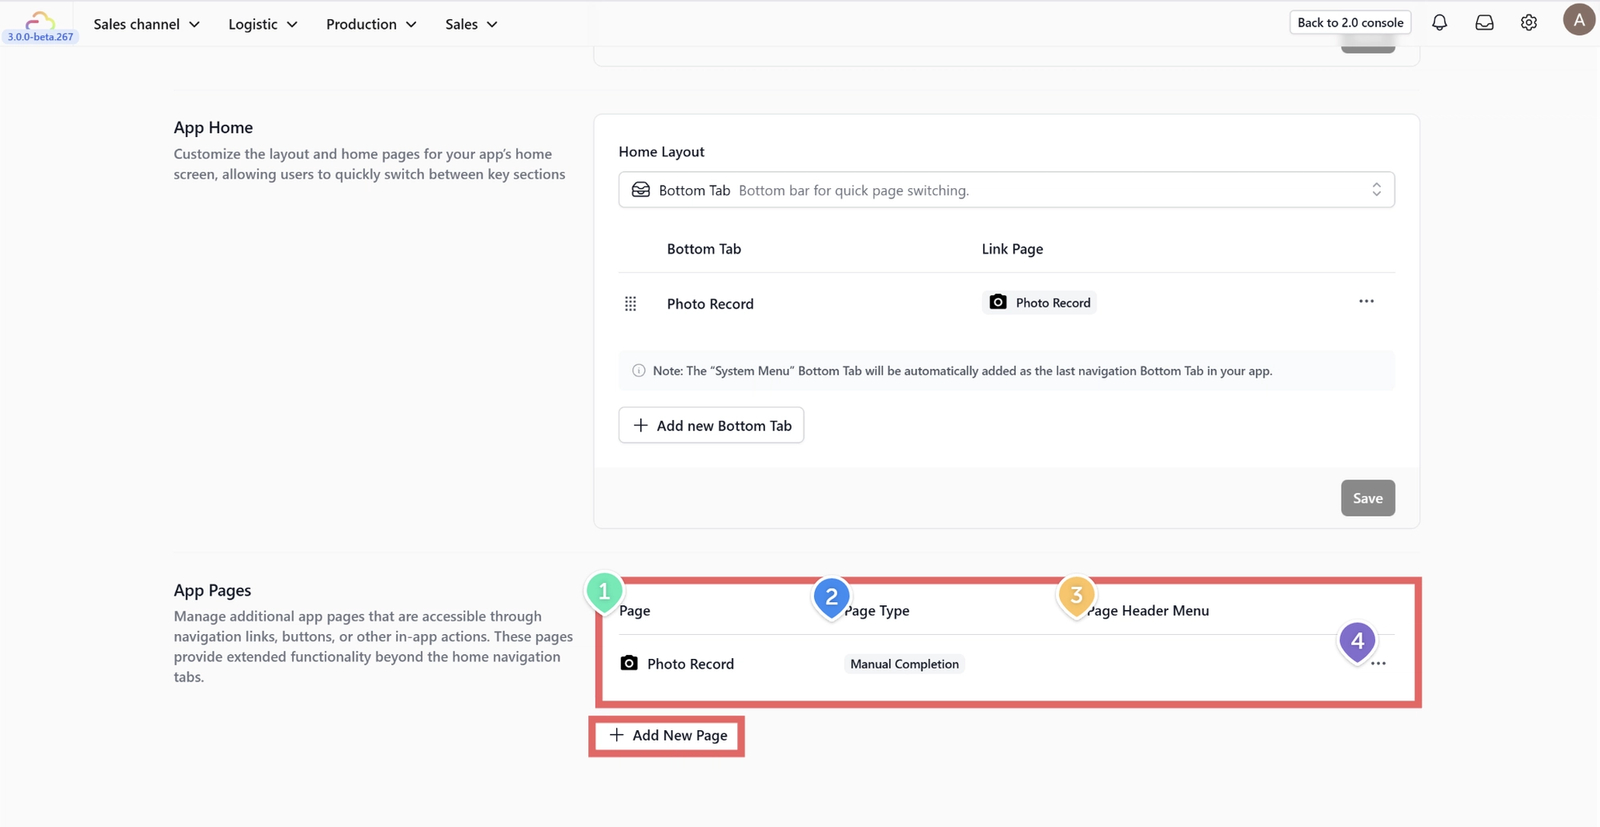
- By default, the Driver App includes 4 essential pages, but you can always + Add New Page to further customize the workflow.
- Page Type: This defines the "logic" of the page.
- Page Header Menu: You can add secondary buttons to the top right of any page to link to support tools or help documents.
- 3 Dots (Options Menu): This icon gives you the power to manage your page settings.
- Edit: Click this to dive back into the configuration.
- Delete: Use this to remove a page entirely if your workflow changes and that step is no longer needed.
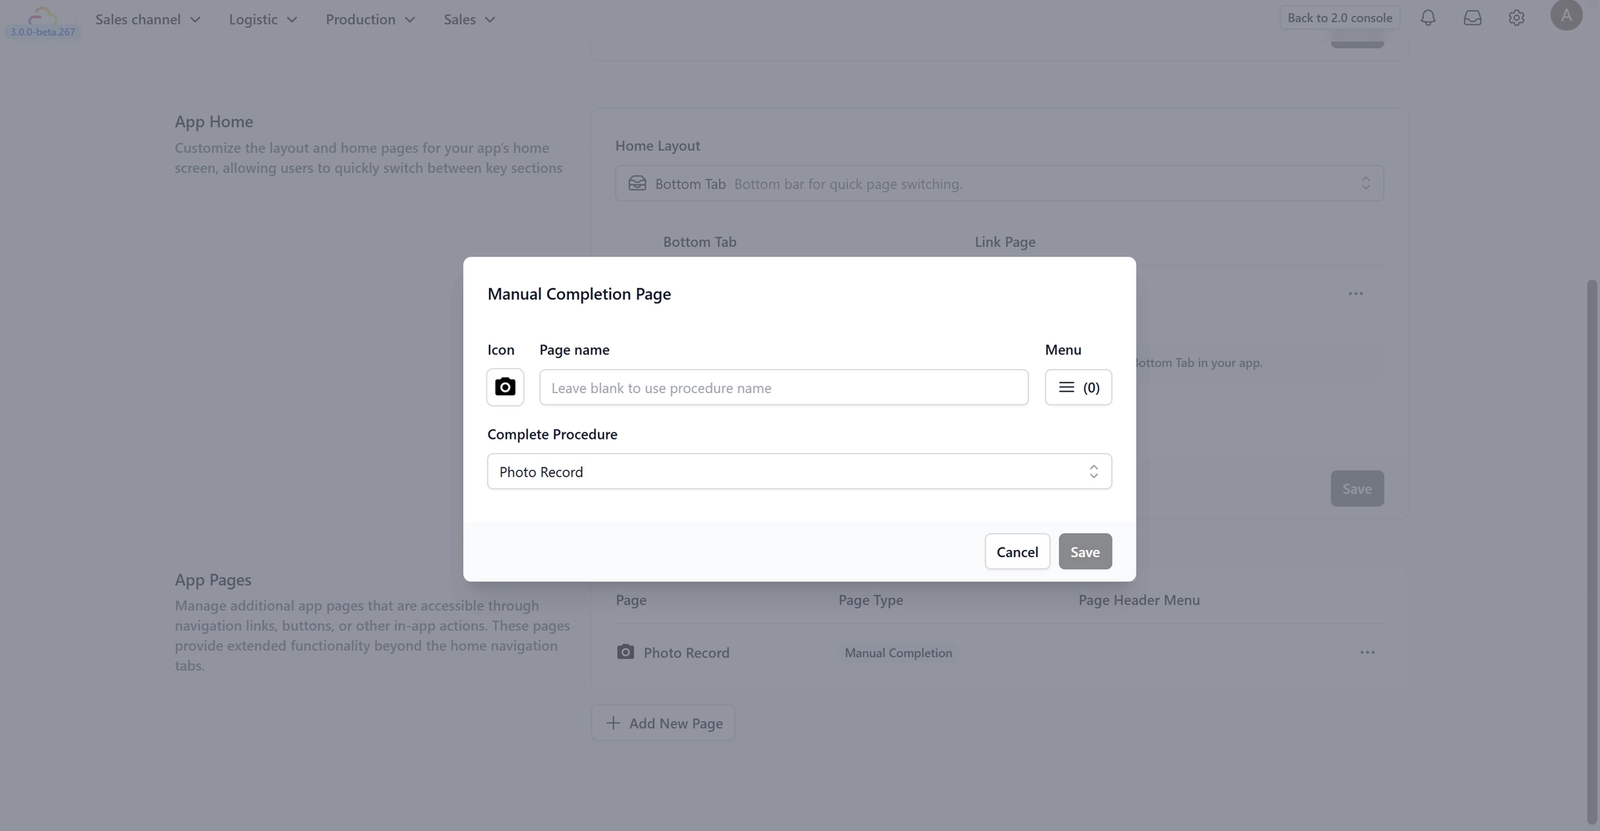
Photo Record Page
Page type: Manual Completion Page
What is this page? The Photo Record Page is a specialized tool used for visual documentation within your workflow. It is technically a Manual Completion Page, meaning that the act of taking and saving a photo serves as the "completion" of a specific step in your business process.
Configuration Options
Based on the Manual Completion Page settings, here is how you can configure the interface for your team:
- Icon: Select a visual symbol (like a camera) to represent this page in your app's navigation or index lists.
- Page Name: You can give this page a custom title like "Condition Photos" or "Quality Check". If you leave this blank, the system will automatically use the name of the linked procedure.
- Menu (0): This allows you to add a Header Menu. You can link buttons at the top right of the camera screen to other helpful pages, like "Order Details," so workers can check instructions without leaving the camera.
- Complete Procedure: This is the most important setting; it links the page to a specific task in your system (e.g., Photo Record). When a staff member saves a photo, the system automatically marks that specific step as "Completed" for that item.
Give feedback

Up next
Understanding Tote Based ProcessingLearn how to use "Totes" (tracked containers) to move multiple items between locations efficiently and prevent loss during logistics.
Read more