Configuring Data Fields
In this article
When your team processes an order, there are details that matter beyond the basics — the type of service, the condition of an item, a special instruction from the customer. Data fields are how you capture that information consistently across every order and every staff member. This article explains what data fields are, how to choose the right type, and how to set them up in EasyBiz.
Contents
Contents
What Is a Data Field?
Think of a data field as a blank on a paper form — except it's digital, and you decide what goes on it.
For example, if you run a laundry business and you want your staff to record the service type for every order, you'd create a data field called "Service Type" with options like Wash & Fold, Dry Clean, and Ironing. Your team then selects the right option when they process each order.
Once you create a data field here, you can attach it to any procedure in your BPM workflow.
Where to Find Data Fields
From the top navigation bar, click the Settings icon (⚙️). Under the Platform section, click Data Fields.

Choosing the Right Type
When you create a data field, you need to pick a data type. This tells the system what kind of answer your staff is expected to enter — whether that's a short word, a number, a date, a photo, or a choice from a list. Picking the right type matters because it prevents your team from entering the wrong format. For example, a Number field won't accept letters, and an Email field will flag anything that doesn't look like a valid email address.

Here are the types available in your system:
Text & Numbers
- Text — A short one-line answer. Use this for anything open-ended but brief — like a brand name, a gate access code, or a locker number.
- Long Text — A bigger text box for longer write-ups. Good for damage descriptions (e.g., "Strap is torn on the left side, slight discolouration near the zip") or special customer instructions.
- Number — Numbers only. Use this for a product serial number, the number of pieces received, or a quantity of items in an order.
- Amount — For money. Use this to record a repair cost estimate, service fee, or the declared value of an item.
Photos & Files
- Image — Lets your staff take or upload a photo. Perfect for capturing the condition of an item before you accept it, or photos of a completed repair as proof of work.
Contact Details
- Phone Number — Formats the answer as a phone number. Useful when you need to collect a secondary contact number, such as a building management office or an alternative contact person.
- Email Address — Makes sure the answer looks like a valid email (must contain @ and a domain). Use this if you need to send updates or receipts to a different email address.
Dates & Choices
- Date — Opens a calendar so your staff can pick a specific date. Use this for a requested service date, a promised return date, or a warranty expiry.
- Options — A dropdown list of choices you define yourself. This is the most useful type for keeping data consistent. For example:
- A "Service Type" field for laundry with options like Wash & Fold, Dry Clean, and Ironing
- A "Bag Issue" field for bag service with options like Broken Zip, Torn Strap, Stain, and Hardware Damage
- An "Address Type" field with options like Home, Office, and Hotel
Instead of staff typing answers differently every time, they just pick from the list so your records stay clean and easy to read.
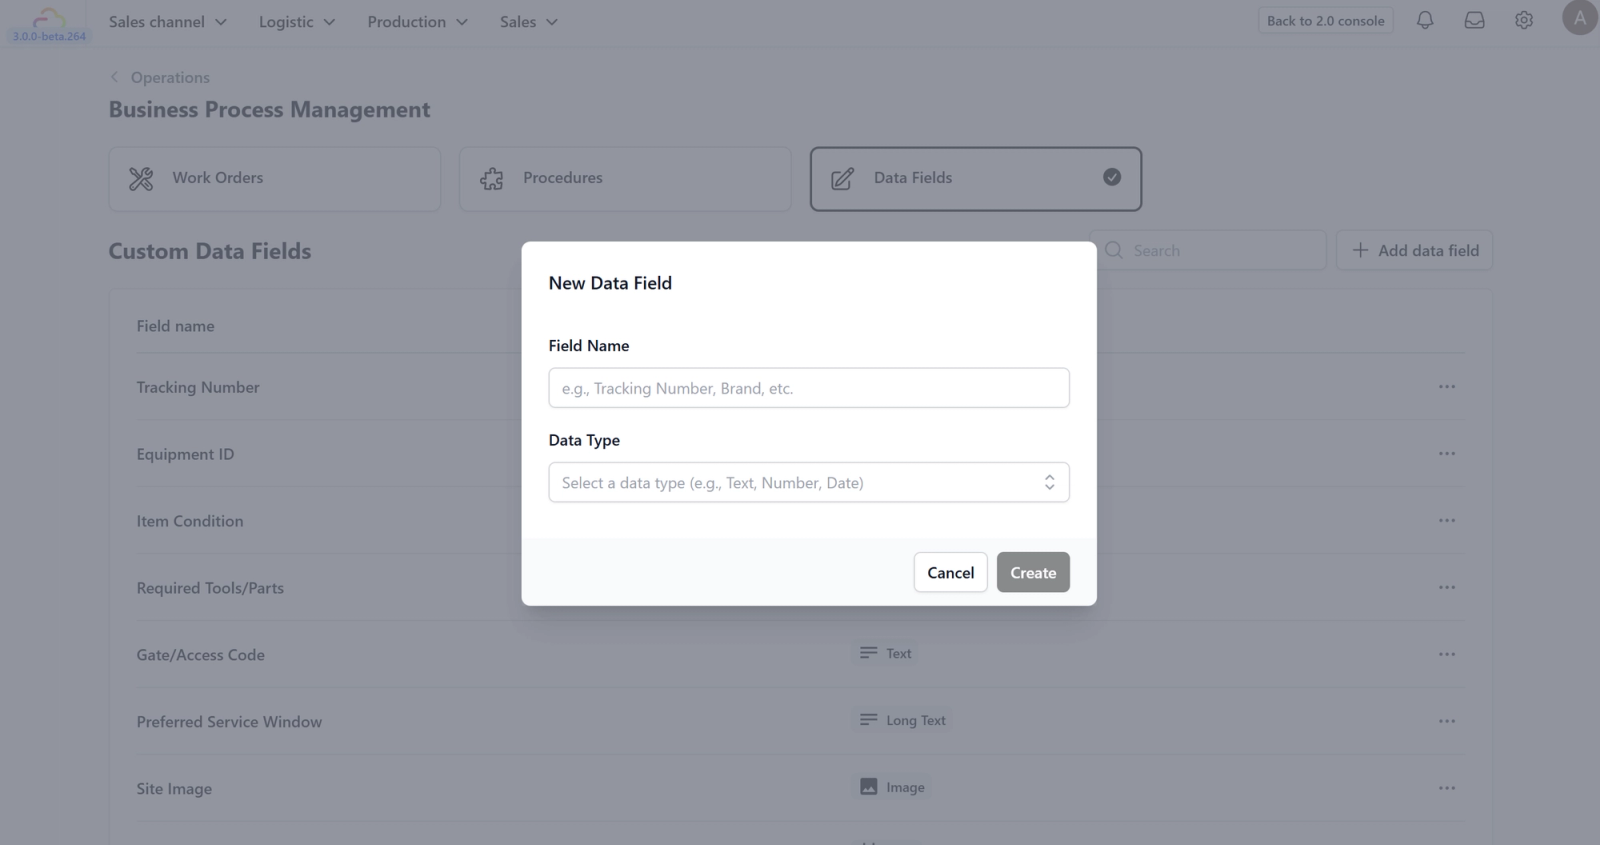
How to Add a Data Field
1. Click the + Add Field button in the top right.
2. Enter a Field Name — this is what your staff will see on the form. Be specific. Instead of "Type," write "Service Type" or "Bag Condition." The clearer the label, the less guesswork for your team.
3. Choose a Data Type from the list above.

4. Click Create.
Managing your Date Fields
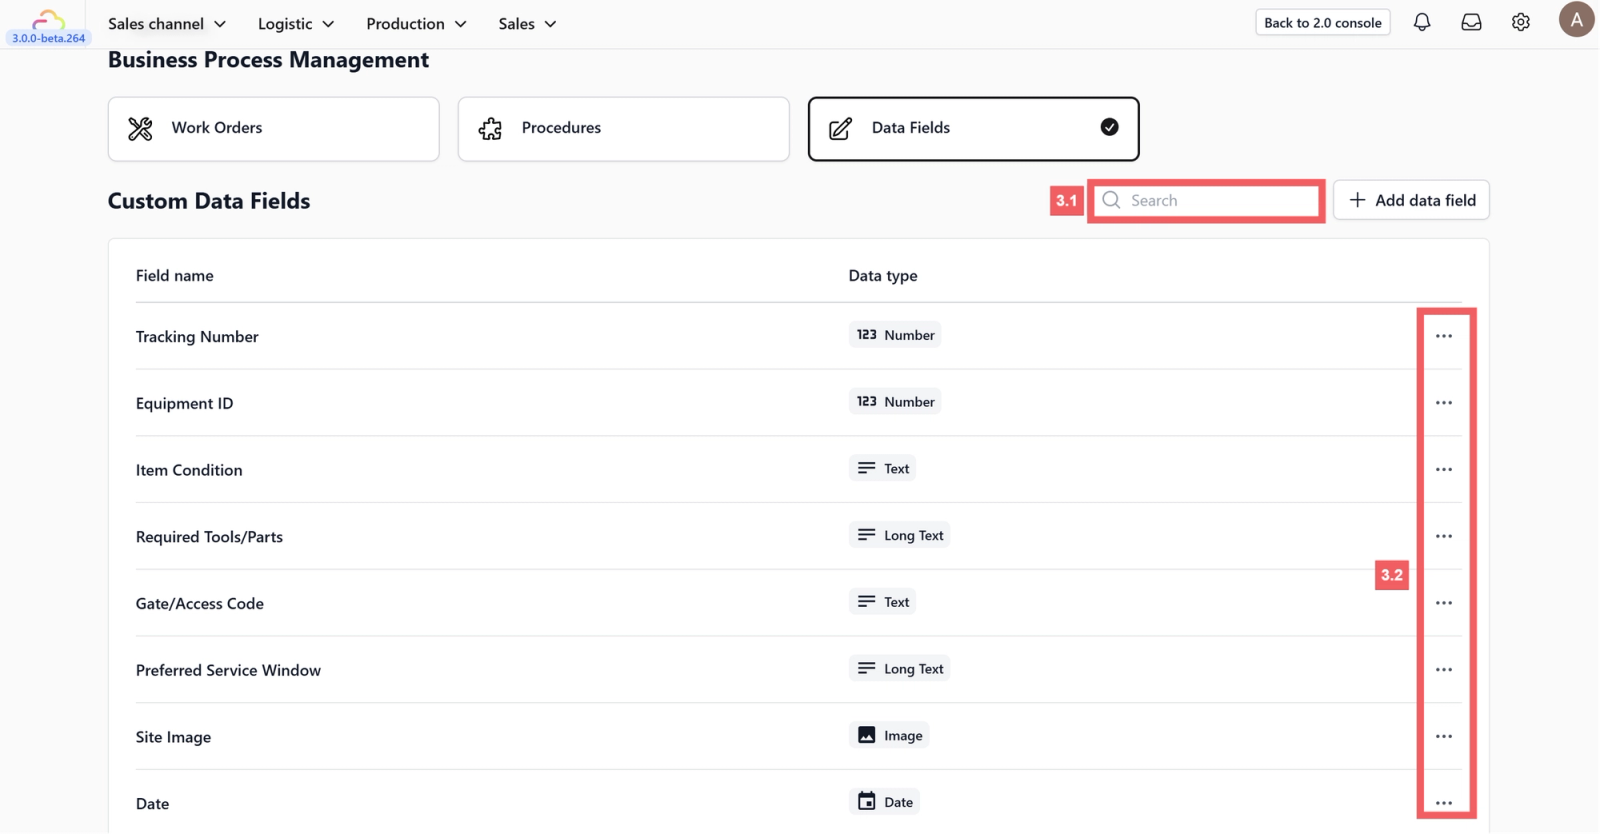
Once you have fields set up, you'll see them listed on the main Data Fields page.
- Search — Use the search bar at the top to find a specific field by name.
- Edit or Delete — Click the ••• menu on any field to edit its name or data type, or to delete it if it's no longer needed.
Give feedback
Up next
Business UnitsConfigure what your business sells, how orders are handled, and what your customers receive — all in one place.
Read more