Setting Up a Reschedule Pickup & Delivery Mini App
In this article
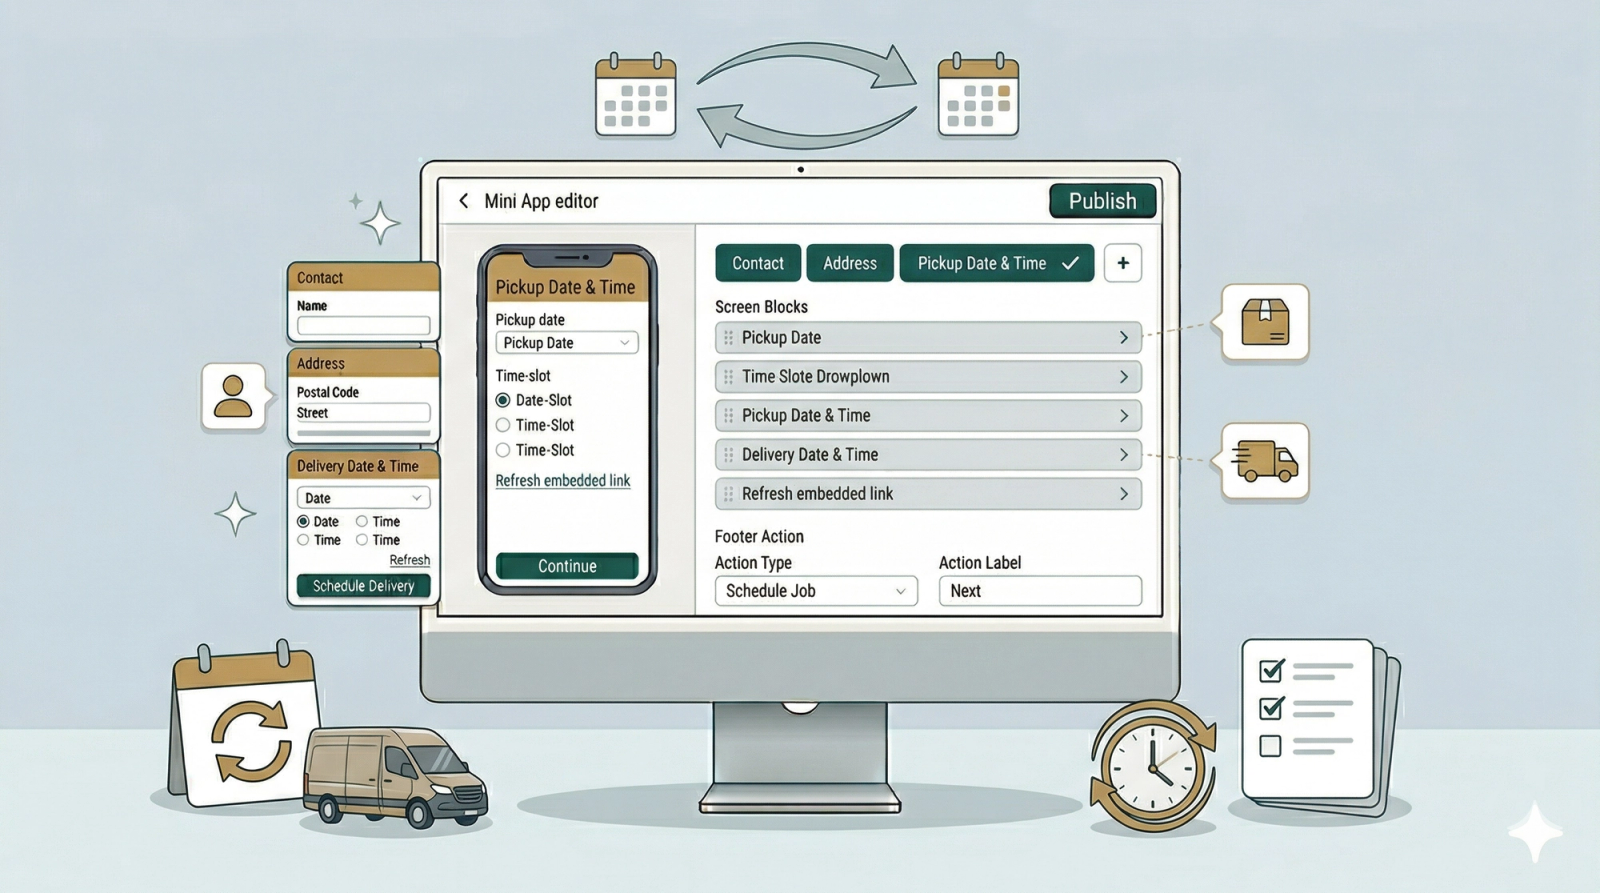
A Mini App is a small form your customers open directly inside WhatsApp — no downloads, no links to external websites. The Reschedule Pickup & Delivery Mini App makes it effortless for your customers to move an existing booking to a new date and time — all without calling your team. Instead of going back and forth over WhatsApp to arrange a new time, you simply send them a single button. They tap it, choose their new pickup and delivery slots, and the booking is updated in your EasyBiz system instantly.
Contents
Contents
Who Is This For
When a customer needs to change their pickup or delivery time, instead of handling it manually through chat, you send them a form directly inside WhatsApp. They pick their new slots themselves, and the reschedule is done — no phone calls, no back-and-forth.
Why Use It
- Fewer missed pickups and deliveries Customers who can't make their original time will reschedule instead of simply not answering the door.
- Your system updates automatically Once the customer confirms, their booking is updated in EasyBiz instantly. No manual changes needed.
- Returning customers don't repeat themselves EasyBiz recognizes existing customers and pre-fills their saved details automatically.
⚠️Before You Use This Mini App
This Mini App must be sent to a customer who already has an existing order in your EasyBiz system with a pickup or delivery already scheduled. When you send it, the system will link the new times to that existing order.
If the customer does not have an existing booking yet, please send them the Pickup & Delivery Booking Mini App instead to create the order first.
What happens if there is no order to reschedule? If you accidentally send this Mini App to a customer who has no existing booking, the form will still open — but when they tap the final button, the system will not be able to find an order to update. The reschedule will not go through.
Create Your Mini App
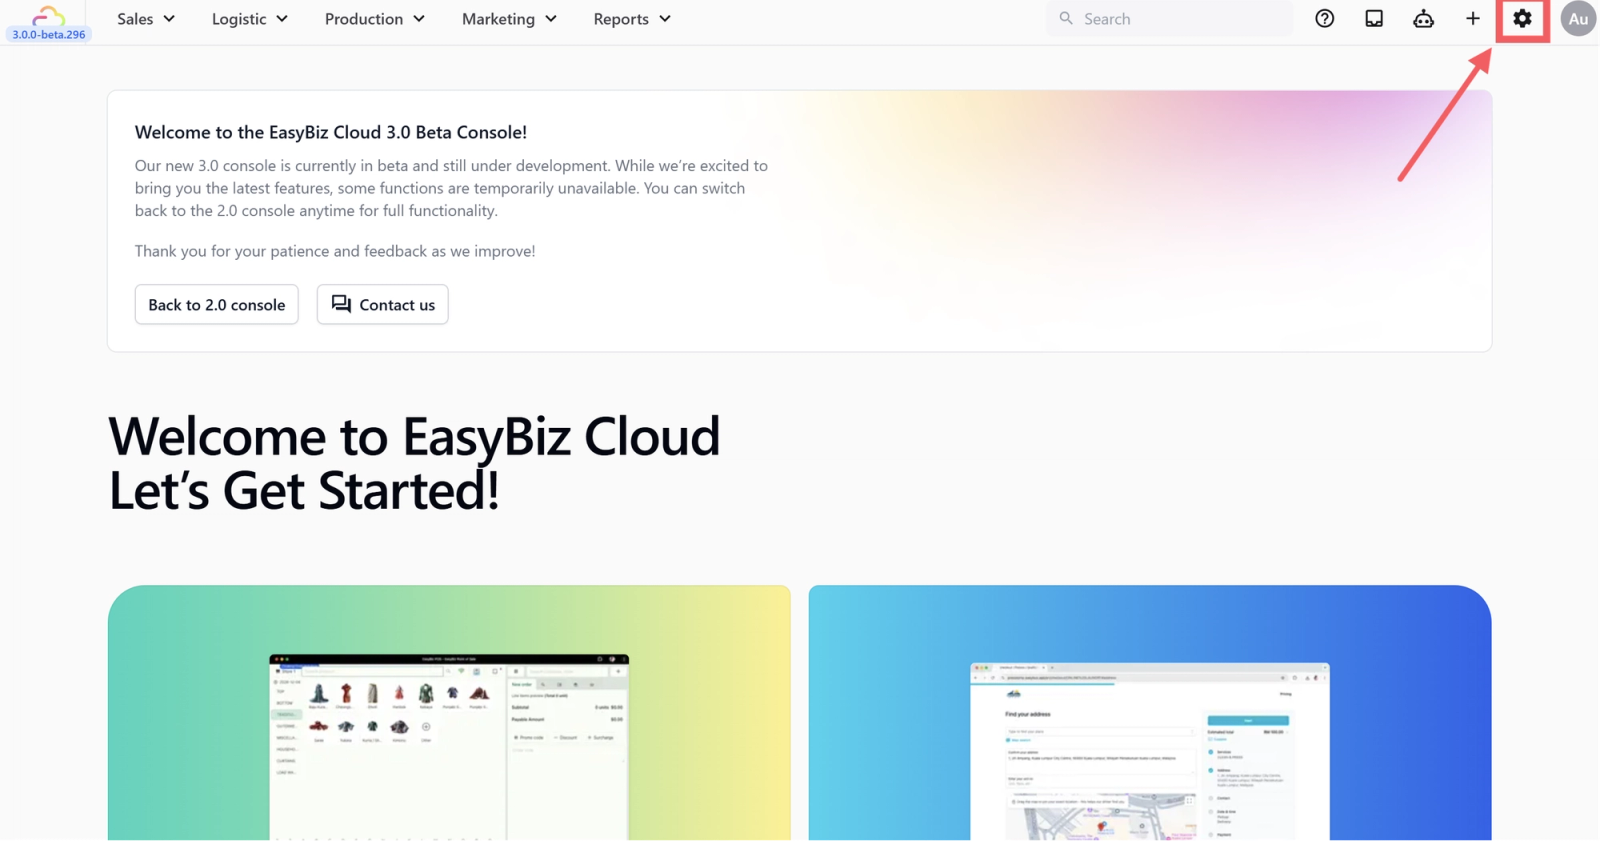
- Go to Settings from the top navigation bar.

- Under Sales Channels, click WhatsApp.
- Open the Mini-Apps Tab.
- Click the + New Mini App button.
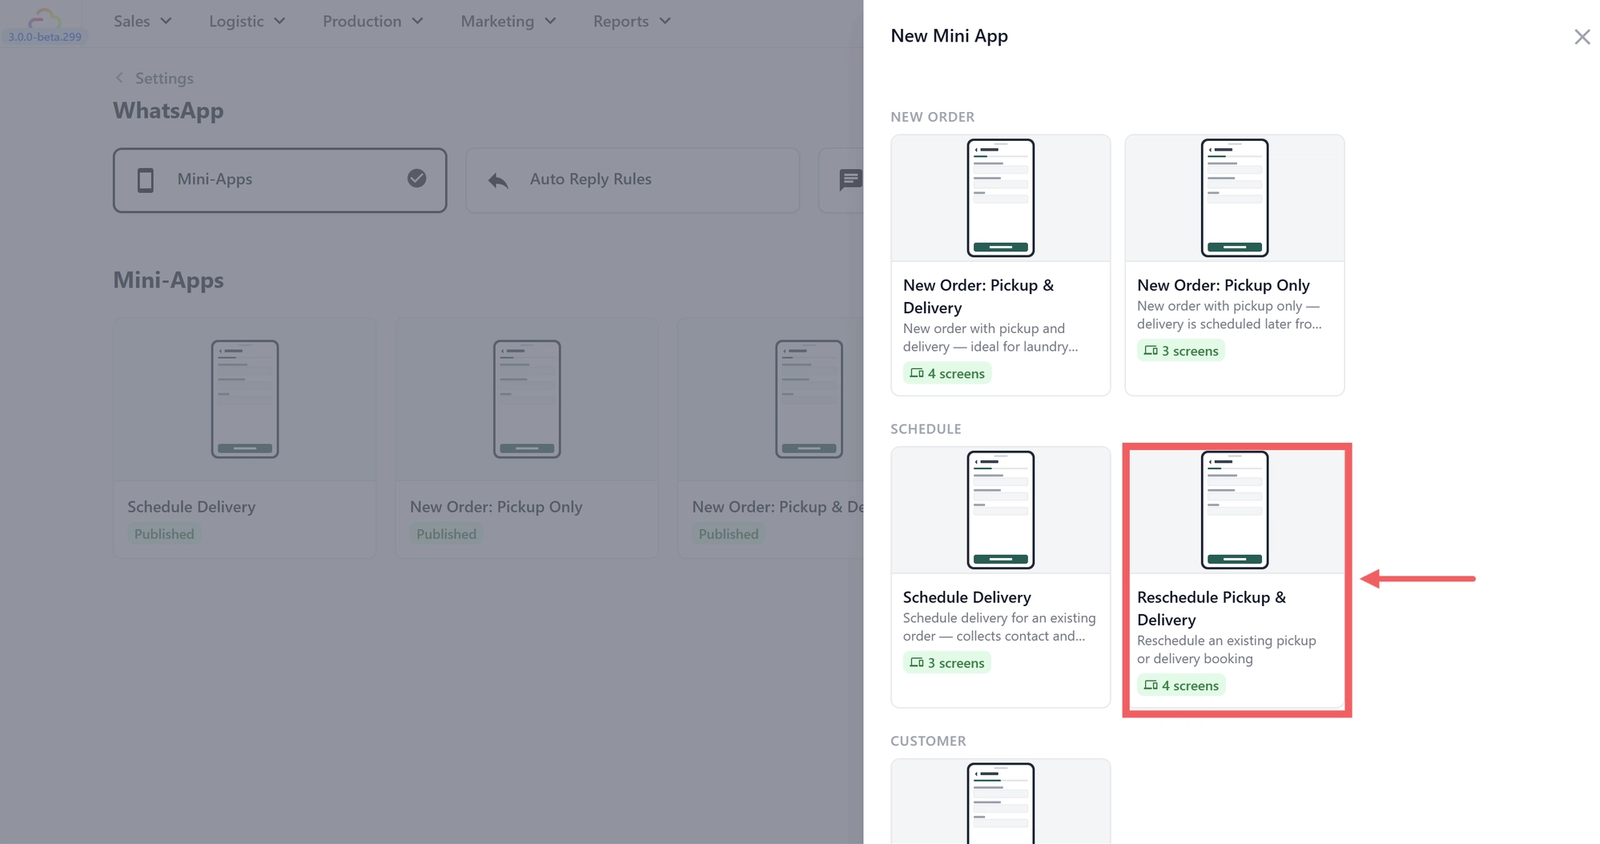
- Select the Reschedule: Pickup & Delivery Reschedule template.

- Enter a name for your Mini App.
- Click Create to open the editor.
Understanding the Editor
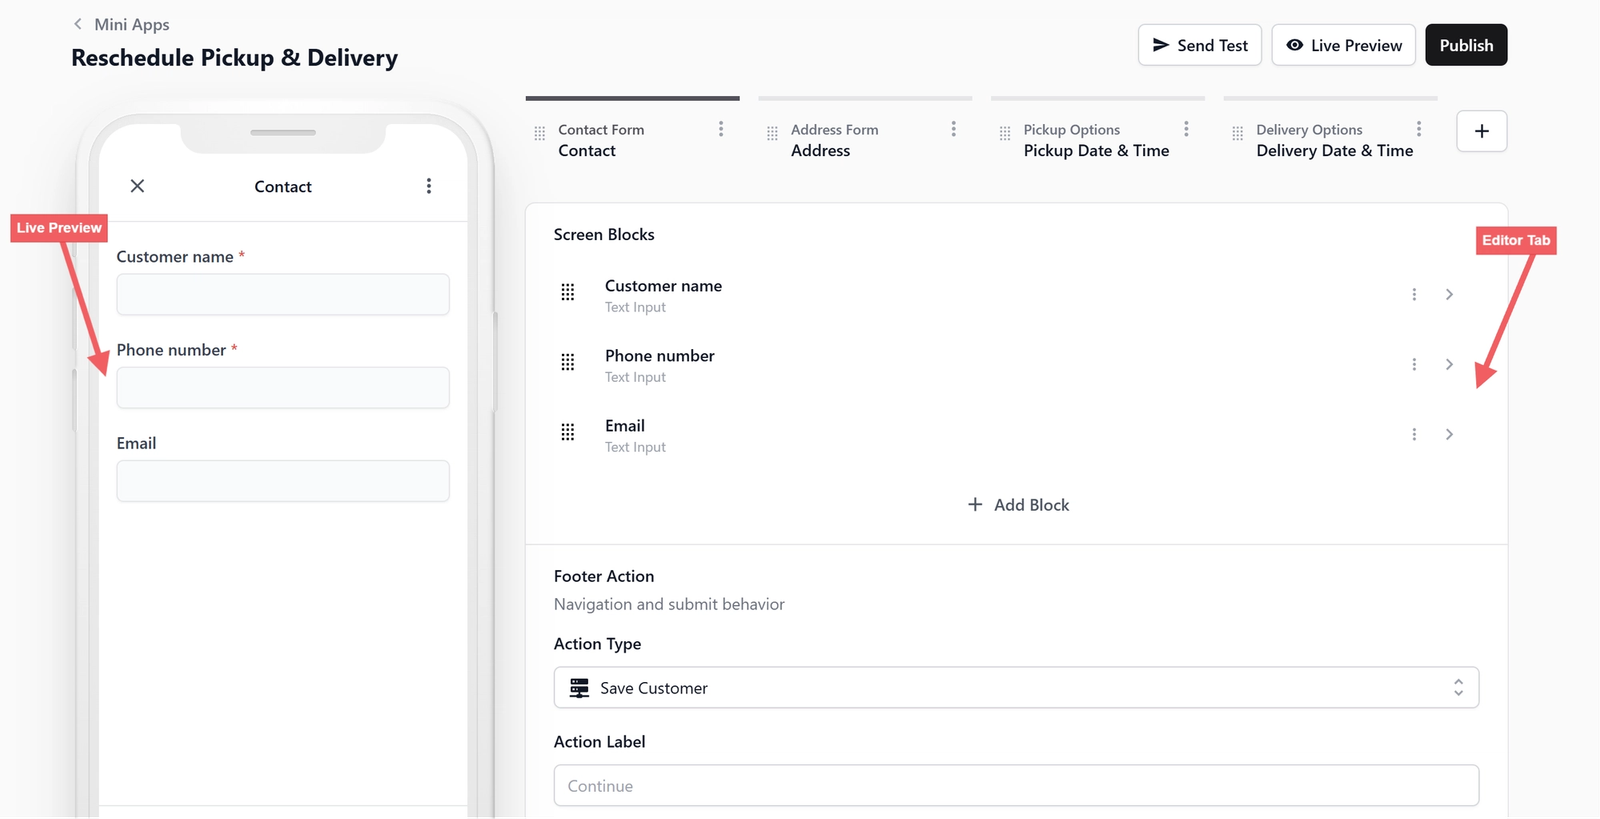
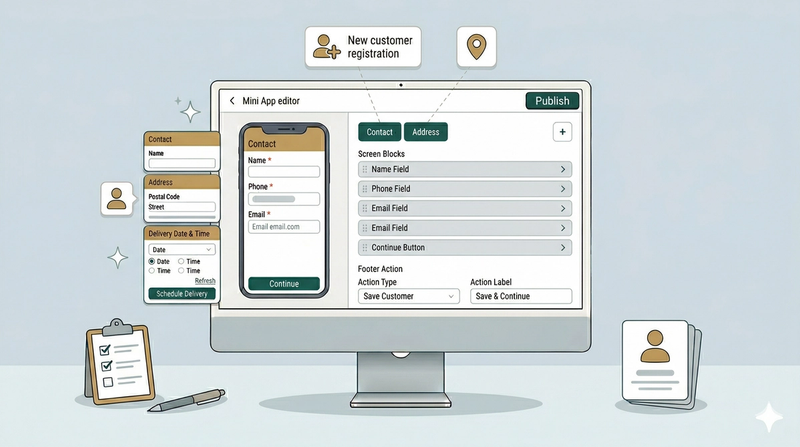
When you open your Mini App, you will see the screen is divided into two parts to make editing easy. The Left Side (Live Preview) is a preview of a mobile phone showing exactly what your customers will see. The Right Side (Editor Tabs) is where you control your form. At the top, you will see tabs for your screens (like pages in a book). You can drag and drop these tabs to reorder your pages.
What are Screen Blocks
Inside every screen, you will see a list of Screen Blocks. Think of a block as a specific field or question you want the customer to fill out (like their name or their phone number). If you click the dropdown arrow icon ( ⌄ ) next to any block, it will expand to show its settings:
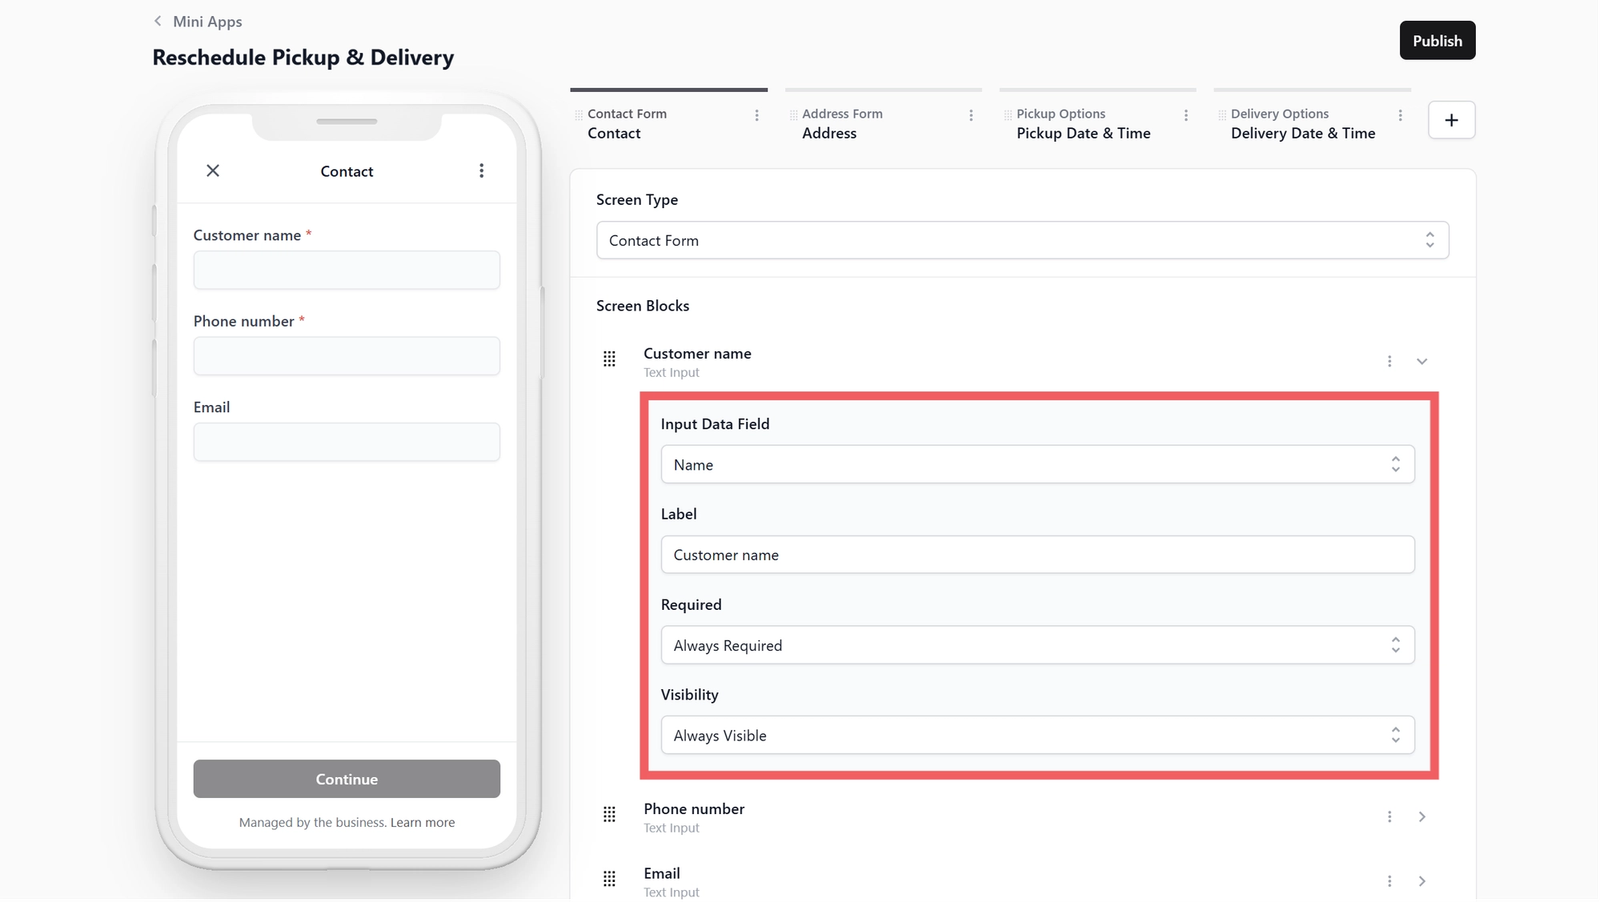
- Input Data Field This links the block to a field in your EasyBiz system — it tells EasyBiz exactly where to save the customer's answer. For example, the "Customer name" block saves to the Name field in your customer profile. You configure these fields in Settings > Operations section > Custom Fields. Read more about Data Fields.
- Label This is the text the customer actually reads on their screen (e.g., "Customer name").
- Required You can choose if the customer must answer this (Always Required), if they can skip it (Not Required), or if it only shows up under certain conditions (Conditional).
- Visibility This controls whether the customer sees this block at all. Set it to Always Visible so it appears on every submission, or set it to Conditional so it only appears when a specific condition is met (for example, showing a unit number field only when the customer selects "HDB" or "Condo" as their property type).
What is a Footer Action
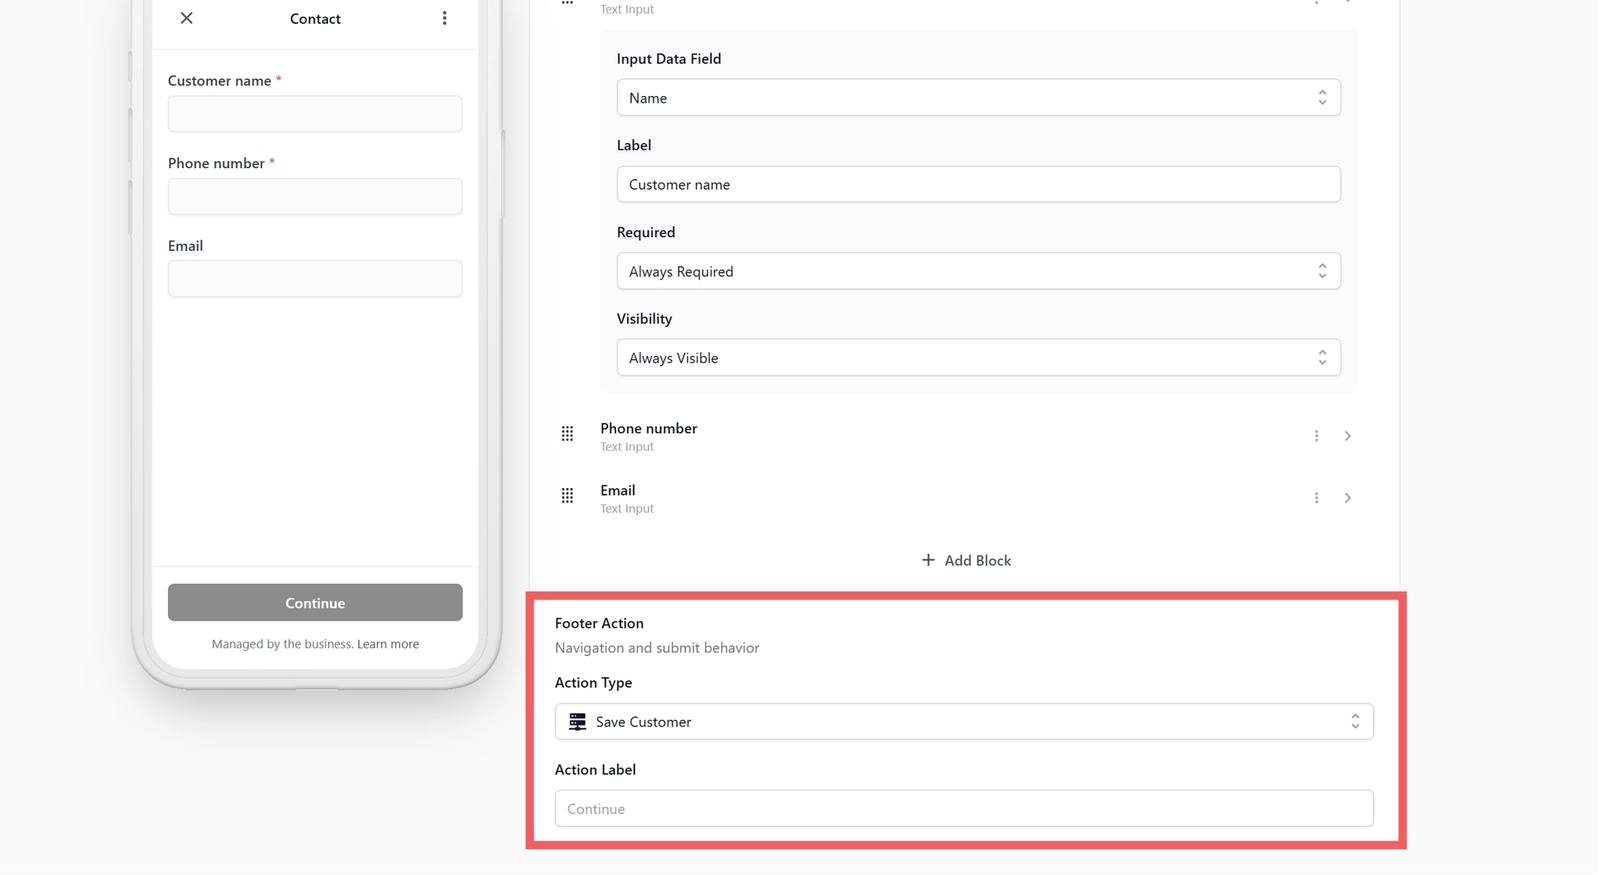
At the very bottom of the editor for each screen, you will see a Footer Action. This controls what the button at the bottom of the customer's phone does when they tap it. It might tell the app to save the customer's details, move to the next page, or finally create the order.
What is Already Set Up
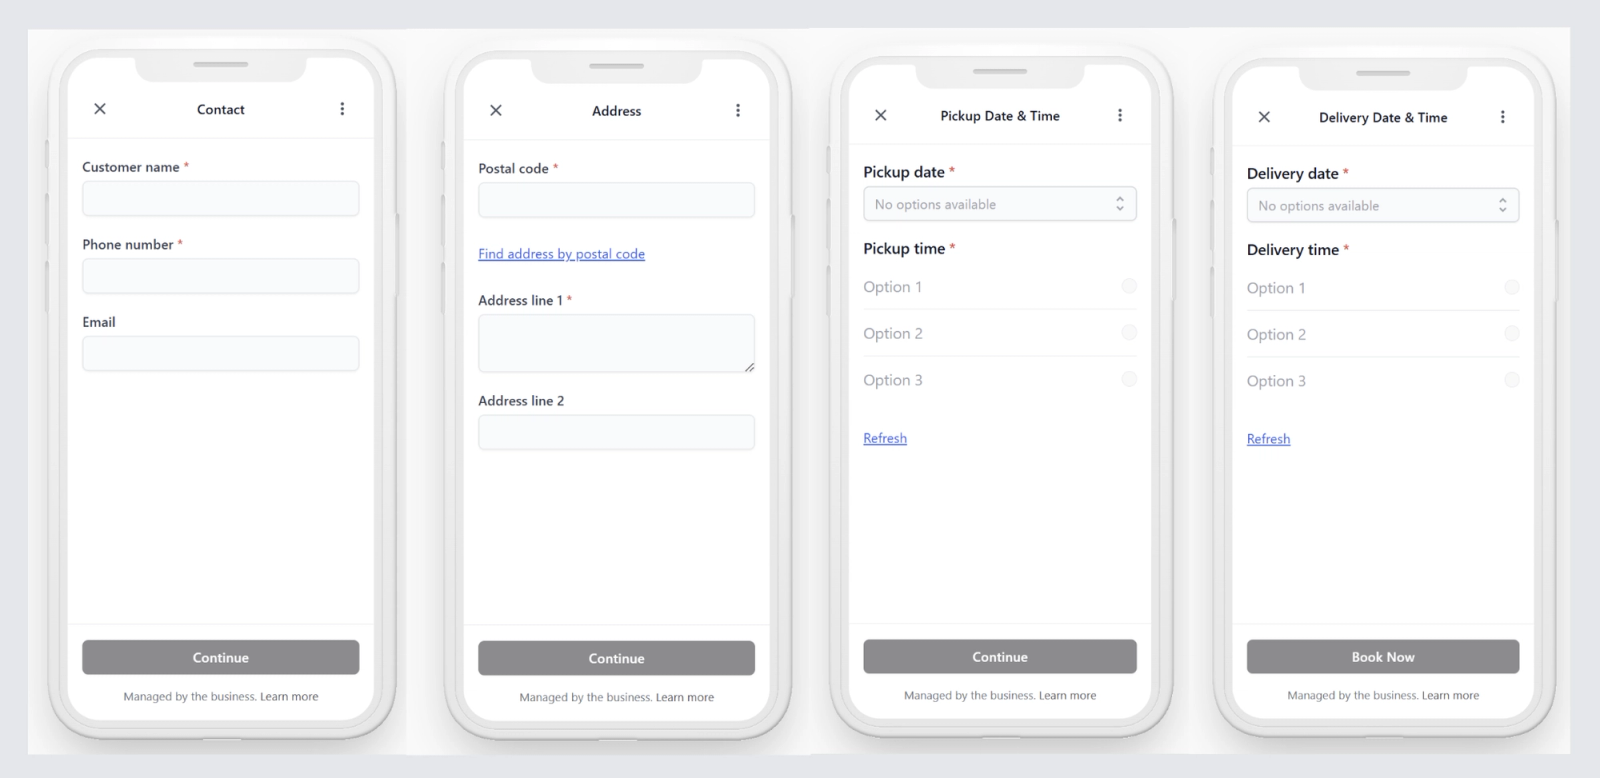
This template is ready to use immediately! It comes pre-built with four default screens that your customer will go through in order. Here is exactly what is inside your default setup:
Contact Screen
This screen confirms the customer's basic details before they reschedule.
- Blocks Included Customer name, Phone number, and Email.
- Footer Action Set to Save Customer. When the customer taps "Continue", EasyBiz securely saves their details or updates their existing profile.
Address Screen
This screen confirms the address for the pickup and delivery.
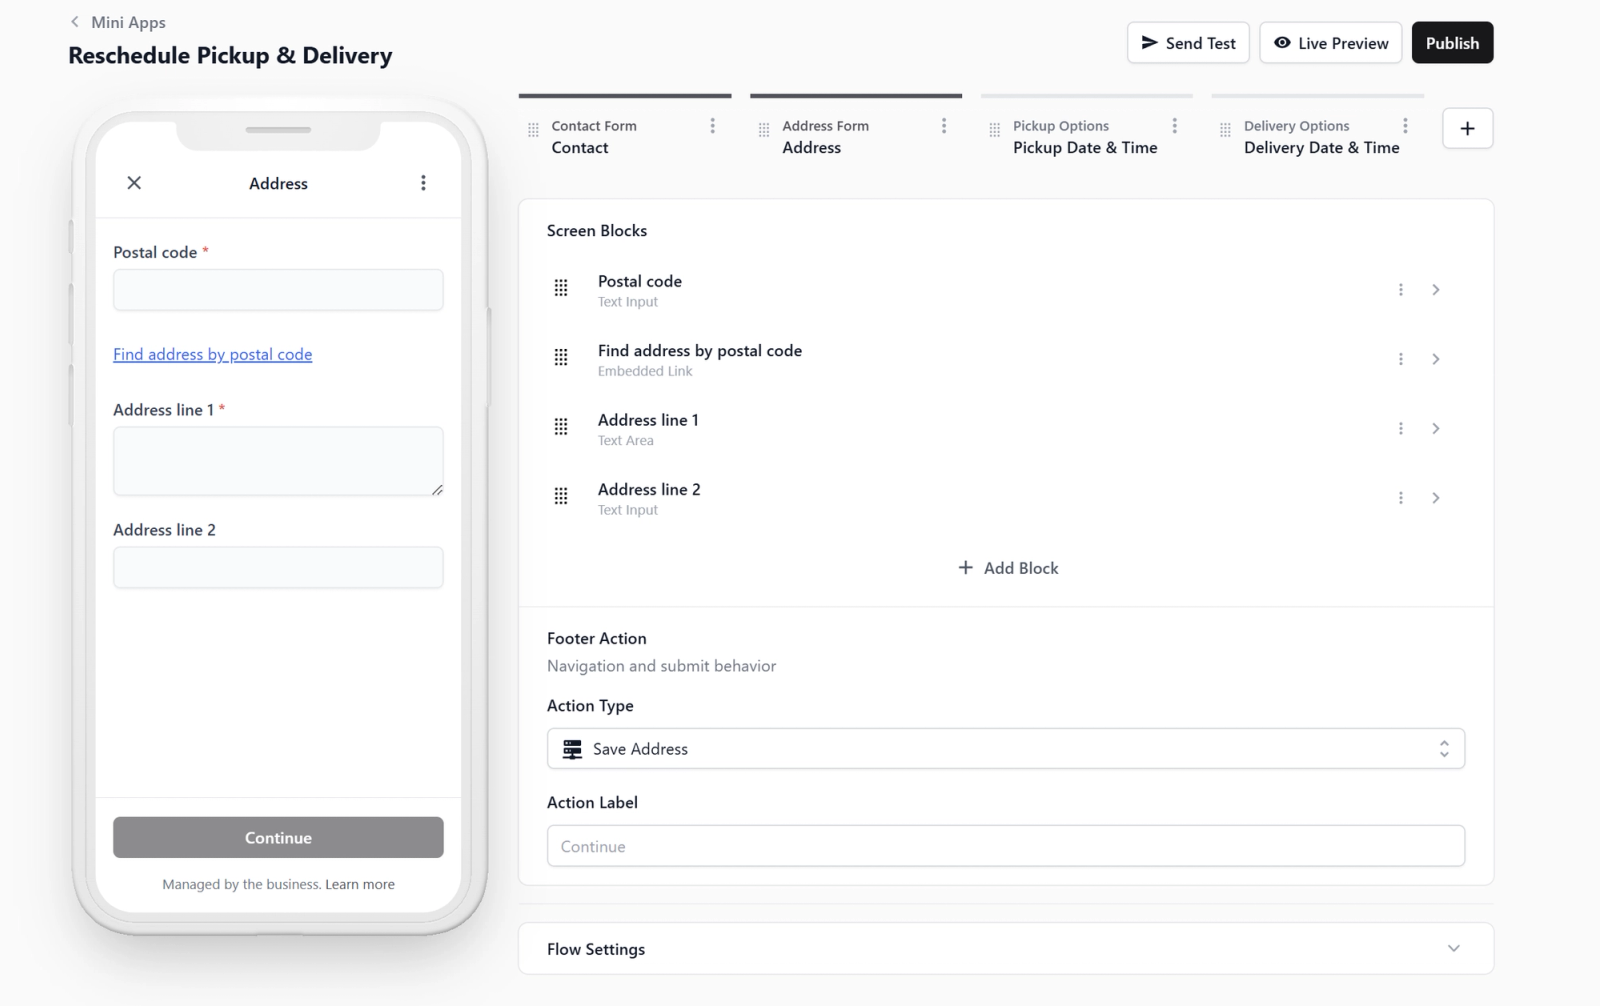
- Blocks Included: Postal code, a clickable "Find address by postal code" link, Address line 1, and Address line 2 (left optional for unit/floor numbers).
- Footer Action: Set to Save Address.
Pickup Date & Time Screen
This screen lets your customer choose when they want their items collected.
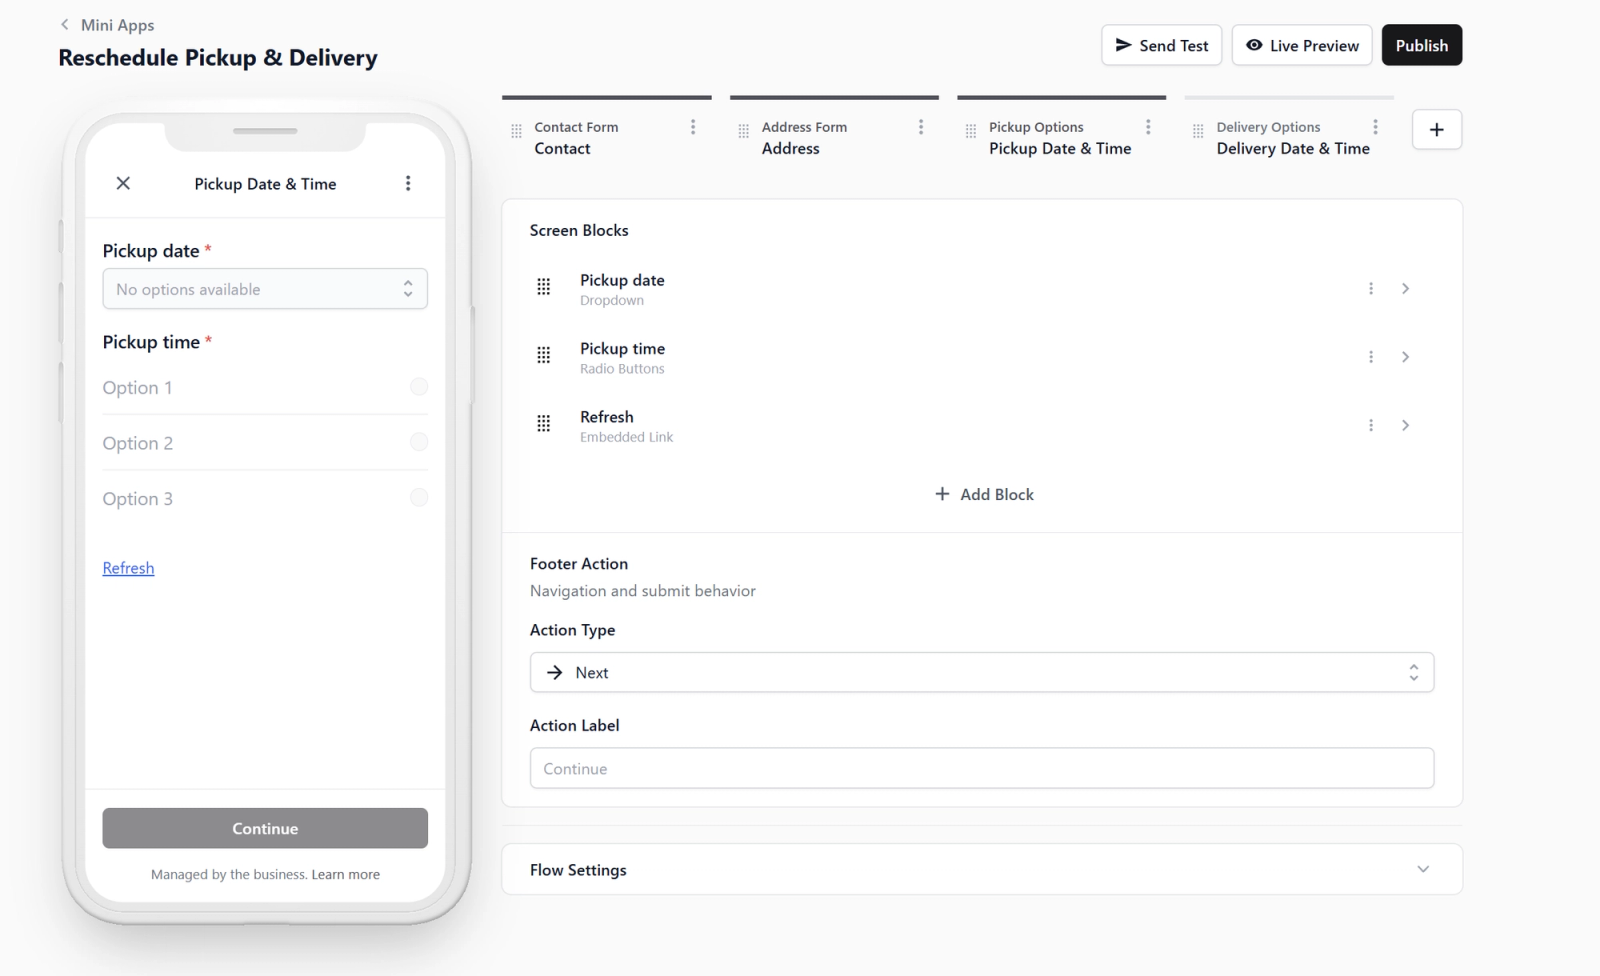
- Blocks Included: Pickup date dropdown, Pickup time options, and a "Refresh" link (in case they need to see the latest available time slots).
- Footer Action: Set to Next to simply move them to the final step.
Delivery Date & Time Screen
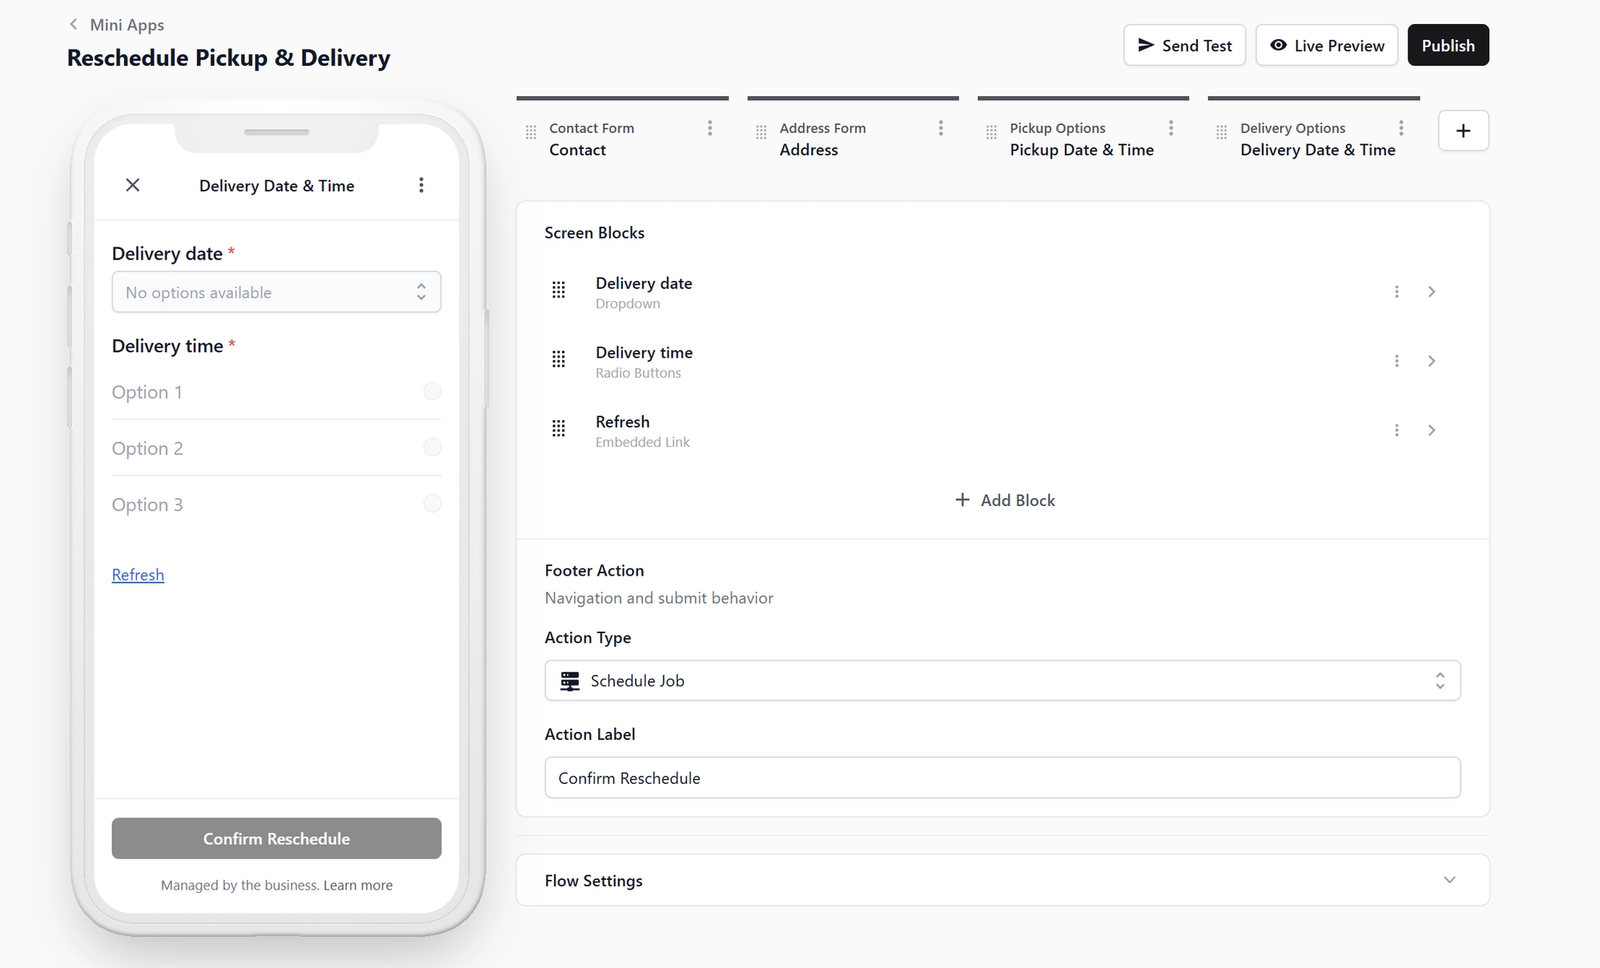
This screen lets the customer choose their new delivery date and time.
- Blocks Included: Delivery date dropdown, Delivery time options, and a "Refresh" link.
- Footer Action: Set to Schedule Job. Once the customer taps this final button, the booking is instantly created in your EasyBiz system!
Customizing Your Mini App
The default setup above is all you need to run your business smoothly. You can click Publish right now and start taking bookings!
However, if you want to make Address Line 2 mandatory only for certain property types, you can set that up as well.
Making Address Line 2 Mandatory
By default, Address Line 2 (unit number) is optional because customers in landed houses do not have one. Here is how to make it mandatory only for HDB, Condo or Offices.
Step 1 Create an Address Type Data Field
Before we can ask the customer for their property type, we need to create a blank space in the system to save their answer. Read more about [Data Fields].
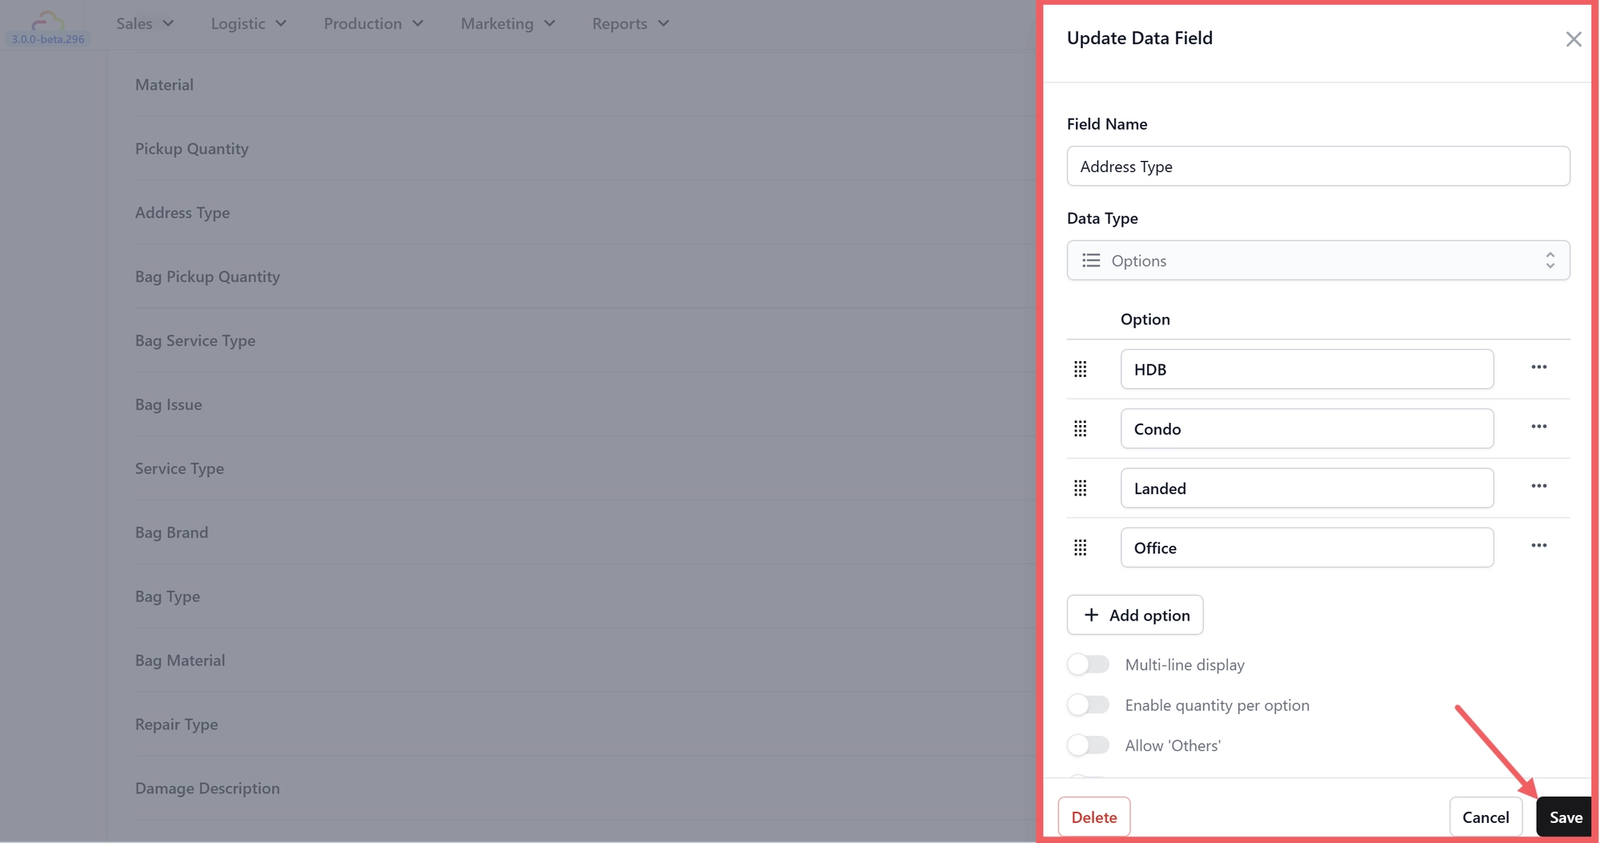
- Go to Settings> Operations section > Custom Fields.
- Click Add Data Field. Name it Address Type and select Dropdown as the Data Type.
- Type in your options: HDB, Condo, Office, Landed. Click Save.
Step 2 Add the Address Type Block
- Back in your Mini App editor, click your Address screen tab.
- Click + Add Block
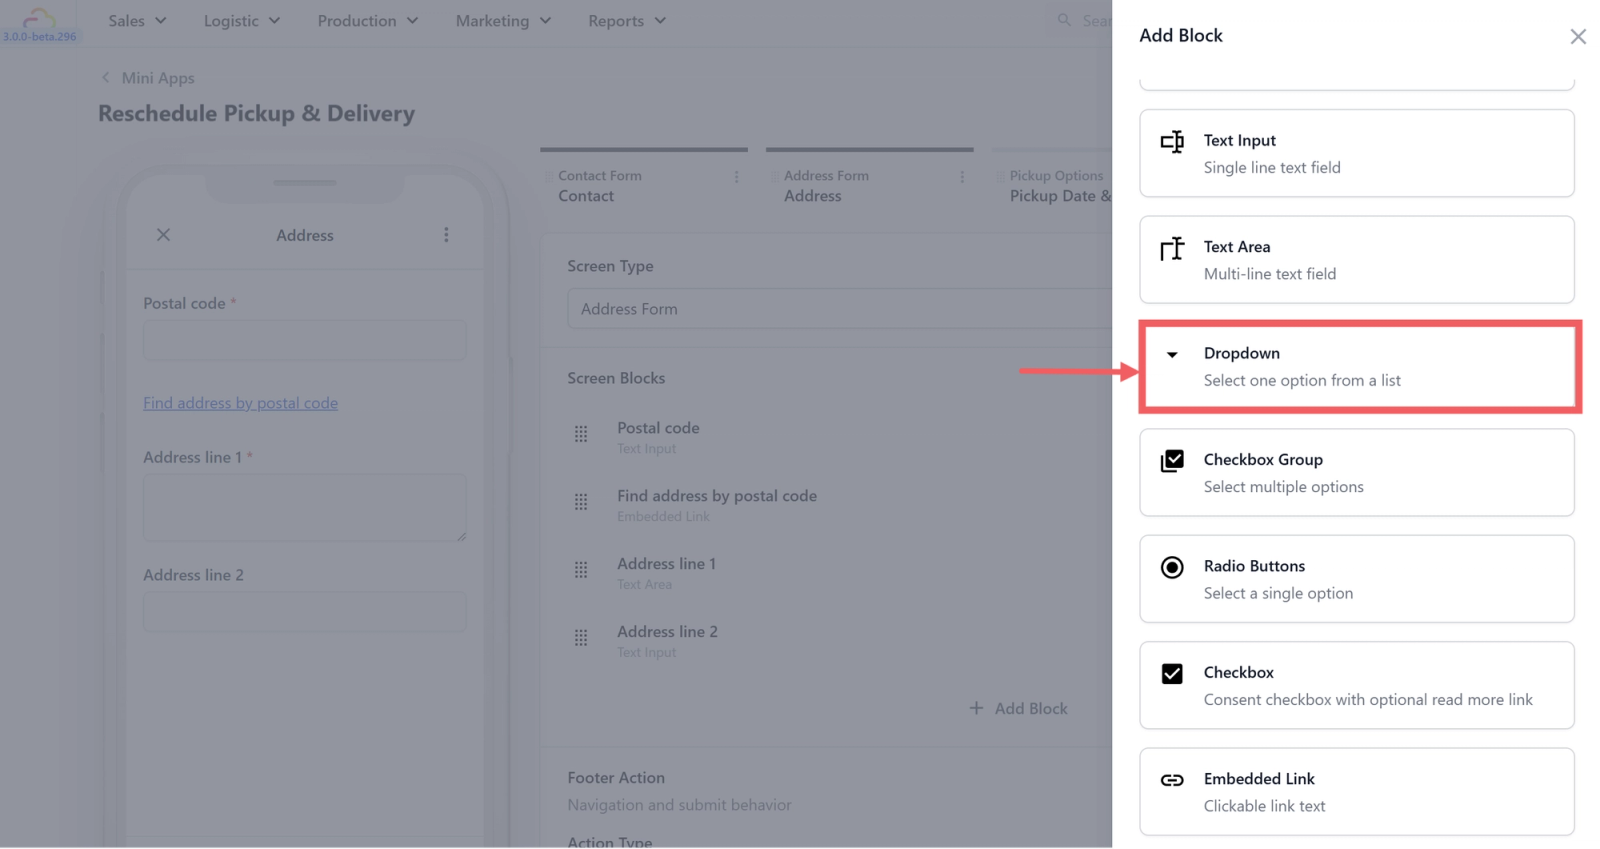
- Choose Dropdown.
- Open the block settings (click the ⌄ arrow). Set the Input Data Field to your newly created Address Type field.
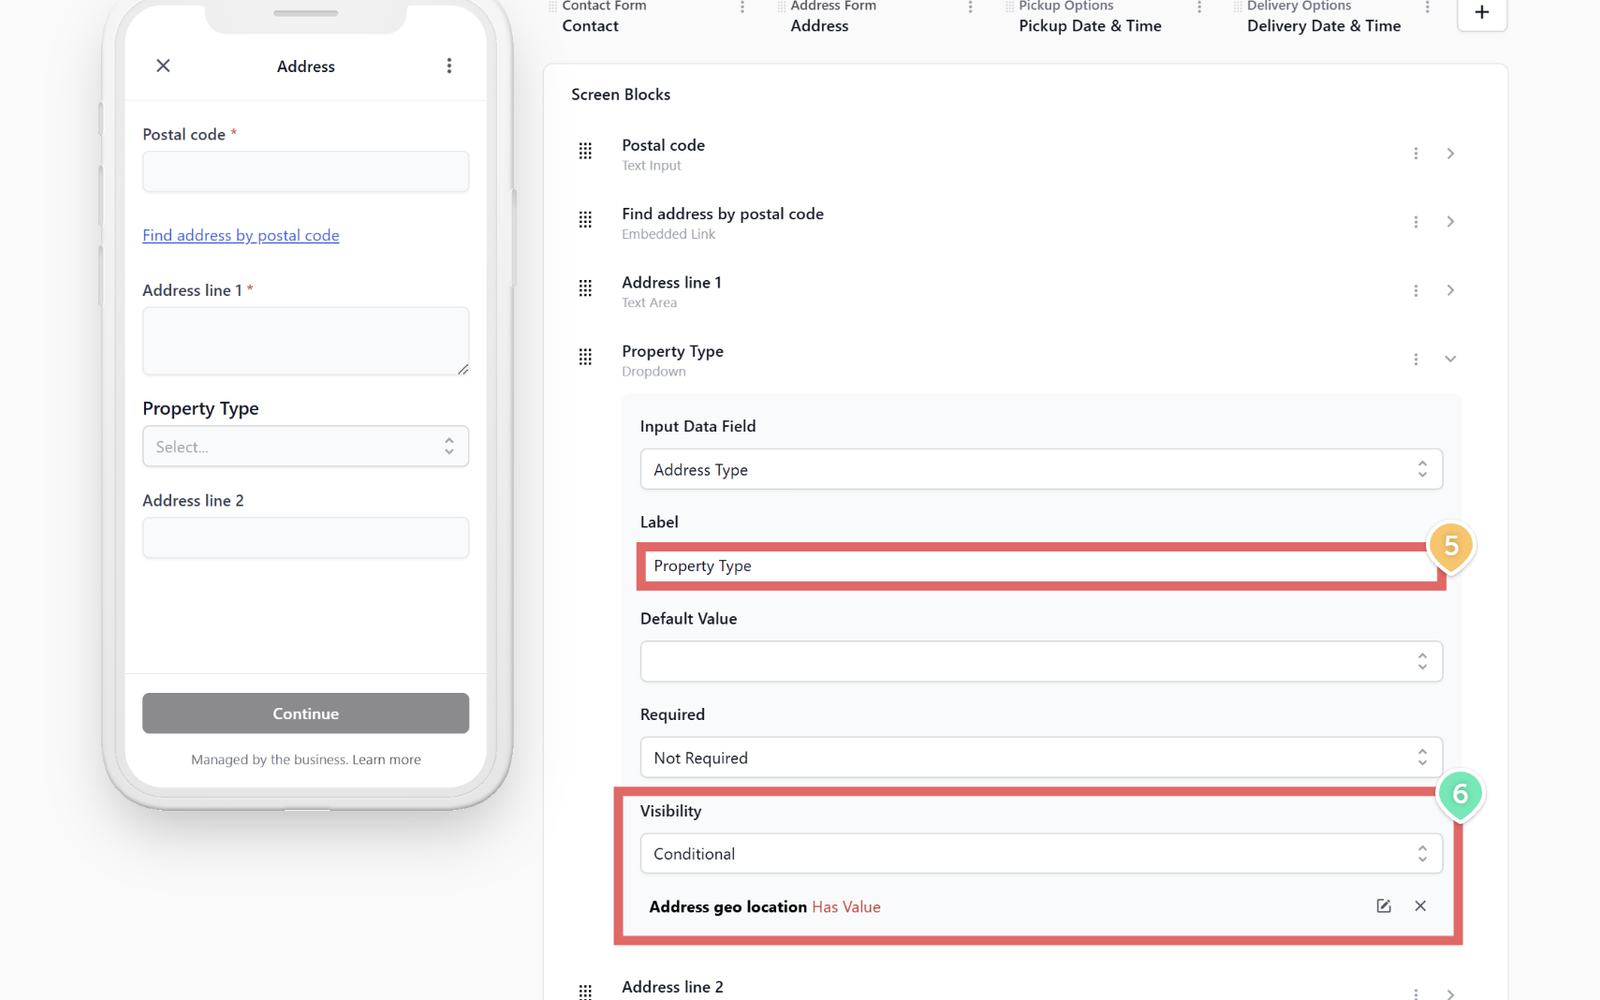
- Set the Label to "Property Type".
- Set Visibility to Conditional. Choose When: Address geo location -> Operator: Has Value. This ensures the dropdown only appears after the customer finds their postal code.
- Drag and drop this new block just above Address Line 1.
Step 3 Make Address Line 2 Conditional
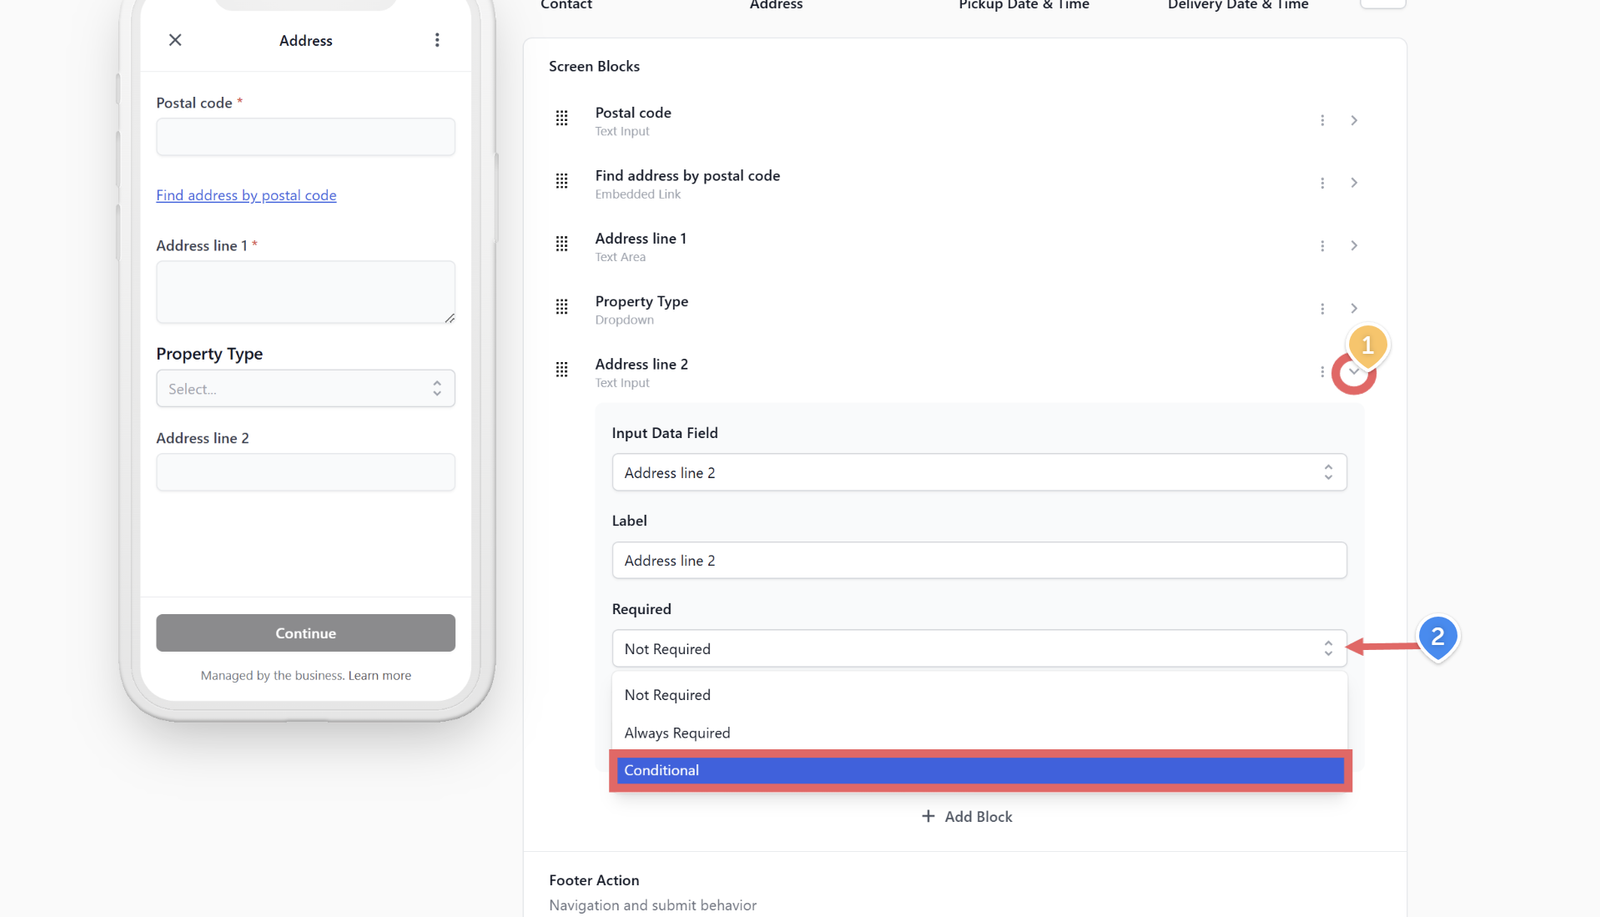
- Open the settings for the Address Line 2 block.
- Change Required to Conditional.
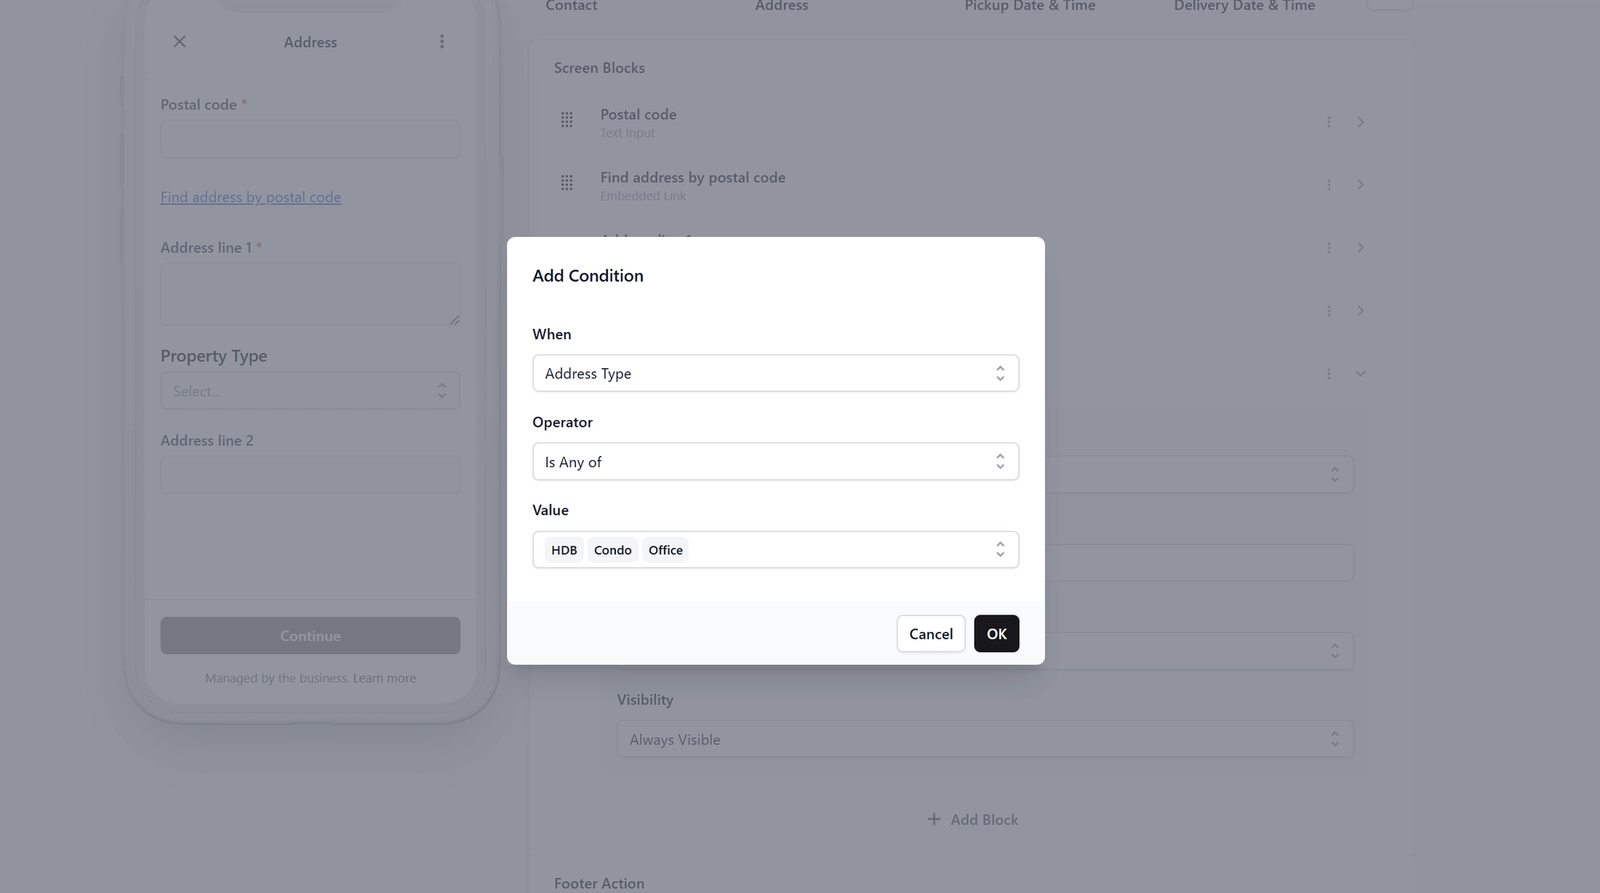
- Set it to When: Address Type -> Operator: Is Any Of -> Value: HDB, Condo, Office.
Now, Address Line 2 will be strictly required for apartments, but completely optional for landed properties!
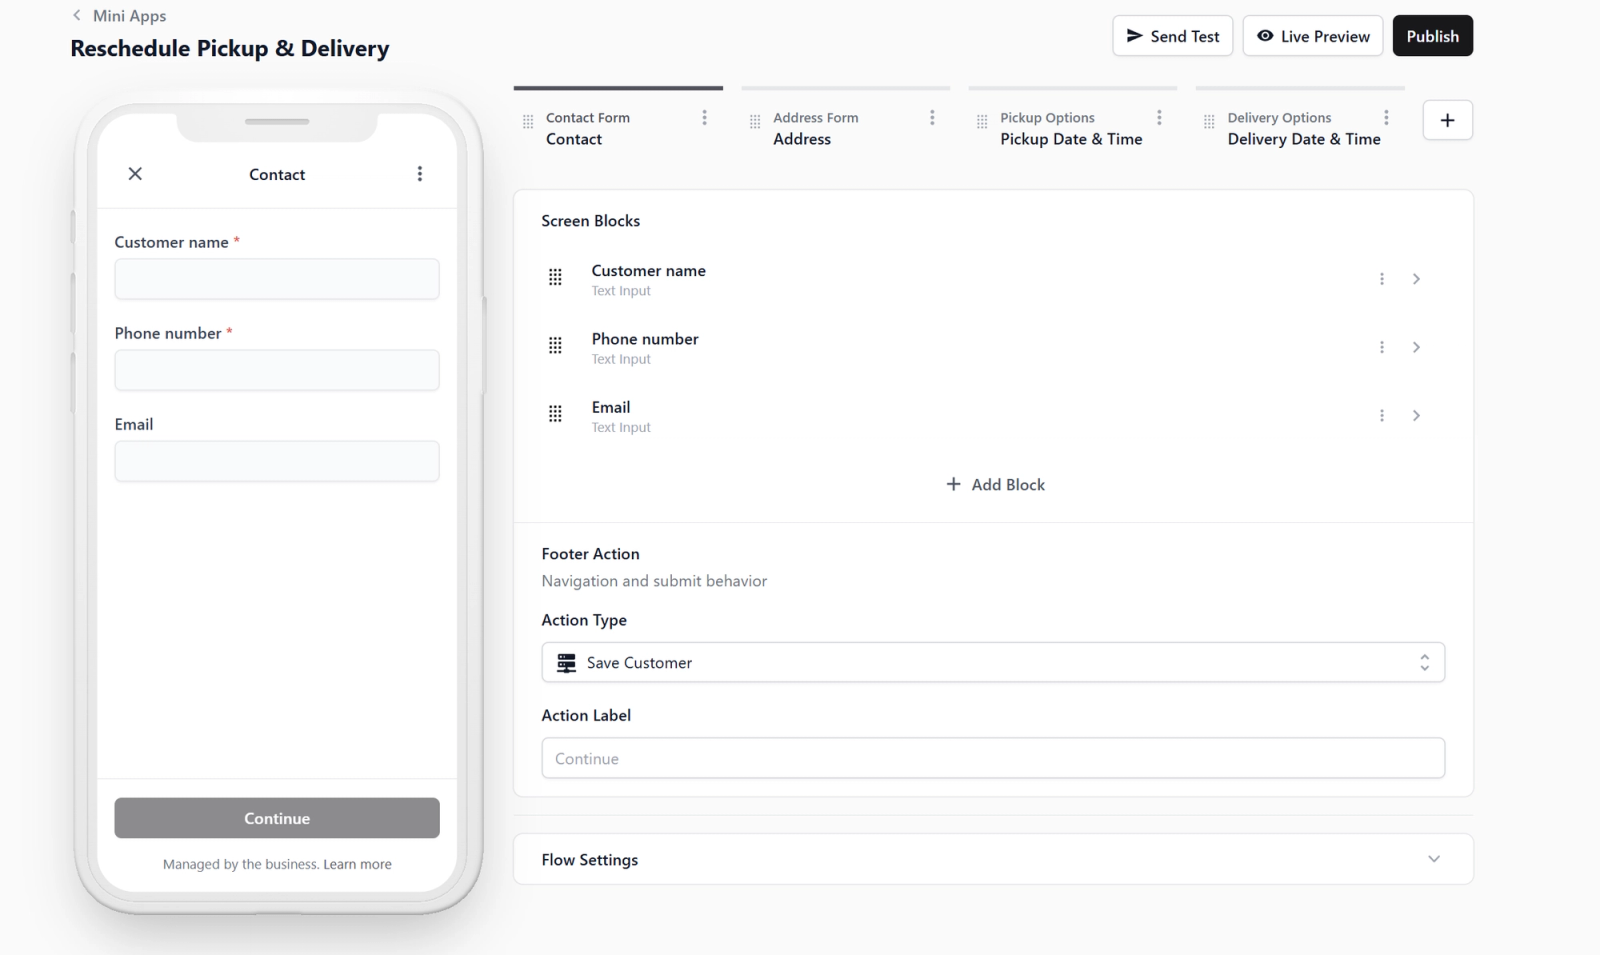
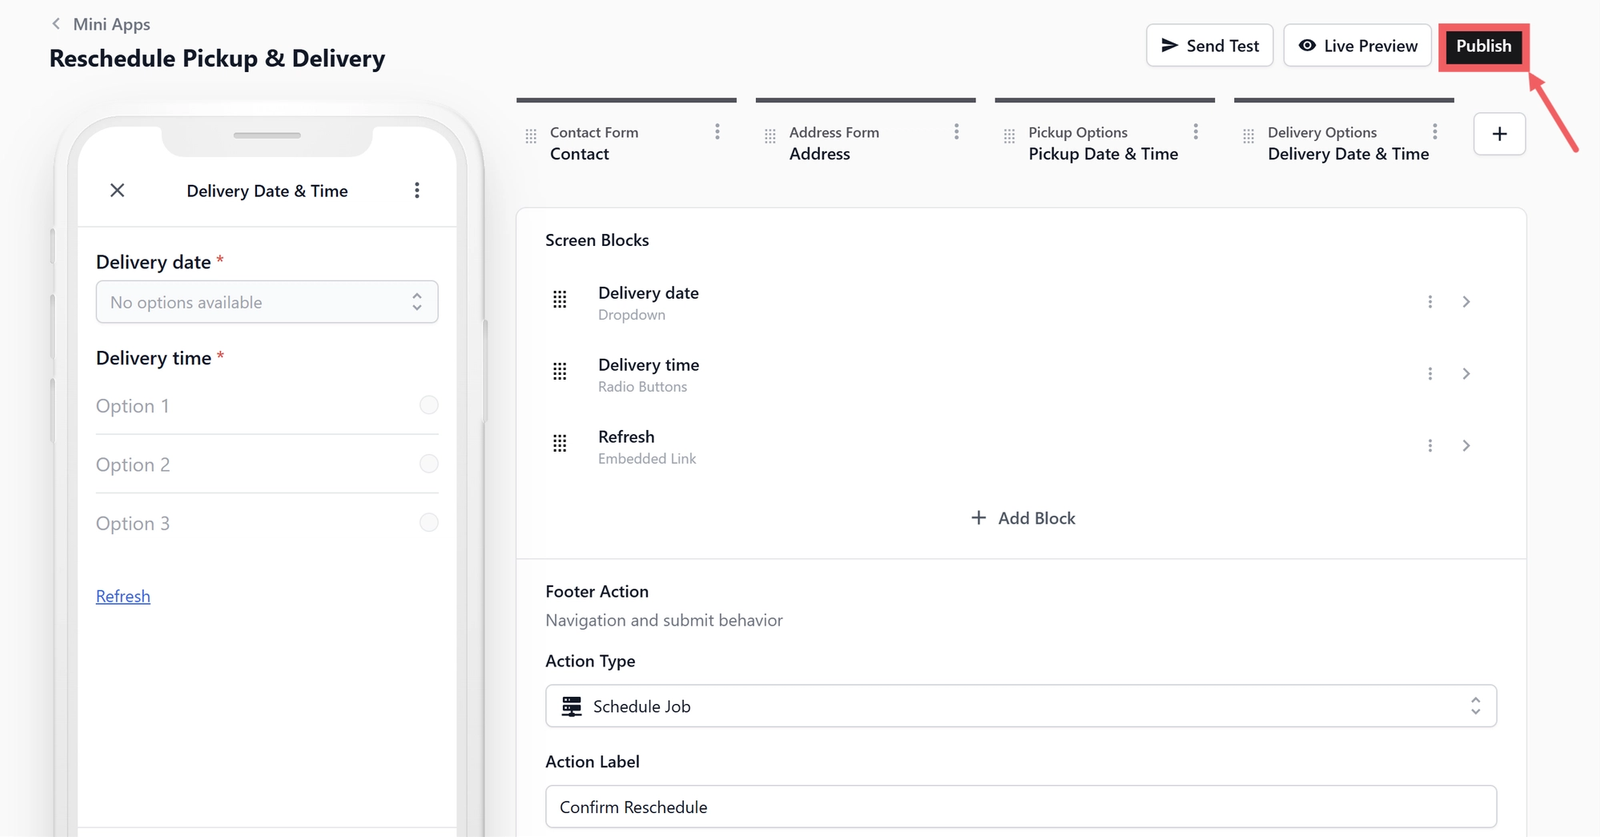
Publish Your Mini App
Once you are happy with your setup, it is time to make it live!
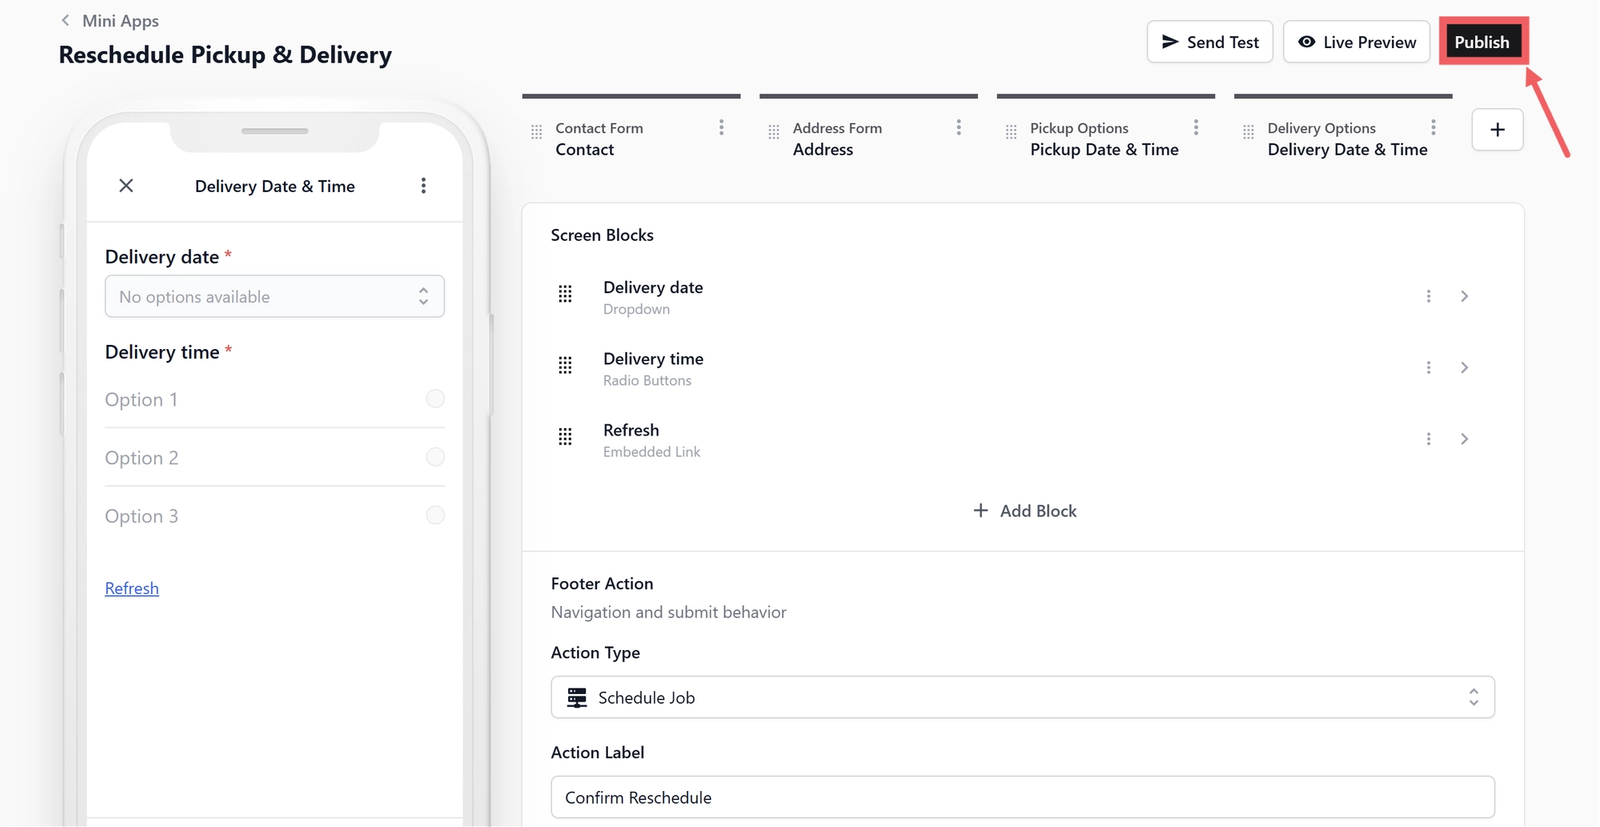
- Click the black Publish button at the top right corner of the editor.
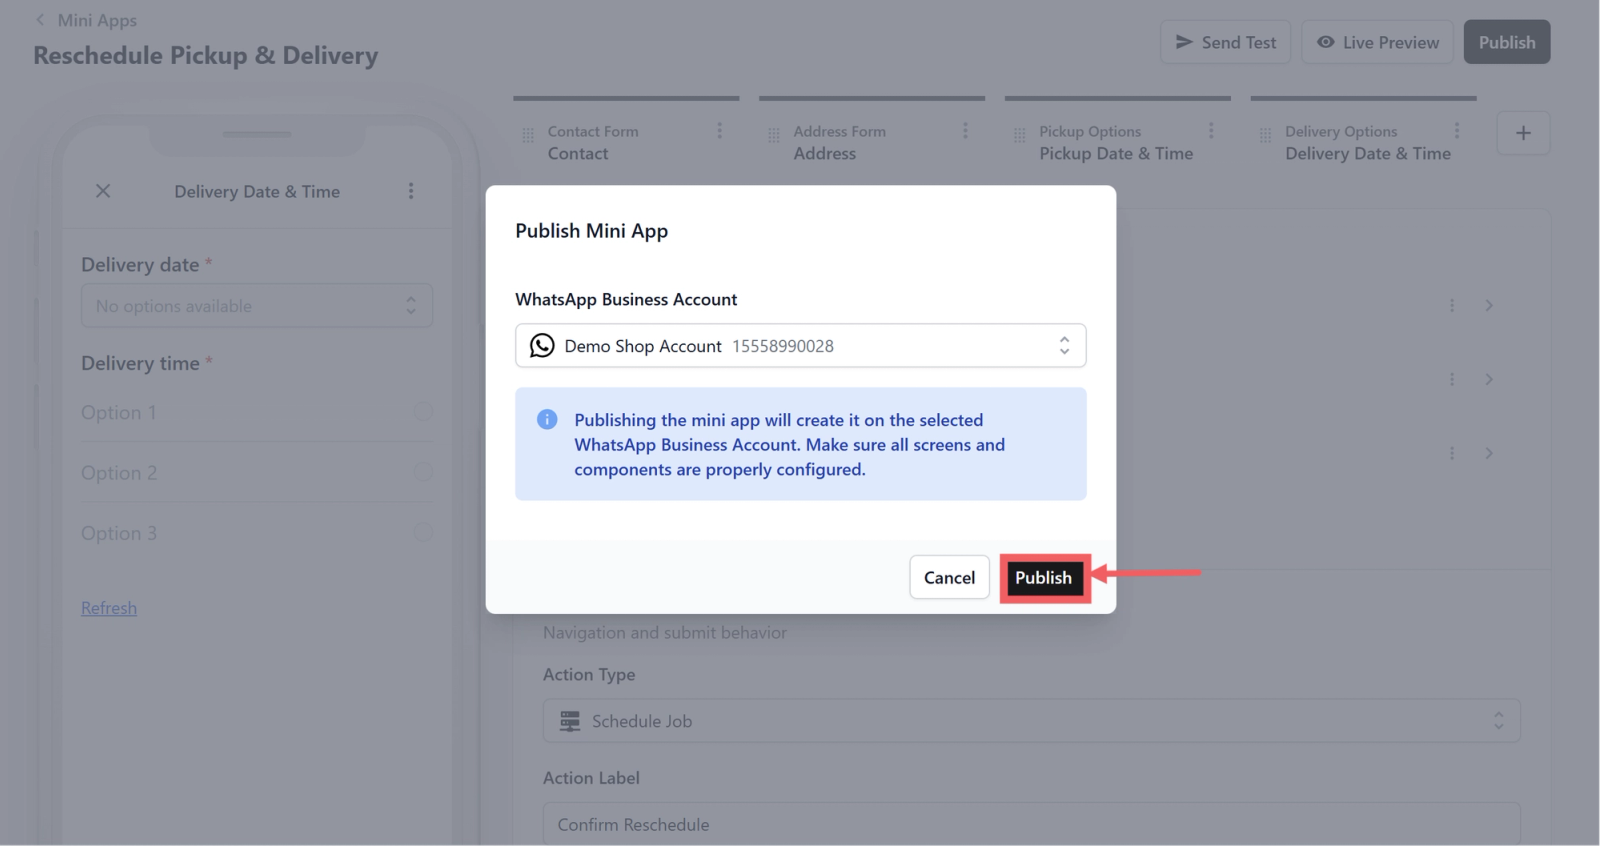
- A confirmation dialog box will pop up. Ensure your WhatsApp Business Account is selected correctly, then click Publish.
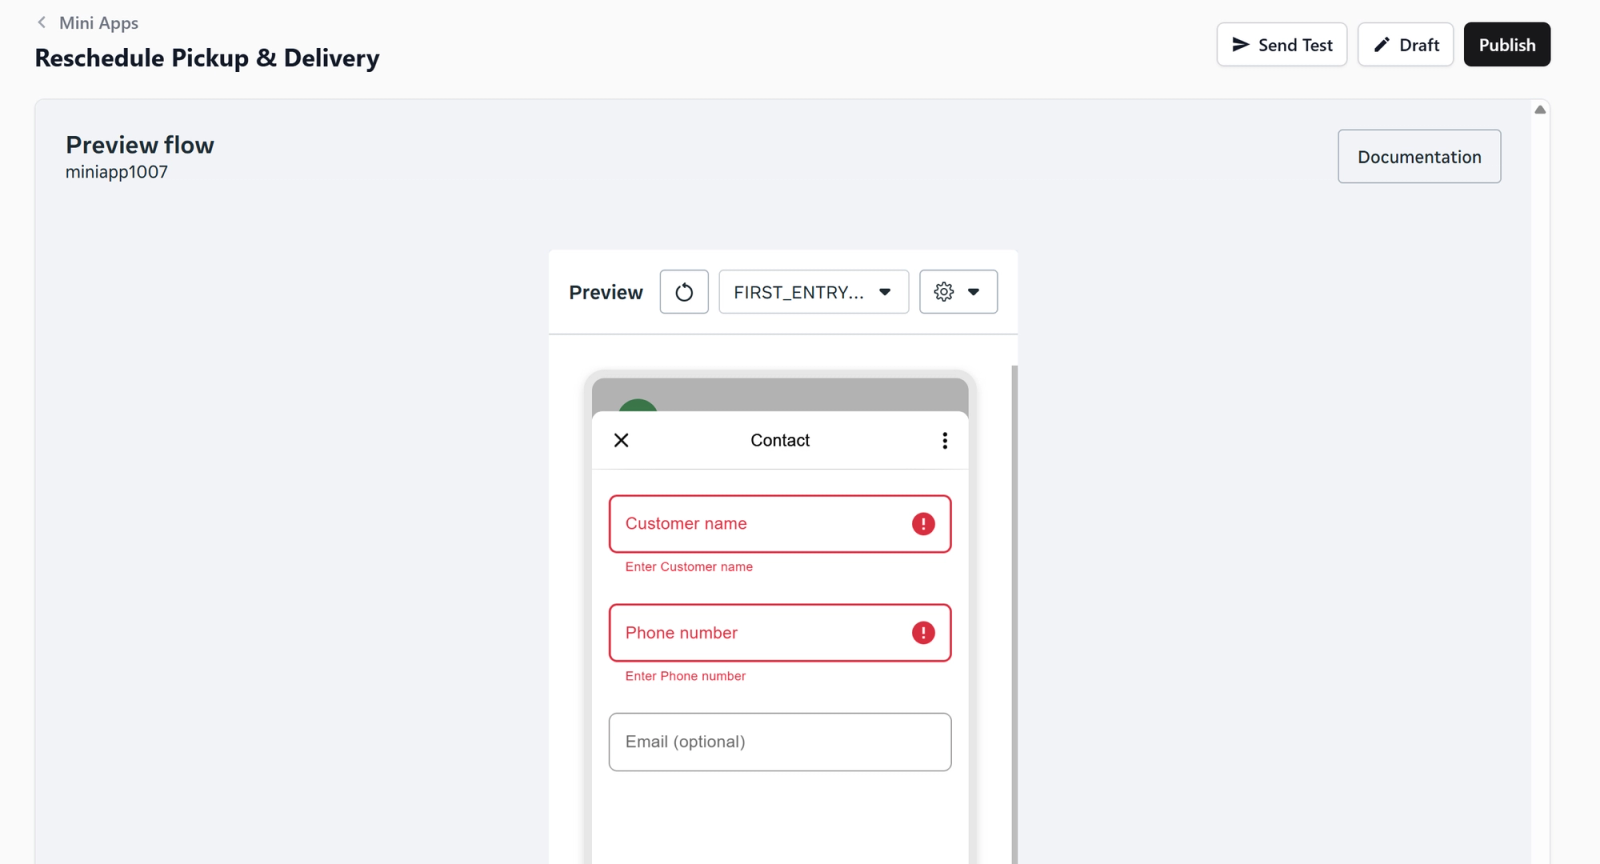
- You will now be taken to the Live Preview screen. This screen shows you exactly what your customer will see and interact with on their phone.
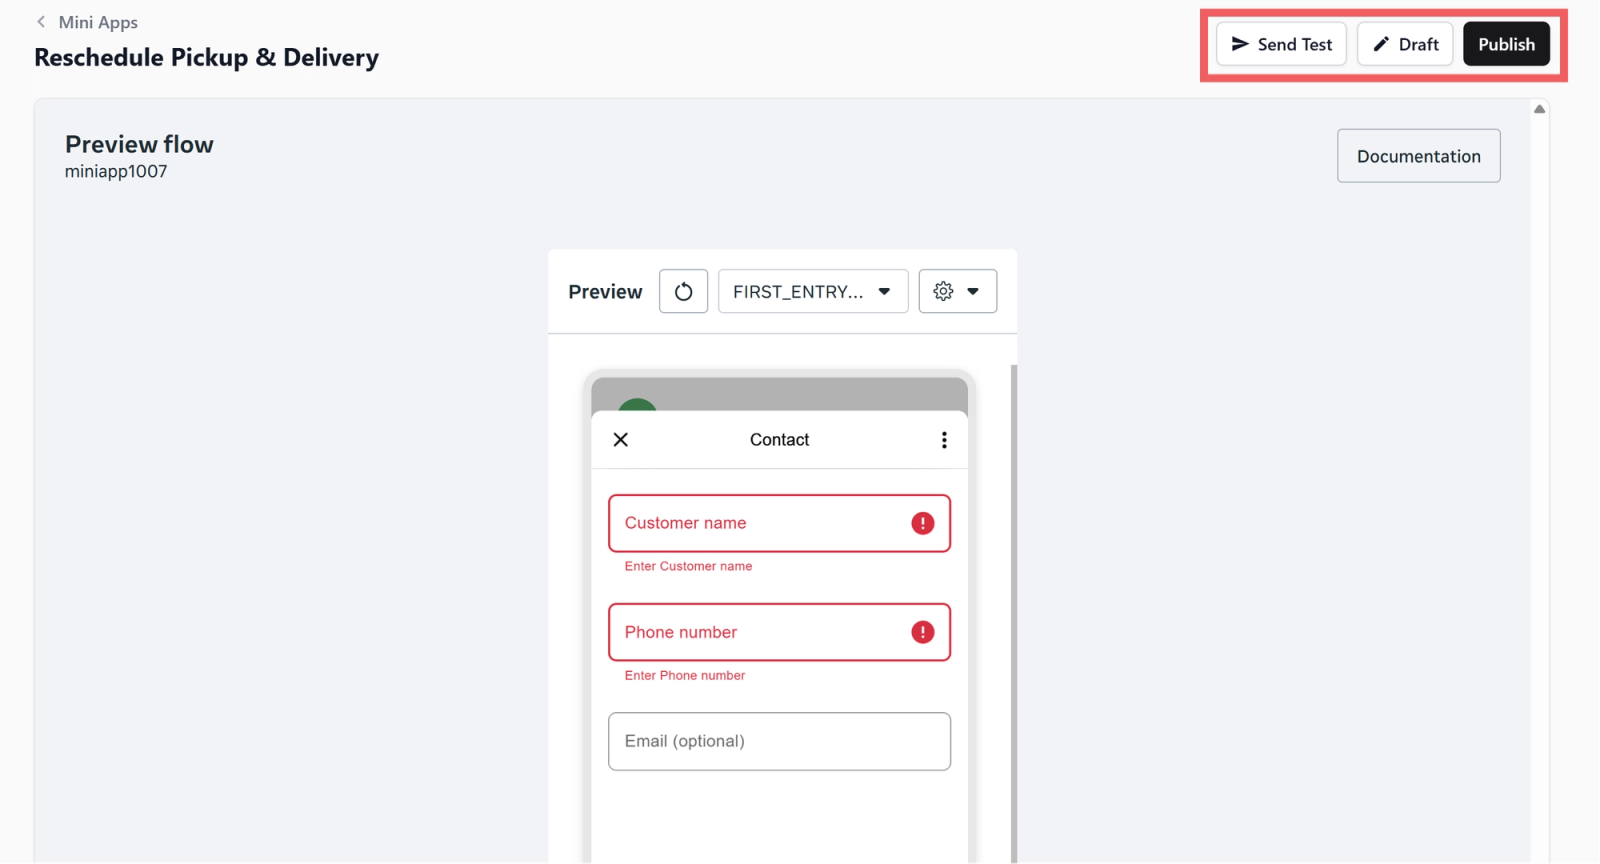
- At the top right of this screen, you have three final options:
- Send Test: Want to try it yourself first? Click this button, enter/select your phone number, and EasyBiz will send the form directly to your personal WhatsApp so you can test it like a real customer!
- Draft: If you notice something you want to change in the preview, click this button to return to the editing mode.
- Publish: If everything looks perfect, click this final Publish button to make your Mini App live and ready to use!
FAQs
Can this Reschedule Pickup & Delivery Mini App create a new booking?
No. This Mini App is only for changing an existing pickup and delivery booking. For new bookings, use the New Order: Pickup & Delivery Mini App.
What happens if the customer has no active order?
The form may still open, but the reschedule cannot be completed because there is no existing order for EasyBiz to update.
Can the customer change both pickup and delivery times?
Yes. This template lets the customer choose new pickup and delivery slots, then updates the booking in EasyBiz.
What's Next?
Now that your mini app is configured, continue to [Sending Your Mini Apps to Customers] to learn the different ways to share each mini app and get customers using them.
Give feedback
Up next
Setting Up a Customer Sign Up Mini AppLet new customers register their contact details and address through a simple WhatsApp form — ideal for onboarding walk-ins or capturing leads.
Read more