How to Get Around Your POS Screen
In this article
Now that your POS is signed in and ready to go, this guide walks you through the main areas of your POS screen. Whether you need to take an order, look up a past order, open the cash drawer, or close out the day, this article shows you where to find it all.
Contents
Contents
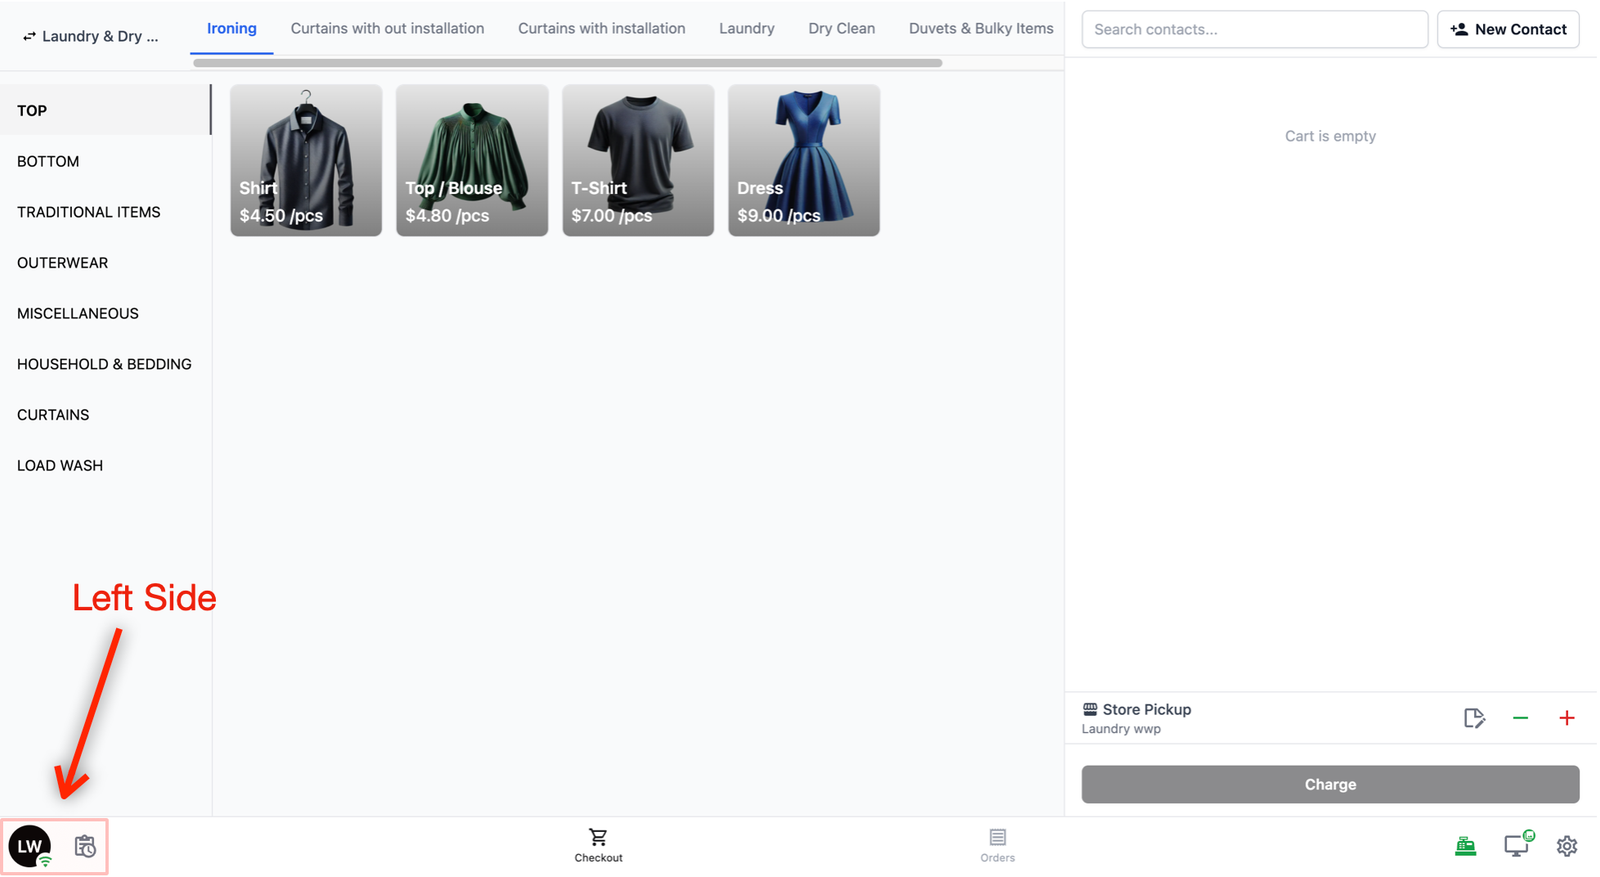
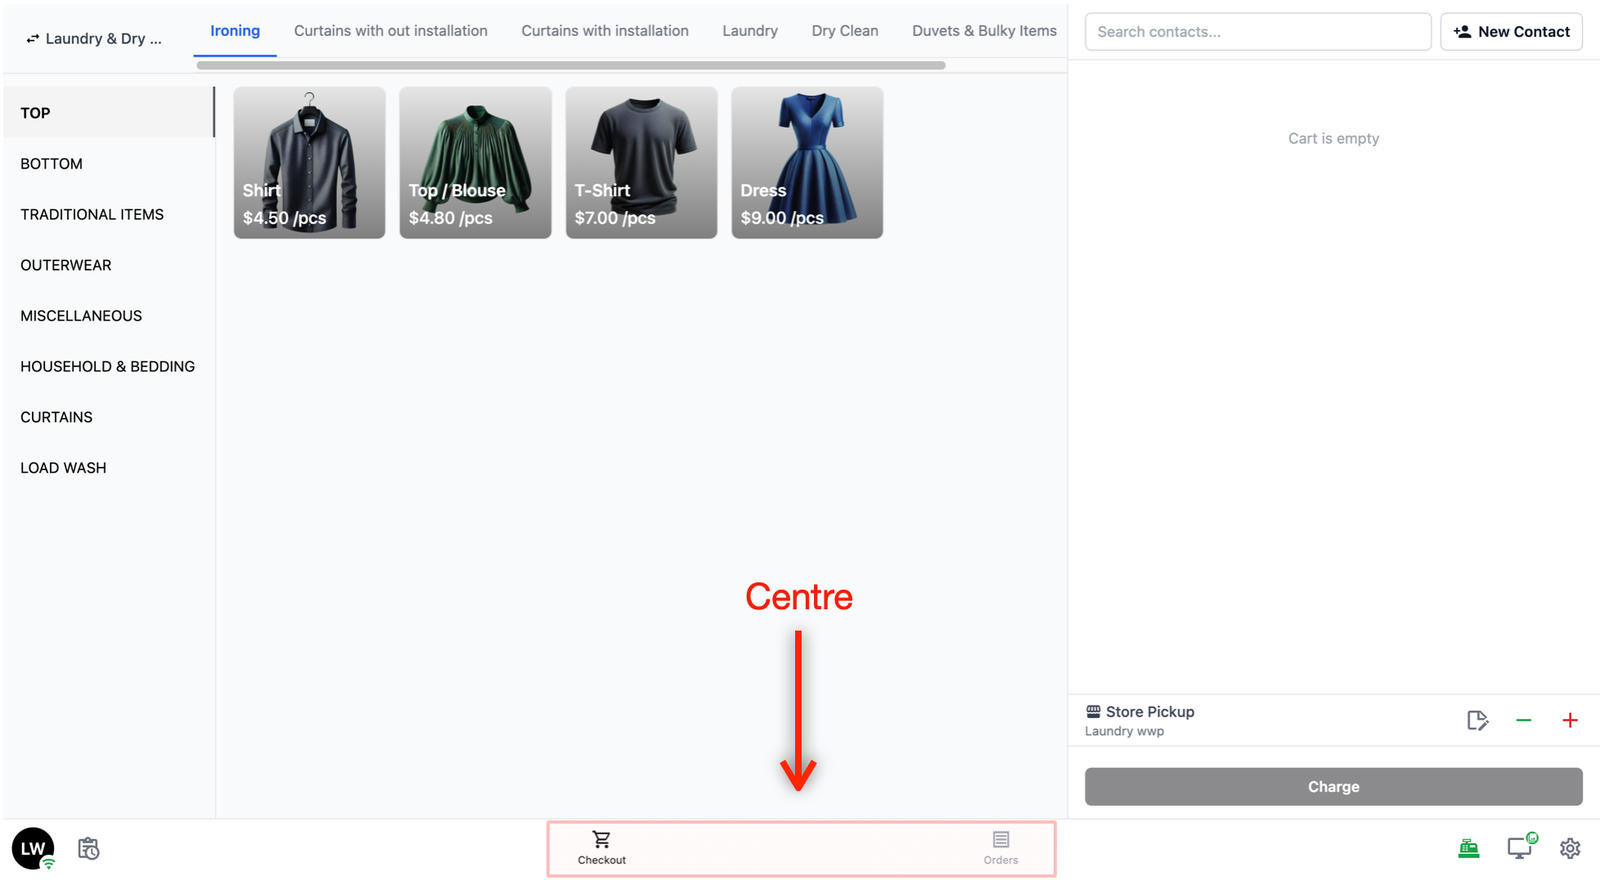
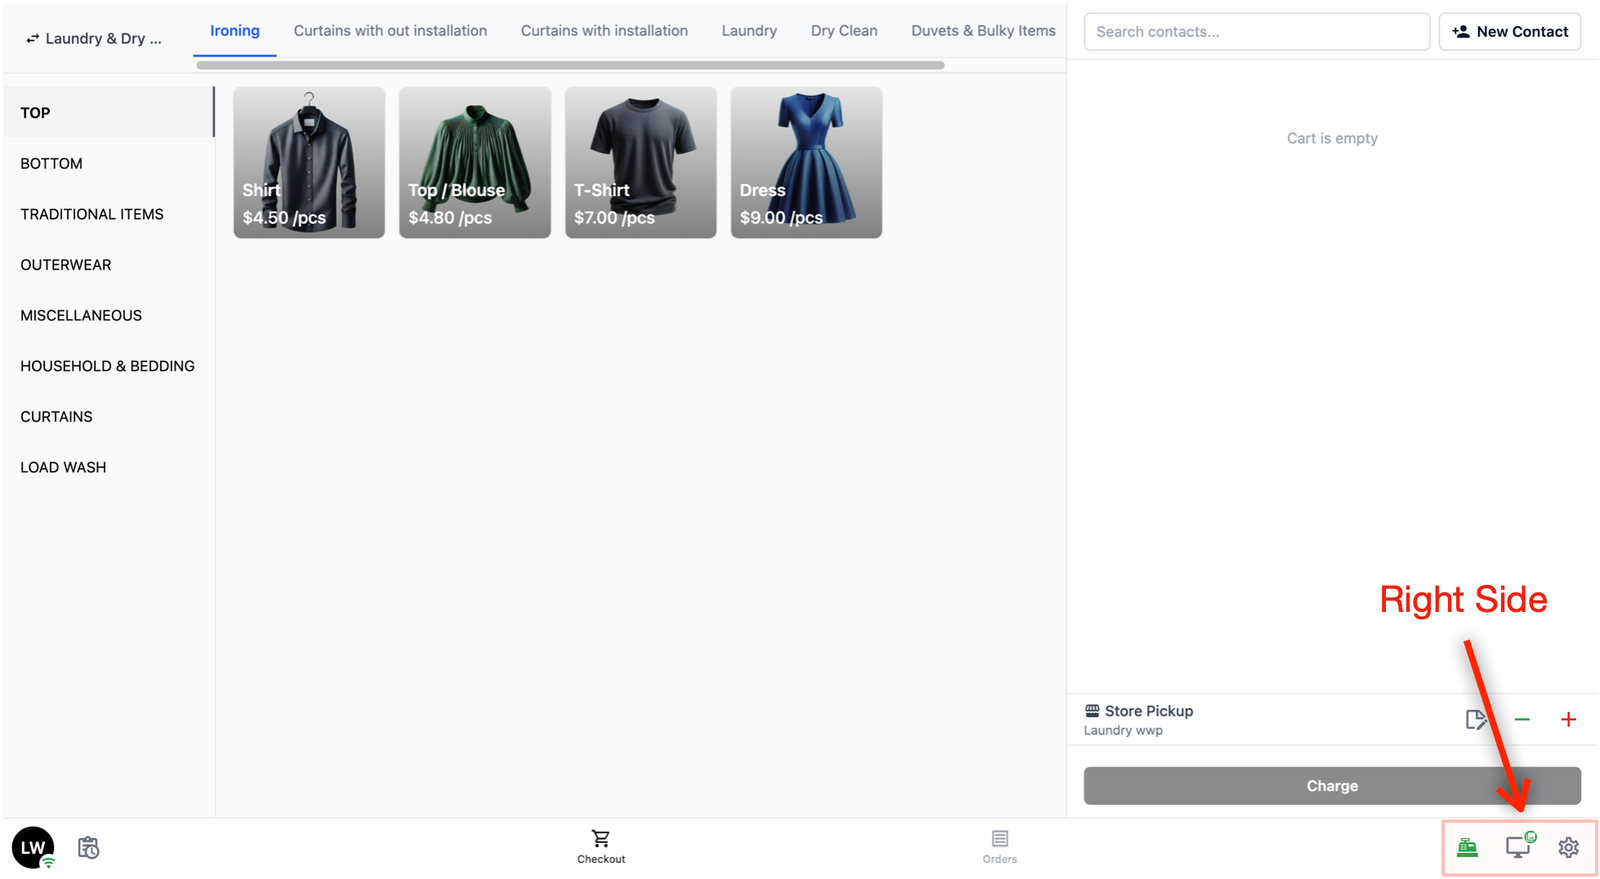
The Bottom Navigation Bar
The bottom of your POS screen is the main navigation bar. This is how you move between different sections of the POS. Here is a quick look at each icon — we will go through each one in detail below.
Left side
- Your Profile: A circle showing who is currently signed in. Tap this to access the Time Clock.
- Daily Sales: A clipboard icon with a clock, next to your profile. Tap this to view the day's sales summary and run the Close of Day report.
Centre
- Checkout: The cart icon. This is the main screen where you take orders. It is the default screen that loads after clocking in.
- Orders: The list icon. Tap this to view and manage all orders taken on the POS.
Right side
- Cash Drawer: A cash register icon. Shows a red dot when the drawer is closed and green when it is open. Tap this to manage your cash drawer.
- Customer Screen: A monitor icon. Click on this to control what appears on your customer's facing screen. Learn more →
- Settings: A gear icon. Tap this to access POS settings such as printer connections, signing out, and reloading the app.
Now that you know where everything is on the navigation bar, let's go through each section in detail.
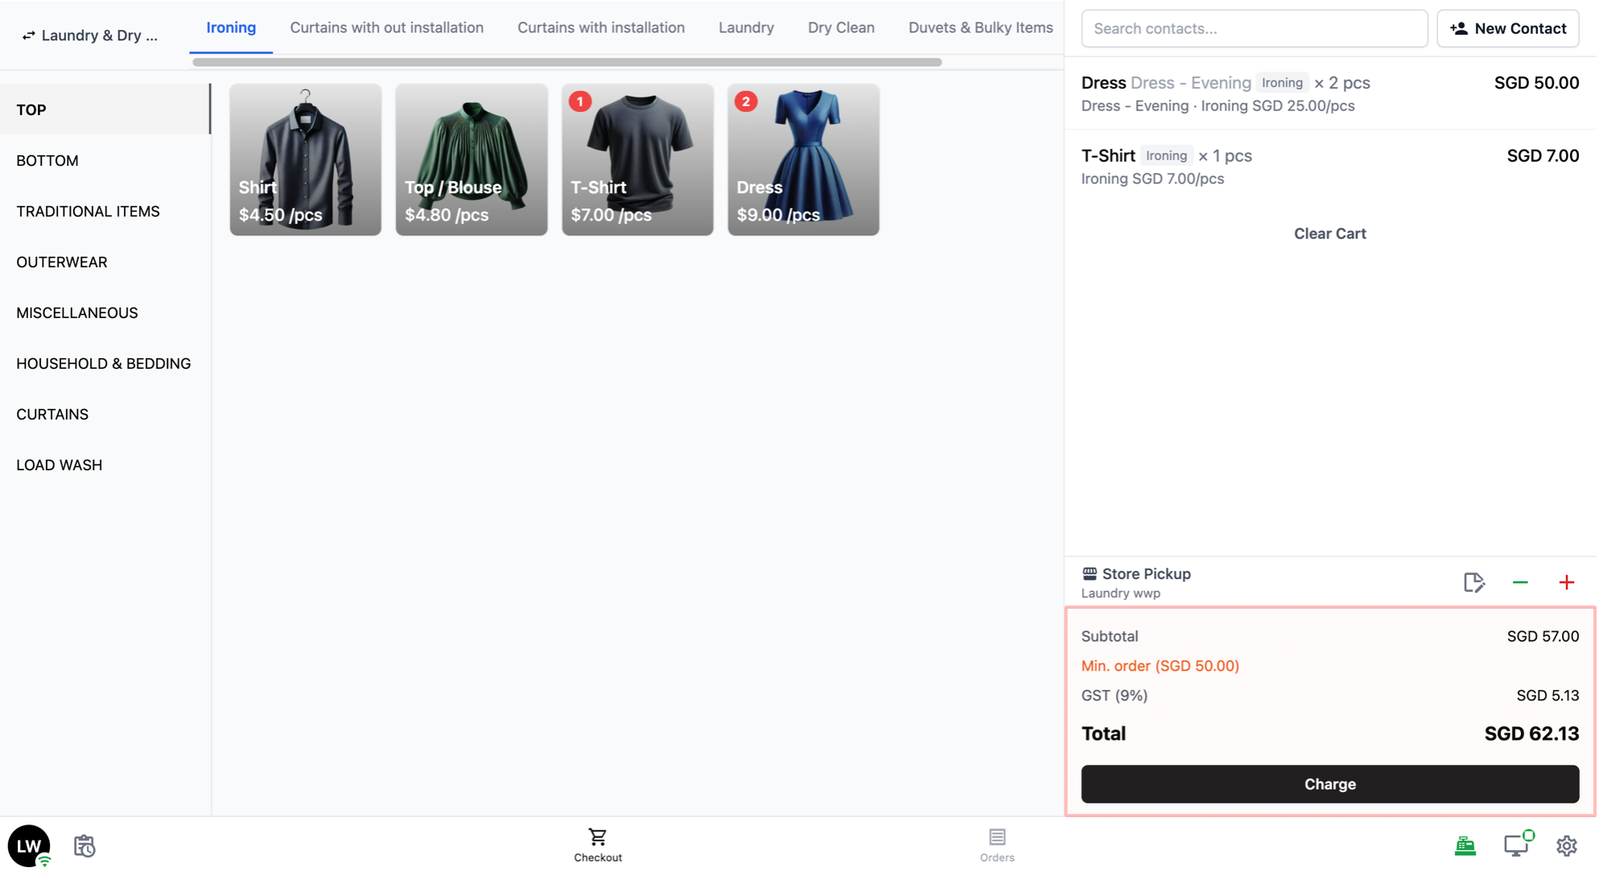
The Checkout Screen
The Checkout screen is where you will spend most of your time. It is the first screen you see after signing in (unless Time Clock is set to mandatory, in which case you will need to clock in first).
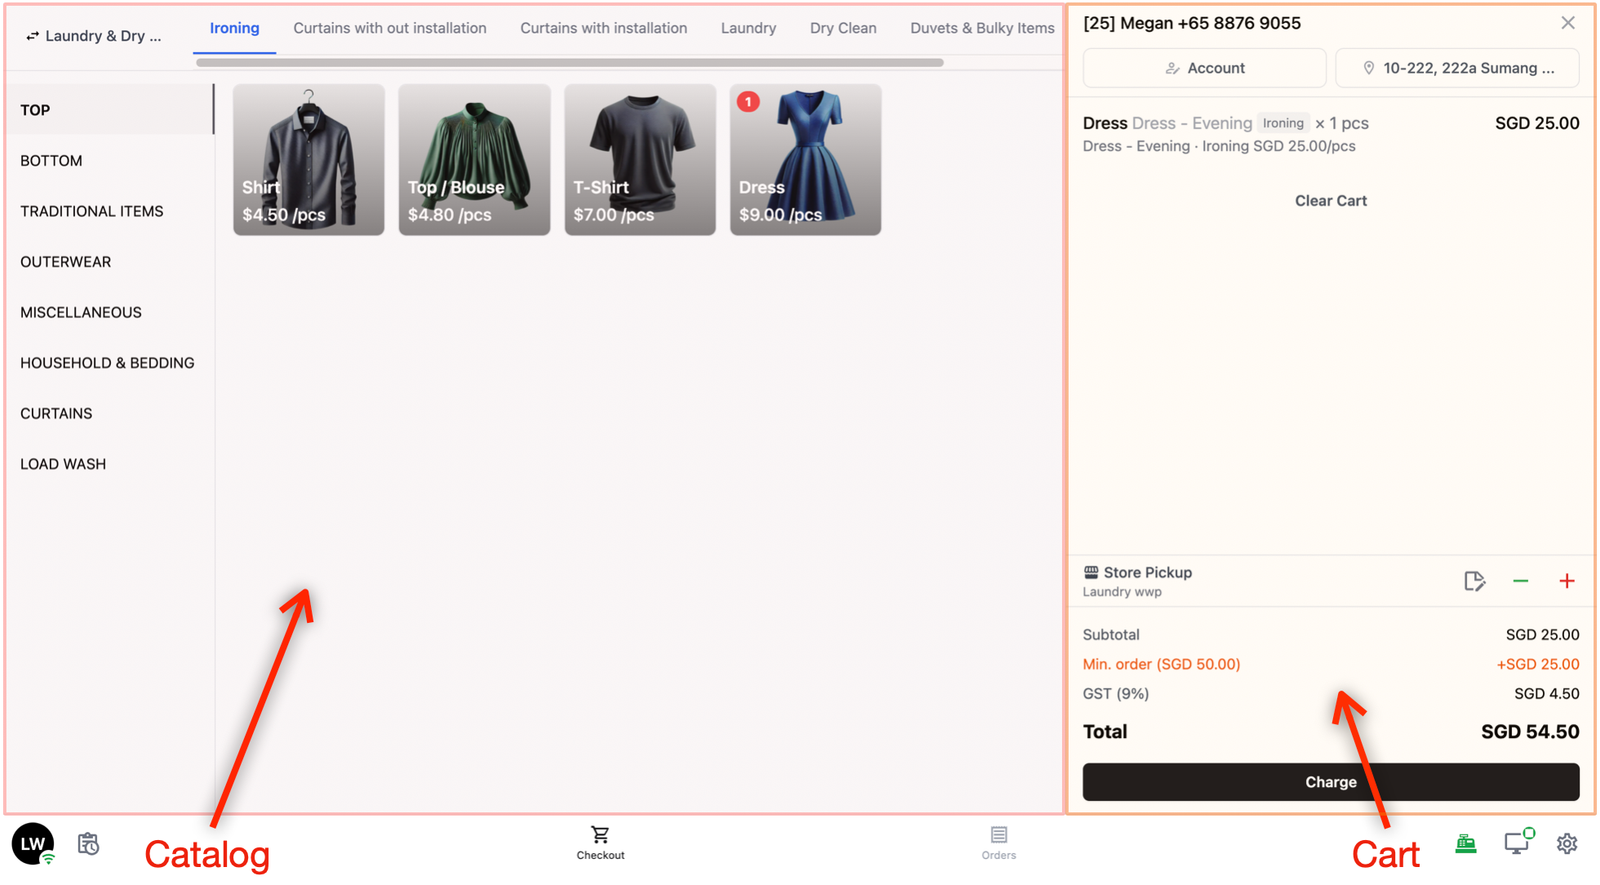
The screen is divided into two main areas: the Catalog on the left, and the Cart on the right.
Catalog
The left side of the screen is your catalog. This is where you browse and select products to add to an order.
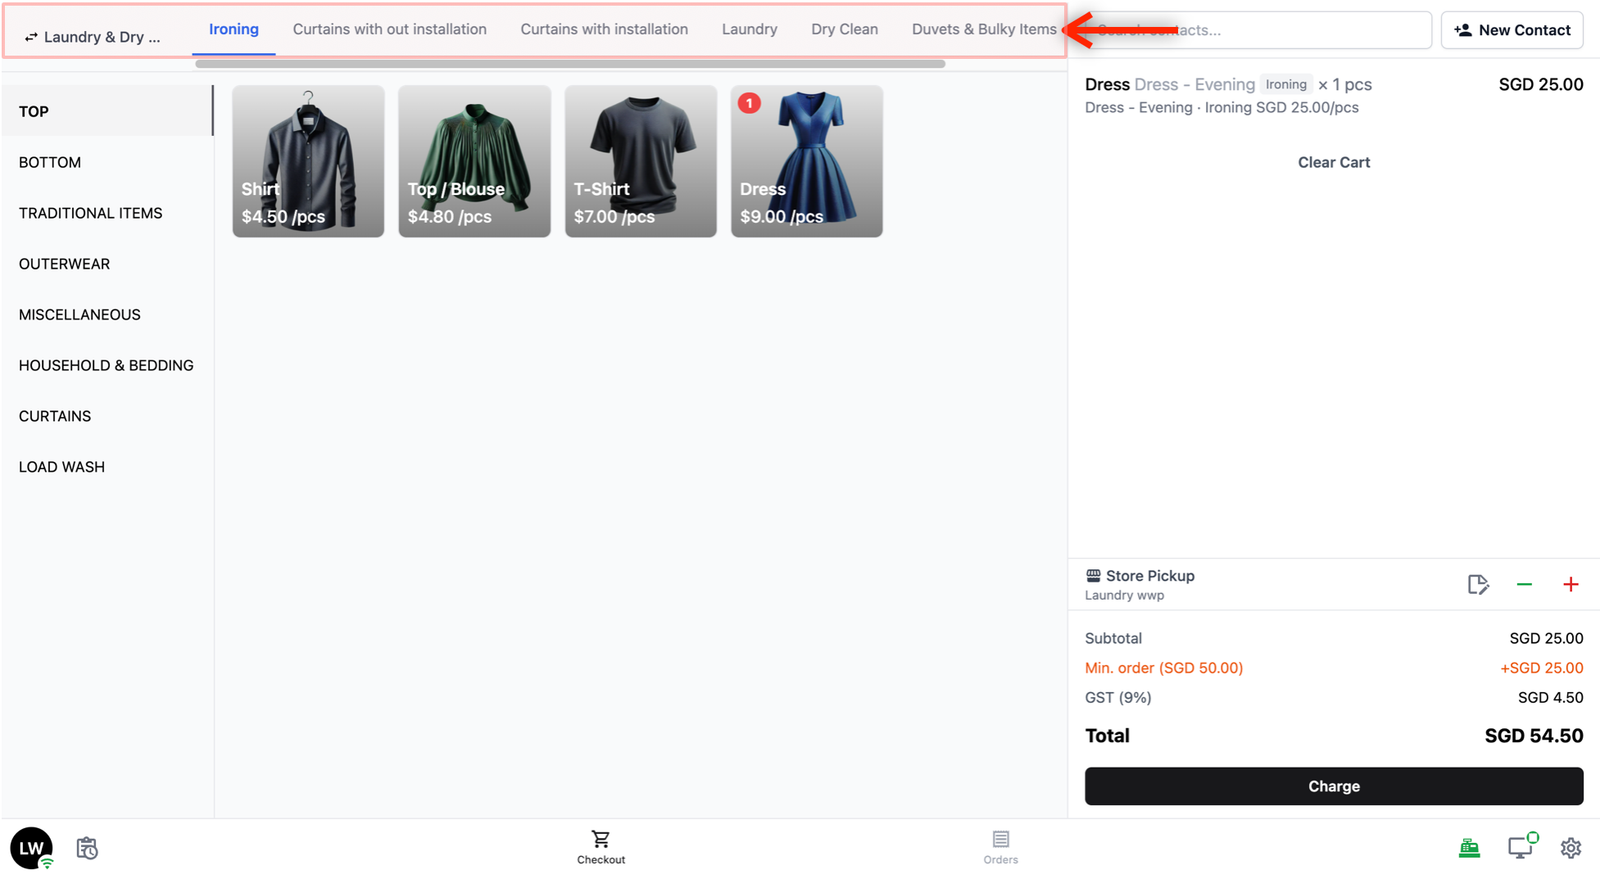
- Service Tabs
- If you turned on Group by Service Option in your POS settings, you will see a row of tabs at the top of your Catalog. These are your service options (for example, "Ironing", "Laundry", "Dry Clean").
- Tap on a tab to filter the catalog so that only products with that service option are shown.
- Search Bar
- Below the service tabs, there is a Search products bar. You can type a product name here to quickly find what you are looking for instead of browsing through categories and tabs. This is especially useful when you have a large number of products.
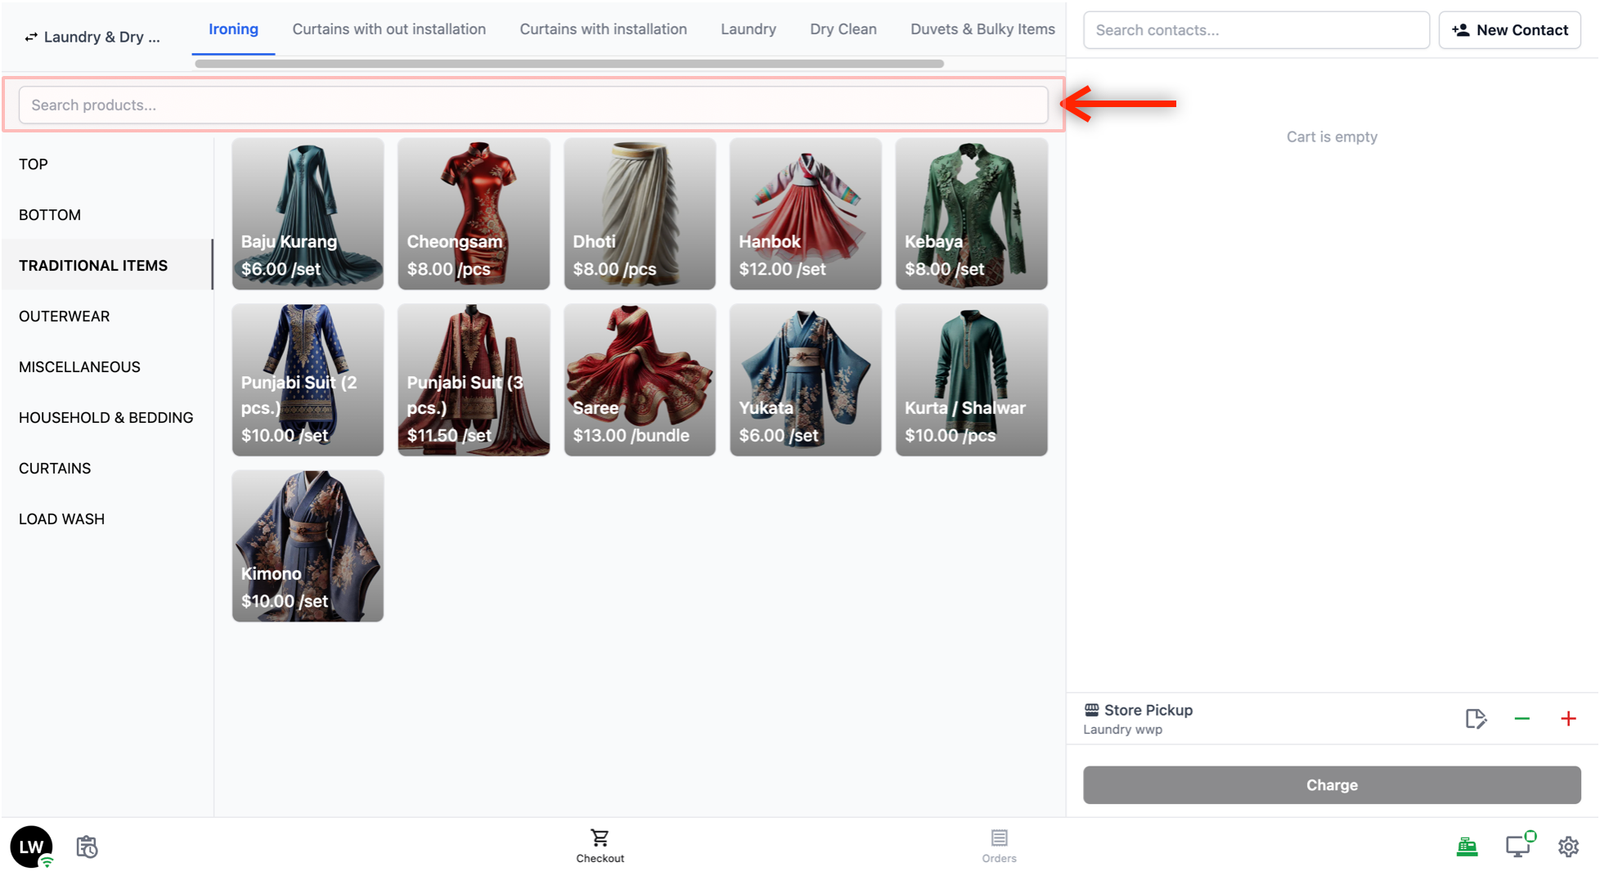
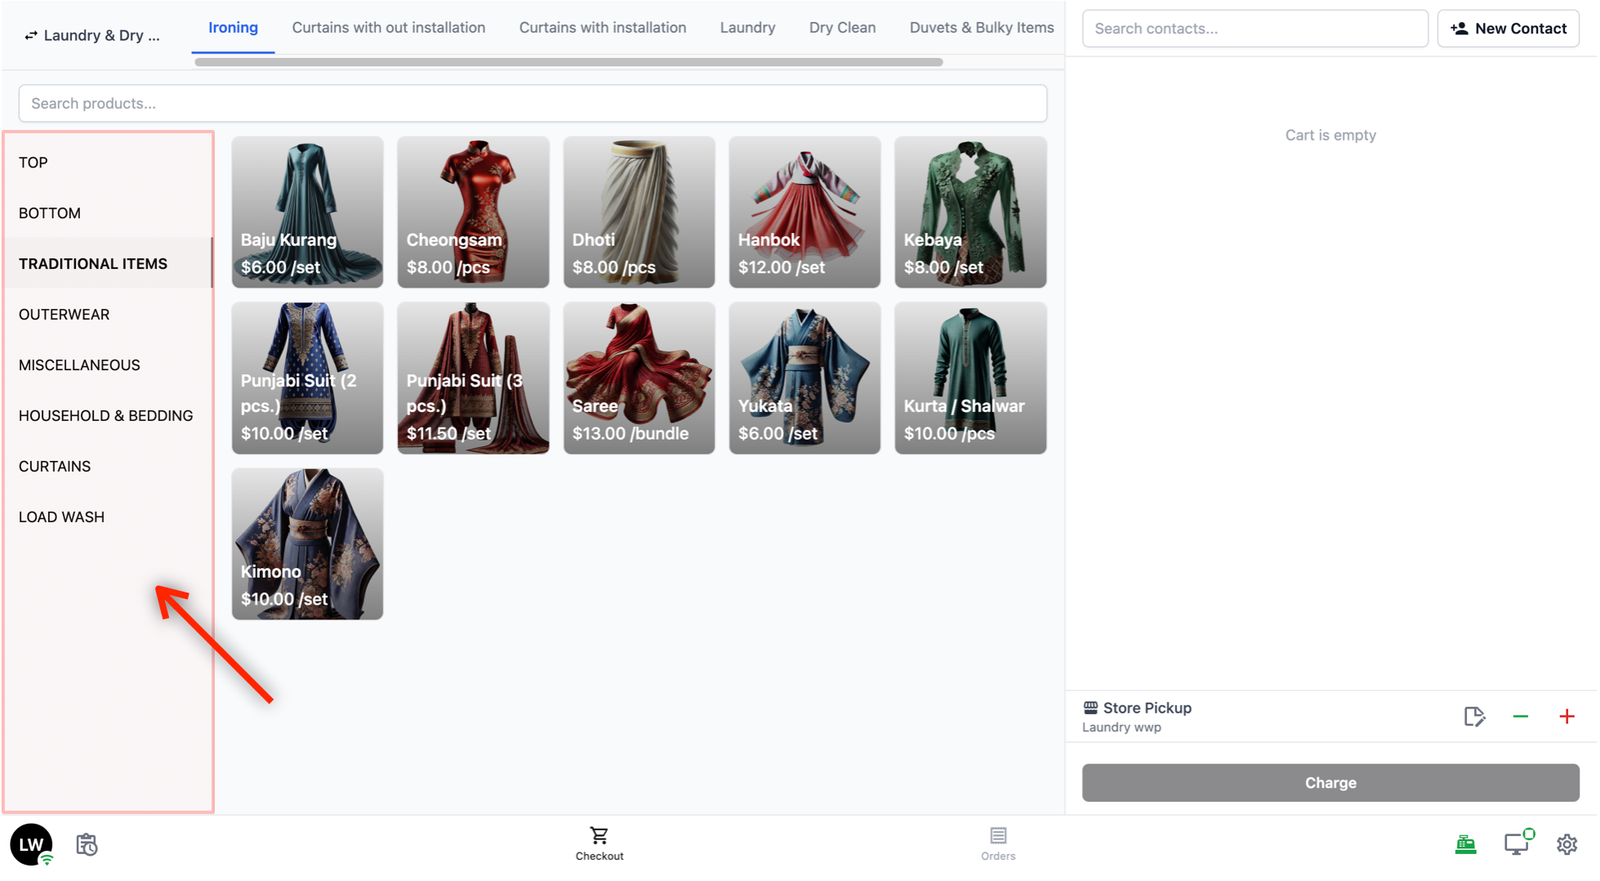
- Categories:
- On the left side, below the search bar, you will see a list of categories. These help you narrow down what is shown in the product area.
- For example, you might see categories like "Top", "Bottom", "Traditional Items", "Outerwear", and so on. Tapping on a category filters the product area to show only the products in that category.
- Products:
- The main area of the catalog shows the products available under the selected service tab and category. Products can appear in two different views depending on how the POS has been configured:
- Grid view: Products are shown as cards with their name and price. If product images have been configured, the image will also be displayed. The card size can be set to small, medium, or large.
- List view: Products are shown in a list format with their name and price. If product images have been configured, the image will also be displayed.
- Tap on a product to add it to the cart. When a product is added, a red badge with a number appears to show how many of that item are in the cart. An edit icon also appears, which you can tap to adjust the item (for example, to change the quantity or add any add-ons).
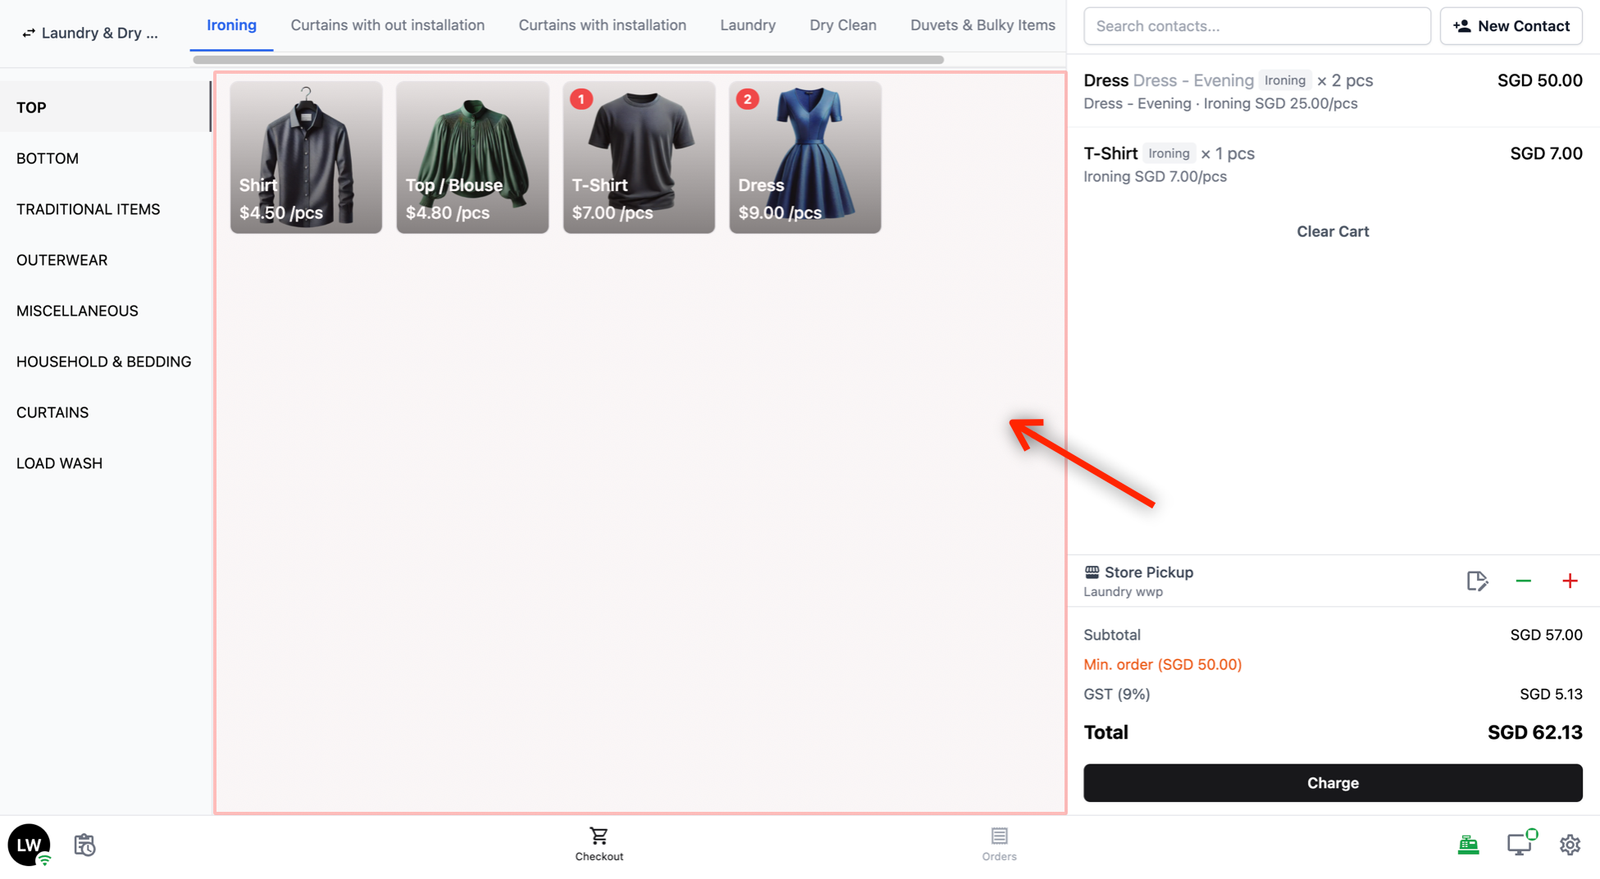
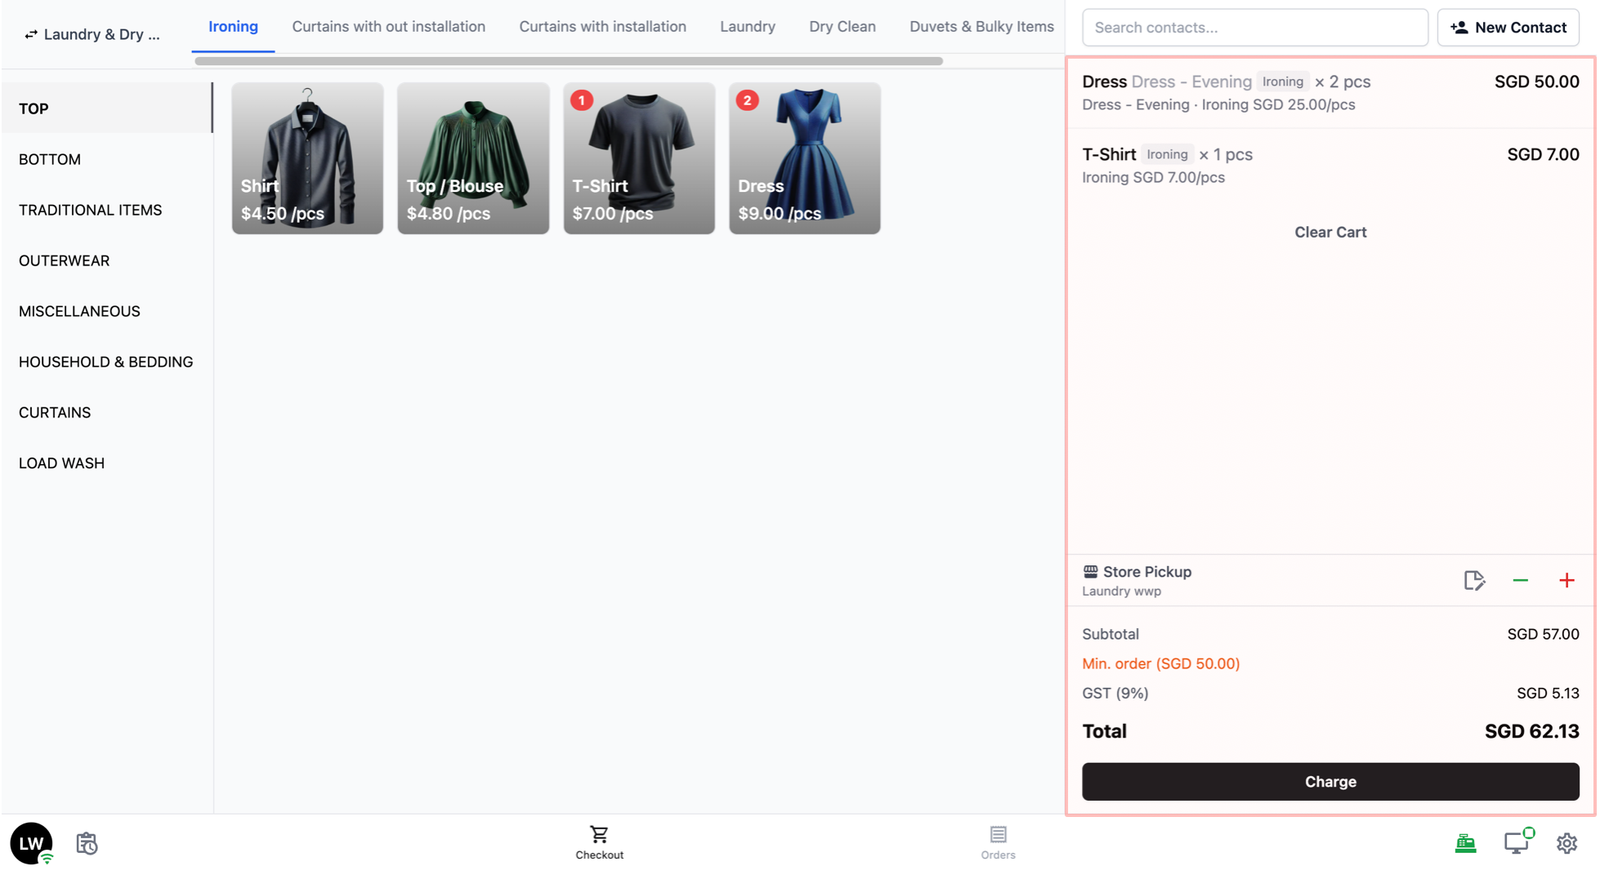
Cart
The right side of the screen is the cart. This is where items are added to an order.
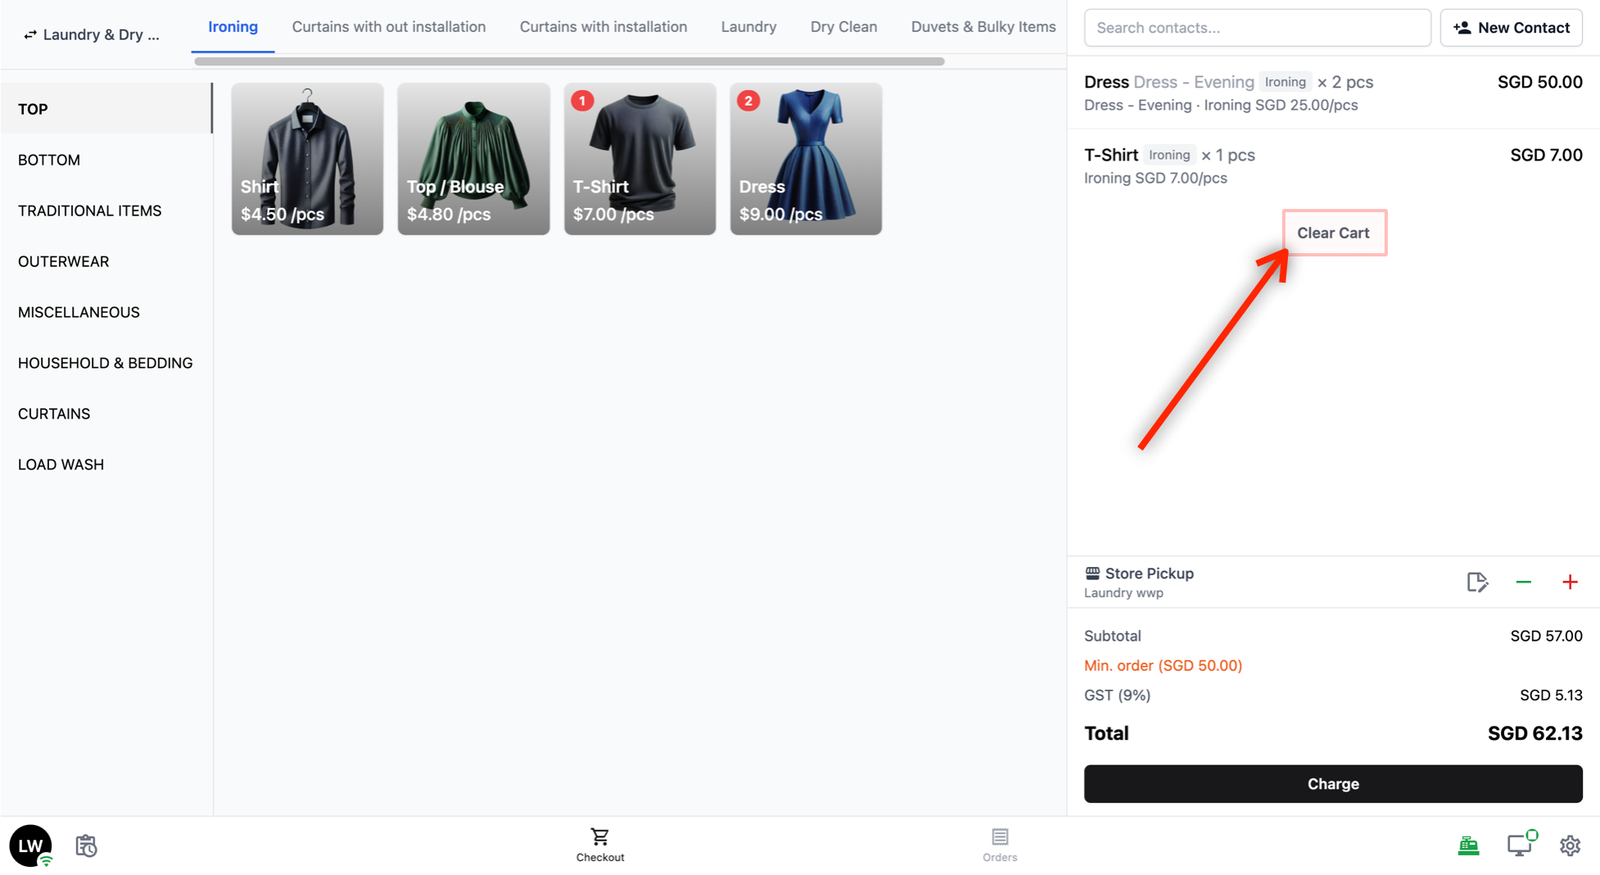
- Clear Cart: Click on this button to clear all items from the cart. You would need to click the Clear button again to verify that you want the items in the cart to be cleared.
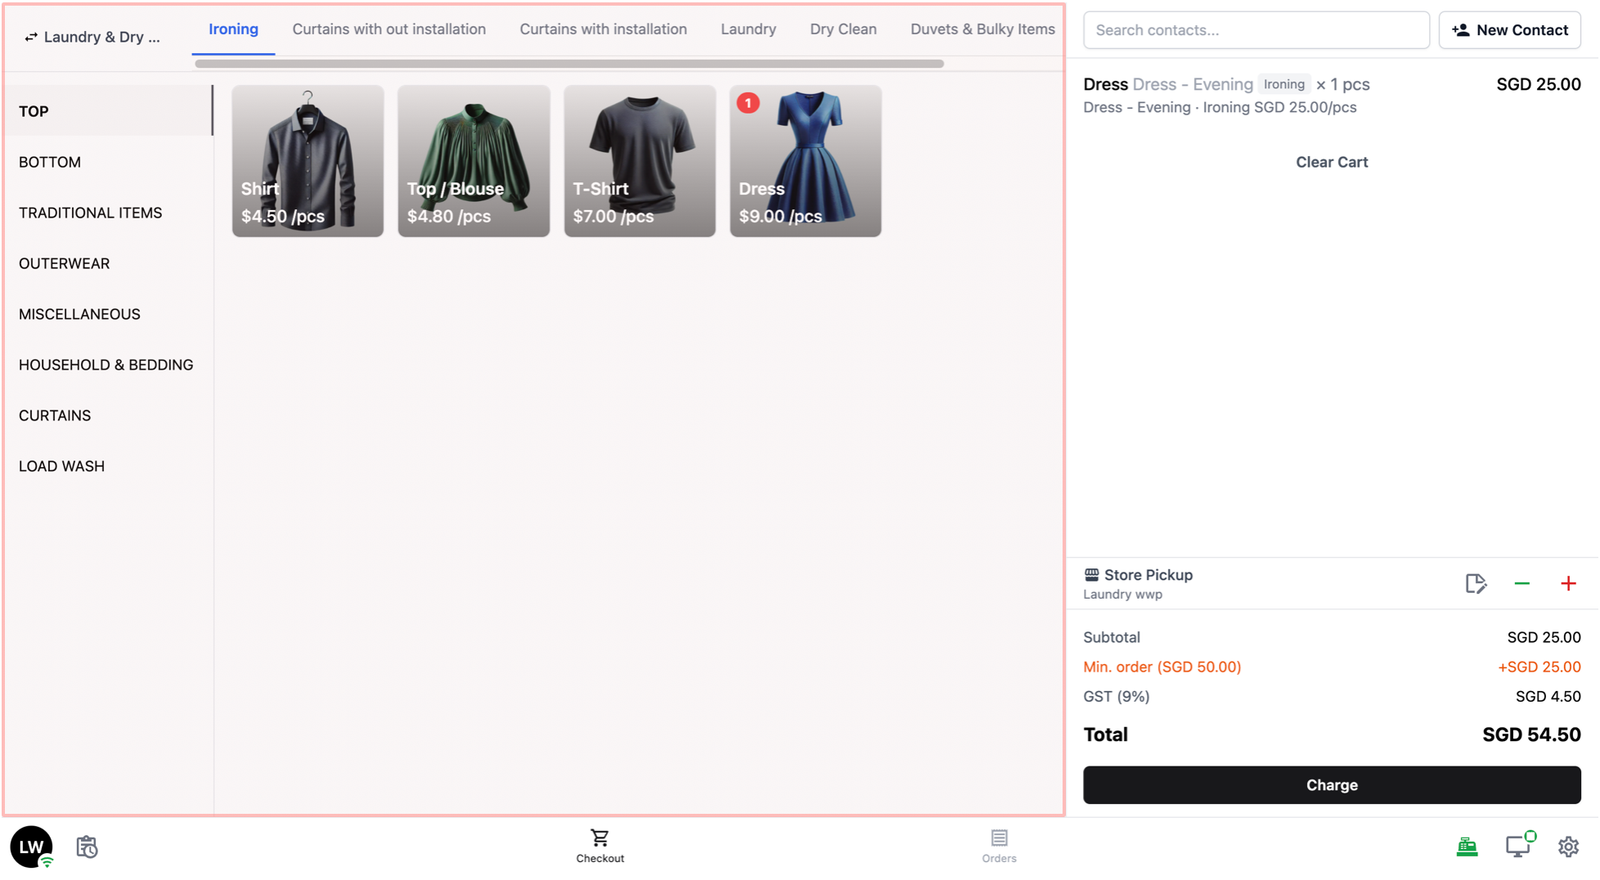
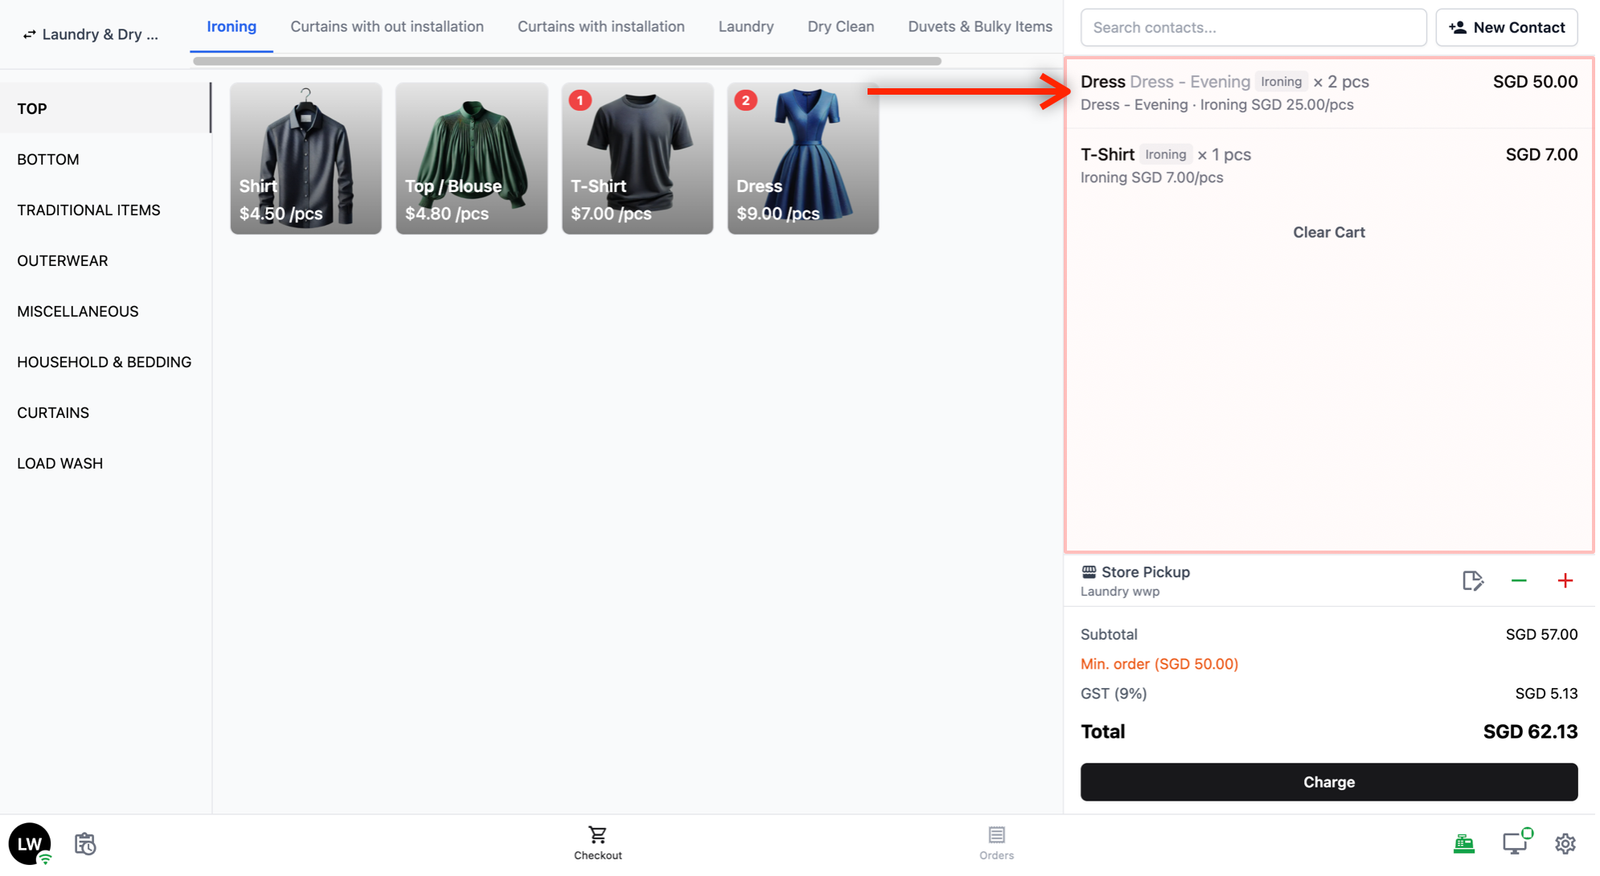
- Customer Section: Below the cart label, there is a Search contacts bar to look up an existing customer by name, phone number, or email. Linking a customer to the order lets you keep track of who placed it. If the customer is not yet in your system, tap + New Contact to create a new customer record.
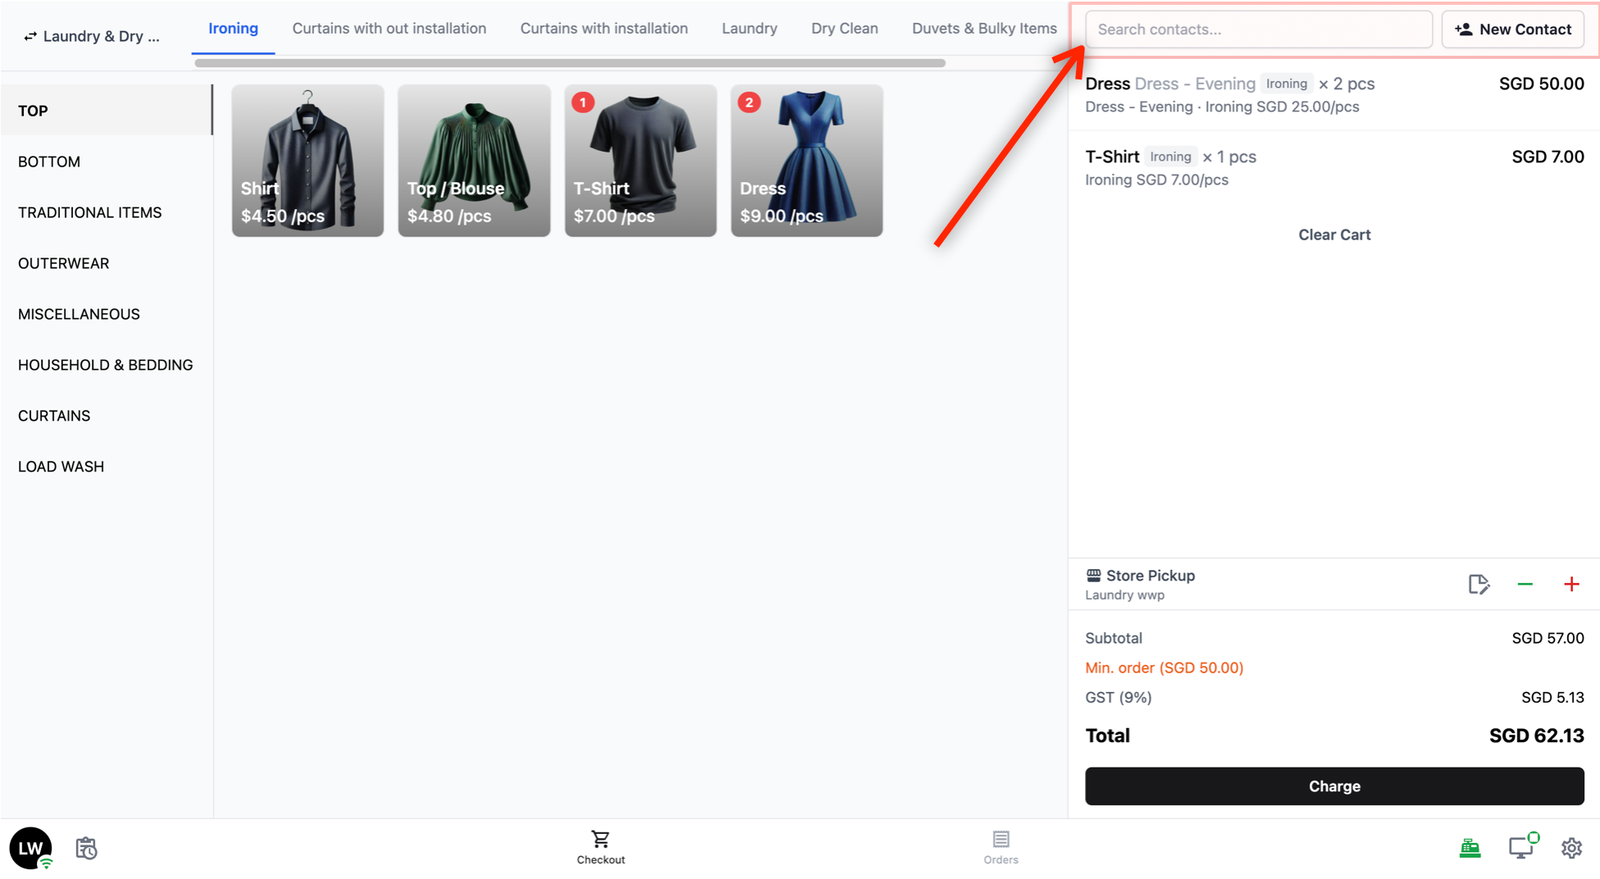
- Order Items: This area shows the list of items you have added to the cart. Each item displays its name, service type, and price. If the same product is added more than once, the quantity is shown.
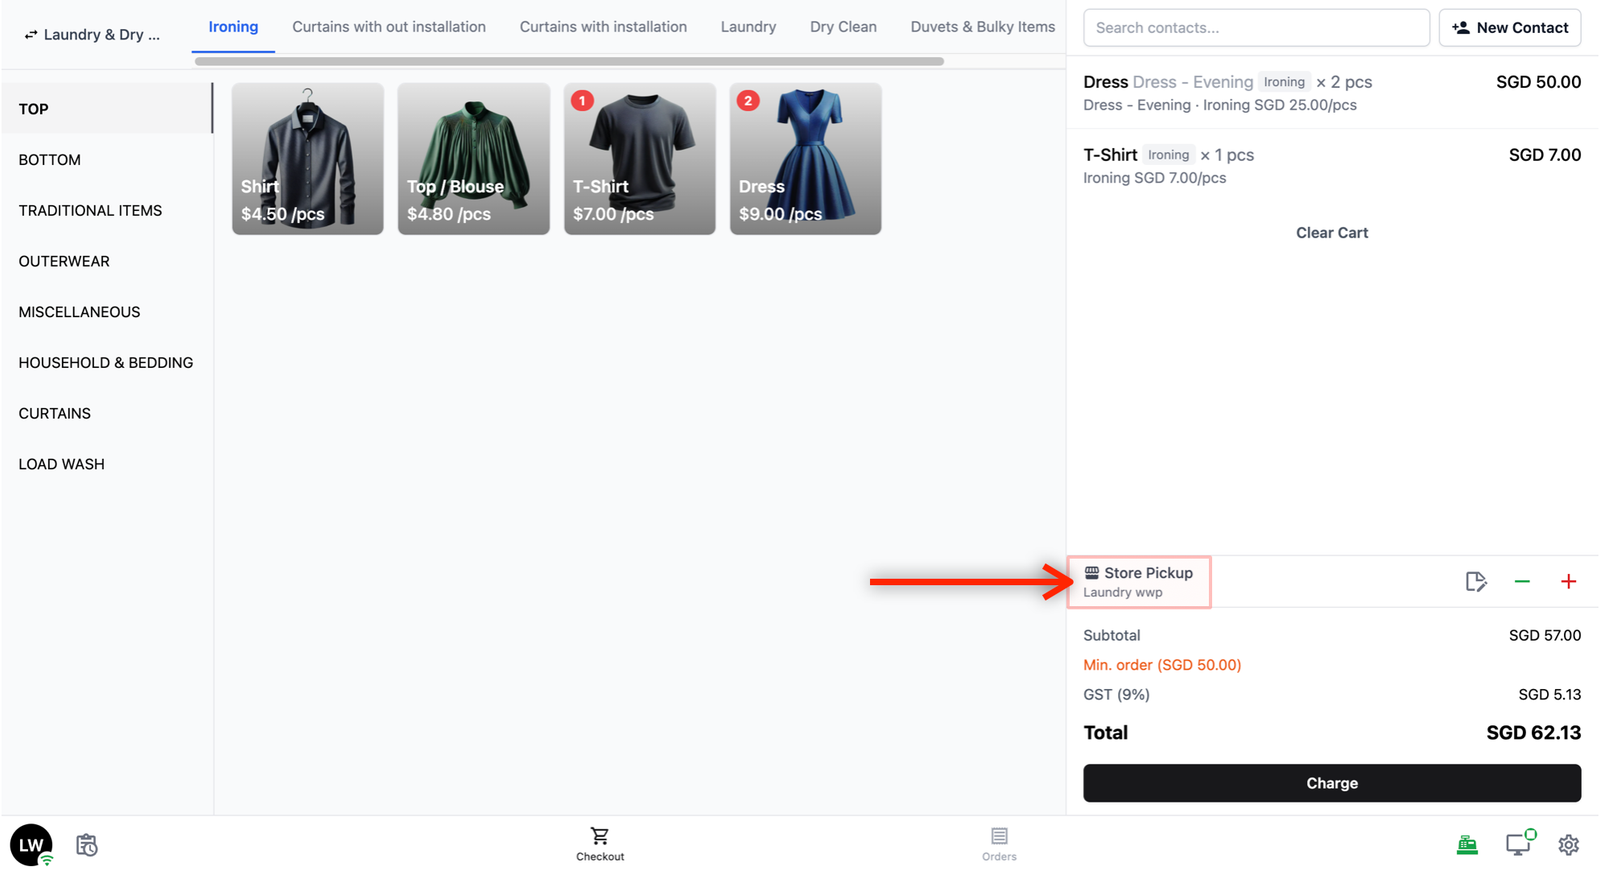
- Delivery / Pickup Option:
- Below the order items, you will see the delivery or pickup option. This shows how your customer will get their items back. Tap on it to change the option.
- The options available depend on what has been set up for your business unit. For example, you may see Home Delivery, Self Pickup at this shop, or Self Pickup at another branch. If you do not see any options, your boss or admin will need to set these up first. [See the guide on setting up delivery and pickup options →] (Coming Soon)
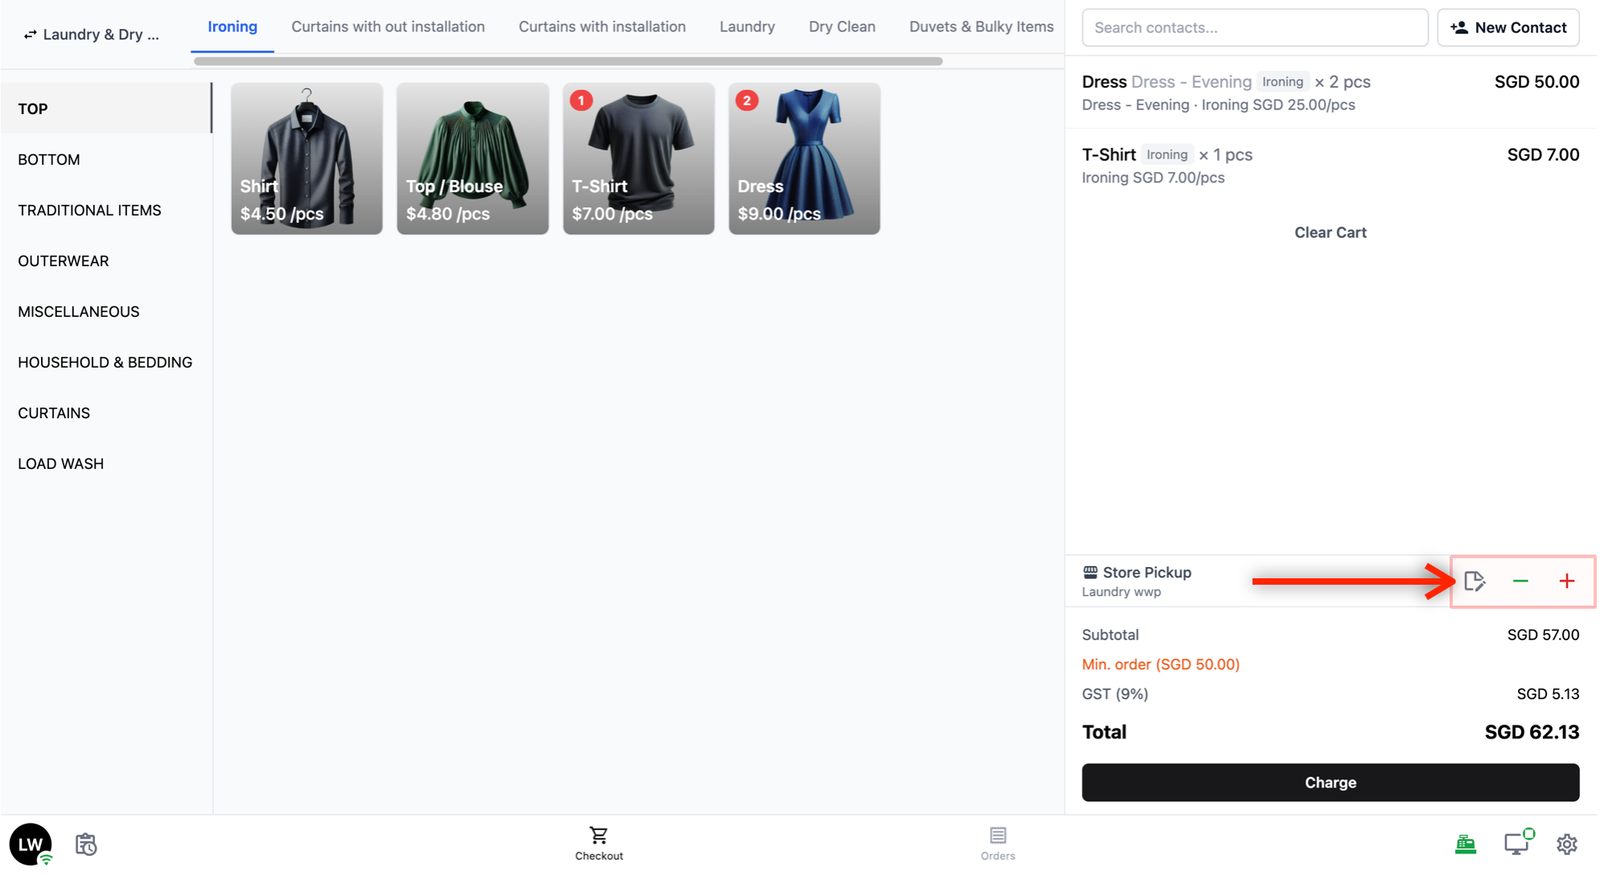
- Next to the return type, you will see Notes, Discounts, and Surcharges:
- Note: Tap this to add a note to the order (for example, special handling instructions).
- — (minus sign): Tap this to apply a discount to the order. If you have set up discount rules, they will appear here automatically. You can also apply a manual discount.
- + (plus): Tap this to add a surcharge to the order.
- Totals and Charge: At the bottom of the cart, you will see a breakdown of the order total. Below that is the Charge button. Tap this to proceed to the payment screen.
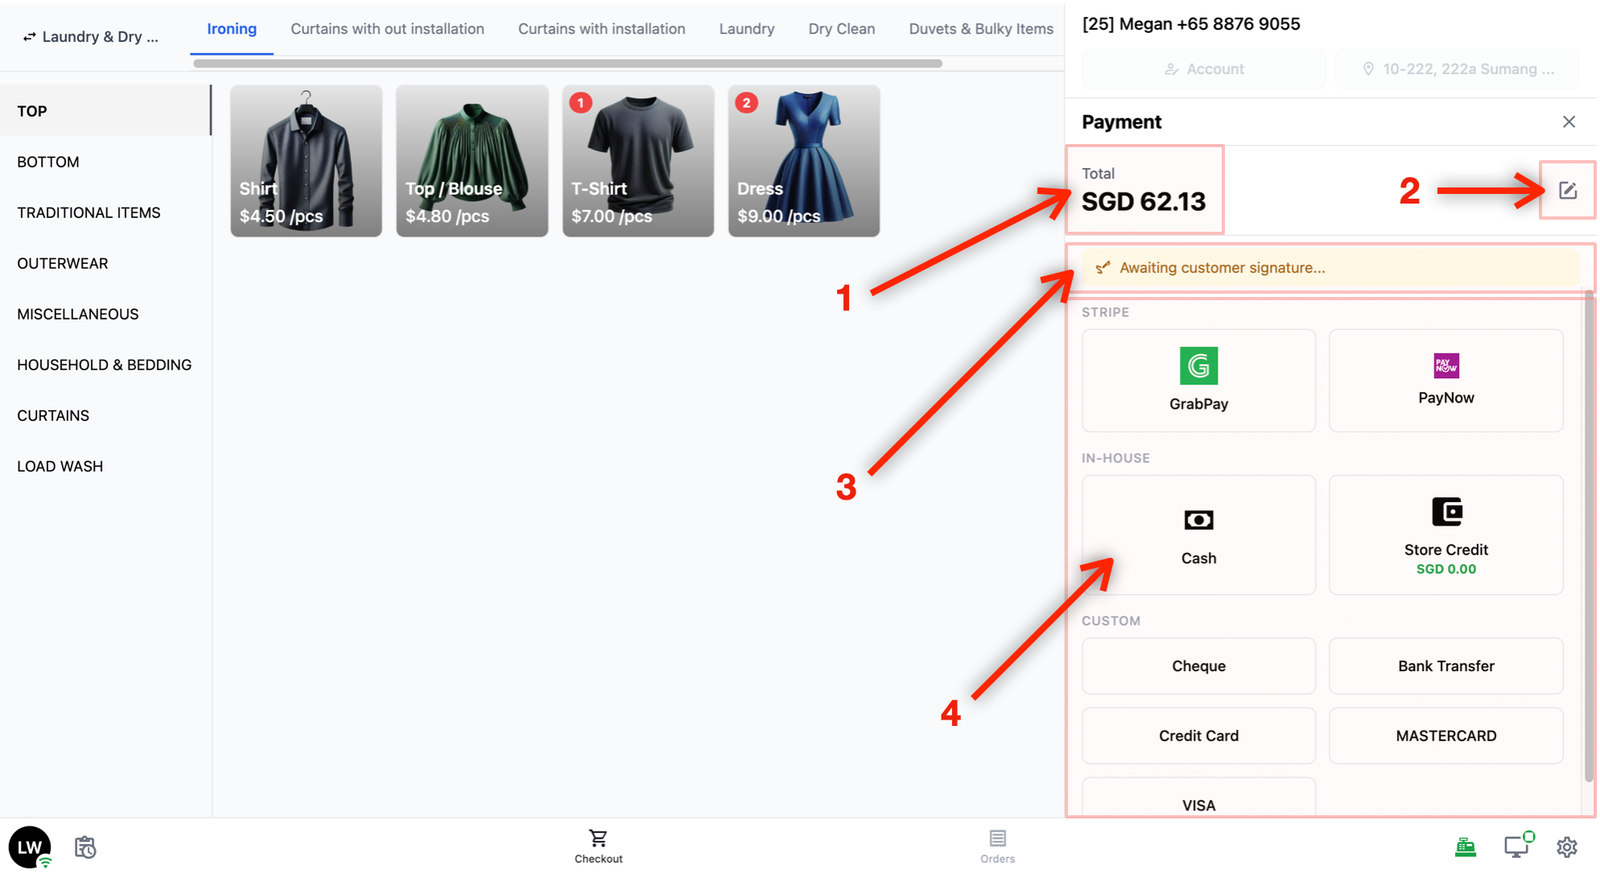
Payment Screen
When you tap the Charge button, the payment screen appears.
- Order Total and Customer Details
- At the top, you will see the Total amount for the order.
- Partial Payment
- Next to the total, there is a pencil icon. Tap this if the customer is not paying the full amount and you need to process a partial payment.
- Awaiting Customer Signature
- If the Customer Screen is being used, you will see an "Awaiting customer signature..." message. This means the customer can see the Order Review screen on their display — showing the order details and an area for them to sign to confirm.
- Payment Methods
- Below that, you will see the available payment methods grouped by category (for example, Stripe, In-House, Custom). Tap on a payment method to complete the transaction.
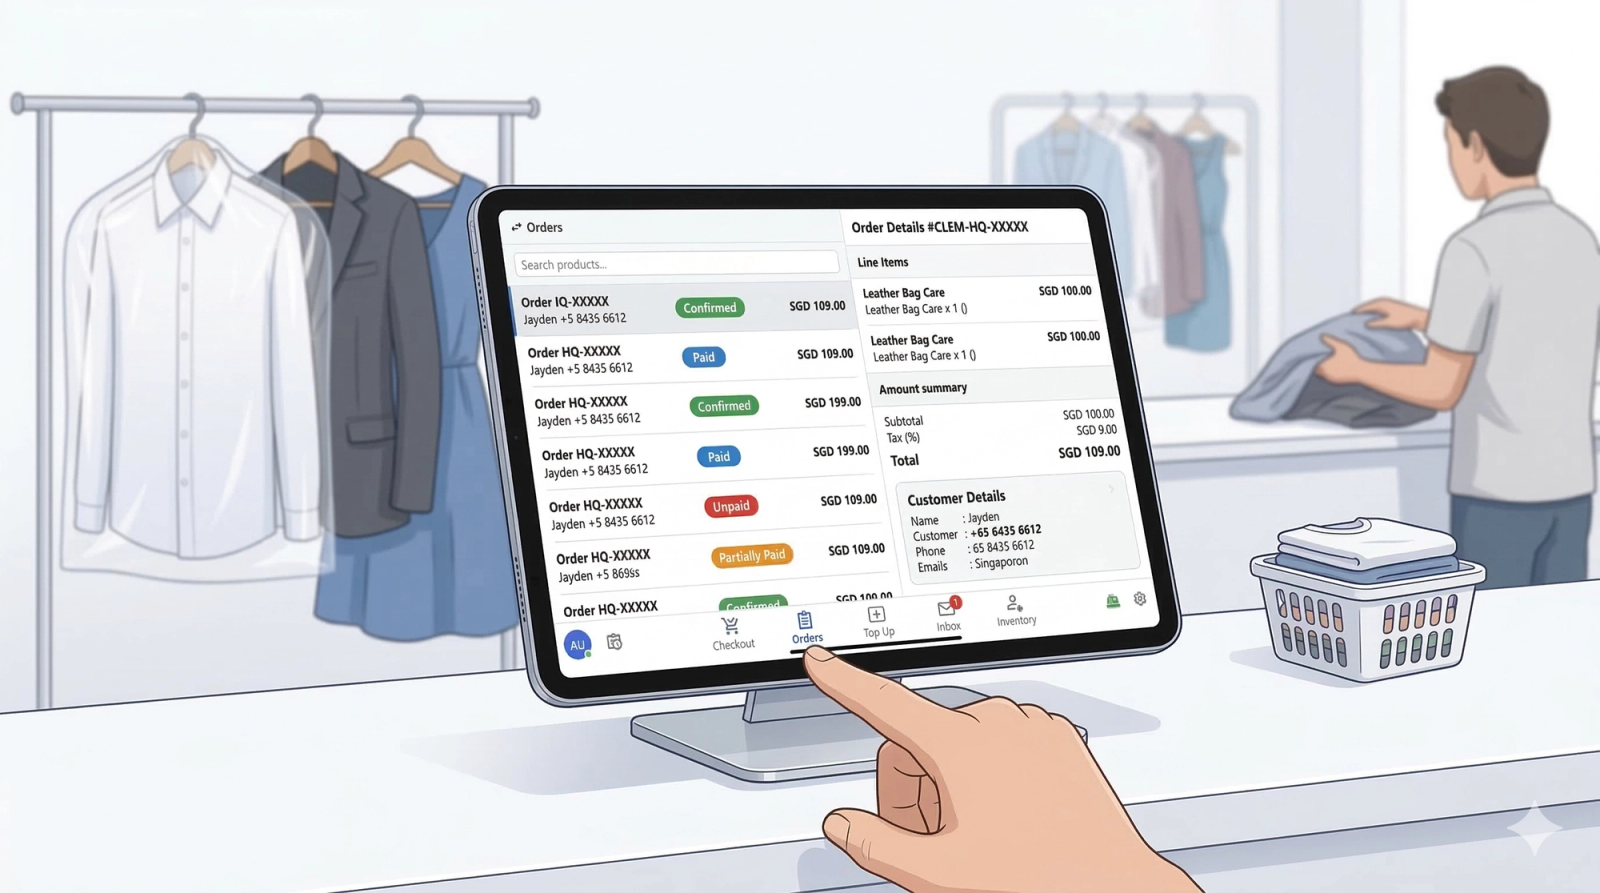
The Order Screen
Tap Orders in the bottom navigation bar to view and manage your orders.
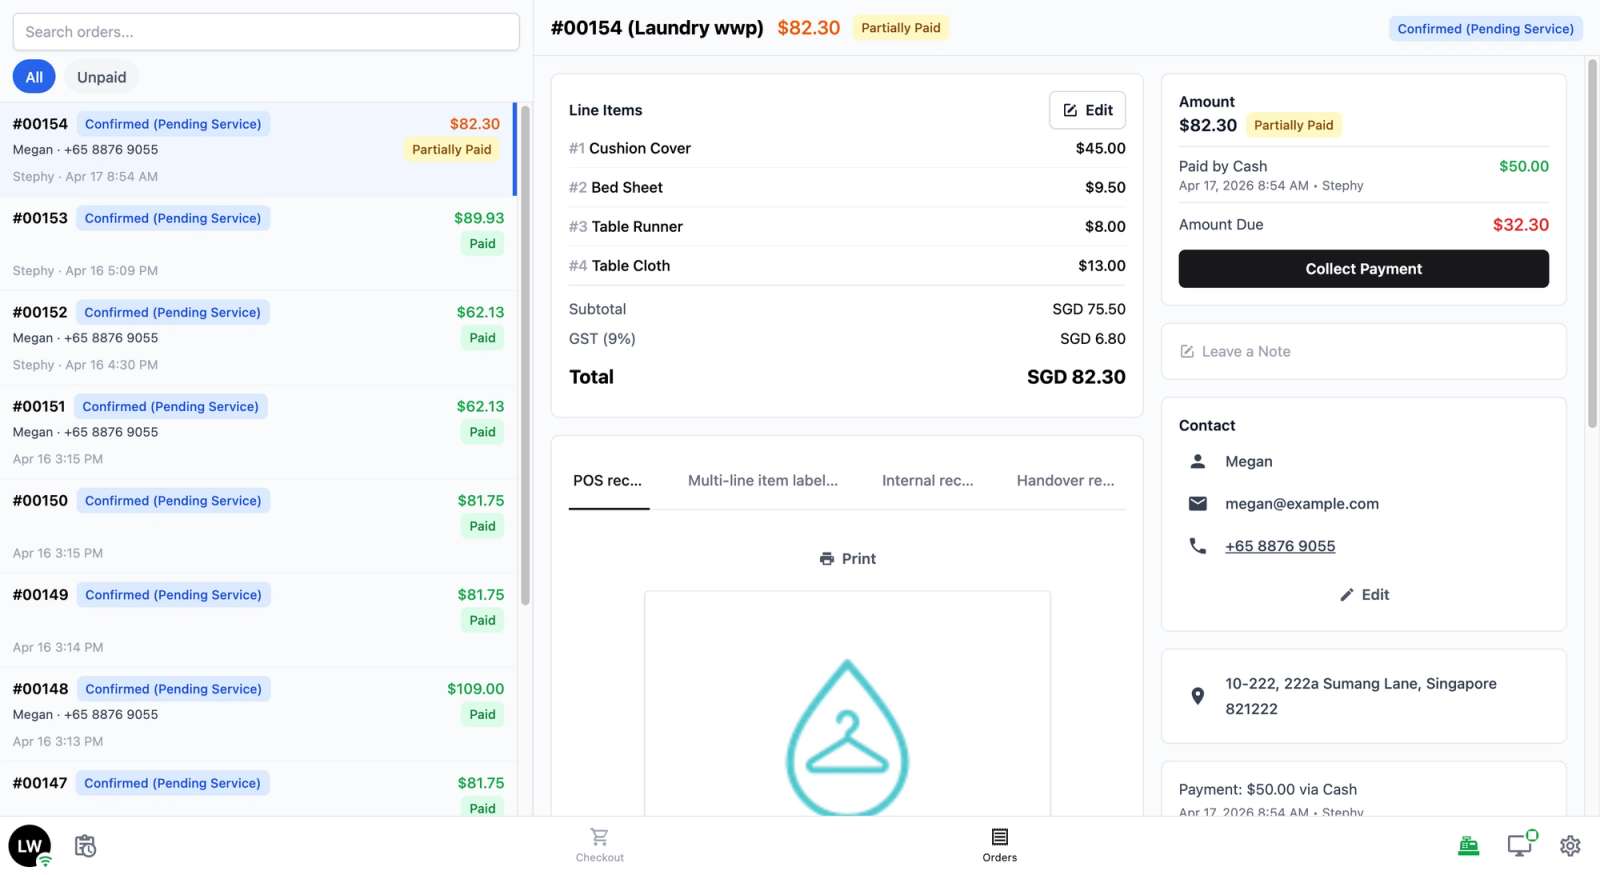
The Orders screen is split into two areas: the order list on the left, and the order details on the right.
Order List
The order list shows all the orders taken on this POS.
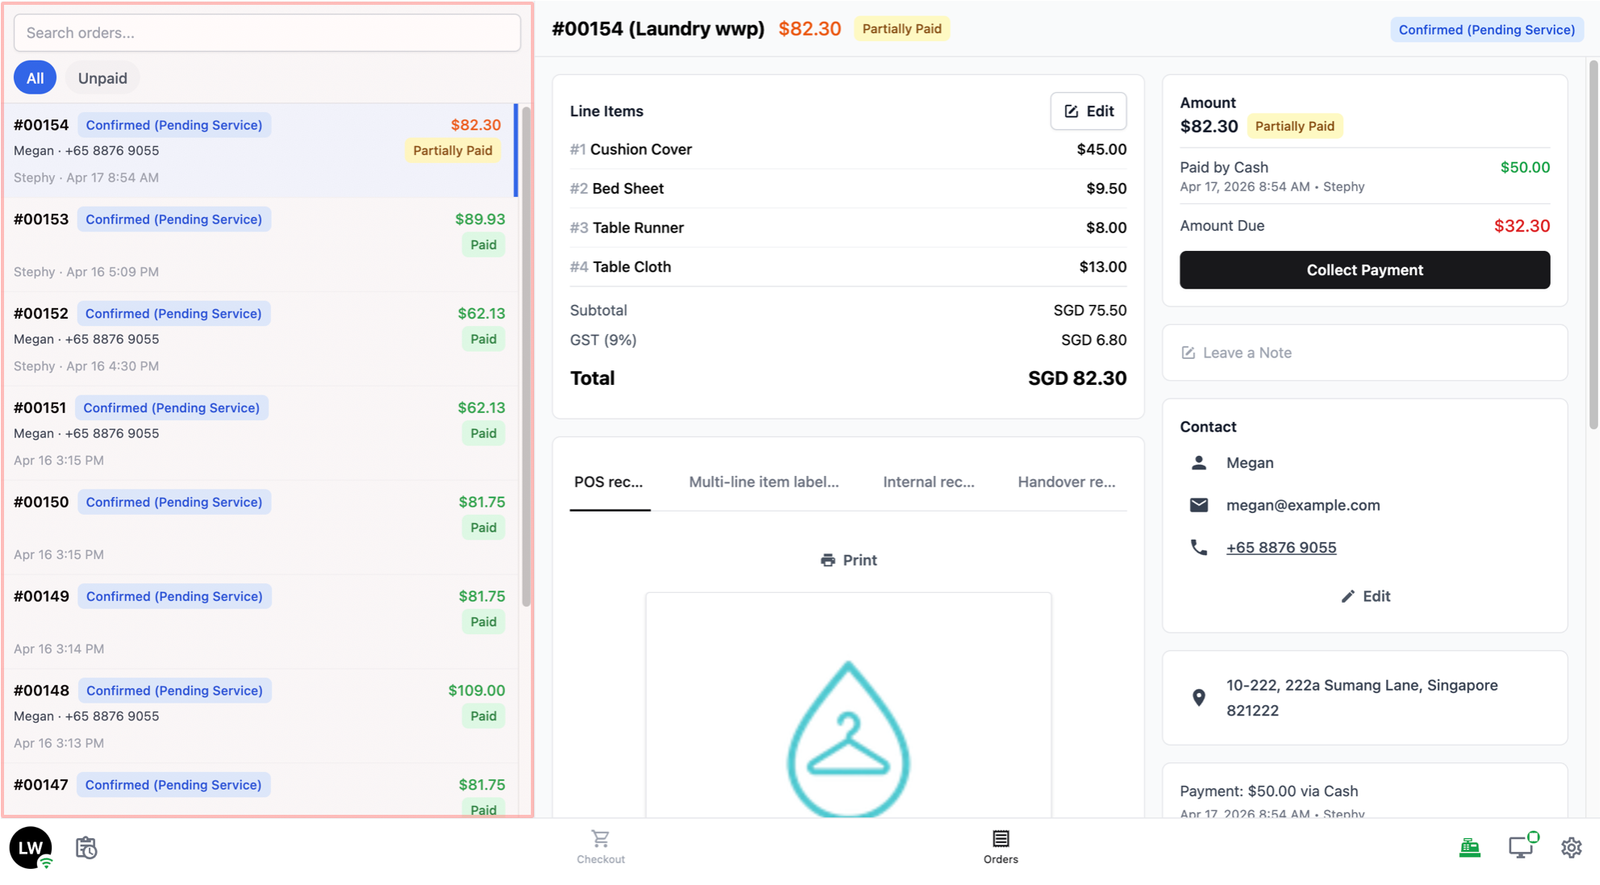
- At the top of the list, there is a search bar where you can search for a specific order by order number, customer name, or other details.
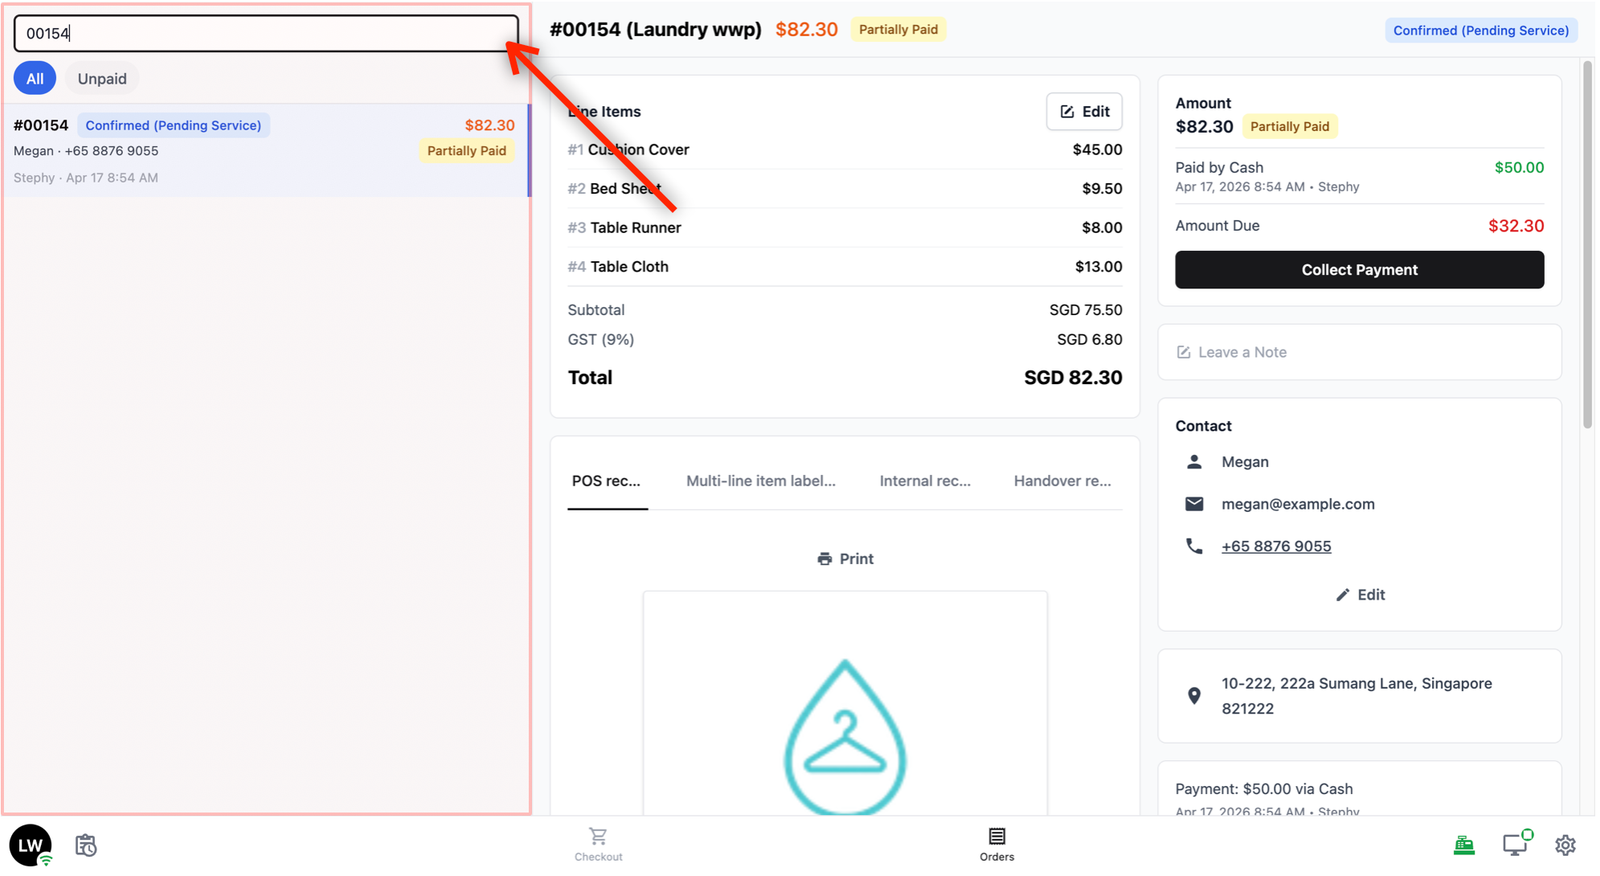
- Below the search bar, there are two tabs to filter the order list by default:
- Unpaid: Shows orders that have not been fully paid yet.
- All: Shows all orders, regardless of date or payment status.
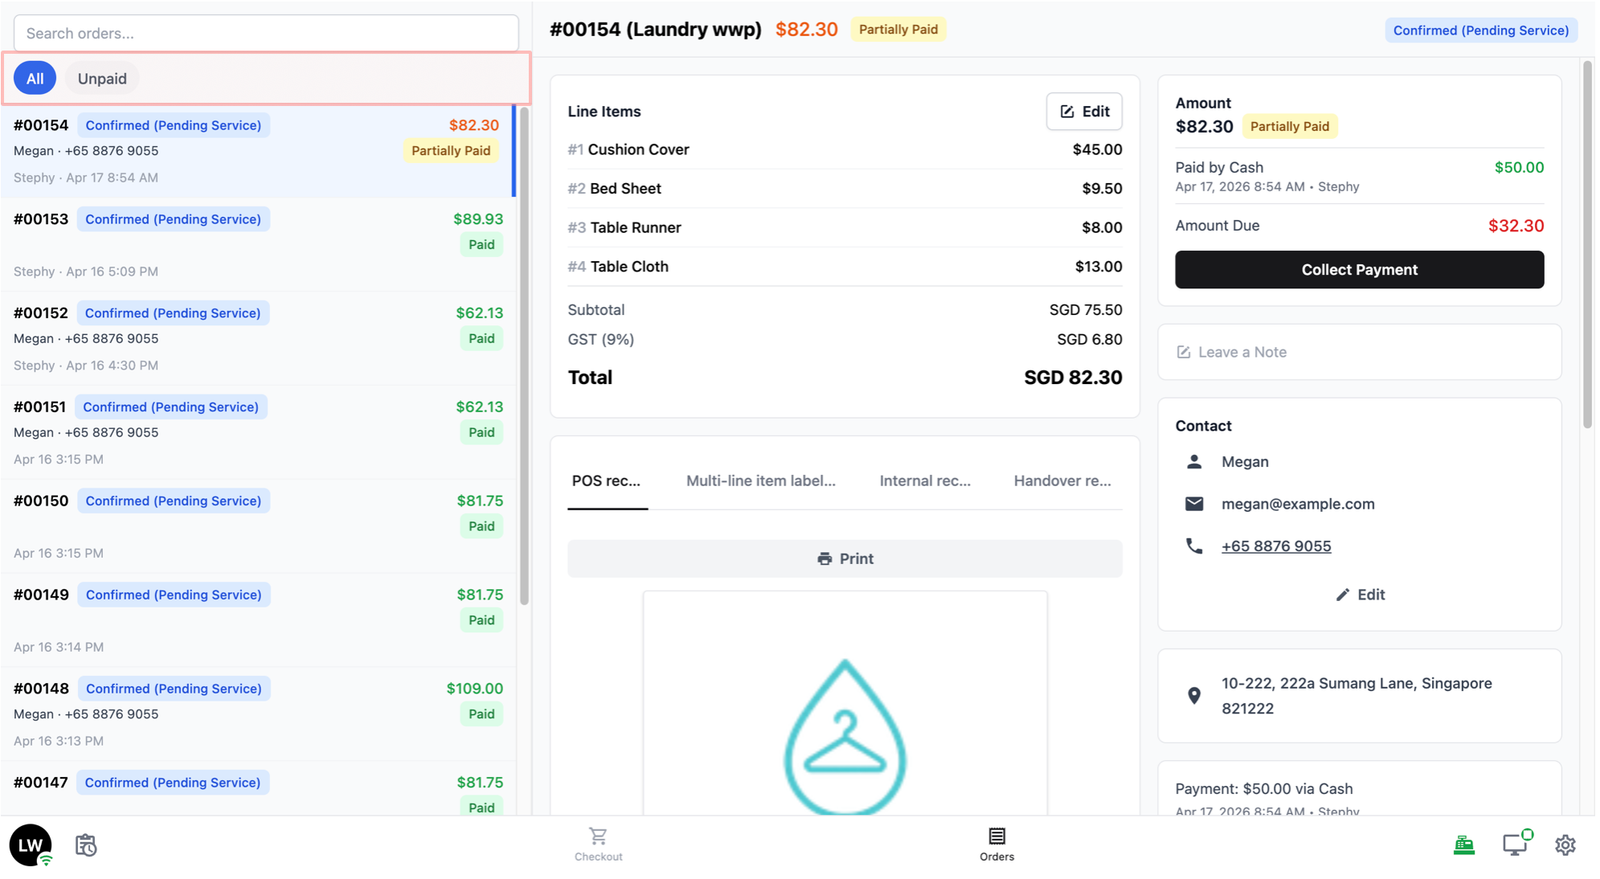
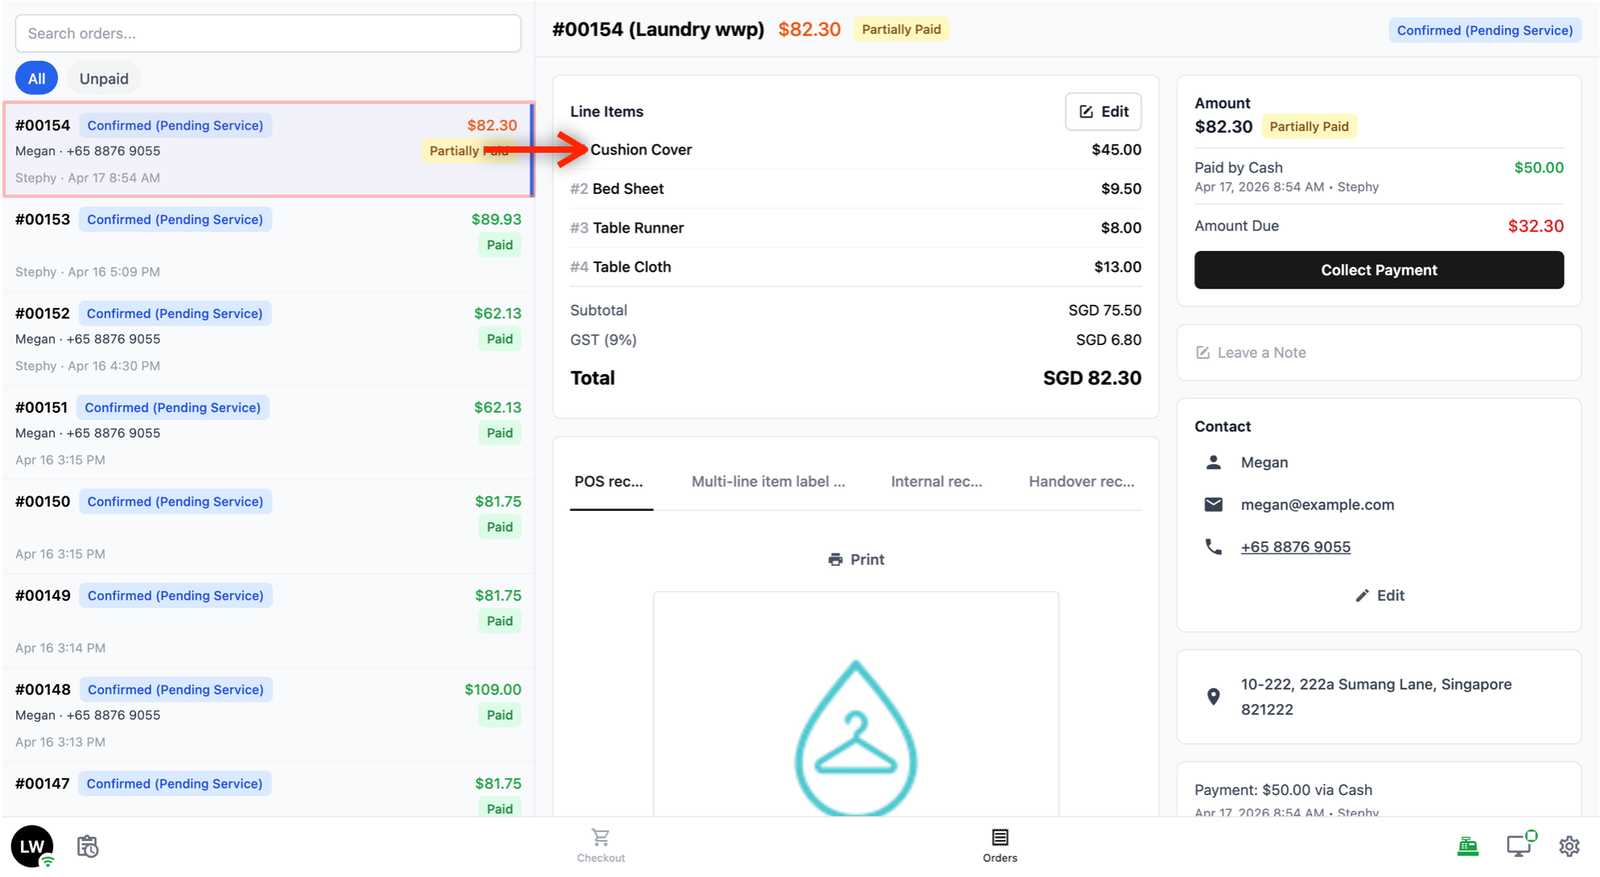
- You can tap on any order in the list to see its full details on the right side of the screen.
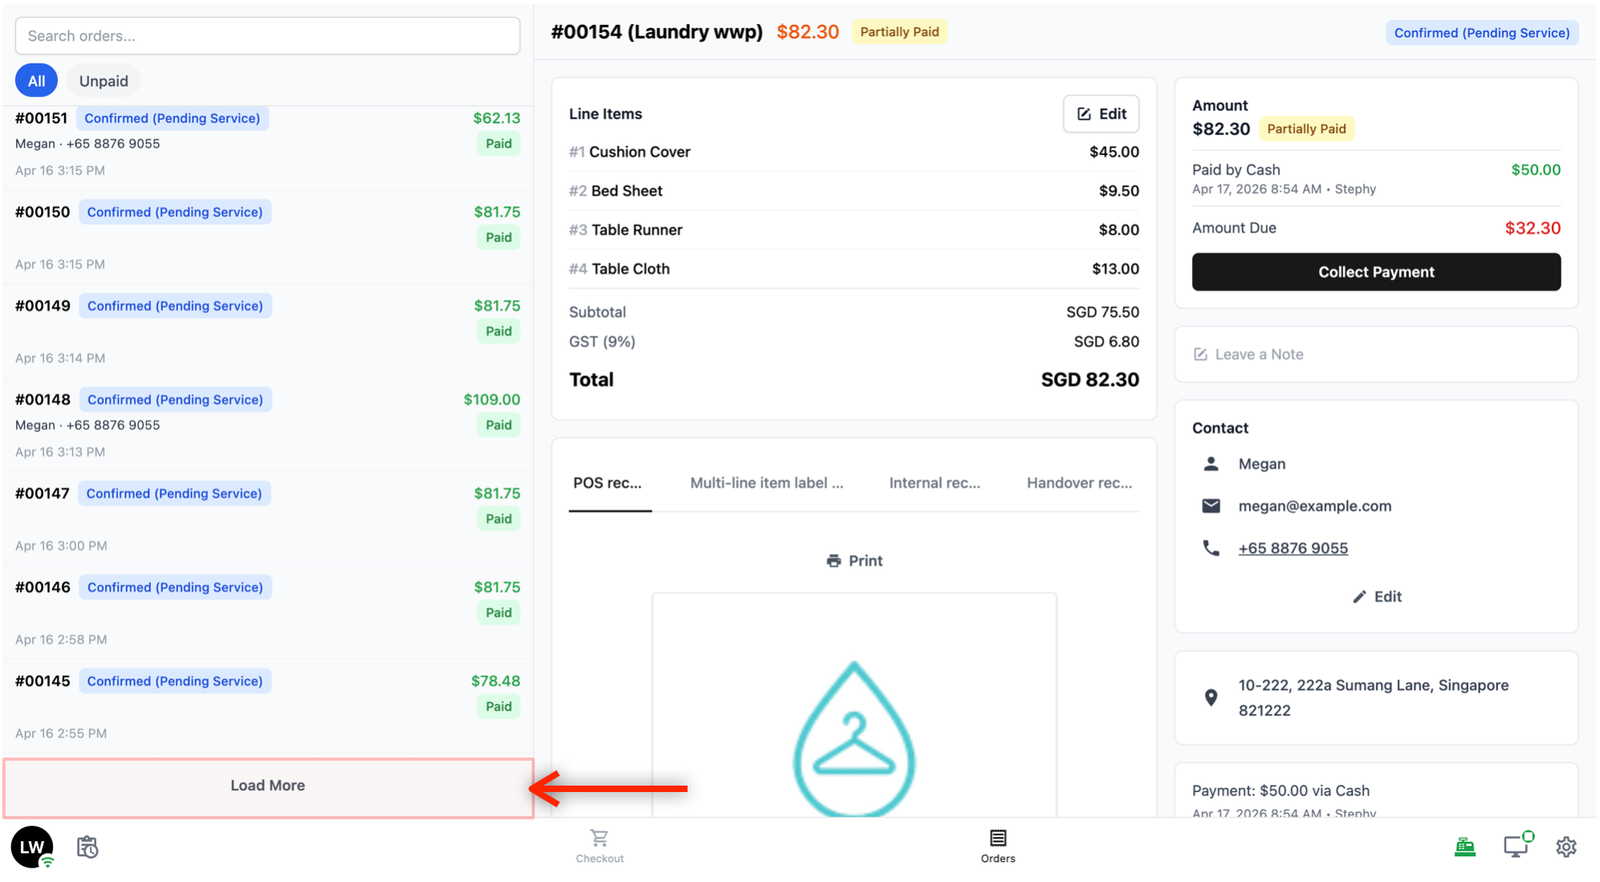
- If the list is long, there is a Load More button at the bottom to load additional orders.
Order Details
When you tap on an order in the list, the right side of the screen shows the full details of that order. The details are split into two areas — the left side and the right side.
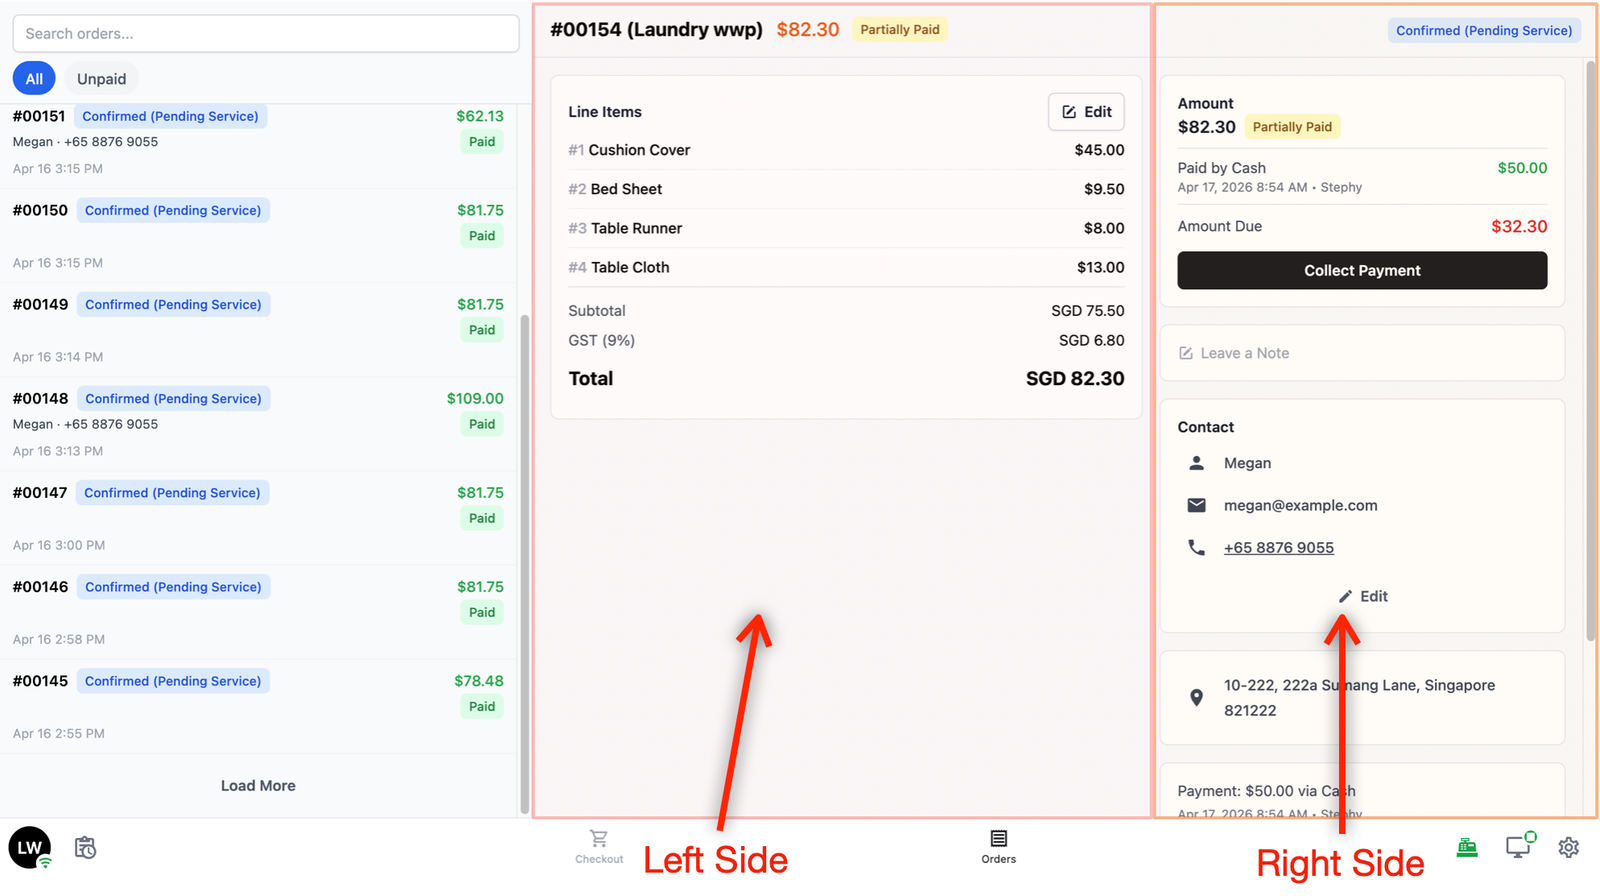
Left side:
- Line Items: This shows what was ordered, including the item name, service type, price, and totals. There is an Edit button inside this section that lets you make changes to the order, such as adding or removing items.
Right side:
- Payment: This shows the amount paid, the payment method used, and when the payment was made.
- Notes: This shows any notes attached to the order. You can add or edit a note here.
- Contact: This shows the customer's name, email, and phone number.
- History: This shows a timeline of everything that has happened with the order — for example, when it was created, when it was paid, and any changes that were made.
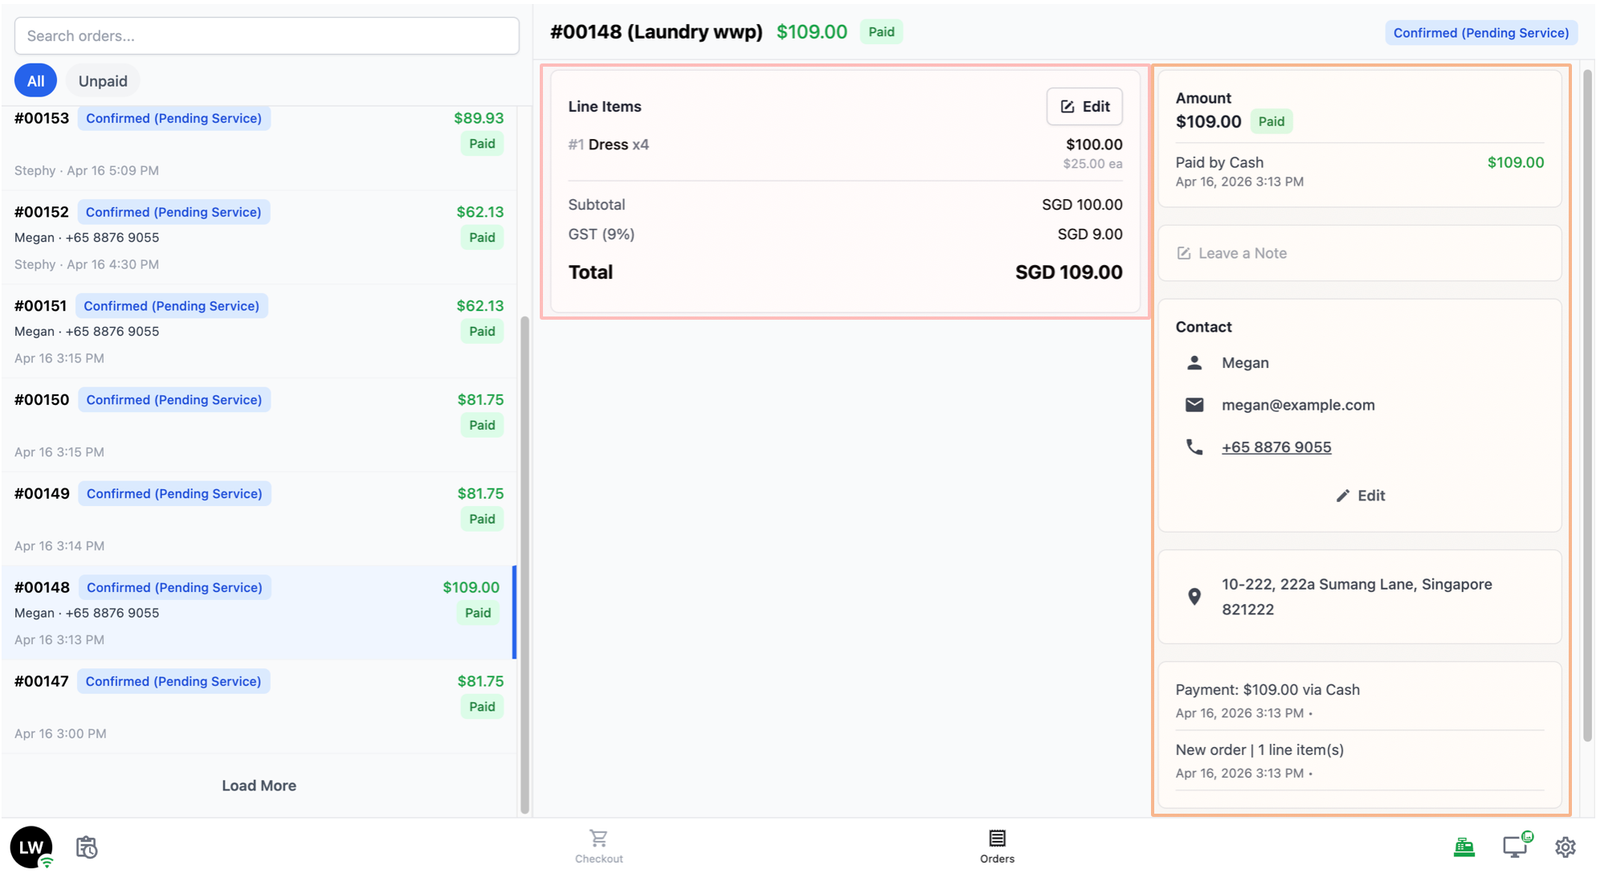
- At the bottom of the order, there is a Cancel Order button if you need to cancel it.

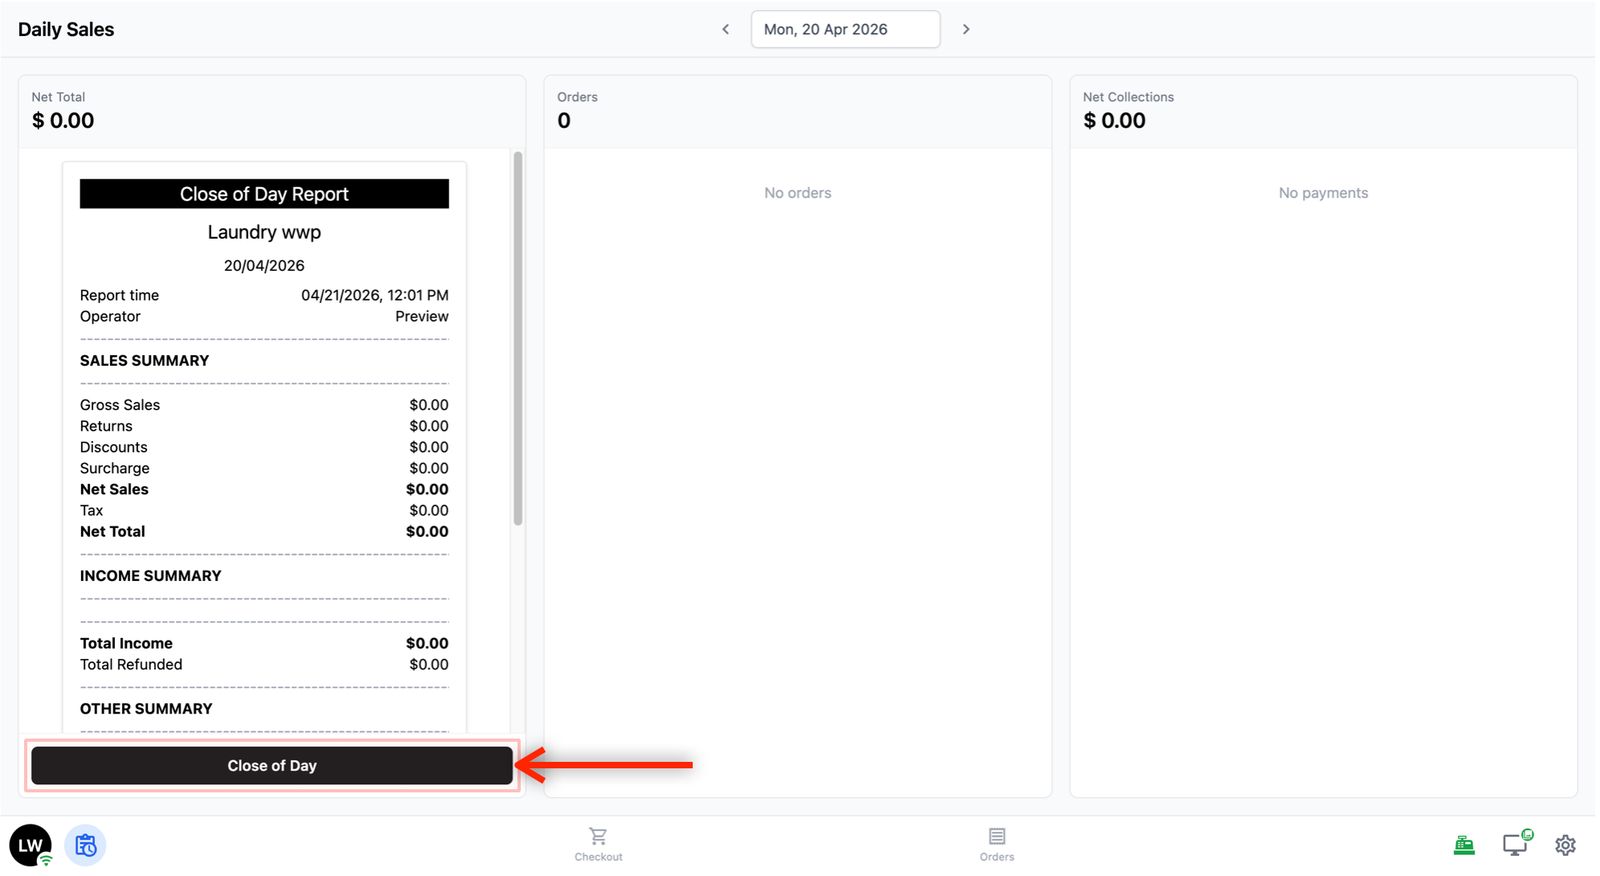
Daily Sales
Tap the Daily Sales icon (the clipboard icon with a clock, next to your initials on the left side of the bottom navigation bar) to open the Daily Sales page.

- At the top, use the left and right arrows to move between days, or tap the date in the middle to pick a specific day.
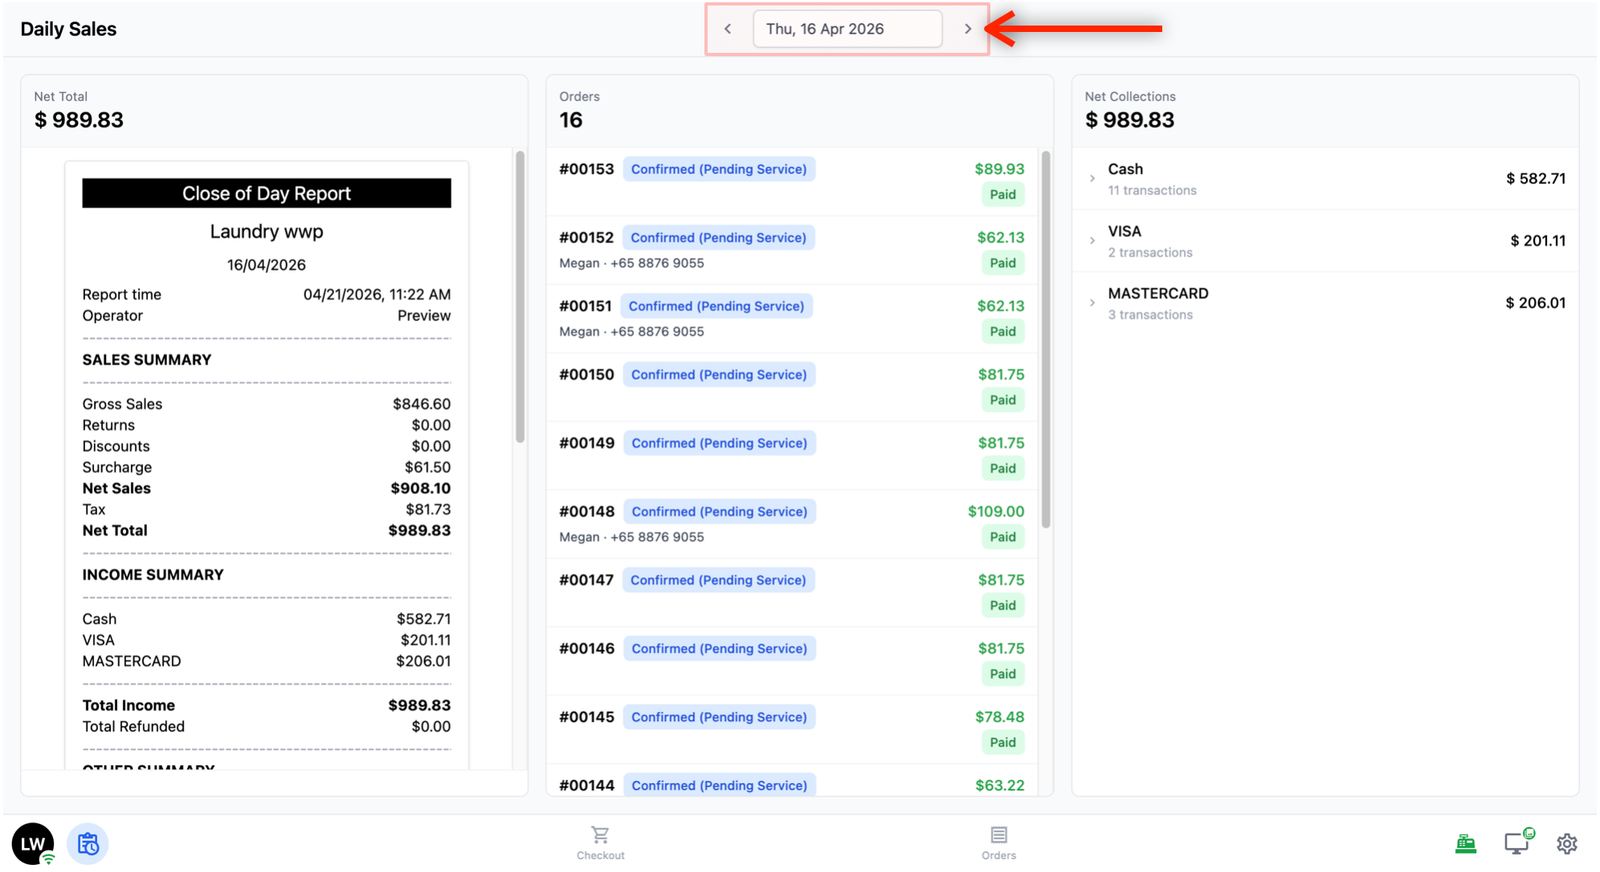
- Below, the page is split into three sections side by side.
- The three sections are:
- Net Total (the day’s total sales, with a receipt-style summary below it)
- Orders (how many orders were taken, with a list you can tap to view each one)
- Net Collections (how much was actually collected, broken down by payment method).
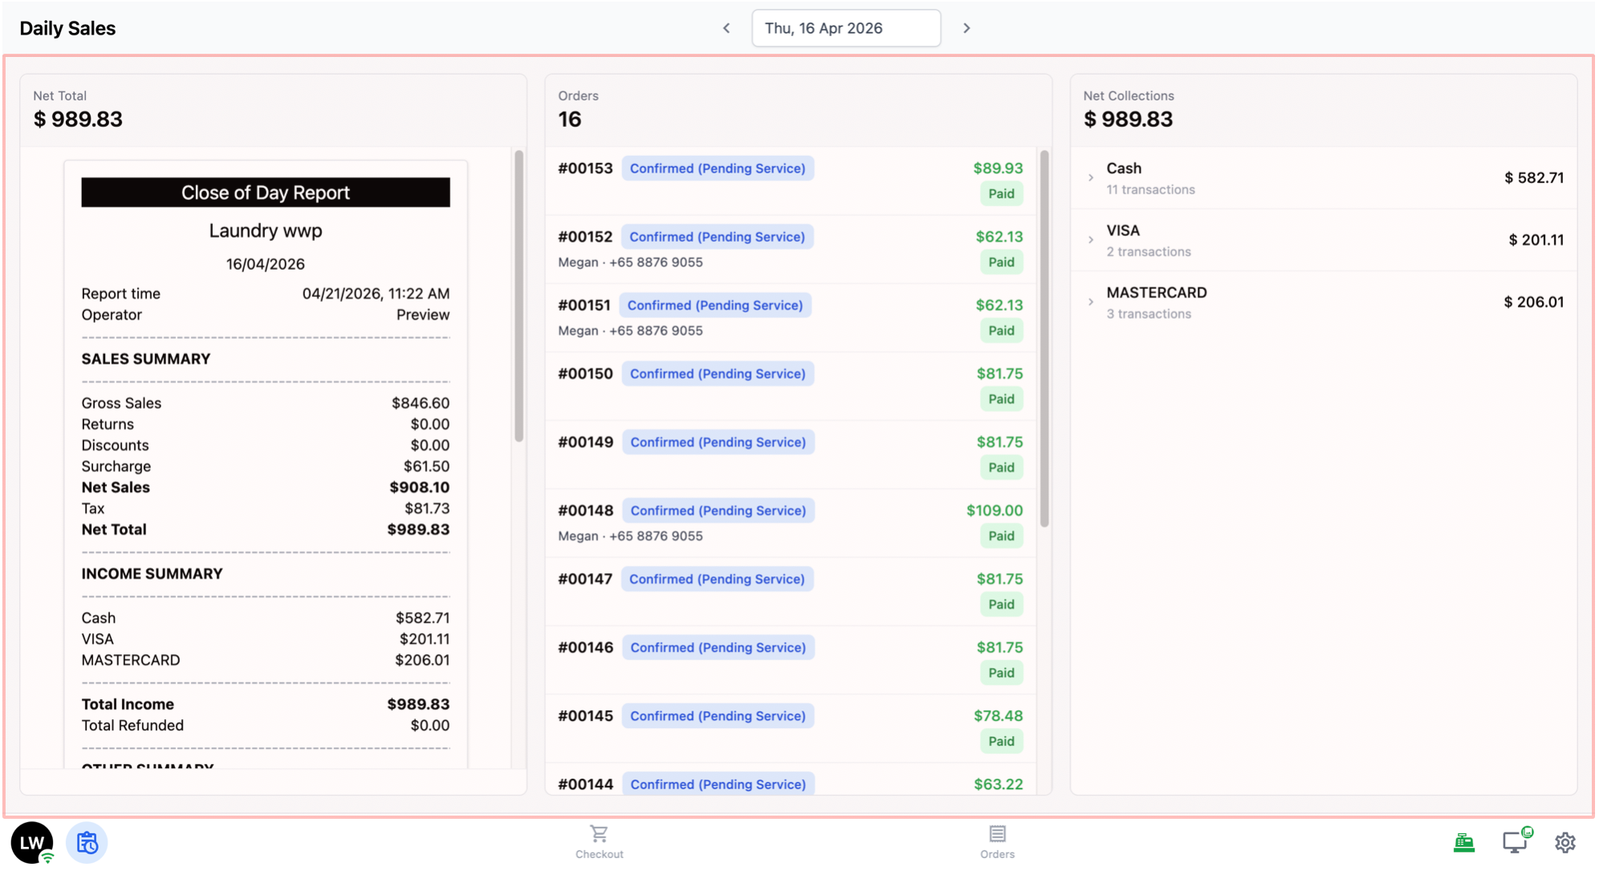
- At the bottom of the Net Total section, there is a Close of Day button. Tap this to officially close out the day. Once submitted, a Print Report button will appear so you can print the day’s summary. If you need to undo the close, tap Withdraw.
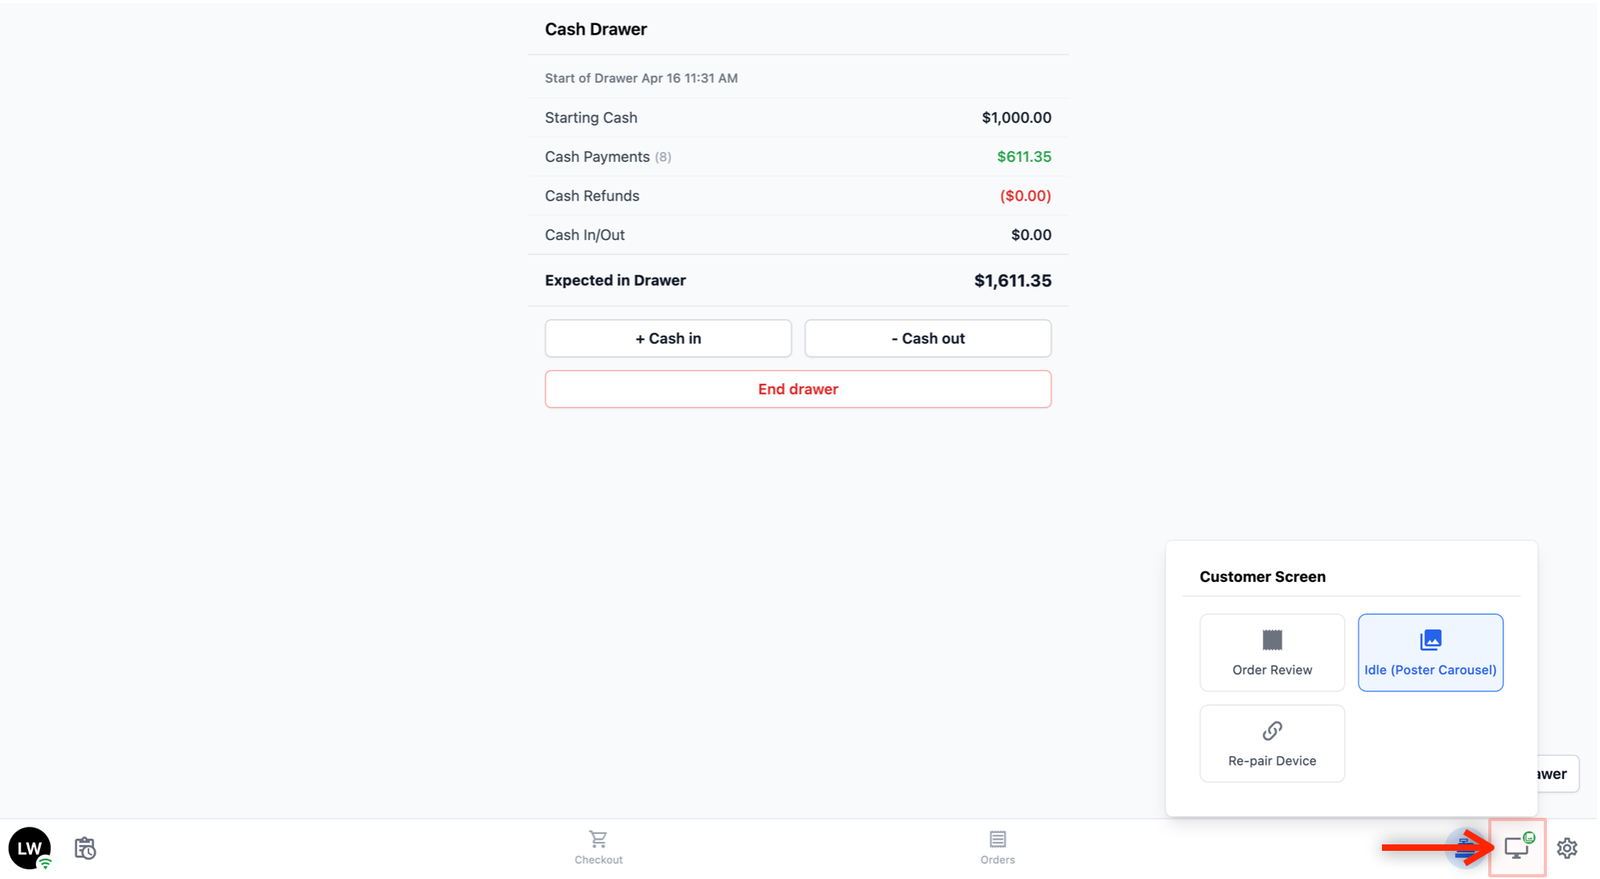
Cash Drawer
Tap the cash register icon on the right side of the bottom navigation bar to open the Cash Drawer page.
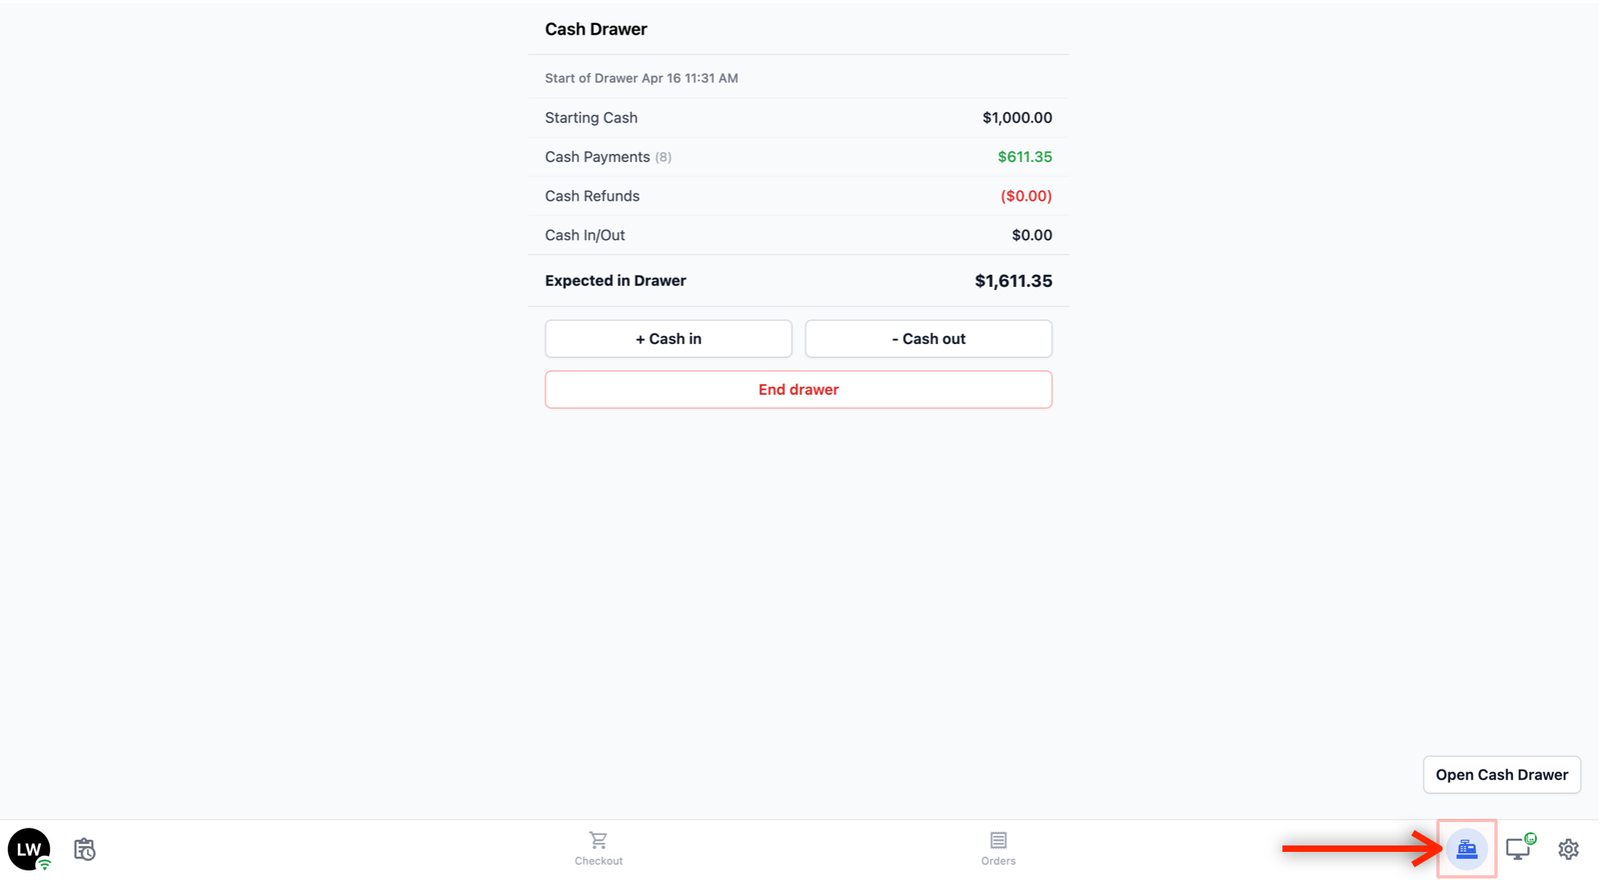
- The Cash Drawer page shows the current state of your cash drawer with a summary of the day's cash activity.
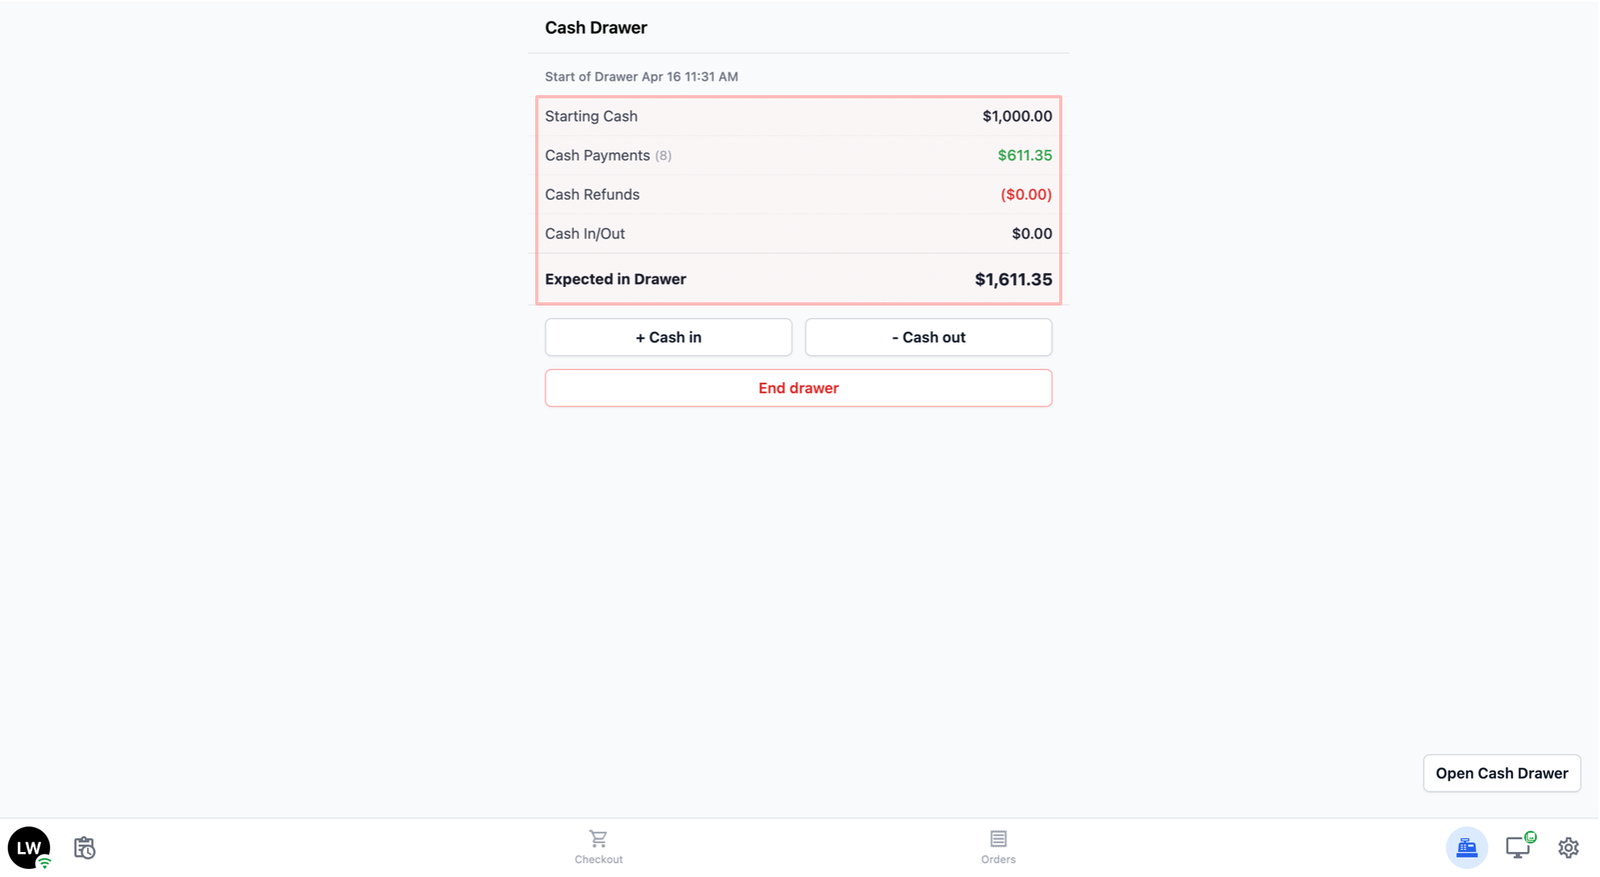
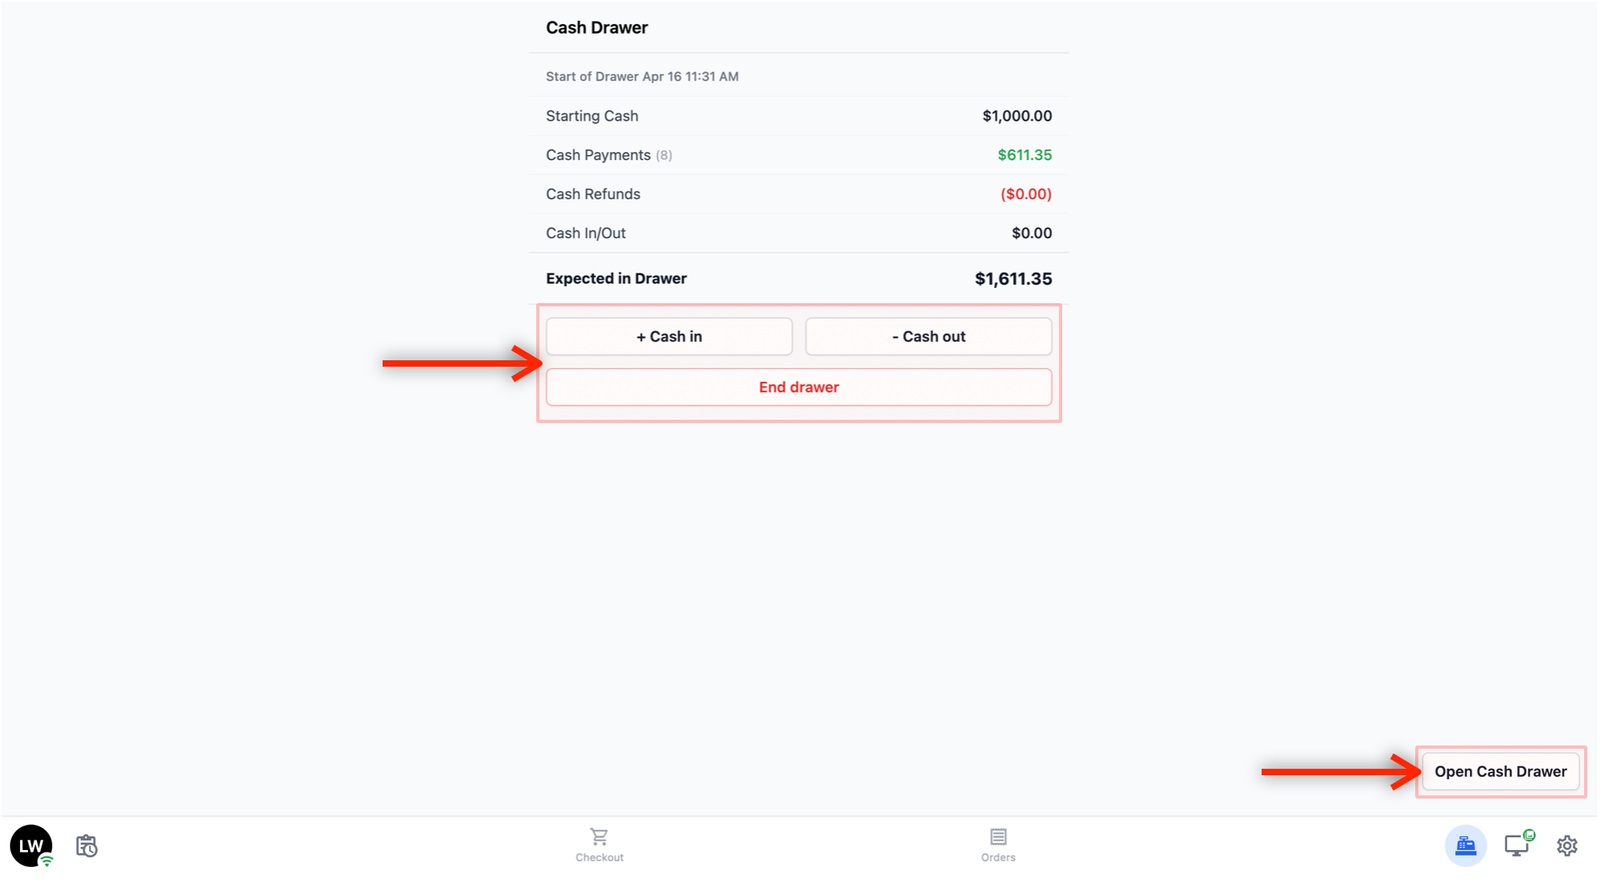
- Below the summary, there are four action buttons:
- + Cash in: Record cash being added to the drawer outside of a regular transaction (for example, adding extra starting cash to the drawer). You will be asked to enter the amount and a reason.
- - Cash out: Record cash being removed from the drawer outside of a regular transaction (for example, a petty cash expense). You will be asked to enter the amount and a reason.
- End drawer: Close out the current drawer session.
- Open Cash Drawer: Physically open the cash drawer (if connected to the POS).
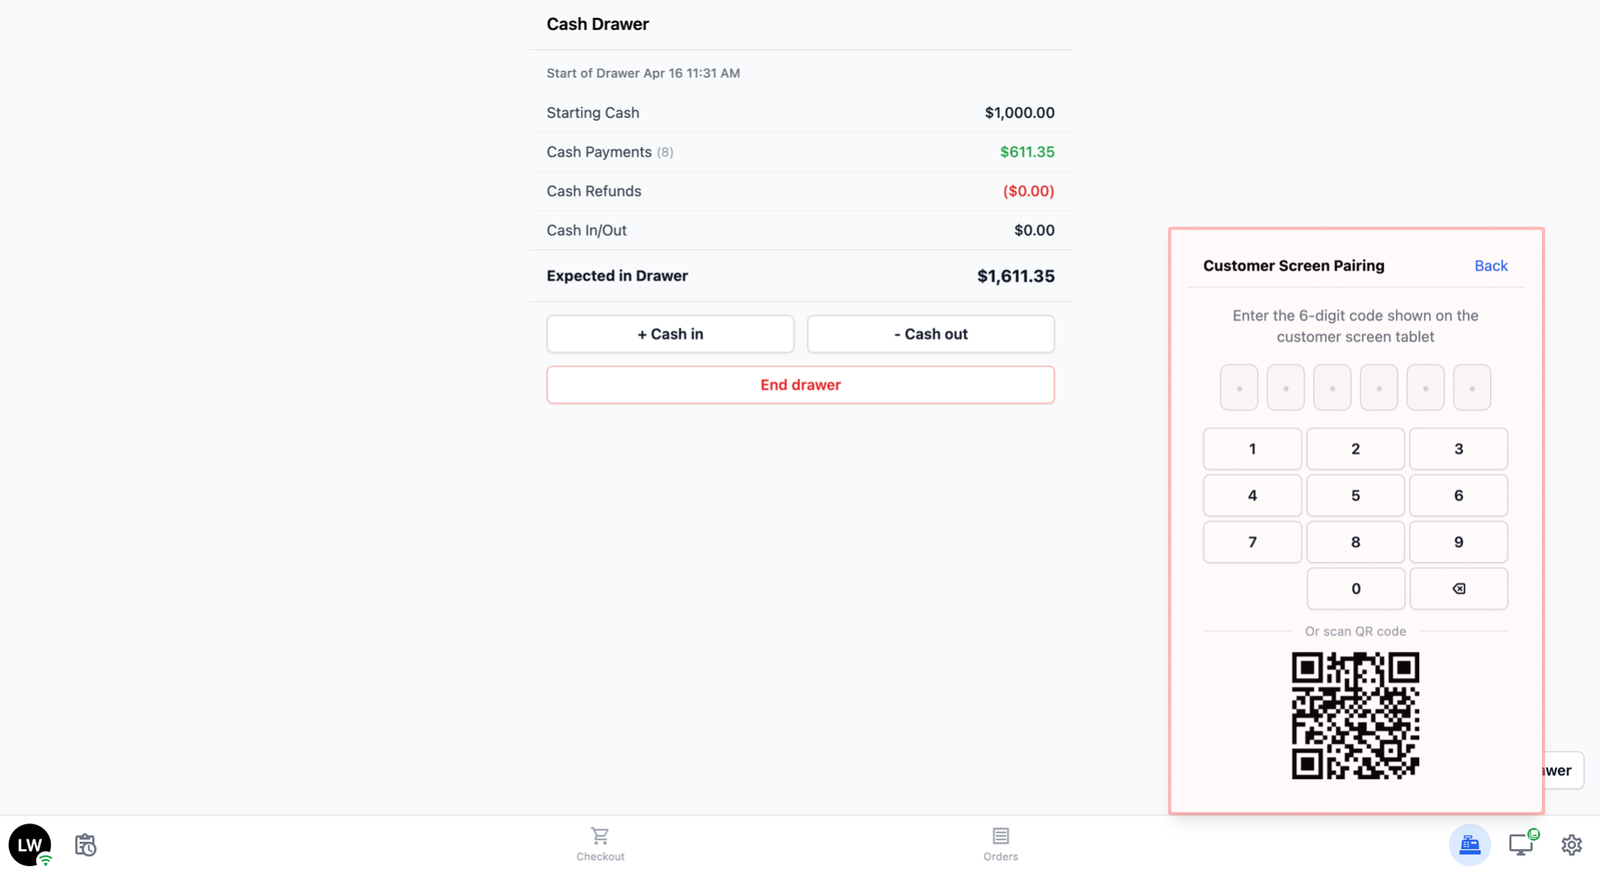
Customer Screen
The Customer Screen is a second display that faces your customer — for example, a tablet on the counter.
- Tap the monitor icon on the bottom navigation bar to open the Customer Screen panel and control what appears on that display.
- If no tablet is paired yet: You will see a pairing panel. Enter the 6-digit code shown on the customer tablet (or scan its QR code) and the two devices will link up.
- If tablet is paired: The panel shows the options below. Tap one to switch what the customer sees.
- Order Review: Shows the customer a live summary of the order you are ringing up — line items, quantities, discounts, and the total. It updates in real time as you add or remove items at the POS. Great for letting the customer verify the order before payment.
- Idle (Poster Carousel): Shows a rotating set of promotional images (or your business name, if no images are set up yet). This is the default when you are not taking an order.
- Re-pair Device: Tap this if you need to link the POS to a different customer screen tablet — for example, when you replace the tablet.

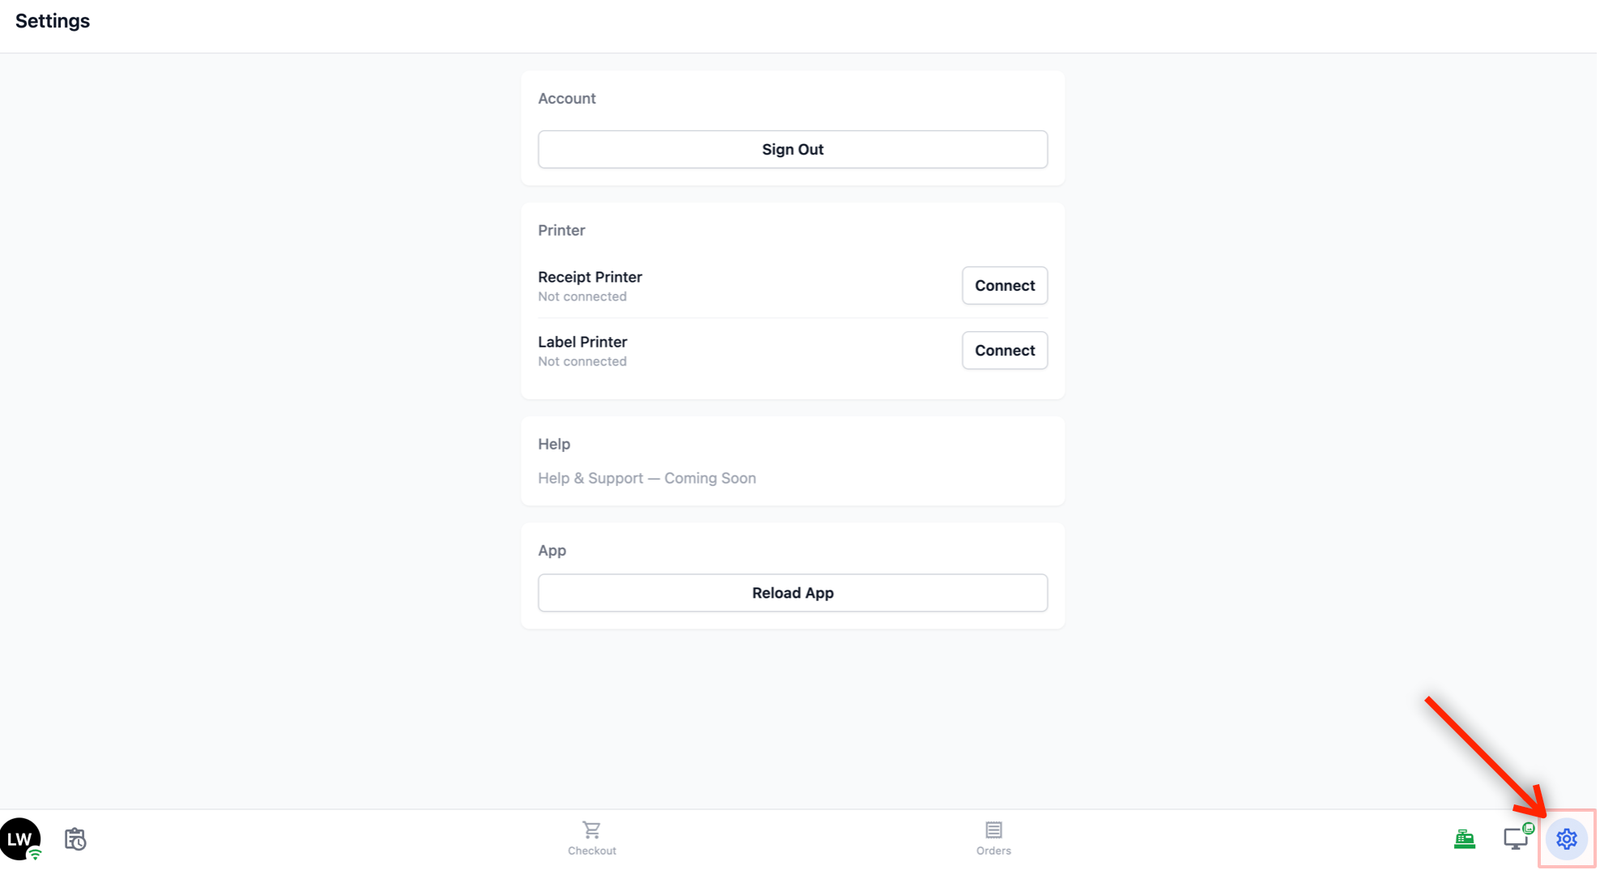
Settings
Tap the gear icon on the far right of the bottom navigation bar to open the Settings page.
The Settings page has four sections:
- Account: Shows who is currently signed in. Tap Sign Out to sign out of the POS.
- Printer: Connect or reconnect your receipt and label printers.
- Help: Access help and support resources. (Coming soon)
- App: Tap Reload App to refresh the POS if it is behaving unexpectedly or after an update.
Give feedback
Up next
Set Up POS Staff ManagementRegister your counter staff, assign passcodes, and control who can access the POS.
Read more