Adding Accessories
In this article
Accessories are small extra items a customer leaves with the main item, but they are not part of the main item itself. Examples include a dust bag with a handbag, a belt with a dress, or a strap with a camera bag.
Contents
Contents
Before You Start
You need at least one Service Item set up before accessories become useful, because accessories only appear at the POS after staff add a Service Item to the order. See Setting Up Service Items.
Where to Find Accessories
- Click the ⚙️ Settings icon in the top-right corner.
- Under the Catalog & Pricing section, click Product Catalog.
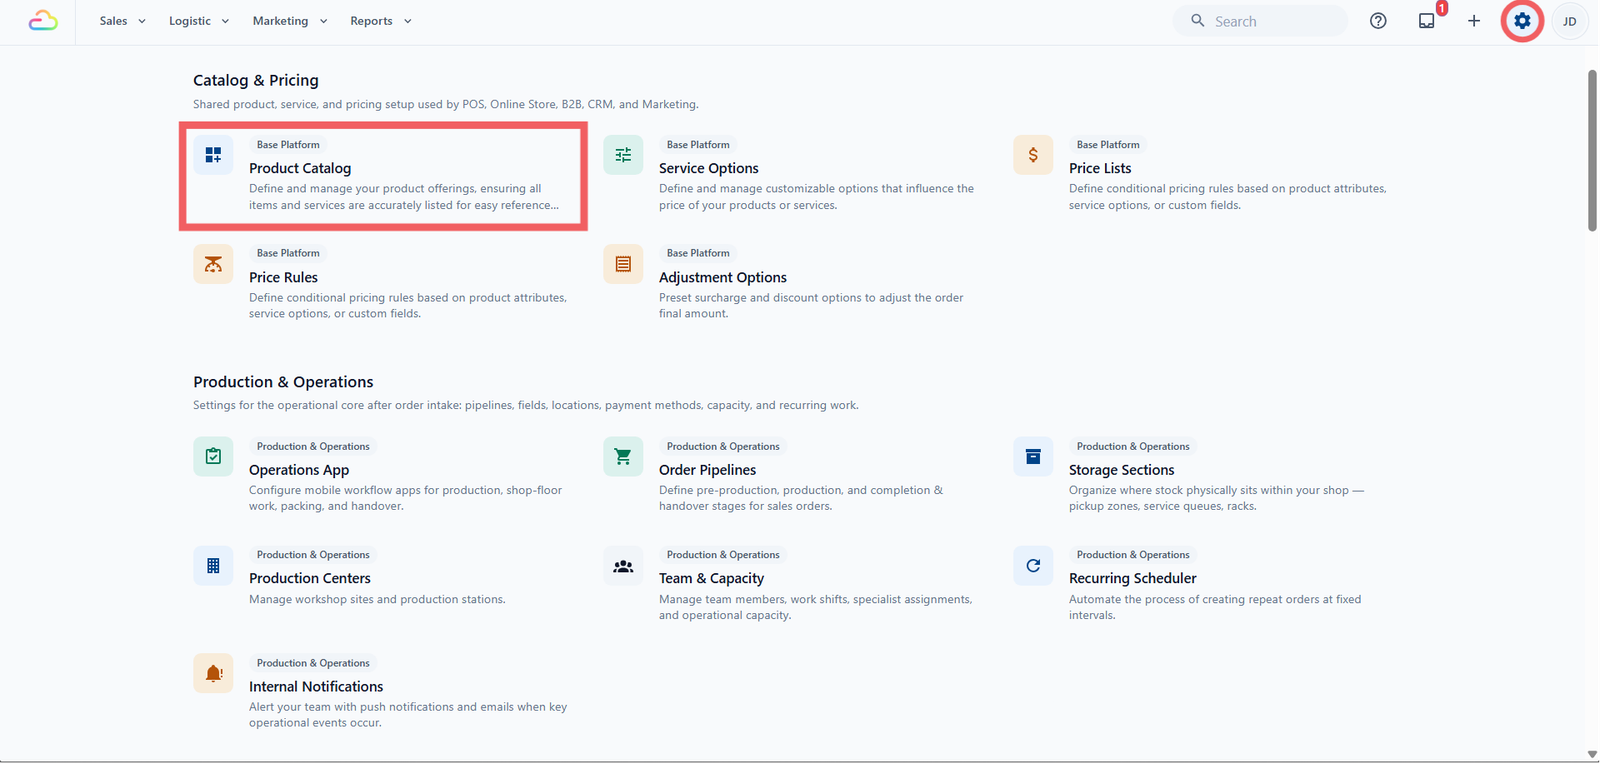
- In the Product Catalog tab bar, click Accessories.
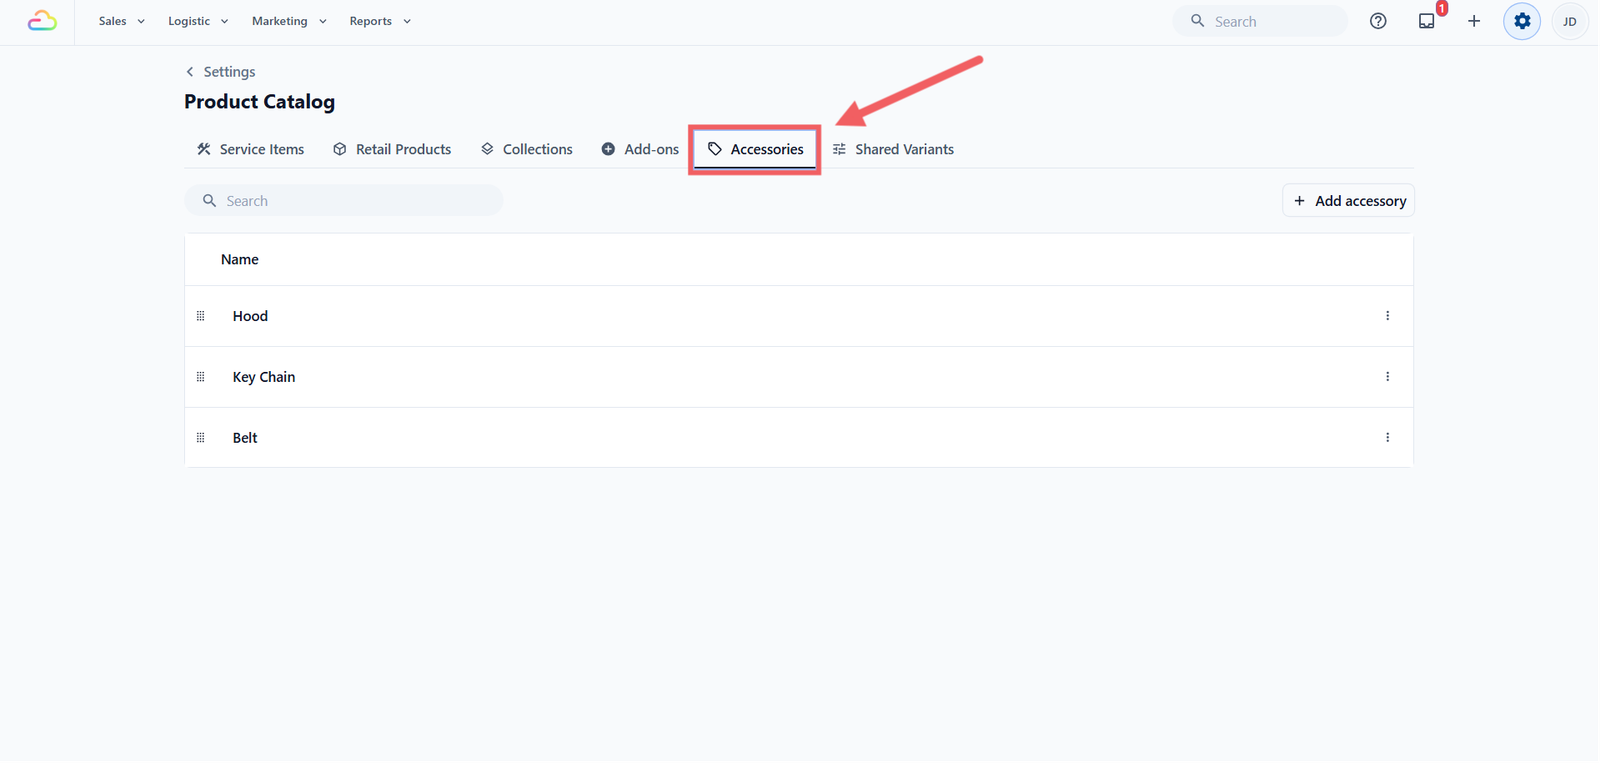
You land on the Accessories list. The Accessories tab, between Add-ons and Shared Variants, is underlined to show you are on the page.
Adding a New Accessory
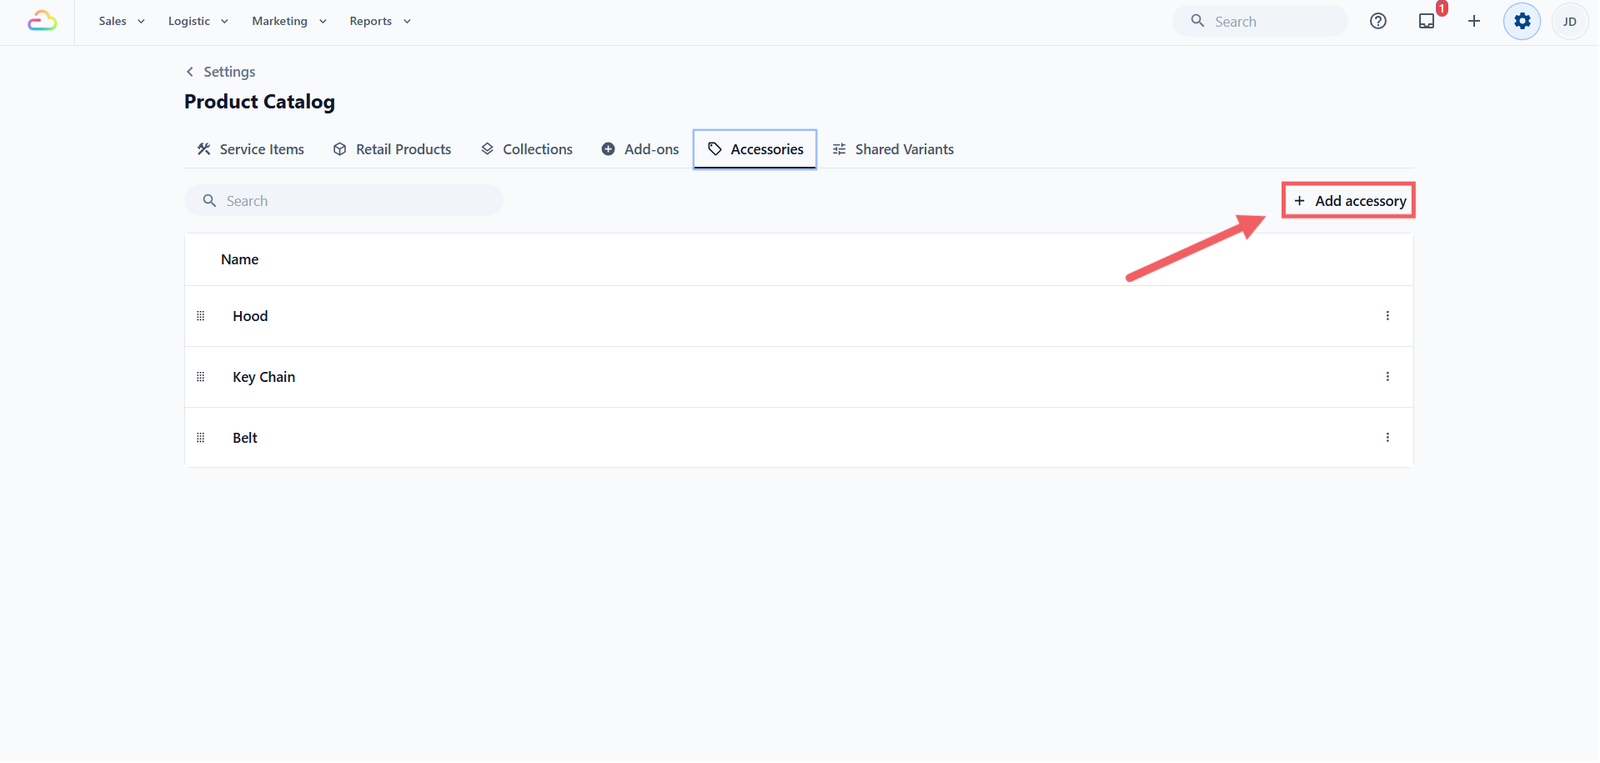
- Click the + Add accessory button at the top-right of the toolbar.
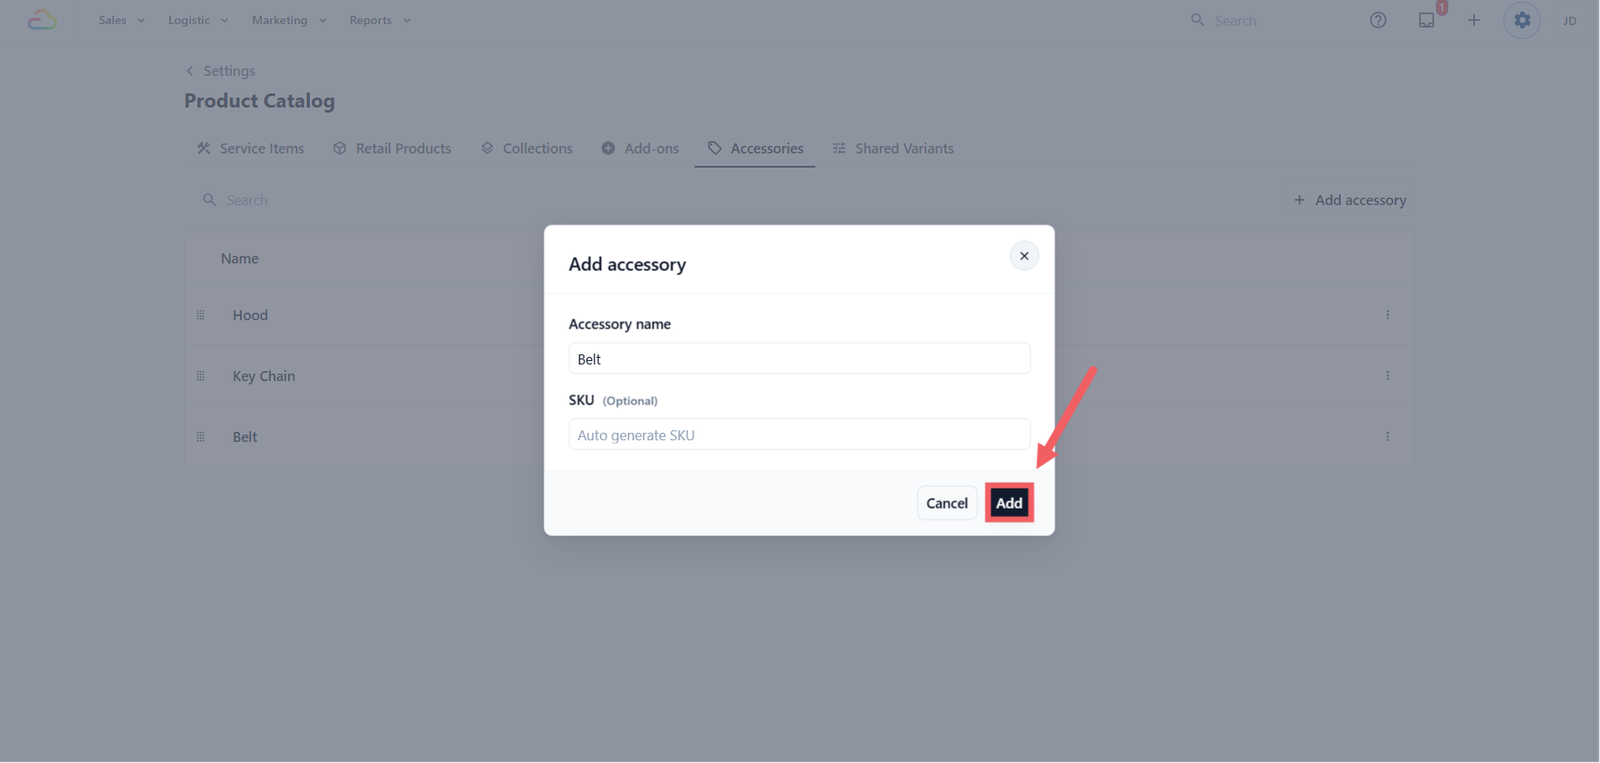
- In the Add Accessory dialog, fill in the Accessory name (required) with the short name your staff would say out loud, for example Dust Bag or Belt.
- Optionally fill in the SKU, a short code that identifies the accessory in your records. Leave it blank and EasyBiz generates one for you, like ACCY-1.
- Click Add.
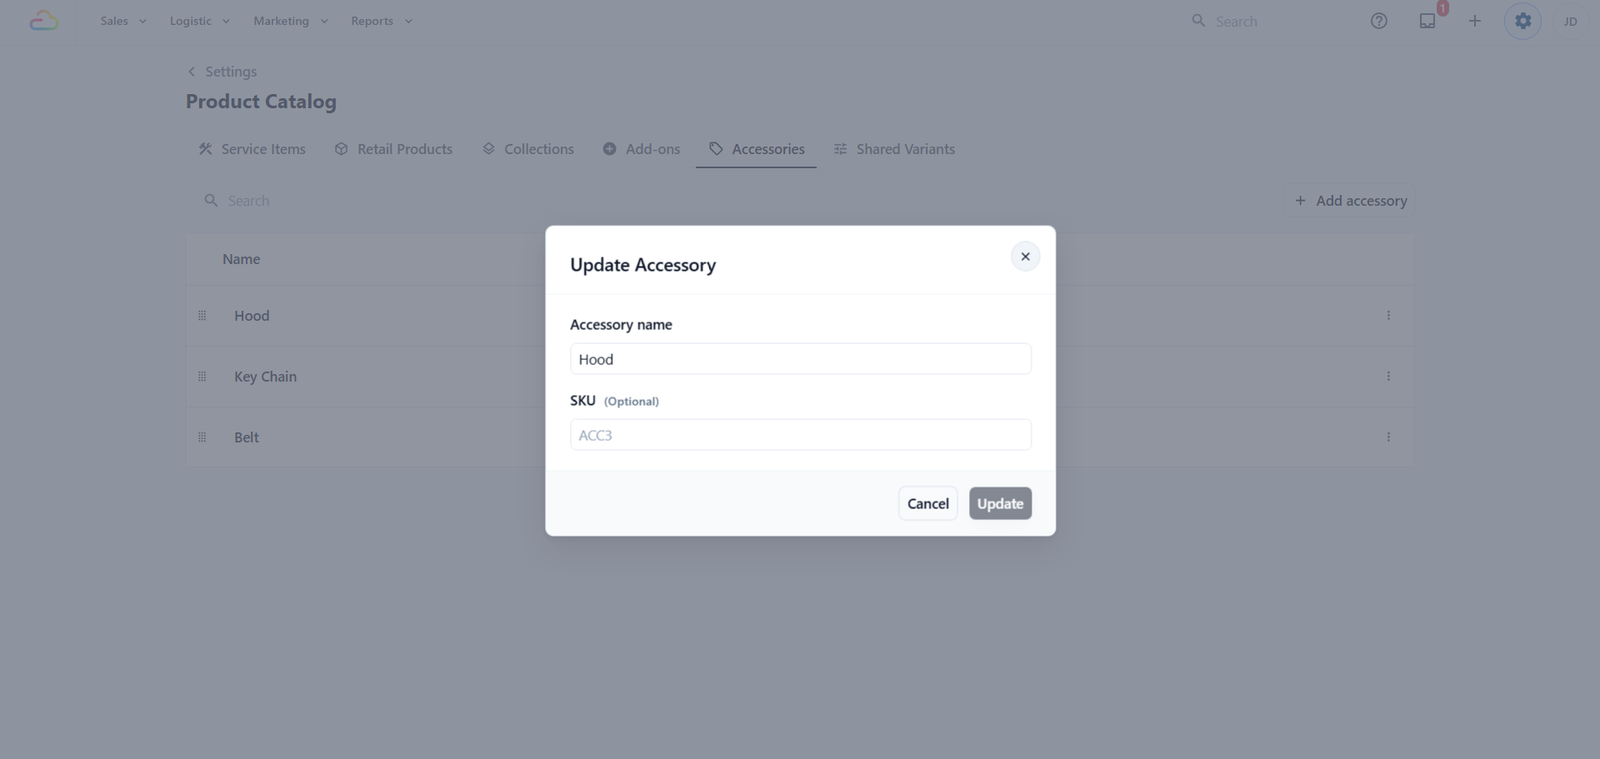
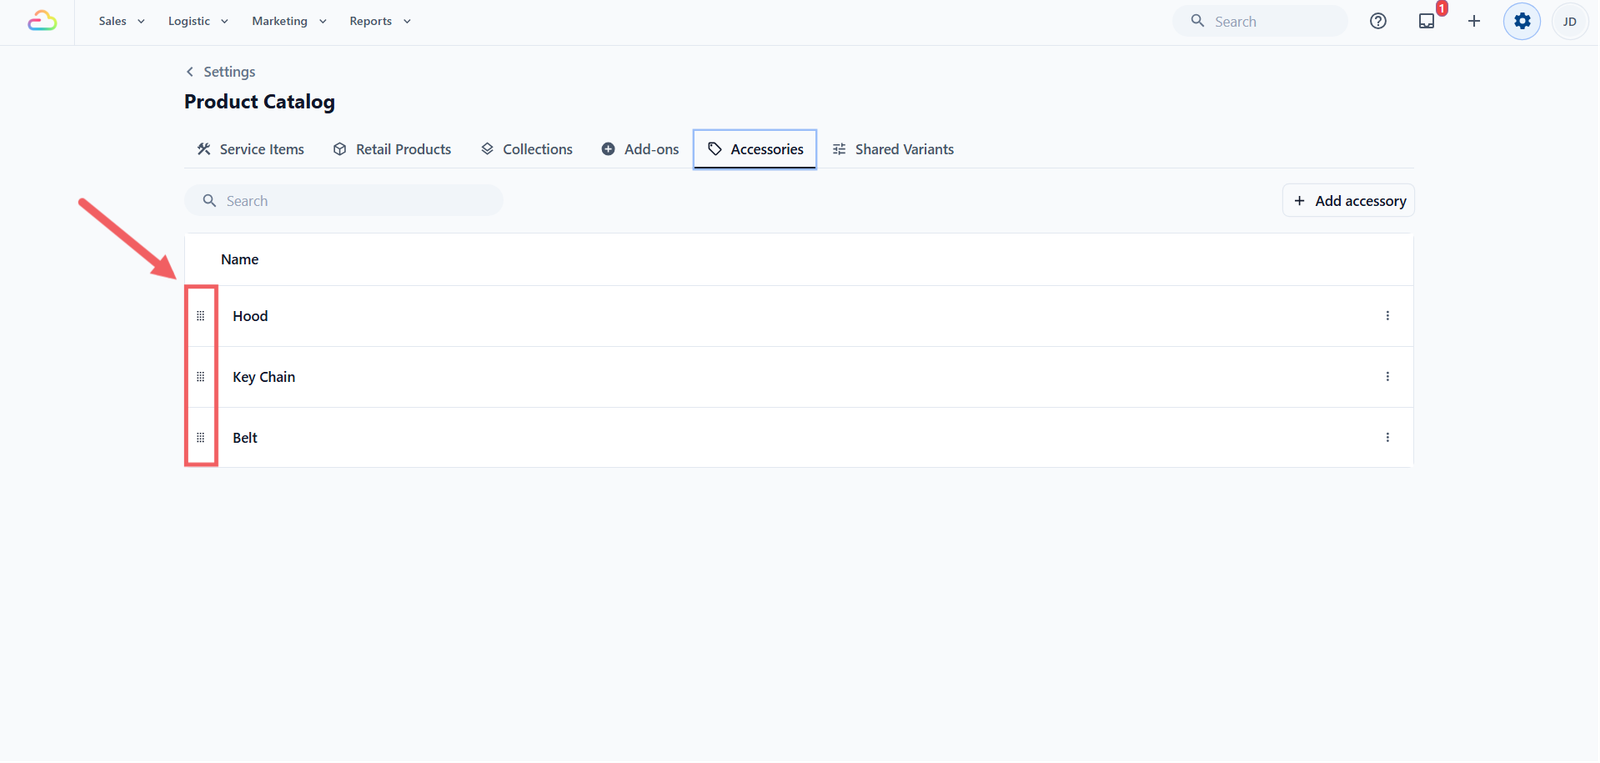
Editing or Reordering an Accessory
- To edit: click anywhere on the specific row. An Update Accessory dialog opens with the current name and SKU pre-filled. Change either field, then click Update.
- To reorder: grab the dotted drag handle on the far left of a row and drag it up or down. The new order saves automatically and is the order staff see at the POS.
Deleting an Accessory
- Click the ••• three-dots button at the far right of the row.
- Click Delete.
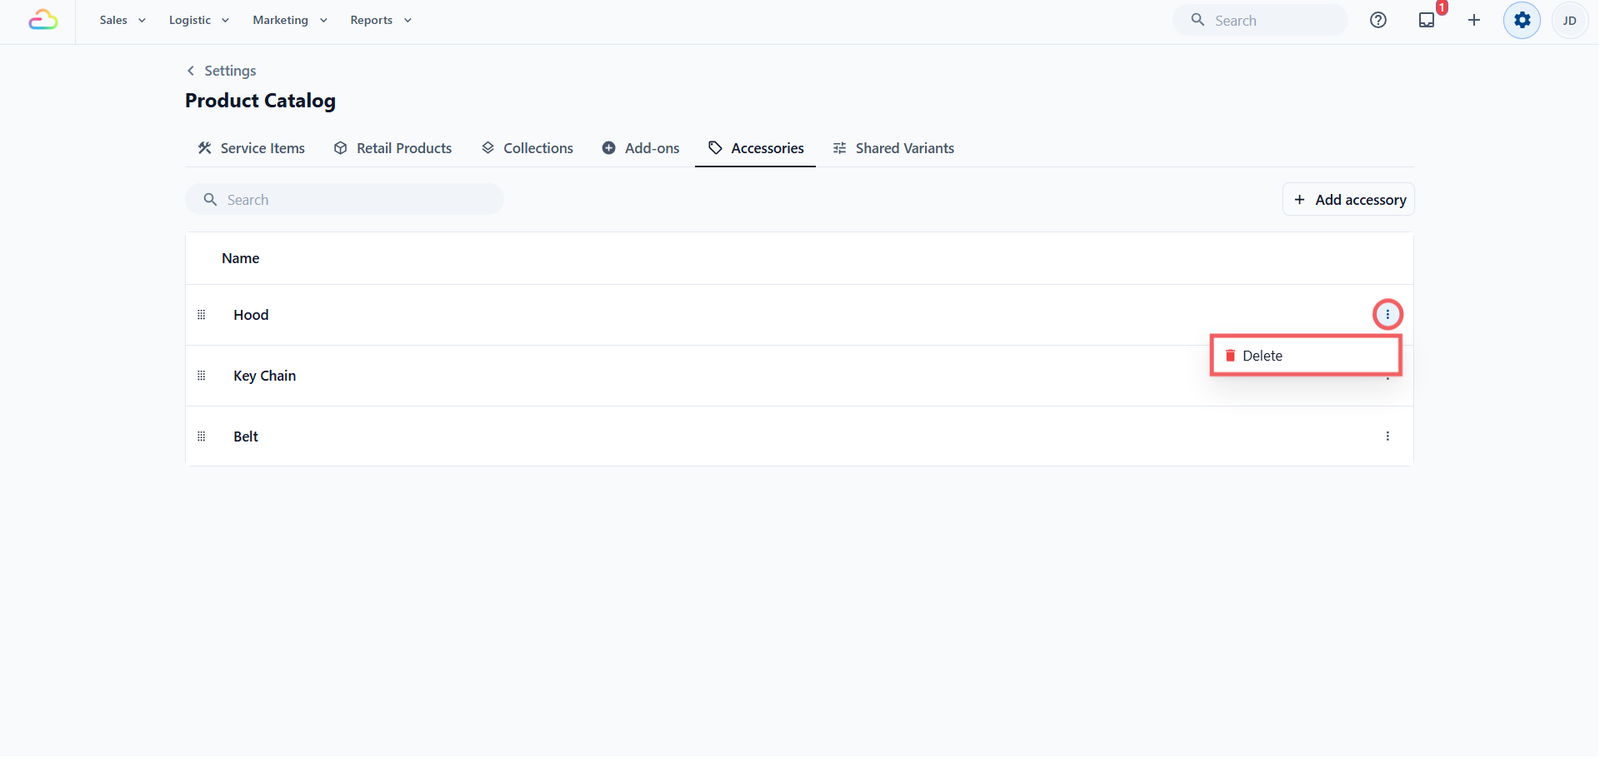
- Confirm in the popup that appears.
Delete is the only option in that menu. To edit, click the row instead.
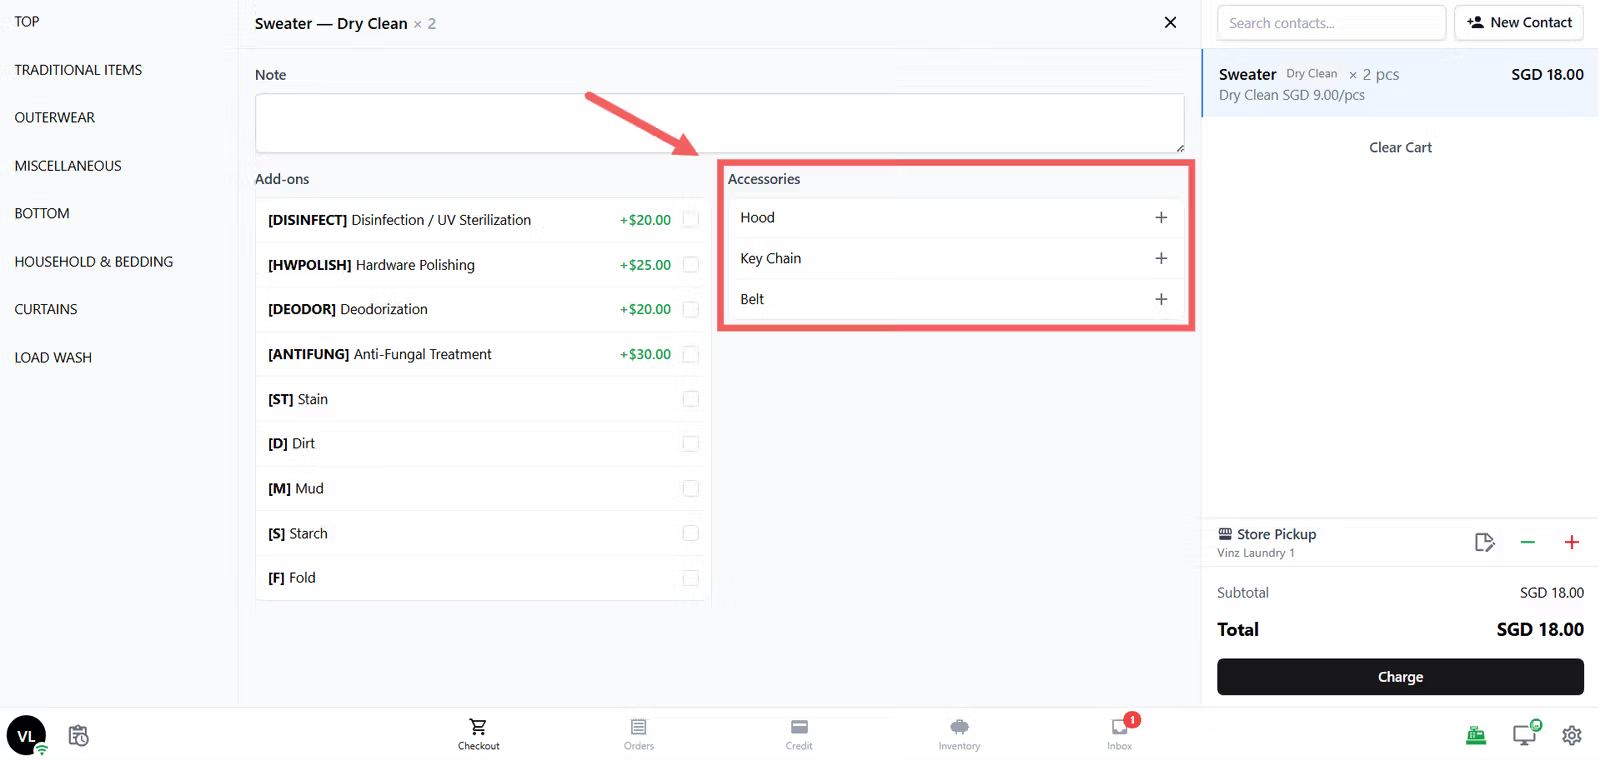
Where Accessories Appear at the POS / Console
Accessories do not appear on the initial intake screen. They appear in the Edit Panel, which opens when staff click Edit on a line in the cart after adding a Service Item to the order.
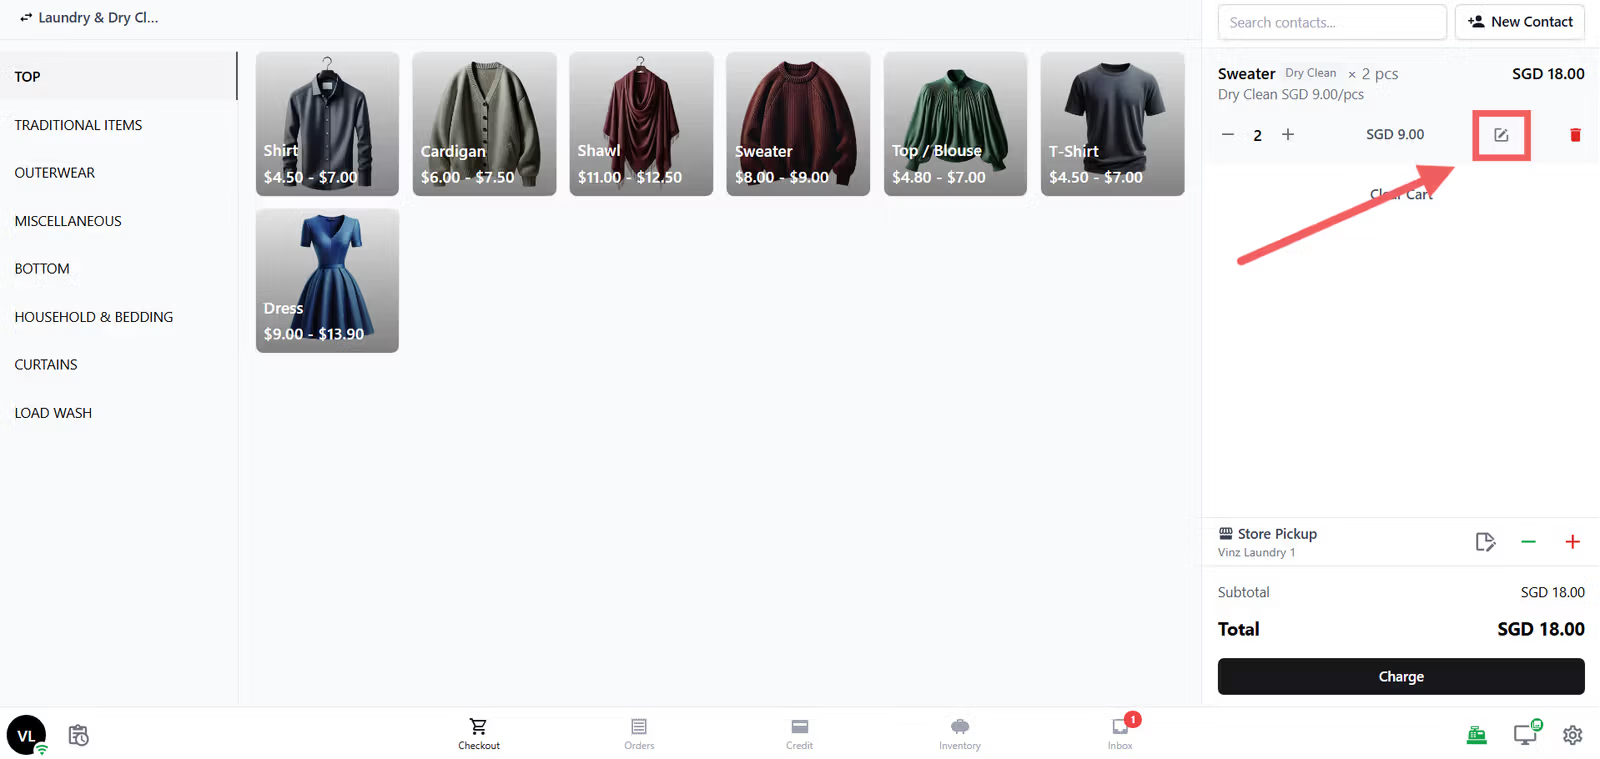
The Accessories picker sits next to the Add-ons picker. Staff use the + and − buttons to set the count for each accessory the customer brought, for example 1 Dust Bag and 1 Charm. Because the count is attached to a specific line item, your workshop sees exactly which accessories belong to which item. This matters when one customer drops off several items at once.
FAQs
Do I have to set up accessories before going live?
No. Accessories are optional. You can go live without any, then add them later when you notice items your staff keep writing in the order notes.
Is the SKU code required?
No. Leave the SKU field blank and EasyBiz generates a code for you, like ACCY-1. Only fill it in if you already use your own coding system.
Can I charge the customer for an accessory?
No. Accessories record what the customer brought, not what they are charged. Use an Add-on if you want a price, for example "Reattach Strap +$5".
If I rename an accessory, do past orders update too?
No. Past orders keep the accessory name as it was at the time. Only new orders use the updated name.
Why don't I see the Accessories picker at the POS/Console?
The picker only appears after at least one Service Item is added to the order and you click Edit on the line. If you still don't see it, check that at least one accessory exists in Settings.
Are accessories tied to a specific service, like only Laundry?
No. Every accessory is available to every service in your shop. Drag-reorder them so the most relevant ones for your busiest service sit at the top.
Give feedback
Up next
Adding Shared VariantsSave the sizes or options you use again and again, then reuse them across your service items and retail products in seconds.
Read more