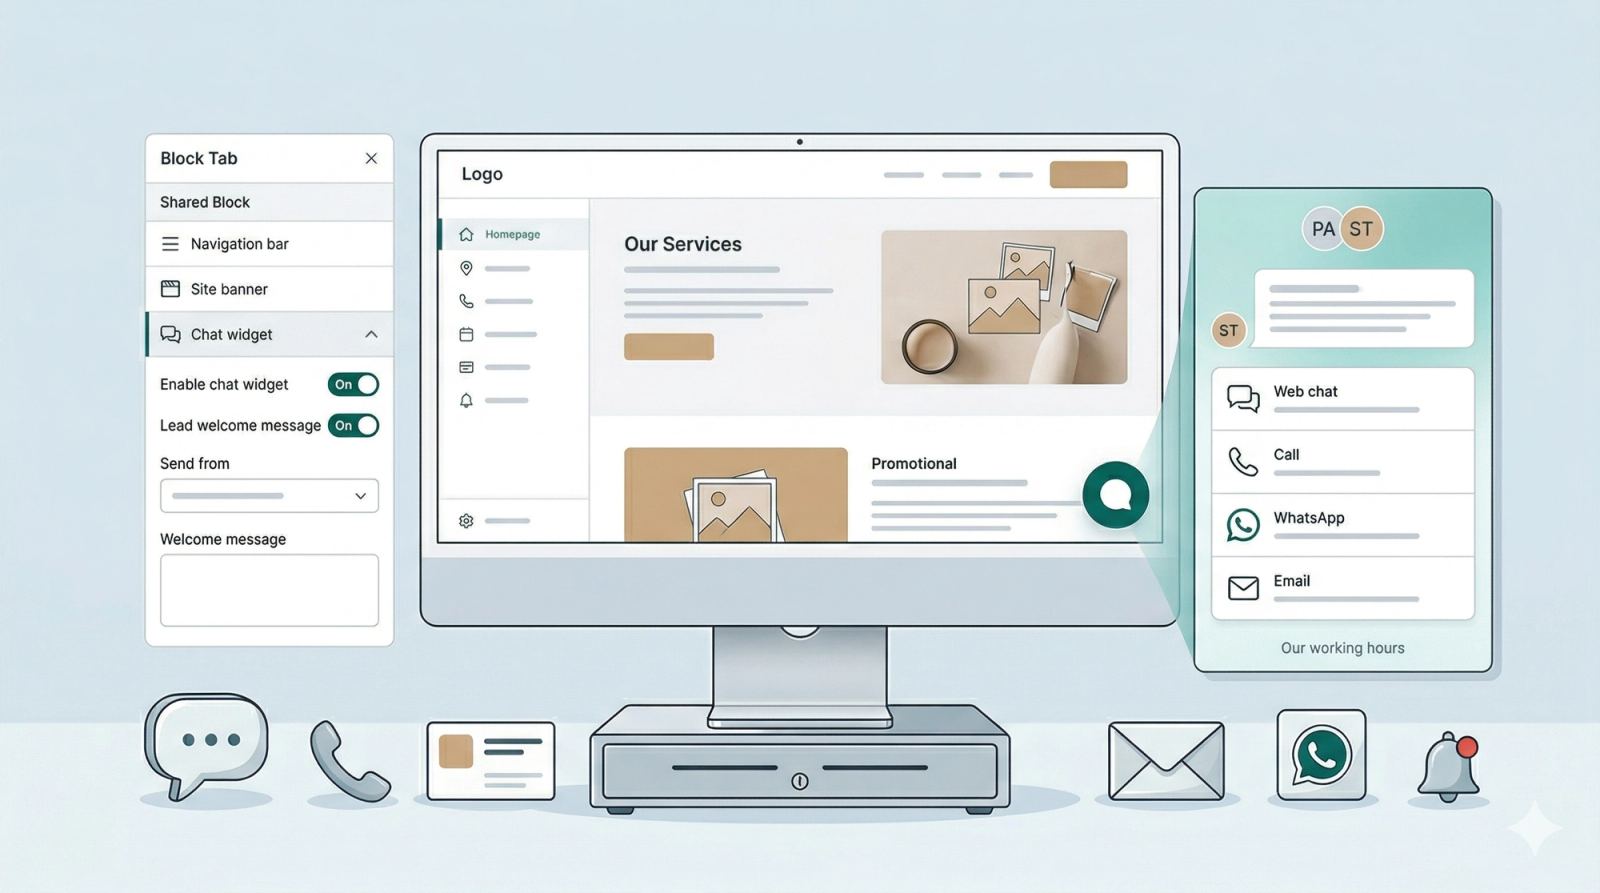
Block Tab: Chat Widget
In this article
The Chat Widget is a communication tool that allows you to converse directly with your customers. Think of it as a direct text line to your business.
Contents
Contents
What is a Chat Widget
A Chat Widget is a messaging bubble at the bottom of your website. It allows customers to send a message directly to you and your staff while they are browsing your site.
Why use it?
- Instant Contact: If a customer has a question about your services, they can instantly find out how to reach you via WhatsApp, Phone, or Email.
- Direct Web Chat: Customers can chat with you directly on your website, making it easier for them to get the information they need to book with you.
- Never Miss a Lead: It allows customers to leave their contact details and a question even when you aren't available to answer the phone.
How to Set Up Your Chat Widget
- Activate the Widget: Under the Block tab, click on Chat Widget. Switch the toggle to On. This will turn the Chat widget feature on and the messaging bubble will now appear at the bottom right of every page on your website.
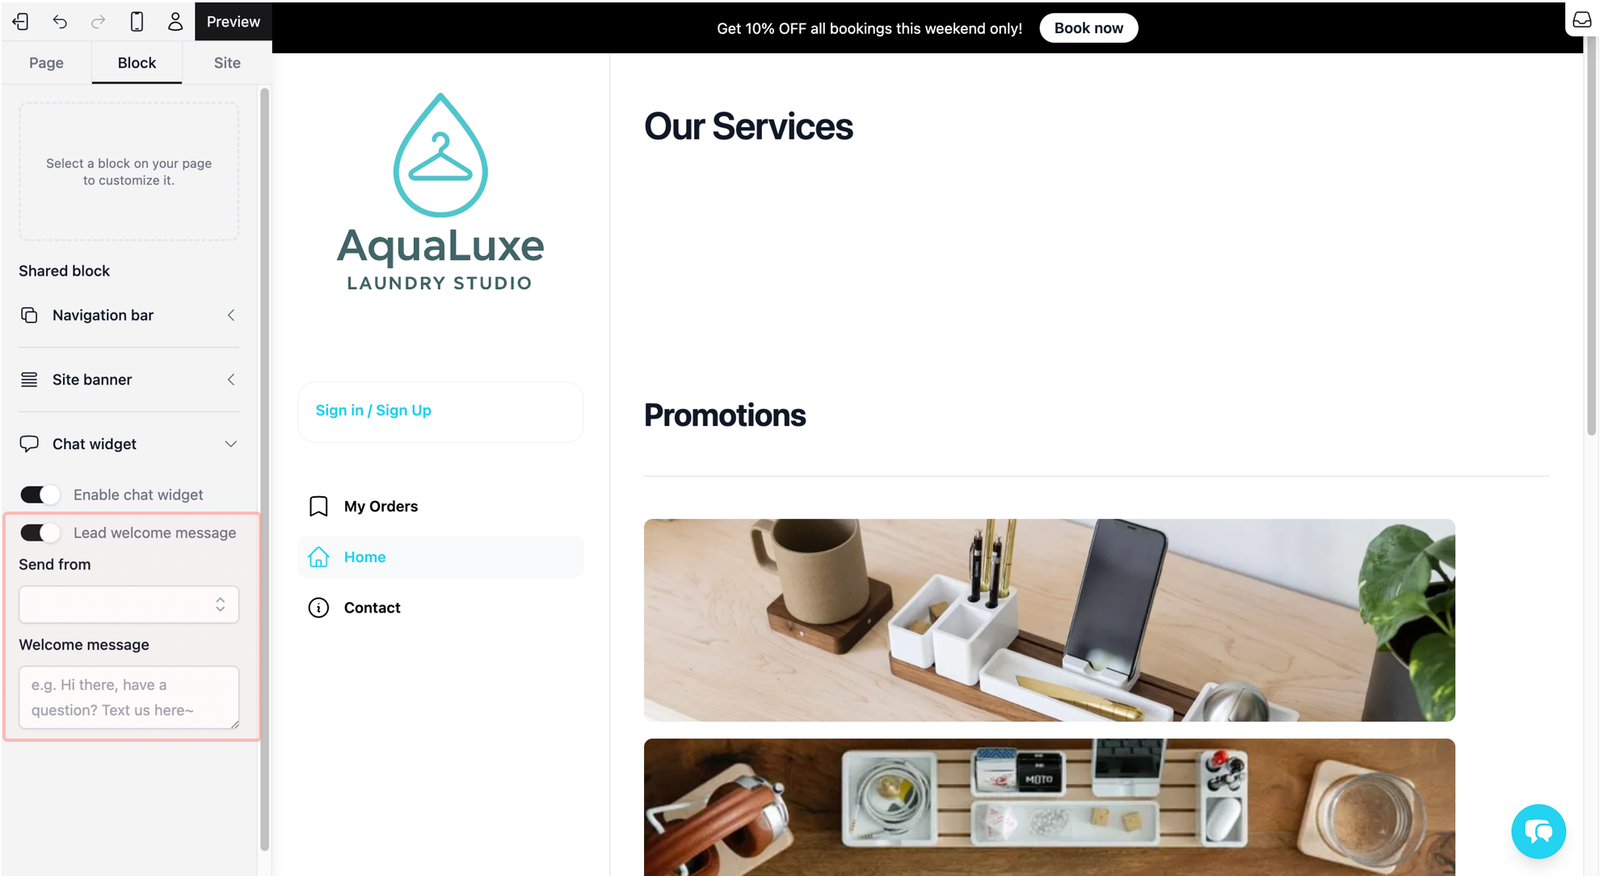
- Lead welcome message: When you turn on the chat widget, the Lead welcome message toggle will appear. This is useful in grabbing a visitor's attention, as a small greeting will pop up over the bubble. If turned on, these two fields will appear as such:
- Send from: Choose which team member the message is coming from.
- Welcome message: Type a simple greeting (e.g., "How can we help?").
Design your Chat Widget
Now that your widget is active, you’ll want to make it feel like a natural part of your business. Since the widget starts as a basic template, this is where you can customize the design and details to ensure it reflects your brand's personality.
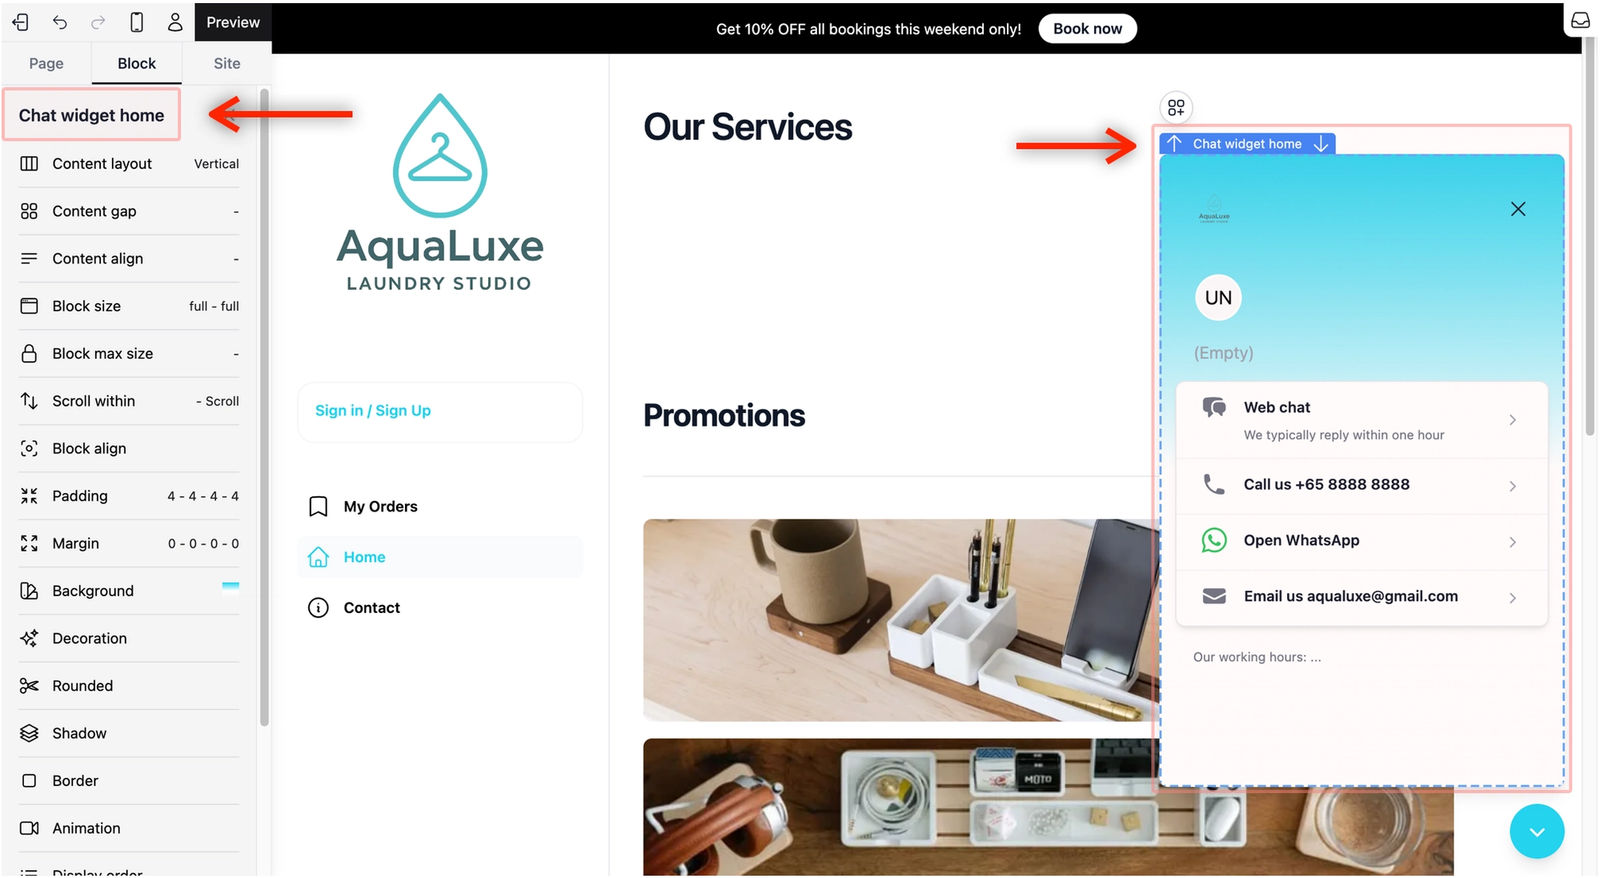
To begin, click on the messaging bubble in your website preview to open it. This will show a pop-up of the Chat widget. Notice that the visual builder now shows the editor for the Chat Widget itself.
Click on an empty space inside the pop-up to open the Chat widget home Editor in the visual builder.
Let's walk through a typical setup to get your widget "customer-ready".
Change the Background Color
First, let’s make the chat match your brand by changing the background.
- Click Background in the sidebar editor, and under the Color Gradient tab, change the Start, Stops and End colors to match your business. To learn more about background colors, click here →
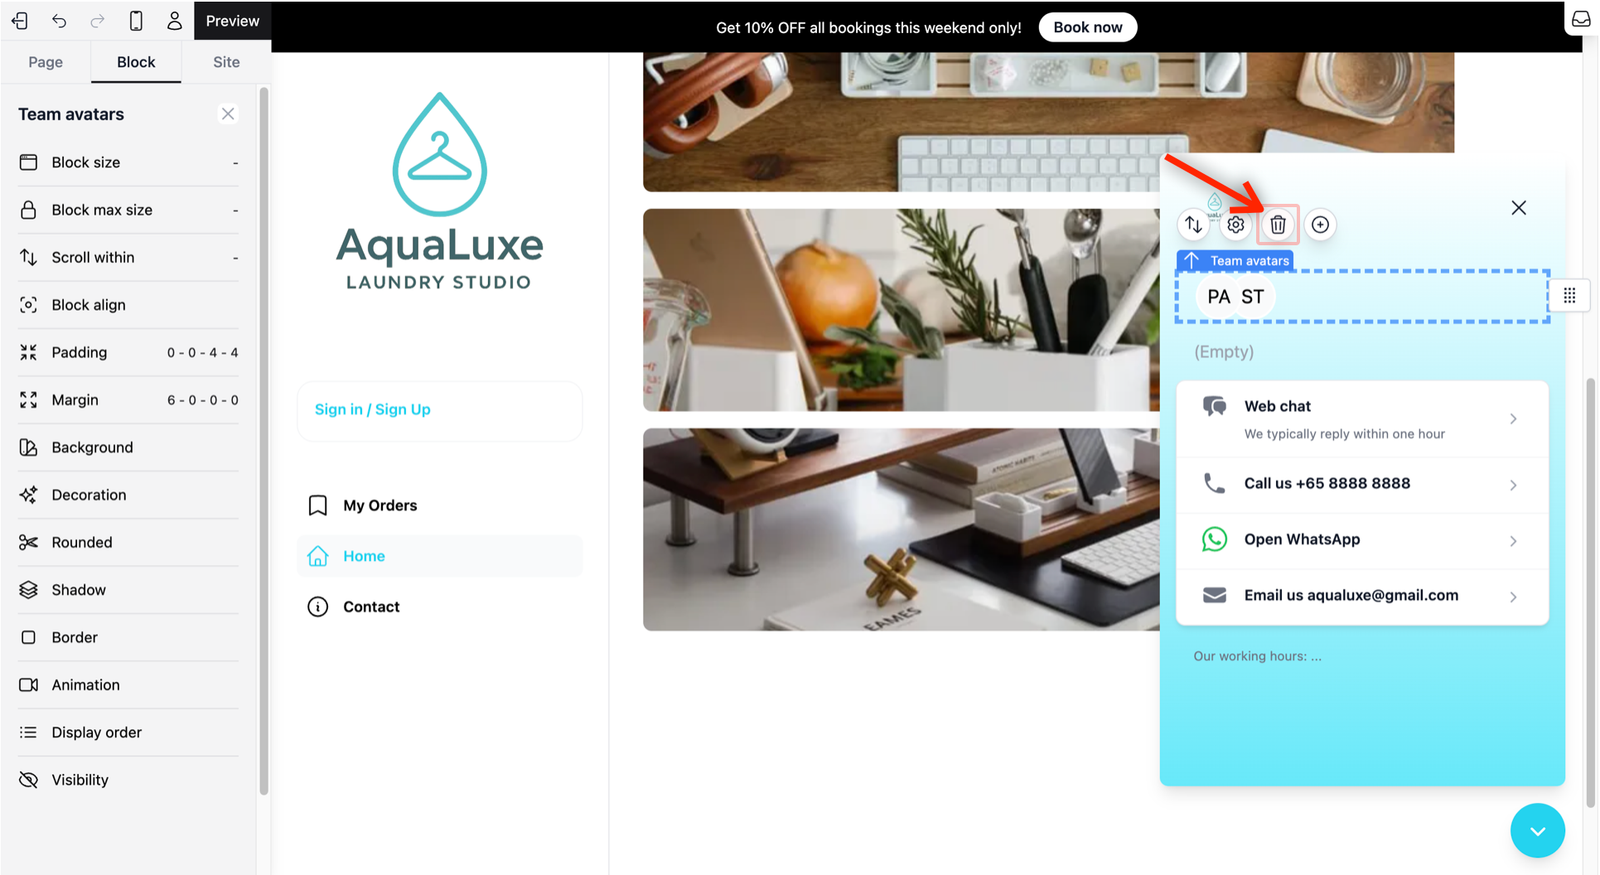
Team Avatars
You may see a circle with initials (like "UN"). This is for Team Avatars, allowing you to show the faces of your staff.
- Click on the circle, you should see the block being titled as Team avatars, then click on the Settings icon in the Quick Action Toolbar.
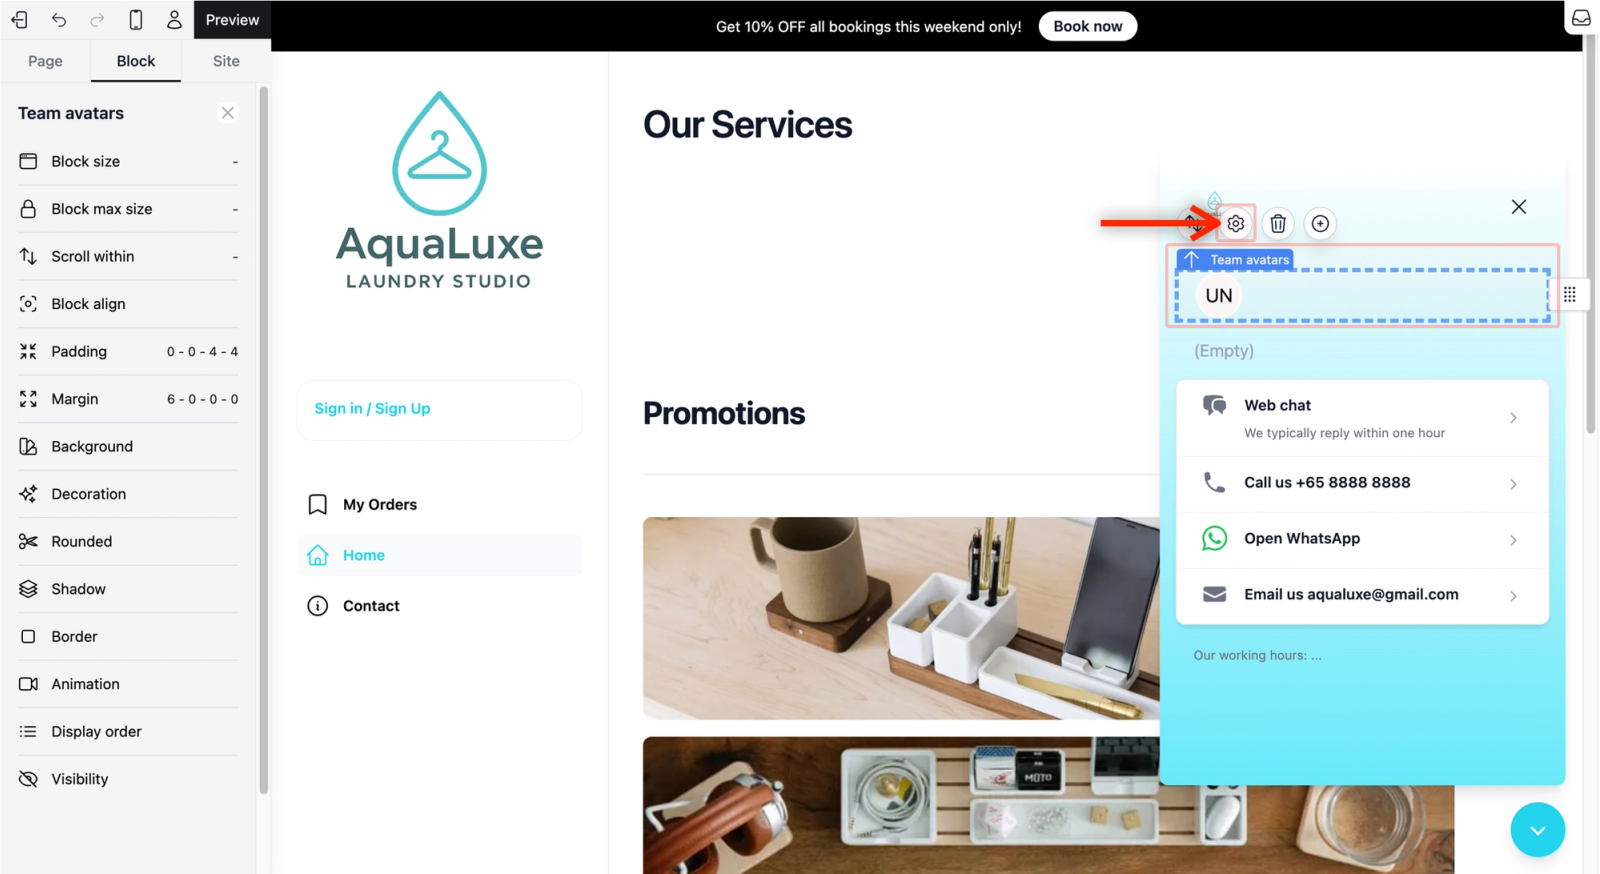
- The pop-up view to set your team members avatar will appear here. From the dropdown field, select up to 4 team members.
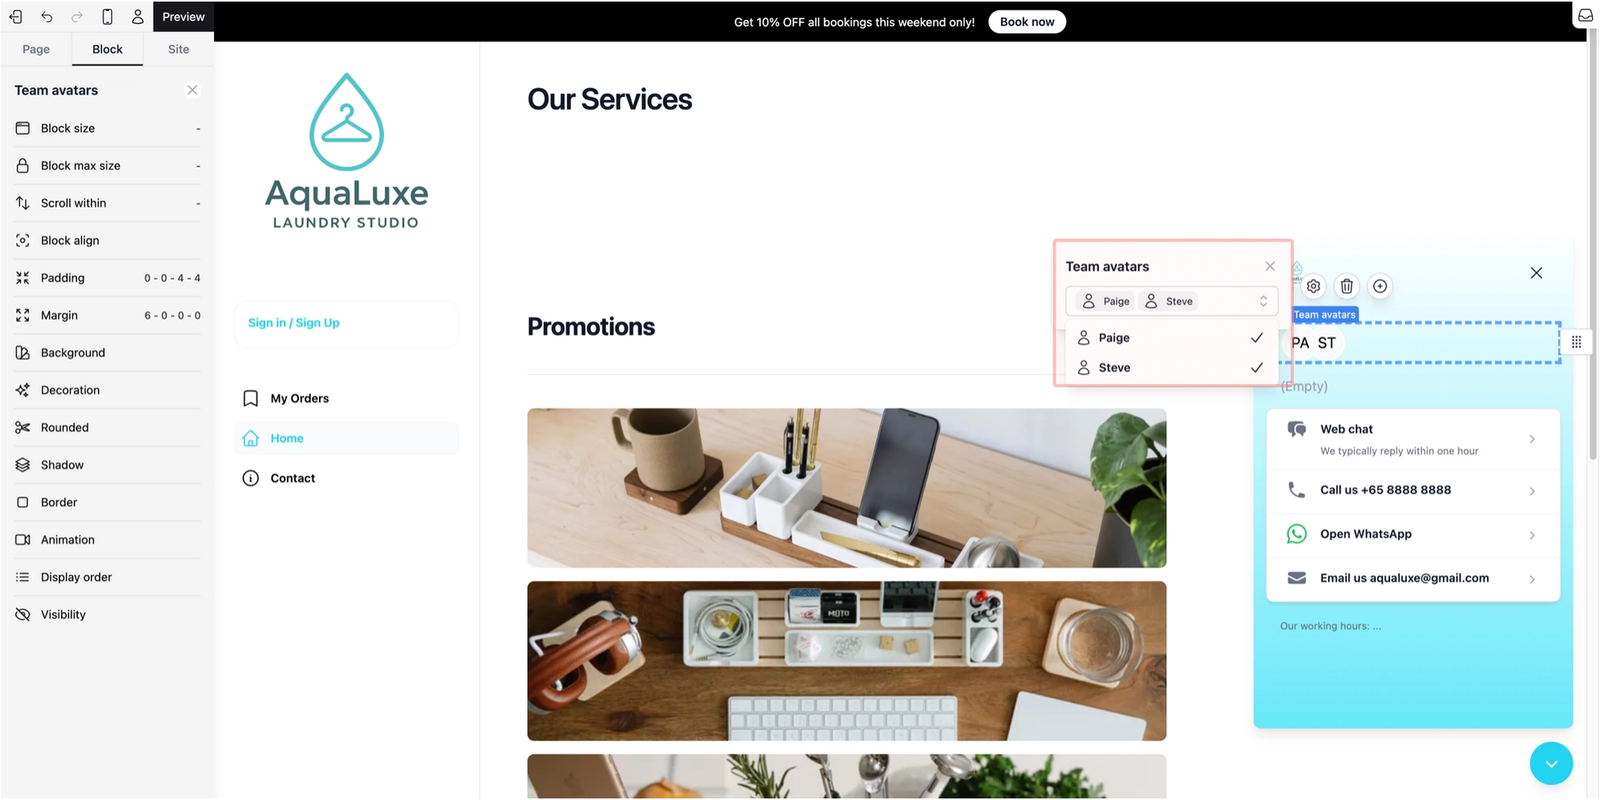
- To Delete: If you don’t need this, simply click the Delete (trash can icon) in your Quick Action Toolbar.
Add a Welcome Text
Just like any other chat bubble on a website, a welcome message is usually what the customer sees first.
- In the template, you will see a block with (Empty) as the placeholder. Click on the block, which will show you an example of a welcome text. Change it to a custom greeting of your own.
Manage Your Contact Methods
In the Chat Widget, you would have realized that there is a section where it lists the different contact methods available for your business. This is based off what you have set up in the Site tab under your Business Contact settings.
- Open Settings: Click on the block where the contact methods are listed, then click the Settings icon from the Quick Action Toolbar.
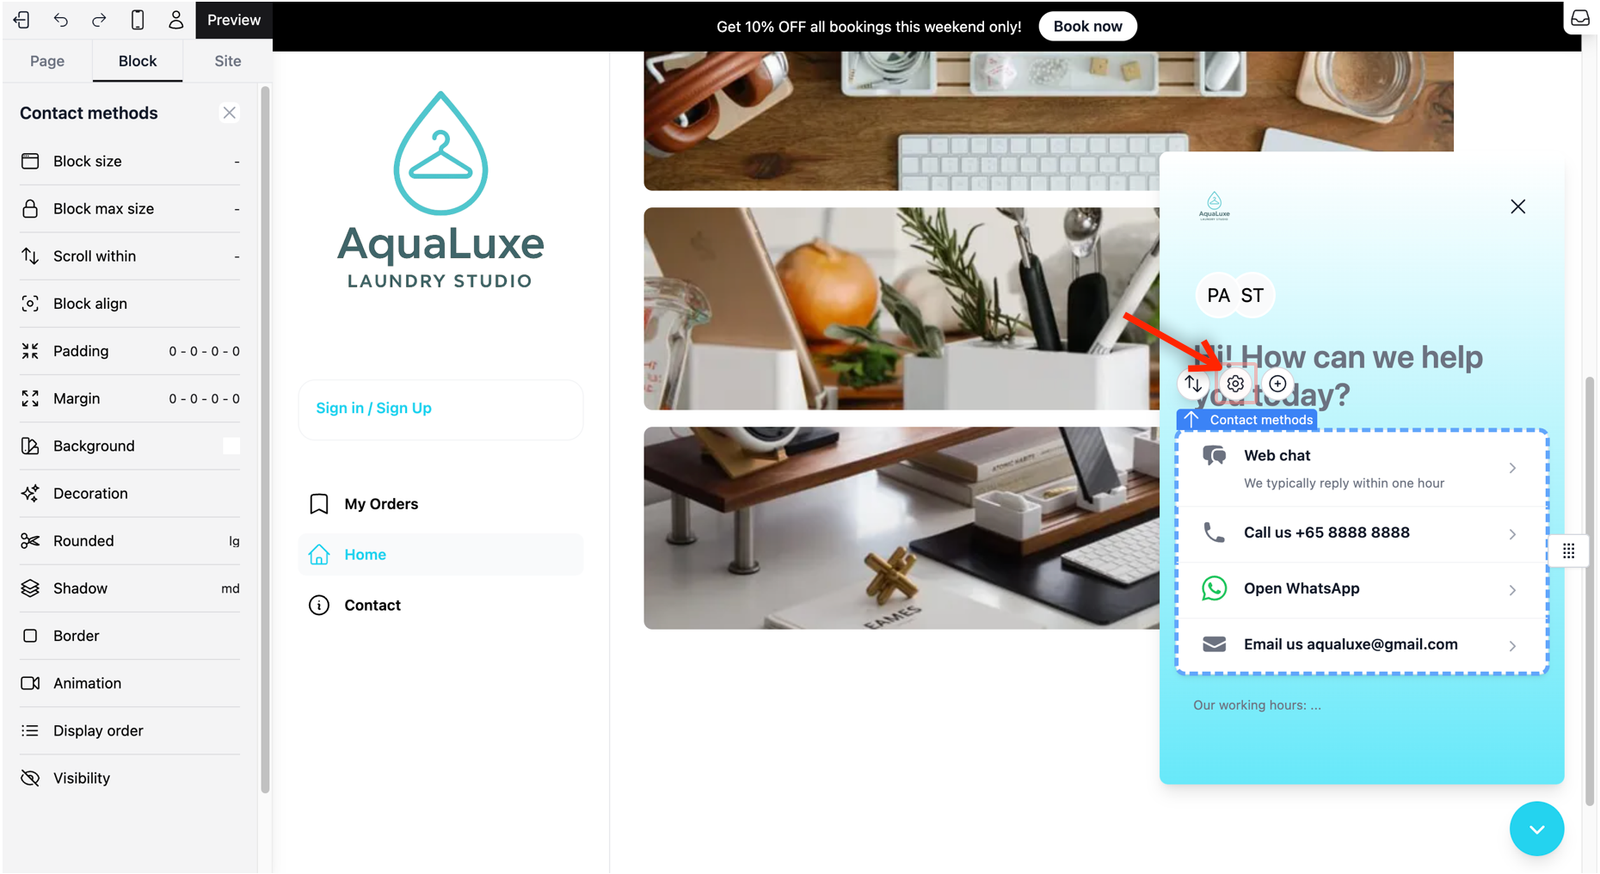
- Toggle Channels: From the pop-up window, you will see your contact methods (Phone, WhatsApp, etc.). Use the Status toggle to turn specific contact methods on or off.
- Add Descriptions: You can add a note for each contact method, such as "For urgent matters" under your WhatsApp.

- Reorder: To arrange contact methods, click and hold the Drag-and-Drop icon and move it to your preferred spot.
Set up your Web Chat
The Web Chat lets customers message you directly through the store. It is best to require their information first so you can follow up with them later.
- Find the chat screen: Double-click Web Chat from the list of contact methods to enter the chat screen.
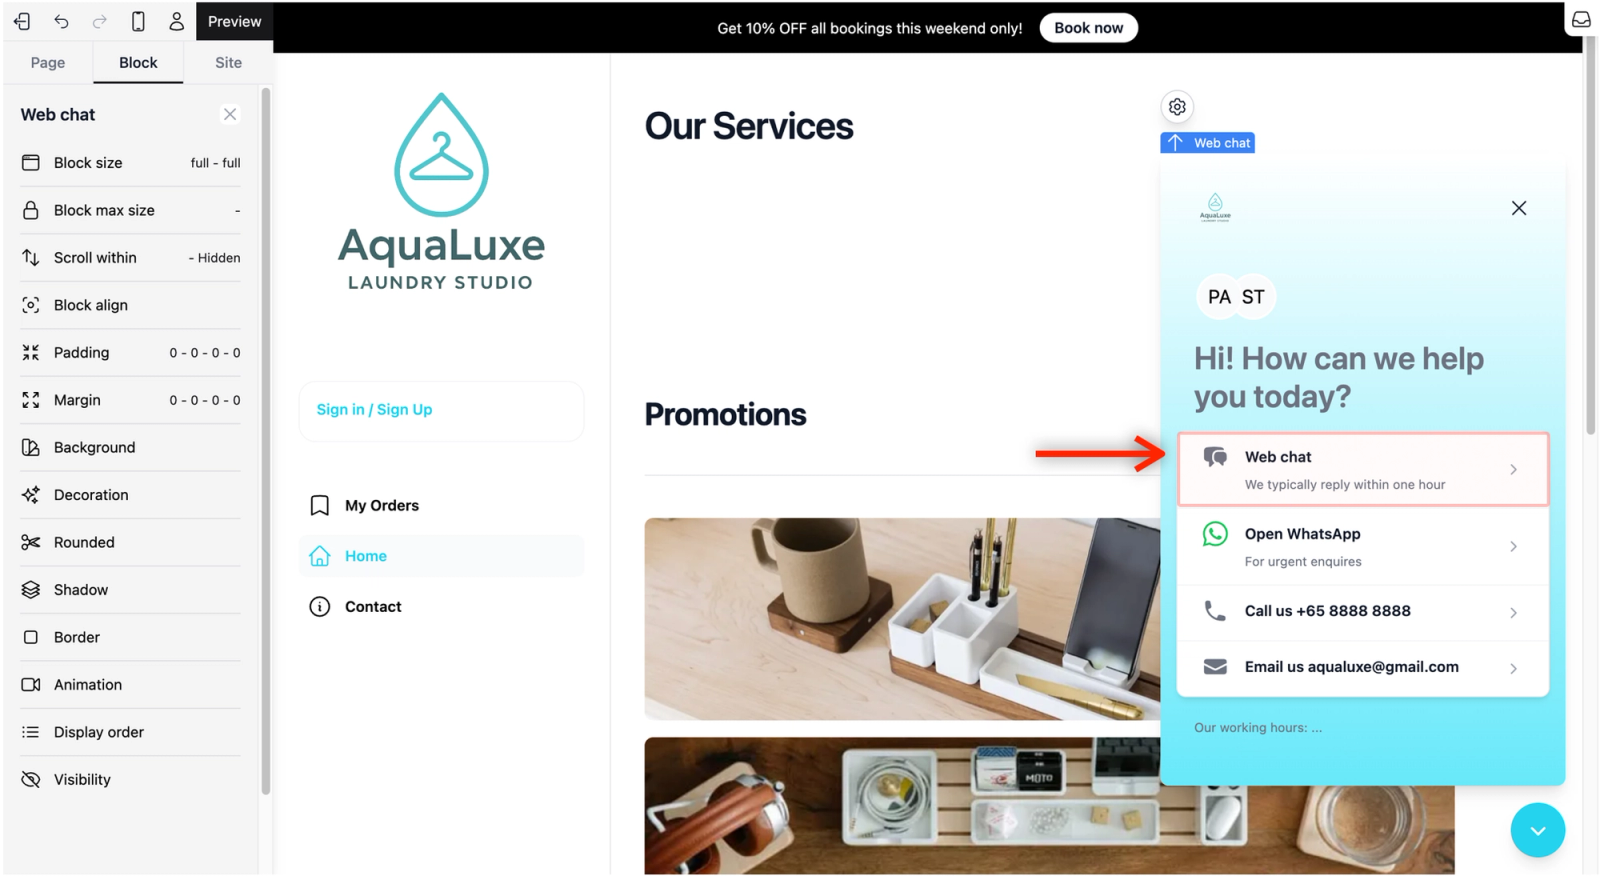
- Open Settings: Click on the preview to select the Web chat block and click the Settings icon from the Quick Action Toolbar.
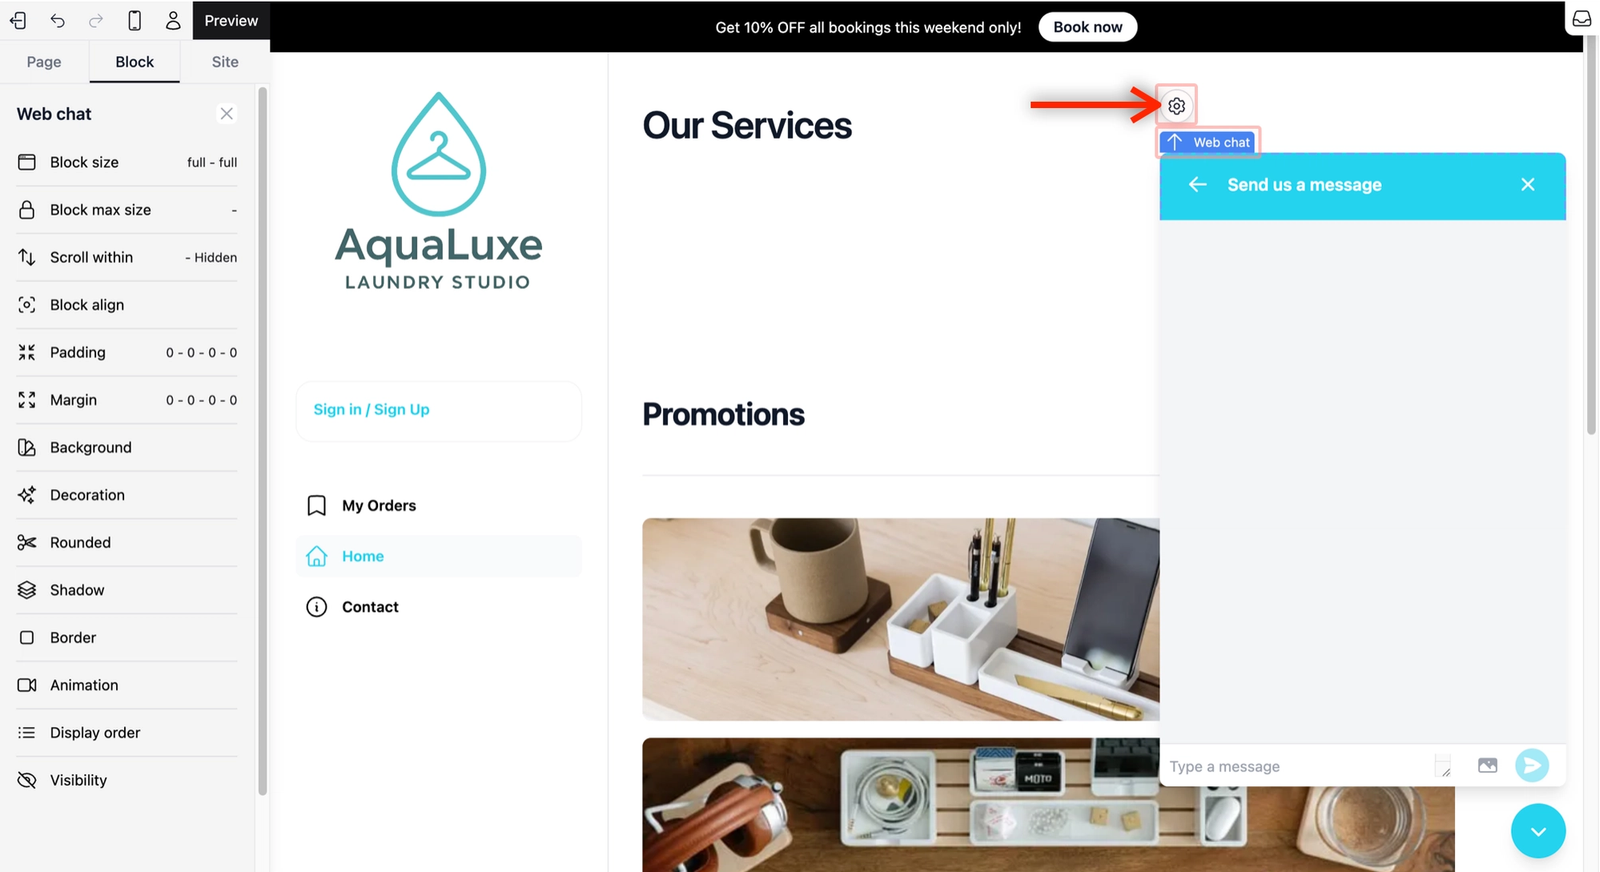
- Add Form Fields: Click the Add account form field dropdown. For this demo, let’s add all three: Name, Phone, and Email (you can set Email to "Optional" if you like). This ensures the customer enters their details when they first click into the Web chat.
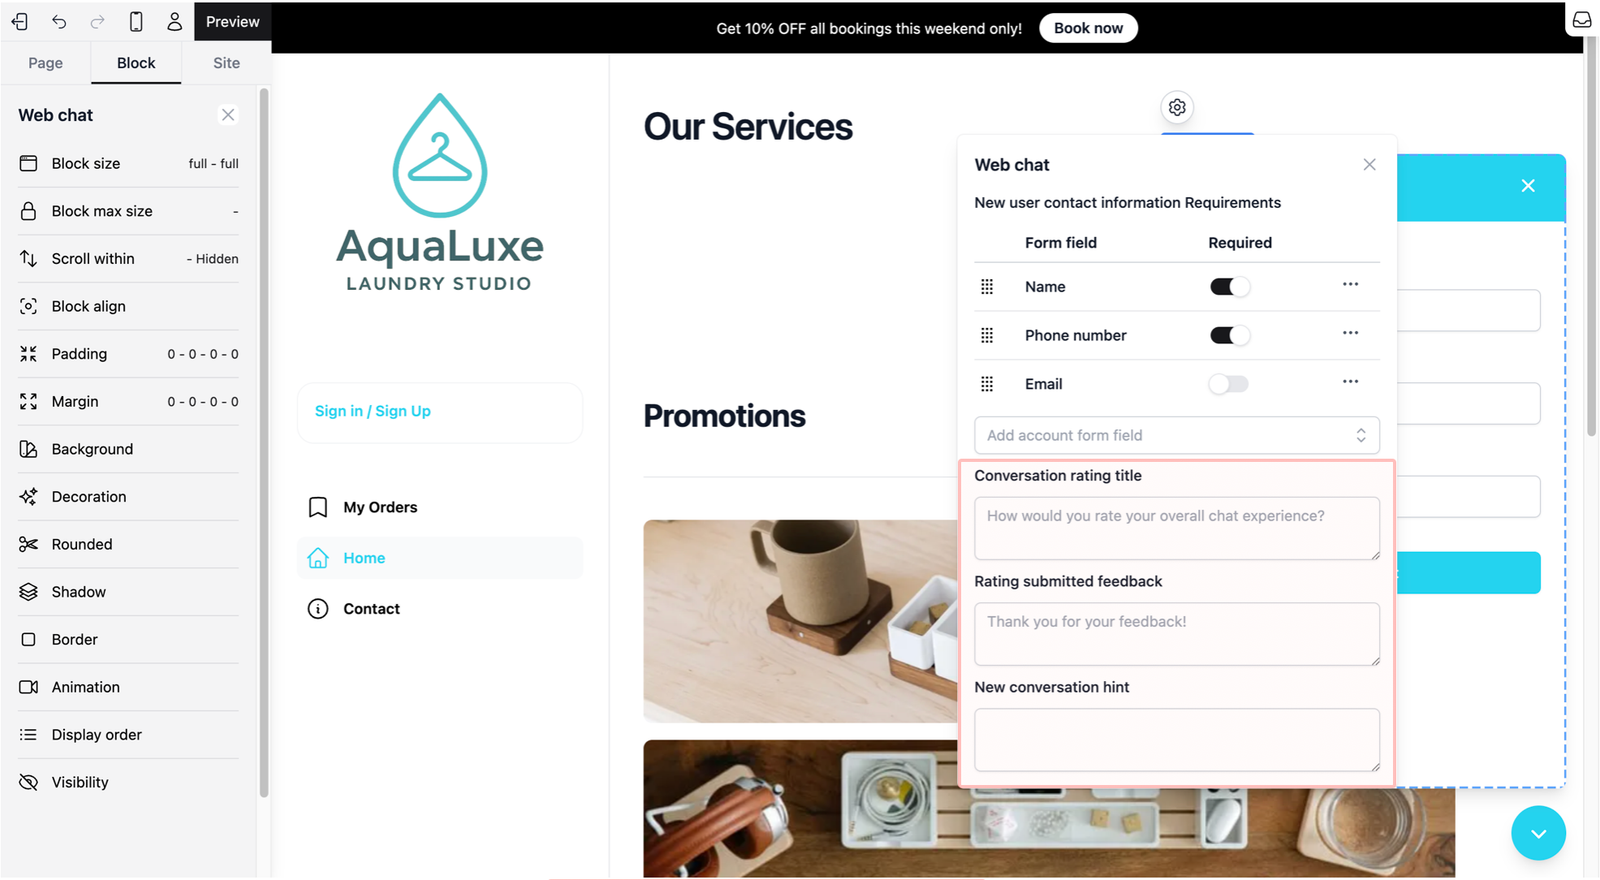
- Custom Messages:
- New Conversation Hint: The text at the top when a chat starts.
- Rating Title & Feedback: What the customer sees when they rate the conversation at the end.
- Verify: Once you click the cross icon to close the settings, your Web Chat is ready. Customers will now be prompted to fill in their details before starting a conversation with you.
Give feedback
Up next
Set up your Online Booking SystemThe booking system is the heart of your website. It allows visitors to browse your "menu" of services and officially book your time and expertise.
Read more