Online Store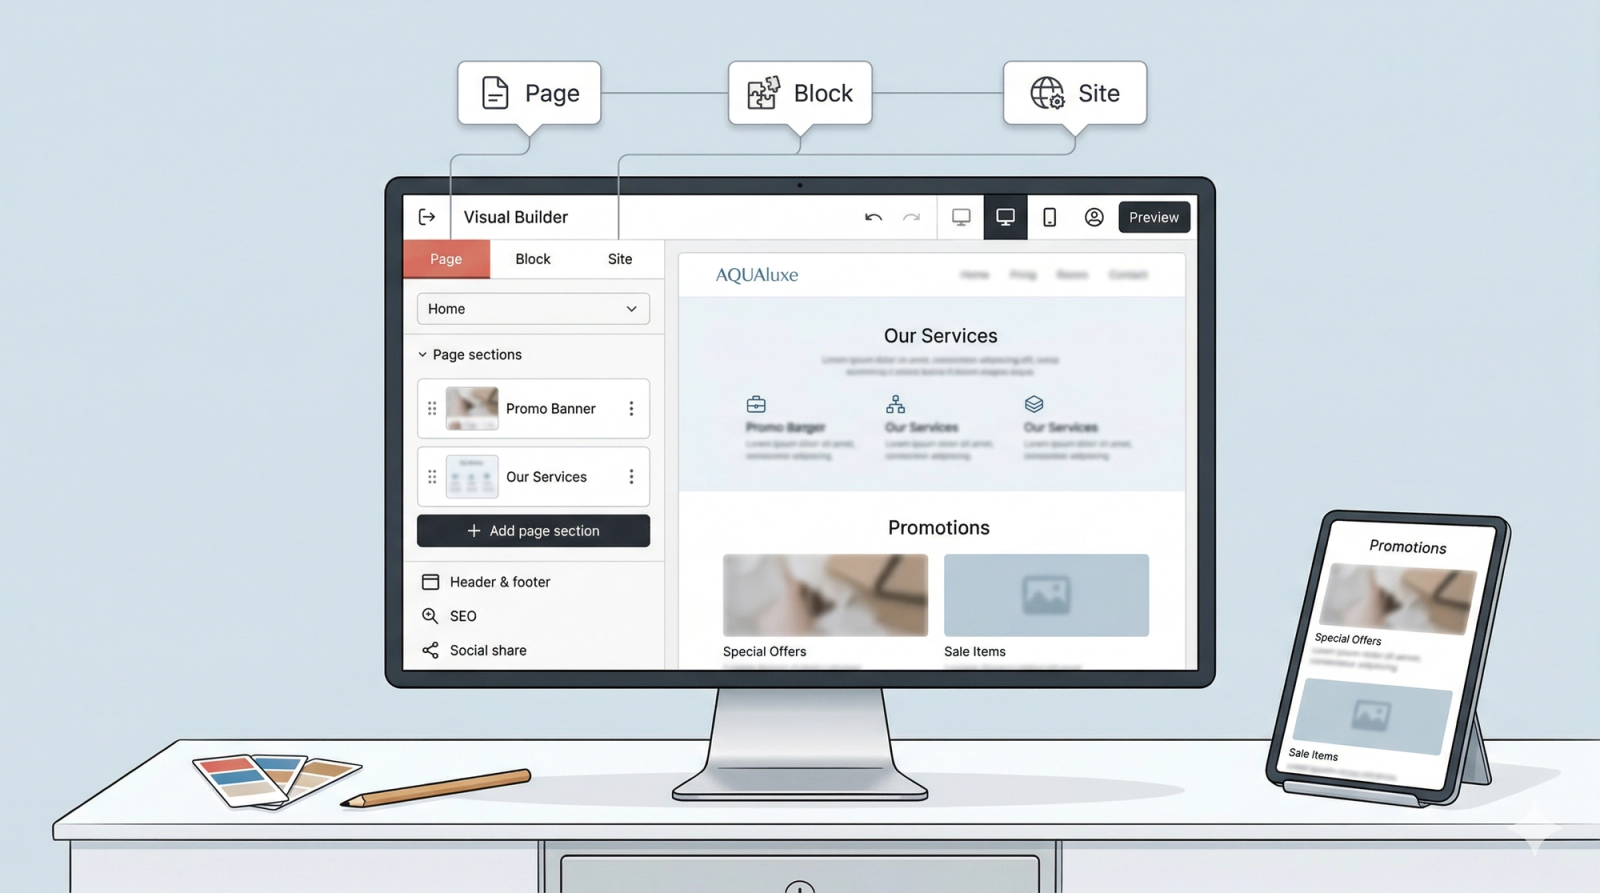


Navigating the Visual Builder
In this article
The Visual Builder is where you design your Online Store. It is an all-in-one interface that lets you customize your website without coding, combining simple tools with a live view of your work.
Contents
Contents
Understanding the Visual Builder
Now that you’ve created your store, you’ll be working inside the Visual Builder.
Think of this like building a PowerPoint slide. You don't need to code; you simply use "Blocks" (like text boxes or images added in a powerpoint slide) to build your page. Because the editor is "live," every change you make happens in real-time, showing you exactly what your customers will see.
Find the Visual Builder
To begin designing your website, you first need to navigate to the editor.
- From the top navigation bar, click on Sales channel.
- Select Online Store from the dropdown menu.
- In Online Store Page, locate your online store by the name you provided earlier.
- Click on the Edit Site button to open the visual builder.
You should now see the visual builder interface.
The Layout at a Glance
Understand how the screen is organized to find your tools quickly.
- The Sidebar (Left Side): Think of this like the Insert & Format panel in PowerPoint. This is where you find new text boxes, change colors, or add pages. It is organized into three tabs: Site, Page, and Block.
- The Live Preview (Right Side): Think of this as a Slide in PowerPoint. This shows exactly what your website looks like. Any change made in the sidebar updates here instantly.
Understanding the Sidebar
The sidebar is your control center. It is divided into three tabs to make the building of your website easy and organized.
- 📄 Page Tab: This is where you manage the pages of your site. Just like organizing slides in a presentation, you use this tab to add new sections to the page, organise them to which order you want these sections to appear in, and decide what appears in your Website preview.
- 🧱 Block Tab: This is the tool you will use most often. When you click on a specific text box, button, or image on your page, the Block Tab opens to let you edit that specific item. It’s where you swap photos and rewrite headlines etc..
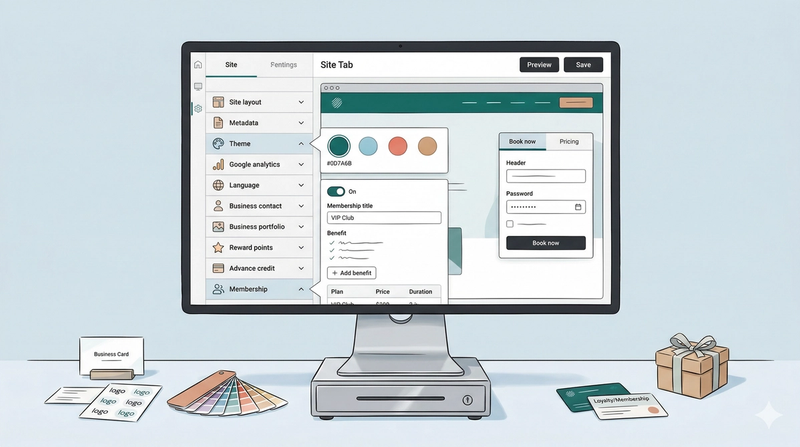
- 🎨 Site Tab: Think of this as the "Global Settings and Slide Master" in PowerPoint. This is where you set the foundation for your store, such as your business name, logo, contact info, and brand colors. Changes made here apply to your entire website at once, including your reward system.
📘 Coming Up: This section is just a high-level map to help you understand the layout. Don’t worry about the specific details yet. In the next few sections, we will define the specific fields and settings within each tab.
The Top Control Bar
Before you finish your work, use the tools at the very top of your screen to review and save your changes.
- The Exit Button: Think of this as your "Back Button." Clicking this will take you out of the builder and back to your Online Store Page.
- Undo & Redo Arrows: Just like in Word or PowerPoint, these buttons let you reverse a mistake or go forward again. When you change something in the Sidebar, the Website Preview updates instantly; if you don't like the result, click Undo to revert it. It acts as a safety net for any adjustment you make.
- Mobile View: Most customers will view your site on their phones. Click this to see how your design looks on a mobile screen. To go back to the computer view, simply click the icon again.
- Customer Preview:
- What it does: Shows you exactly what a customer sees when they log in to manage their profile or order history.
- How to Sign Out: To stop viewing the site as a customer and return to the standard design view, simply click the Customer icon again and click the Mock sign out button to sign out of the mock account.
- Preview: Think of this as a "Test Drive." This allows you to see your changes as an actual live website before you officially show it to the world.