Page Tab
In this article
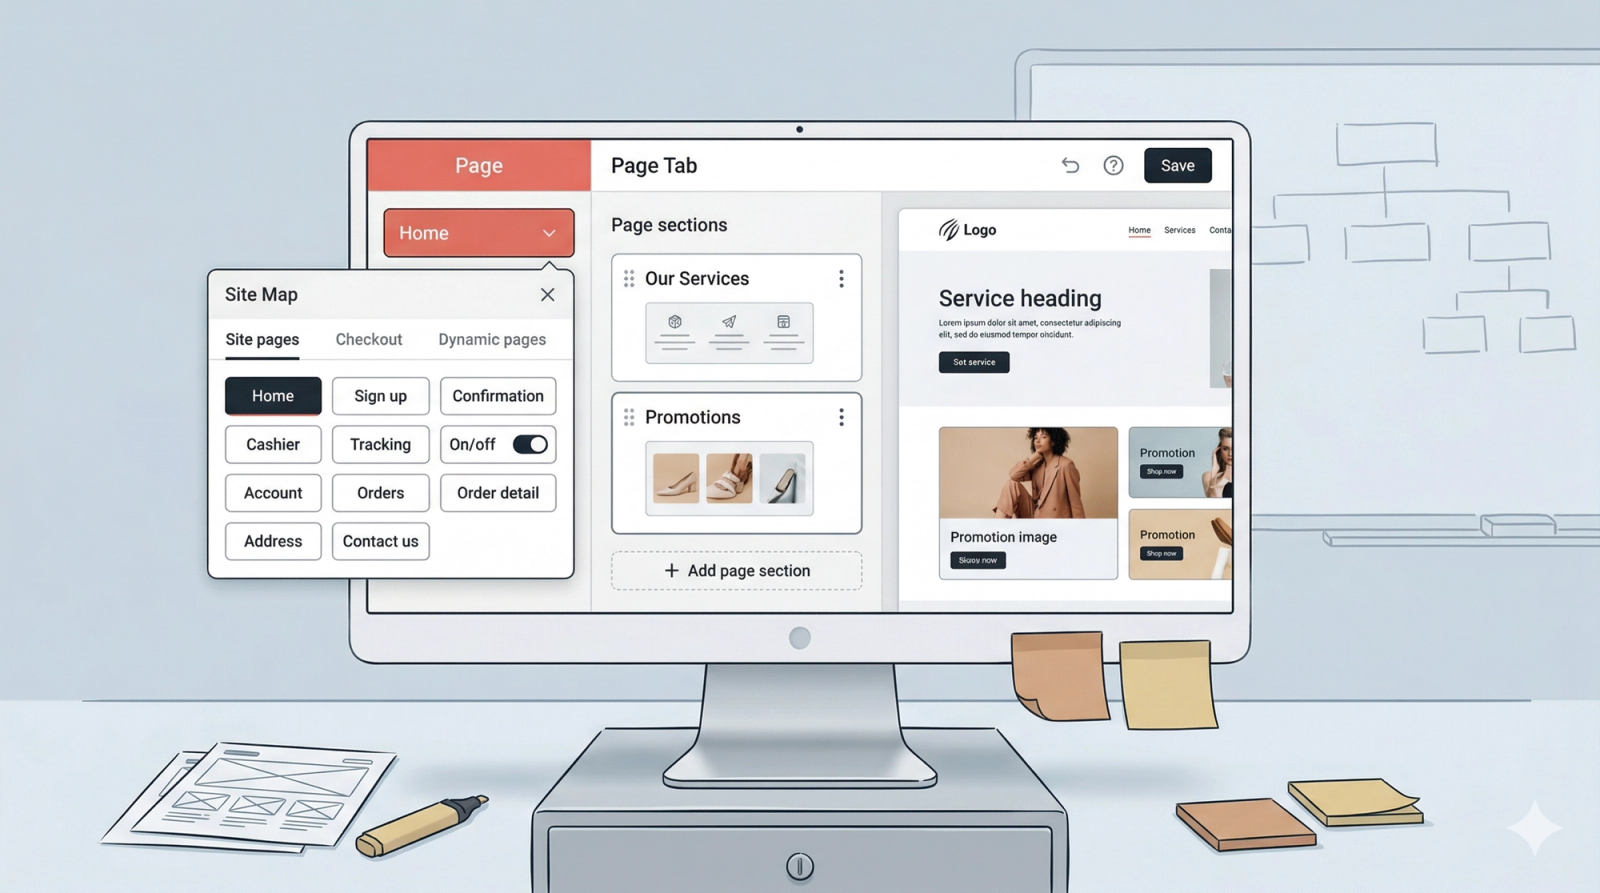
The Page Tab is where you build the structure of your website. It allows you to switch between different pages, enable access to your checkout and pricing views, and organize the physical layout of each page using sections.
Contents
Contents
Page Navigator
At the top of the Page Tab is a button showing the name of the page you are currently on. Clicking this opens a menu called the Site Map. This is essentially a Directory of all the pages on your website.
Within the Site Map, you will see three main tabs used to organize your website:
- Site Pages: For managing your ready-made page templates.
- Checkout: For connecting your pricing and booking views.
- Dynamic Pages: For creating your own custom-built pages.

Site Pages
In EasyBiz, Site Pages are ready-made templates we have designed to help you get started quickly.
- To Switch Pages: Just click the name of any page (like "Home" or "Sign up") to see it on your screen.
- Manage Site Pages: Click this link to open a view showcasing all the available page templates EasyBiz offers. This makes it easy to see all your options in one place.
- The On/Off Switch: Use this toggle to control which pages are "Live" and visible to your customers.
- Choosing Your Look: When you toggle a page ON, an overlay will appear asking you to choose which Page Template you would like to use for that page. This allows you to pick the design that best fits your business style.
- When switched OFF: The page is hidden from your website. In EasyBiz, we recommend switching off any pages you aren't using yet to keep your website simple and easy for your customers to navigate.
Checkout
This tab is where you manage how customers find your Pricing and Booking pages.
- Enable Navigation: Locate the Price List you want to use and click on the Enable button. In EasyBiz, this "connects" your services to your website so customers can see what you offer.
- Previewing your Store: Once enabled, you will see buttons for Pricing and Checkout. Clicking these will automatically update your Website Preview on the right, allowing you to see exactly what your customers see when they prepare to book or pay without leaving the editor.
Dynamic Pages
In EasyBiz, if you need a unique page that isn't in our templates, you can build it from scratch here.
- + New Page: Click this to start a brand new page. Give it a name (like "Gallery" or "Special Events").
- Adding the Page: When you are done, click on the Add button, the pop-up window will close automatically, and EasyBiz will immediately show your brand-new page in the website preview.
- Managing Your Pages: Look for the three horizontal dots (⋯) next to your page name. This is your "Options" menu where you can Rename, Duplicate (copy), or Delete the page.

Page Sections
Every page in EasyBiz is made of Sections stacked on top of each other, similar to blocks in a tower. One section might be a "Welcome" message, while the next might be a "Promotion." This makes up a page.
Change the Page Sections Order
If you want to move a section higher or lower than another:
- Click and hold the Drag and drop icon (the small handle next to the section on the right).
- Slide it up or down to your preferred spot. When you are happy with the placement, let go. The website preview will update immediately.
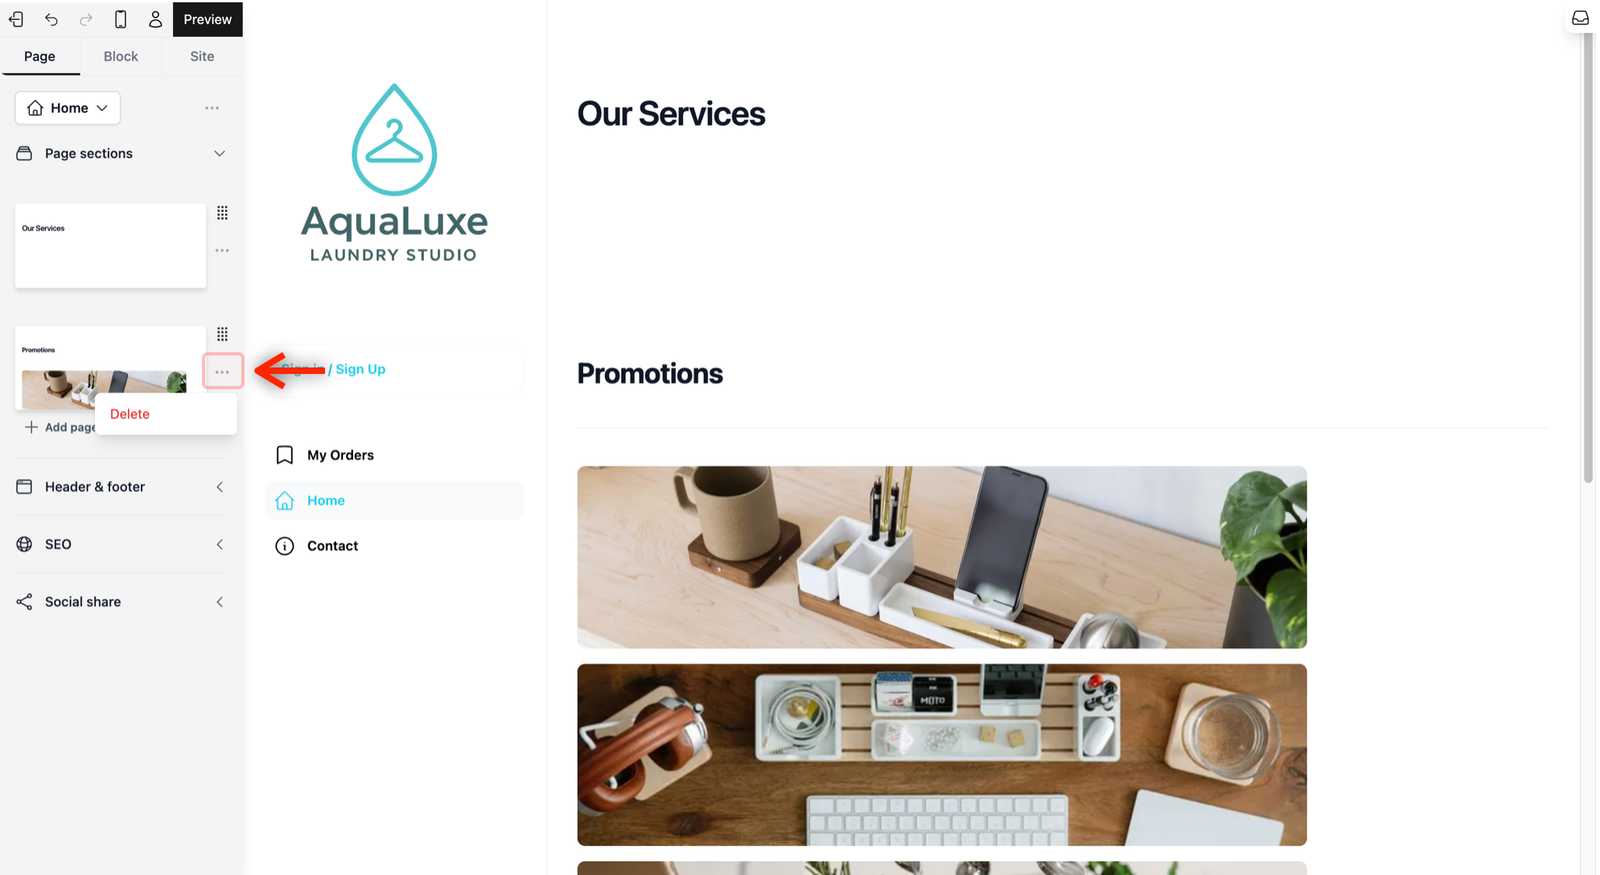
Remove a Page Section
If you find that a section no longer fits your website’s needs, you can remove it in just two clicks:
- Click the three horizontal dots (⋯) below the drag and drop icon and select Delete.
Add a new Page Section
To add more content or a new feature to your page, you can browse our library of pre-designed sections:
- Add page section: Click on the + Add Page section button located under every section. This gives you the freedom of choosing where you want to include your new section in the current page. Clicking it will open a window on the right side of your screen showing different section design options.
- Choose a Category (Left Side): From the window, the categories of the sections will appear on the left side. We have grouped these by purpose, such as "Promotion", "Contact" or "FAQ" to help you find what you need instantly.
- Pick a Section (Right Side): Likewise from the window, the section templates will appear on the right side. Click the template you like. It will automatically appear on your page exactly where you clicked the + Add page section button previously.
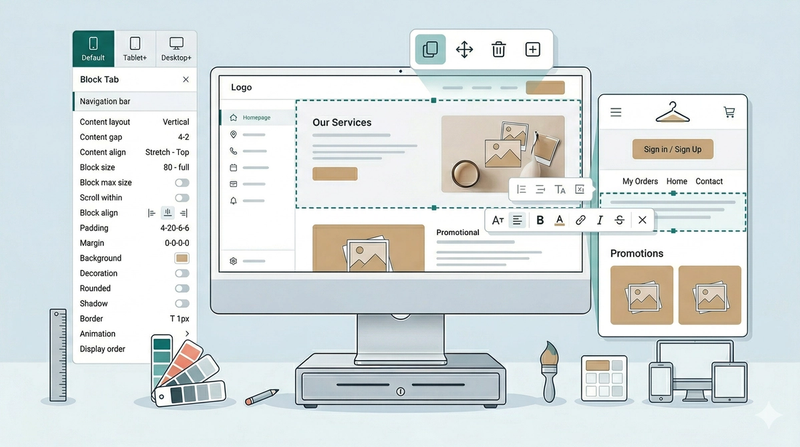
- Editing the Content: After adding a section, the sidebar will automatically switch to the Block Tab so you can start changing the text or photos right away. To return to your list of sections, simply click back on the Page Tab.
Give feedback
Up next
Block Tab: Getting Started with the Visual BuilderThe Block Tab is where you customize the specific elements of your website.
Read more